A shower installation installed in the bathroom allows you to save space in small spaces. Before turning on the shower cabin and testing the operation of the equipment, you must read the technical documentation. Compliance with the manufacturer's recommendations increases the service life of the installation and prevents breakdowns.
Installation is the basis for proper operation
Of course, you can call specialists who will install the shower stall. But if you want to save on the services of plumbers, then it is better to try to do a good installation yourself. The installation instructions will also be useful if you decide to monitor the work of hired employees in order to be savvy in this matter and be able to defend your point of view if any of their actions arouse your suspicions.
It must be said right away that if you are planning to install a shower cabin in the bathroom, then all sorts of repair work should already be completed.
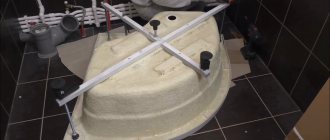
After the hydrobox has been delivered to your apartment, you should remove it from the box. There are not so many shower components and they depend on the purchased model. If you have a classic shower stall, then in the box you will find a tray, and an acrylic one will come complete with special legs. The box will also contain a roof, back wall, front panel, doors with guides, various fittings, shelves, hoses and other water supply devices. However, you can easily purchase a cabin without a tray, roof or rear wall.
Be sure to take into account that to connect and activate the cabin equipment, you will need filters. Opt for mechanical cleaning. Also note that the water pressure should not be very low or very high. Ideally from 2 to 5 atm. If the pressure is higher, you need to install a reduction reducer.
The box must be connected to the electrical network with a special three-core cable, which is laid to the product from the electrical panel.
Direct installation instructions for shower cabins are as follows:
- Place the pallet in the location chosen for the cabin. Next, adjust the legs and secure with nuts. After this, the pallet should be moved 30 cm away from the walls;
- Place the back wall on the pallet and secure the position with the bolts that come with the kit. Do the same with the second wall;
- The work continues with the installation between the walls of the panel on which the control will be located. Secure it with screws;
- After this, work must be carried out to install the roof. This is done with the help of bolts and holes, which are located both on the roof and on the walls;
- When the cabin body is mounted, the moment comes to connect the electrical equipment;
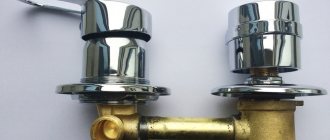
- Next, you should attach the shower and watering can to the switch;
- Attach the existing attachments, then work on the doors. Install the rollers, screw the handles;
- When the cabin is assembled, you need to check the hot and cold water supply system, make sure that the product is functioning correctly and process all the seams. To do this you will need silicone sealant;
- After the work has been carried out, after 20 minutes, you should check whether the cabin is sealed. At the slightest leak, you need to wait until the product dries and apply the sealant again, applying it to the problem area;
- If you are sure that the cabin is sealed, leave the product for a day so that the sealant is completely dry;
- If you think that the installation was carried out correctly, but the appearance of the cabin makes you suspicious, contact the service center.
Operation of the shower can begin as soon as the sealant has dried and the product is fully connected and ready for use. Be sure to check if the wiring is grounded.
Shower cabin set: what is included in the set?
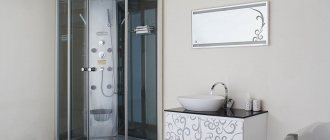
This is a structure consisting of an upper and lower part, side doors and walls, and a panel. The basis is the frame. For strength and lightness, it is made of aluminum . The sides, dome and doors are attached to it.
Once assembled, the entire structure is attached to a pallet , which can consist of different materials:
- acrylic;
- cast iron;
- metal;
- marble chips.
The doors are made of glass and the walls are made of polystyrene.
The design itself:
- the upper part of the shower dome ;
- bottom pan ;
- glass doors;
- side walls;
- panel.
Cabin installation is not limited to the usual collection of components. It is necessary to adjust the horizon of the pallet. Legs and a level will help with this .
Important. Cab doors should move smoothly To do this, it is important not to overtighten the adjustment bolts.
How to use the functionality
blockquote>If the funds allowed you to choose a multifunctional shower cabin, then you should understand in detail the operation of its additional equipment.
So, you have connected the box to electricity. Next, you should check the functionality of all shower cabin modes, such as radio, steam generator, telephone and others. The electronic control panel is a very convenient way to configure equipment options. It is this that allows you to turn on and regulate such amenities as hydromassage, Turkish bath, steam and radio. A convenient control method using keys controls water pressure and temperature, lighting, and fan. In a word, all the electronics of the shower stall.
The control panel is equipped with keys that allow you to adjust the volume. So, by pressing the vol, + - key, you can select the desired volume.
Using the FM keys you can turn on the radio and tune in to the desired wave. How does this device work? You need to press the FM key, after which the display will show the station that was last selected. By pressing the TUN and plus and minus keys you can change the settings. If you want to search for a radio station, you need to press the + or – key and hold until it starts automatically searching. To memorize a radio station, press the M key, select the desired channel and activate the memorization mode by pressing the key again.
If your cabin has an ozonizer function, then that's just great. After all, it is she who can destroy all the bacteria inside. To activate it, you need to press the function key on the control panel and close the cabin after leaving it. The cabin can continue to operate normally after a quarter of an hour.
If you have purchased an expensive and spacious model of a shower cabin, then it should definitely have a steam generator. What does it give? This device turns the shower into a steam room. Look at the control panel and find the key that controls the steam generator. Click on it. When the indicator is activated, the steam generator will fill with water and begin to fill the cabin with steam. Its output will be ensured thanks to the flask that is located on the pallet. By the way, a steam generator can easily also have an aromatherapy function if you put various types of herbs into the flask or pour in aromatic oil.
A fan is an indispensable device that will allow you to feel freshness during hygiene procedures. It is also necessary to distribute steam evenly when activating the Turkish bath function. The fan turns on simply: press the corresponding button. If during operation you want to disable the function, press the button again.
Some shower cabins have a telephone function on the control panel. It is configured to receive incoming calls. The function is very convenient, since few people would risk taking their phone into the bathroom. When a call comes into the cabin, a characteristic sound is heard. In this case, the radio operation becomes quieter. To receive a call, you need to press the “phone” key. You can reset the call by pressing again.
So, we figured out the functionality. But you need to know some general aspects of operation so that the cabin lasts a long time and the electronics do not fail after a week.
Additional functions
Every year, companies that produce shower stalls try to improve the quality and functionality of their equipment so that you can shower, relax and improve your health. For this reason, hydroboxes with wider capabilities are now being produced. At the moment, the following additional functions are installed in shower cabins:
- Electronic control systems that allow you to easily configure and control the functions of shower boxes.
- Radio.
- Ventilation.
- Seats.
- Shelves for storing things.
- Towel holders, grab bars and hooks.
- "Rain shower" function.
- Decorative lighting.
- Electronic panel or display to control the intensity of the hydromassage.
- Temperature regulator.
- Timer.
- Special block for aromatherapy.
Nuances of operation
- Firstly, before using the shower cabin, make sure that there is no voltage leakage;
- Secondly, the control panel is a delicate device. Don't press the buttons too hard. Also, there is no need to hammer on the control panel keys if some function does not turn on instantly. It’s better to contact a service center if the situation does not correct itself;
- Thirdly, ventilation in closed shower stalls must work perfectly. After using the equipment, the cabin should dry thoroughly;
- Fourthly, you cannot change anything in the control unit;
- Fifth, regarding electricity, all outlets and other equipment should be located in an area outside the equipment. Zone width 60 cm, height – 225 cm;
- Sixthly, in order to carry out the installation work correctly, you will need a space of 30 cm around the perimeter, which will provide free access to the territory;
- Seventhly, you cannot place the shower next to heating devices closer than 15 cm. Such an arrangement can cause damage to the shower cabin equipment;
- Eighth, if you are dealing with an acrylic shower, then the maximum temperature should not be higher than 60 degrees Celsius;
- Ninth, there must be a gap of 15 cm between the ceiling and the roof of the box. This is what the installation instructions for shower cabins say.
Dimensions
The height of most shower cabins with hydromassage is slightly more than 2 meters. This is just enough for most people to fit inside without much inconvenience. The sizes of the tray vary, some of them are a real bathtub, deep and long. Here are some denominations found on the shelves:
- 80x80 cm.
- 90x90 cm.
- 100x80 cm.
- 100x100 cm.
- 110x110 cm.
- 120x80 cm.
- 150x150 cm.
- 170x80 cm, etc.
How to care for the cabin
It is worth noting that the shower tray is its weak point. Especially if it is made of plastic or acrylic. During operation, the pan is always under pressure from the human body. Therefore, you need to stand on it carefully. Do not jump or drop heavy objects.
Sliding shower doors can also be a problem. Their weak point is the wheels. You can’t pull the doors sharply, so that you don’t have to contact a service center later or change the doors, which is quite expensive.
If the cabin has such a function as ozonation, then the problem of the appearance of microorganisms can be dealt with easily and simply! After all, it allows for modern disinfection. Currently, there are many means to prevent the growth of bacteria. It is better to pay attention to the products offered by the manufacturer. However, there is universal advice for all cabins: you should not use substances that contain corrosive components. Especially for acrylic. It is recommended to clean a tray made of this material with toothpaste if you don’t have a specialized product on hand.
Never use cleaning products that contain abrasive particles. Especially soda. You need to clean the cabin with mild products, preferably ones that are intended for this purpose.
Why can't this be done? The fact is that small particles scratch the surface, thereby spoiling its appearance. So, if you try to wash an acrylic tray a couple of times with an abrasive agent, it will become completely covered with scratches, turn yellow and will be difficult to wash.
To prevent blockages, conduct a full inspection of the cabin. Once or twice a year, clean the steam generator from scale and clean the nozzle holes.
If you yourself do not want to inspect the cabin or consider yourself incompetent in this process, the service center will help you do this.
It must be borne in mind that the hydrobox is very negatively affected by the quality of our water. So, if it is supplied to the box from the central water supply, then you should, if possible, mitigate this unfavorable factor.
The liquid enters the water supply system with impurities of various contaminants. There are mineral salts and just dirt from a pipe that has been in use for too long and is starting to fall apart. To neutralize negative factors and purify the water, you can use a filter that is installed in the cabin before the liquid enters. There should be two of them: coarse and fine cleaning. But putting them up is one thing, keeping track of them is another. Filters must be cleaned under water.
Why are the impurities in our running water dangerous? They negatively affect the functioning of mixers, steam generator flasks and nozzles. Salts, which are also contained in water, can settle on both equipment and glass. They create an unpleasant coating that is quite difficult to deal with.
Therefore, after each use of the shower, it is necessary to rinse the cabin with hot water, then rinse with cold water and dry it thoroughly. If you do this once a week or less, the plaque will quickly cover the entire cabin.
Glass is a special shower material that really is the weak link in cleaning. It must be washed after every hygiene procedure. Be sure to brush away any remaining drops of water that, when dry, form an unsightly pattern on the glass. As for mirrors, manufacturers are now producing hydroboxes with mirrors that are resistant to various stains and fogging.
If you are leaving for a long time, the cabin needs to be prepared for departure: washed, wiped dry, and treated with glass cleaner. In this case, it will not become covered with dust and will be waiting for you in its original form.
By the way, special attention should be paid to the rubber used in the doors. Dampness and dirt can give rise to mold, which finds refuge in the rubber folds. Be sure to clean them thoroughly, otherwise the cabin risks filling with an unpleasant odor.
Advantages and disadvantages
By choosing an open shower cabin, the user benefits from the following:
- Purchase costs are minimal. In comparison with a closed shower stall, the cost of an open one will seem purely symbolic, not to mention a spacious bathtub.
- The cabin takes up very little space. This is exactly what the wall-mounted version is designed for: a cabin installed flush against the wall will take up much less space than a closed box. And the corner model will generally fit harmoniously into even the tiniest bathroom: the corner is the least popular area of the room, so a cabin placed here, even if it’s absolutely cramped, will hardly interfere.
But it is also necessary to take into account the disadvantages inherent in such products:
- Unlike a closed one, an open cabin cannot be moved, because, firstly, the mixer is not connected to it in any way, and secondly, the gap between the cabin and the wall is sealed with sealant. A closed cabin, as is known, can be moved without problems within the length of a flexible line and a corrugated sewer hose.
- The wall near which the open cabin is installed must have a waterproof coating. This is either plastic, which looks very “budget”, or expensive tiles.
- Minimal functionality. An open shower cabin usually involves the simplest washing - without a Charcot shower, foot massage, and even more so without a radio, multi-colored lighting and other delights that are “stuffed” with closed cabins. True, no one is stopping you from installing a shower stand with a “tropical downpour” shower head in an open cabin instead of a regular mixer, but even with such equipment it will still be very far from closed cabins.
- To bring pipes into an open cabin, they have to be laid in the wall. It is possible, of course, from the outside, but to do this you will have to cut a hole in the cabin wall and then somehow seal it. It is clear that all this will not look very aesthetically pleasing. There are no such problems with a closed cabin: it has two fittings on the outside, to which you simply need to connect flexible hoses from the hot and cold water supply.
- During bathing, steam enters the room. This means that the bathroom must be finished with materials resistant to high humidity, and capital building structures must be treated with special antibacterial impregnations. To remove steam as quickly as possible, it is advisable to install a fan in the exhaust ventilation duct.
A closed cabin can be safely placed in any room: the steam remains inside and after the procedure is pumped directly into the hood through a special air duct.
Note that there are open cabins surrounded by walls on all sides (they differ from closed ones only in the absence of a roof), but they are extremely rare on sale. However, for a house with wooden walls you will have to look for just such a model.
Operational problems
Basically, when you first start using the cabin, you may encounter three types of problems. The first group is associated with the inattention of the buyer, who may not inspect manufacturing defects or defects formed during transportation. If you find a defect, you should contact the seller or the manufacturer.
The next category of problems is associated with poor-quality installation. It should be noted that absolutely not all specialists are able to guarantee high quality work. Despite the fact that many manufacturers claim that it is impossible to do the correct installation yourself, this is not true. If you purchase a cabin from a well-known brand, installation will usually be easy and simple.
One of the significant nuances that buyers should remember is that our hot and cold water supply system is not well adapted to European showers. This is evidenced by the quality of our water, as well as low pressure. Therefore, in some cases, installation work should be entrusted to qualified specialists who know how to make European plumbing compatible with Russian realities.
Before installation, be sure to pay attention to the warranty. After all, many manufacturers do not provide guarantees if the box was connected independently.
The last and third category of problems is associated with improper use of the product. But if you follow a certain set of rules and fulfill all the connection requirements specified in the instructions, then operating the shower will not cause you any trouble.
pros
- Take up little space;
- use water sparingly;
- highly hygienic;
- allow you to: take a shower and relax;
- provide a healing body massage.
In addition to the above-mentioned advantages of shower cabins, there are also cabins that perform entire fitness programs. They promote health, prevent colds and give energy throughout the day.
Installation of glass sashes
Before installing the doors on the doors, it is necessary to attach the rollers and seals in the places indicated for fastening. Having carefully secured and coated with sealant, it is necessary to install the sashes. You can adjust the gap between the doors using the upper rollers, ensuring that one door is completely adjacent to the other, in order to avoid water leaks while using the shower stall. On some models, the rollers have screws where you can install plugs to protect them from moisture.
Service
If at a dealership or when purchasing a shower cabin from the manufacturer you are offered plumbing service, do not neglect this service. Hard water will not harm high-quality injectors, but water distribution pipes become clogged with various deposits over time. Preventative flushing of the hydraulic system once a year will not hurt, although you can do the work yourself by purchasing a special solution.
Product characteristics
The structures are equipped as follows: doors, a tray (in most cases it is deep), walls, a roof, a shower stand and other additional options.
The products are produced in several types and differ in the shape of their designs:
- square cabins;
- corner rounded.
There are also round, triangular, and oval ones, but these modifications are much less common than square and round ones. The most popular option is the standard version - a 1/3 circle cabin.
In general, some Serena plumbing units can easily pass for a small shower room.
On-site inspection
Next comes the stage of checking the weapon on site: charging and test shots. Here the operations are different for air rifles and pistols. The main rule is that we act according to the weapon’s passport - everything should be described there: in what order is it correct to load, how to shoot, what to shoot with, etc. We read everything, while reading we ignore the point SHOOTING AT PEOPLE AND ANIMALS IS STRICTLY PROHIBITED. This inscription is apparently highlighted specifically for visually impaired people; hardball players, as a rule, are sighted people, so this rule can be circumvented. During the check, you can also carry out zeroing; with an “oblique” barrel, you will not be welcome on the team (unless on the enemy team).
