A modern shower cabin is a wonderful addition to the usual bath, making pleasant and healthy water treatments as varied as possible. Here you can place a hydromassage system and an exotic shower, connect light music and create light and sound effects.
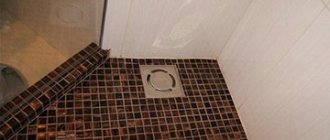
Diagram of a floor with a pallet.
However, without a high-quality shower tray - the basis of any shower - all this is simply impossible. Therefore, you should know how to install a metal shower tray with your own hands.
Why is it better to choose, for example, not a ceramic shower tray, but a metal shower tray, and why is it better to install it yourself, rather than with the help of qualified installers? A metal shower tray is a great choice and is easy to install. Plus, you can save money this way.
Shower with comfort - stall and base
There are several options for arranging a bathing area, and a shower stall with a tray is the most widely used.
This popularity is justified by the specific design of the cabin and the practicality of operation: when swimming, water does not splash around, but is collected in a tray, from where it flows into the sewer.
Also, a shower stall with a tray is popular due to the fact that the lower part of the structure can be used as a mini bath: the water outlet into the sewer is closed, and a small container is quickly filled. This is convenient for the elderly and disabled.
Polypropylene pipes
The skeleton of the frame can be assembled from polypropylene pipes. This is a cheap and simple design if implemented on an industrial scale, but still not easy for individual assembly. The point is to build a flat foundation to reinforce the shower tray. For this, fittings and a soldering apparatus (for plastic pipes) are actively used. Obviously, the edges of the fittings will protrude above the plane, so a leveling mat is necessary in any case.
In this case, excellent insulation of heat and moisture is provided, and conditions are created for forced drying of the lower part of the tray using fans (advanced systems usually have their own built-in cooler, although not necessarily for drying).
Classification
The price of a pallet varies, and in most cases it is justified by the size, shape and material of the product used. Thus, acrylic models are the most popular because they weigh little and the variety of shapes is wide. Cast iron products are used much less frequently, but they are also in demand. In general, products are classified according to:
- Material of manufacture: plastic, cast iron, ceramics, acrylic, marble or other natural stone, metal or alloys.
- Installation location: corner, front, straight, combined.
- Location of the drain hole: corner, central, several drain points or one.
- Dimensions: high or low sides, large or small pallets.
- Appearance: round, oval, square, quarter circle, polyhedral or rectangular.
The choice of one model or another is individual, depending on personal preferences and the stylistic decision of the room.
How to choose the right pallet
When purchasing, many questions arise that you have never had to deal with before. There are important parameters when purchasing a high-quality and convenient product:
- Noisiness . The unpleasant loud sound of water droplets in the morning is not the most pleasant thing. Therefore, you need to pay attention to the material from which the pallet is made, the thickness: the noisiest are metal or cast iron, while acrylic models are the least resistant to sound. It is also worth remembering that the thicker the bottom, the less noise and echo from the splash of water.
- Durability . The most durable ones are made of steel and cast iron, but high-quality acrylic or plastic (reinforced) will not be inferior in quality.
- Price and external indicators . Of course, you want to buy a high-quality and stylish bathtub or shower without spending a lot of money. But, unfortunately, inexpensive options are simple and without sophistication. You also don’t have to guess about quality: high strength and wear resistance are always higher in cost.
- Design . Compliance with the requirements of the stylistic design of the room plays a big role, because the shower base should not only be practical, but also meet the high requirements of interior style.
Model selection
When purchasing a specific shower stall, you cannot consider the tray and walls separately. Often this is a ready-made kit, especially if it is closed. If you plan to choose structural parts separately, then look at the strength of the walls, the height of the sides and functionality. Also pay attention to the presence of an overflow: if water accumulates, the system will protect it from leaking outside the bathtub.
Pallets with high sides are considered the best option. In this case, you can use the installation as a bath and shower.
Selecting a base
The bottom of the structure is always thicker than the walls.
This helps ensure the stability of the entire installation, and also prevents swaying from side to side when taking water procedures. Therefore, a bottom thickness of 3 cm and above is preferable. The exception is acrylic options; strength often depends not on the thickness of the walls, but on the quality of the material.
Installation: instructions
After choosing a model, you can proceed to the important stage - installation of the structure. The appearance of the shower stall depends on the correctness of the work done, because a crooked corner cannot be visually aligned after installing the walls.
Preparatory work
If previously there was already a drain hole at the intended installation location of the shower stall, and the sealing of the base of the floor is good, then work on installing sewer pipes and drainage is not carried out. In the opposite situation, you will have to level the base, fill the concrete floor with mastic, and level the angle of inclination of the drain into the sewer so that it is 3-4% below the main level.
How to place an acrylic tray
An acrylic pallet is a common option, and therefore installation is often in demand. The advantage of this option is ease of installation, so no outside help is required.
Sequence of work:
- Screw the legs to the base. Make sure that there are special silicone or rubber gaskets between the base of the bottom and the fasteners. With their help, the leg is tightened firmly and does not move from side to side.
- Turn the product upside down; you can make sound insulation with foam or fiberglass.
- Turn the unit over to the desired position; do not adjust the legs at this stage.
- Install at the booth location.
- Screw on the siphon and remove the sewer pipes.
- Level it so that it stands as level as possible without wobbling.
- Secure and tighten the legs.
- Check the level again.
- Seal the connection between the siphon and the outlet from the inside.
- Apply sealant to the junction of the pallet and the wall.
How to install a steel pallet
Steel models are mounted similarly to acrylic pallets. The installation option differs only if the product is without legs.
Installation of a cast iron pan
- The legs are screwed to the bottom of the pallet.
- A siphon is connected.
- It is turned over to its original position and brought to the place of future installation.
- Seal the siphon and external drain.
- Install sewer pipes and, if available, overflow.
- Check with a level or laser that the tilt is correct, adjusting the height of the legs if necessary.
A feature that needs to be remembered during installation is the heavy weight of the cast iron installation. If the legs from the manufacturer do not inspire confidence. You can carry out additional fixation with a pipe. To do this, thin steel pipes are welded into a U-shaped structure. The installation is initially placed on this structure, and only then the legs are screwed on.
Installation of ceramic or marble
The marble product is also quite heavy, and therefore before installation you need to pay attention to the thickness of the floor surface. As a rule, the manufacturer of products made from natural or artificial mesh provides components and parts for installation. It is impossible to find individual parts in the store. Installation is carried out in the same way as described previously.
Ceramic options are also extremely popular, but they always come with legs. Installation of this type does not require special skills. All you need to do is screw on the legs and siphon, turn the tray over and level it, adjusting the lifting height of each individual leg. After installation, seal the joint between the wall and the walls of the frame.
DIY pallet
In the case when the pallet is made by hand, installation is carried out as follows:
- 2 rows of brickwork are laid out;
- the base of the floor is poured with concrete;
- after the concrete has dried, treat the surface with mastic or silicone;
- A layer of special glue is laid on top of the brick wall, and a pallet is installed on top.
Subtleties of installing a shower tray in the bathroom
When the shower stall is of standard sizes, with legs or special fixing devices, all that needs to be done is to consistently fasten the bottom. But sometimes difficulties arise because the dimensions of the booth are non-standard, there are no legs or do not fit the style of the room. In this case, problems arise and “savvy” and ingenuity will be required.
Installing a frame on foam concrete without legs
If the pallet has no legs, you will first need to prepare 4 stands. The best material for this is foam block. Installation is carried out on 3-4 cut-out stands at all corners:
- 3 blocks if it is a corner pallet;
- 4 blocks if it is a round or square pallet.
The height of such stands should be within 10 cm. The foam block is placed on the floor on a layer of glue, which, after hardening, prevents the bricks from spreading apart.
On legs
Installing a tray with legs is not difficult. Each product contains instructions, and all that is required is to perform the following steps according to the manufacturer’s recommendations:
- screw the legs, turning the tray upside down;
- install a siphon;
- fix everything with sealant (pipes and siphon);
- turn the pallet over and install it in the desired place;
- level the slope.
On plastic stands
Some manufacturers of bathroom products complete the trays with durable polystyrene foam bases. These settings are very low and require a different approach:
- The pallet is unpacked and the workpieces are taken out.
- The parameters of the bottom of the pallet are measured: the width of all sides.
- The plastic stand is turned upside down and fitted to the pallet.
- Measurements are taken of the location of the future drain hole and the location of the ribs.
- Openings of the required diameter are cut out at the marks.
- The legs are screwed into the mounting sockets.
- The height of each leg is adjustable.
- A siphon is attached to the drain and sealed.
- Mark the future location of the frame with a pencil on the floor.
- The surface of the stand is cleaned of dust.
- Polyurethane foam is applied to the center of the floor contour.
- The stand is installed.
- The slope is checked by level.
- The tray is installed on top.
- The pallet is pressed tightly against the stand; it is better to put something heavy in all corners of the pallet until the glue or foam hardens.
- Start with decorative finishing.
Try to adjust the height of the stand so that the gap from the floors is minimal. If the floor slopes towards the wall, then twist and turn the legs several times, checking the horizontal position.
On bricks
Installation on bricks is carried out if the pallet does not provide for mounting on legs. In this case, it is better to take measurements of the bottom of the pallet, make marks on the floor, and lay several rows of brickwork along these marks. After the cement mortar has hardened (about 3 days), install the pallet, fixing it with glue on top of the bricks.
How to attach to the wall
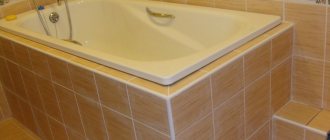
The tray is attached to the wall by tightly fixing it with silicone or sealant.
If the manufacturer has provided for fixing lightweight plastic by attaching the curtains to the wall, then you need to make holes with a drill, screw in dowels and secure the bolts.
As a rule, such fastening is implemented on a rough wall. Either decorative tiles or plastic panels are placed on top of the curtains.
Fastening panels and cabin doors to the pallet
After the installation of the frame or pallet has been completed successfully and the solution has dried, you can begin attaching the walls or doors of the booth. The walls are fixed not directly to the pallet, but to the floor base or vertical bases on the curtains.
Brick foundation
Many people do not think long about solving the problem of building a foundation. Traditional brick helps solve the problem. This is an excellent solution for a ceramic tray, but you need to leave room for a siphon. A properly executed foundation greatly extends the life of the pallet. Much depends on how tightly the bottom fits to the pedestal. Ideally, any deformation is eliminated.
The problem is this. Previously, many people installed a flat pallet without a foundation, or so that only the perimeter rested on the bricks. As a result, the statistics of broken pallets was replenished at incredible speed. The manufacturers quickly noticed this and corrected the matter by adding a fifth leg in the center: this is a plastic tubercle into which a threaded rod is embedded. It is almost impossible to remove this. You understand that a flat foundation is no longer suitable here; you need to leave a gap for this “fifth leg”.
Bricks are a fairly universal tool. For example, at the bend of the perimeter they are laid out like a fan outwards with butted edges. The free space is filled with solution. This scheme is often used for acrylic pallets. It is important to leave space here to control leaks. It would be in vain to think that concrete will stop moisture from reaching your neighbors. Special measures are needed to waterproof the floor. And in any case, dryness needs to be controlled somehow.
If damaged, what should I do?
If for some reason during installation the surface of the product is damaged, scratches or cracks appear, then do not be upset. Sometimes restoration work saves the day:
- If it is an acrylic base, then drill small holes on the sides of the crack into which a fiberglass cord is placed. Epoxy resin is poured over such a crack or a special mixture is sprayed from an acrylic spray can.
- A product made of steel or cast iron is also treated with sprayed acrylic from a can.
- Stone cast pallets can be restored in a similar way.
The only coating that cannot be repaired is ceramics.
Strengthening a steel or acrylic product
These solutions, especially acrylic ones, do not have a strong enough structure. Measures to increase strength come down to installing supporting elements, which can be bricks.
It is important that the pallet presses on all supports with equal force, otherwise one of them may simply push through the bottom
In this case, all supports in places of contact with the bottom must follow its shape. For this you can also use gaskets made of paronite or rubber.
Some complete models of shower cabins have a large height of the fence and tray, for installation of which the ceiling height may not be enough. In this case, you need to make a excavation of the floor in order to install the tray and connect it to the drain.
Final finishing
After the installation work has been completed, decoration is carried out. The sequence of work depends on the type of shower stall and the style of the room. Decorating options with ceramic tiles are popular. High installations are also decorated with decorative plastic panels on slats in a “coupe” style.
Work on installing a pallet with or without legs is carried out by hand. Difficulty arises if natural stone or cast iron is being installed. Products made from such components are heavy, which complicates the process.
Types of structures according to the height of the sides
The bottom comes in the shape of a square, rectangle, or semicircle. The complexity of the work depends on the depth of the pallet.
- The height of the walls from 20 cm gives the structure the appearance of a small bathtub. For a shower cabin with a high tray, installation without a frame is not carried out. The frame is installed on six legs.
- For medium-depth structures (10-20 cm height of sides), installation is carried out both on the frame and according to the principle of small pallets.
- Small structures are sometimes mounted on supports. But if they are absent, then a special foundation is prepared.
There are shower cabins where the bottom is a floor with waterproofing and a drain.
Installation of the shower tray is carried out in two ways: on the frame and on the foundation.