Large construction stores and plumbing hypermarkets have a huge selection of products. Here everyone will find what they are looking for. Among the great abundance, shower stalls catch the eye. The range of this type of product amazes our imagination.
Many people do not like to take a bath and do not want to install one in their home, but prefer modern, beautiful, comfortable and multifunctional shower cabins.
In this article we will take a closer look at this product.
When you walk around the store looking for the booth you need, you involuntarily come across the thought that they are all good. So what should you choose?
Some have a rather high tray and not everyone can raise their feet to such a height, another cabin has inconvenient narrow doors, and the third cabin has generally inconvenient dimensions. Having gone through all the available options, we will focus on a cabin with a low tray.
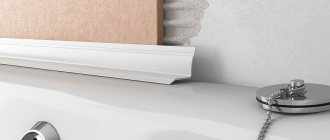
To begin with, a pallet from 5 to 50 centimeters is considered low. The purpose of such cabins is to take a shower. Anything above these indicators can safely be called a bathroom with curtains. Low pallets are used to install cabins, sizes: 80*80cm, 90*90cm and 70*100cm.
Anyone who has tried to step over a high side with wet feet knows that this activity is not safe. It’s not surprising to get caught and fly head over heels from a high trough. Now imagine the height of the side - 10 - 15 cm.
Even elderly people, small children or people with disabilities can overcome this level. That is why many consumers consider a cabin with low walls an alternative option for performing water procedures.
Assemble the pallet
Shot: @Alexander Kvasha / YouTube
As a rule, the lower part of the shower cabin is made of acrylic and reinforced with a metal frame on height-adjustable legs. The front of the structure is covered with a decorative screen, which is more convenient to install at the very end of installation.
Assemble the frame according to the diagram. Usually this is a cross of two steel pipes, which are screwed to the pallet with self-tapping screws in certain places with mortgages. Use only the supplied screws, otherwise there is a risk of drilling through the bottom and ruining it. To reduce squeaking, you can first apply a layer of silicone sealant to the frame.
Install studs with nuts, legs and screen brackets at each end of the cross and in the center. First, roughly adjust the height using the nuts. Then use a bubble level to check the position of the pan and make sure it is level. If necessary, raise or lower the corners by rotating the legs, and once the adjustment is complete, secure them with lock nuts.
General information
Attention! The shower stall should be assembled in a prepared room, all repair work must be completed.
The instructions below will help you assemble any type of shower structure: one with a glass back wall, with dimensions of 100 x 100 centimeters, 80 x 80 or 90 x 90 centimeters.
Shower cabins differ in the design of the tray. It can be high or low. Their assembly is no different, the only difference is in the installation location of the structure and its preparation before installation. It is better to assemble the cabin with a partner; assembly time averages three hours.
Install a siphon
Shot: @Alexander Kvasha / YouTube
Find the parts of the drainage system and assemble it according to the included instructions. Turn the pan on its side and install the siphon. To do this, remove part of the protective film around the drain hole, insert the siphon socket into it, after installing the gaskets. Screw the union nut onto the reverse side and tighten it by hand.
If you are not sure about the quality of the seals, coat all joints with sealant, but keep in mind that disassembling the joint will be problematic later. Typically no additional sealing is required.
Try the drain onto the sewer socket, but do not connect it yet. It’s more convenient to do this at the very end, after assembling the booth (when you slide it into place).
Mount the center panel fittings
Shot: @Alexander Kvasha / YouTube
While the back wall panel is disassembled, it is convenient to install the shower switch, foot massager, as well as a shelf, mirror, towel holder and other accessories that come with the kit. For details of what is attached and where, look in the instructions.
Some budget models do not have a central panel; all accessories and control units are located on one of the side walls.
Door installation
The doors are installed last. The process itself depends on the type of door. Roller doors are considered the most difficult to install, as they require precision.
Given the variety of models and manufacturers, the installation process can differ significantly, so experts recommend watching a video of assembling shower cabins with your own hands, which can be easily found on the Internet.
Assemble the side walls
Frame: @Alexander Kvasha / YouTube
Typically, the design of a shower stall is a frame made of an aluminum profile, into which the side walls are inserted and sliding glass doors are hung. Therefore, it is better to act with an assistant who will hold the walls.
First the frame is assembled. To do this, remove the film from the top of the pallet along its perimeter. Connect the profiles together with screws, but do not tighten them completely, in order to correct the position of the frame if necessary.
Place the resulting structure on the pallet and secure with bolts. Place silicone sealant inside the profiles and trim off the excess with a knife. Carefully insert the glass into place and secure it in the frame with special stops.
Choosing a shower cabin
When choosing a suitable model, each buyer is based on his desires and budget. Options and appearance are also important details.
Shower cabins are usually divided into three types:
- Simple corners. This is the simplest and cheapest option that can be found in the store. Most often, models do not have a roof, and bathroom walls are used instead of side walls. Installation of this design is as simple as possible; the corner can only be used for showering.
- Simple cabins. The option is more expensive and already has its own walls. Often models have nozzles with a water pressure control function. You can not only take a shower, but also use the hydromassage.
- Multifunctional boxes or booths. The most equipped models. Optionally there may be: steam generation, radio, illumination of the tropical rain function, creation of bath conditions, and so on. The number of additional options will directly affect the complexity of installing the booth.
In addition to functionality, division can be made depending on the materials used. Plastic, steel, acrylic or cast iron are used for the pallet.
Stone pallet Source gidpovode.ru
For doors - glass, plastic. The type of door opening is also divided into:
- swing;
- bivalve;
- folding;
- sliding
The main factor in choosing the size of a shower stall is the available space in the bathroom.
Install curtains
Frame: @Alexander Kvasha / YouTube
Sliding doors move along special grooves inside the upper and lower frame profiles. First of all, install elastic stops for the rollers there. To protect against splashes, place seals on the ends of the side walls that will be in contact with the doors.
For convenience, immediately screw the handles to the curtains. According to the instructions, attach the rollers to the doors in the right places and hang the assembled structure on the frame. Check how the doors close and, if necessary, adjust the position of the rollers.
Frame assembly procedure
Assembling the frame and installing the panels is not particularly difficult, but for ease of installation it is better to do it together.
The panels are attached to special profiles using screws or other fastenings. The frame itself is attached to the tray boss with a screw fastening.
For a more rigid and reliable fastening, the guides are reinforced with side strips. Next, the lower guide for installing the doors is installed.
The top guide is inserted into the grooves of the side guides and secured with latches.
Mount the ceiling panel
Shot: @Alexander Kvasha / YouTube
Remove the protective film from the top of the cabin and install a rain shower head, lighting, fan and other components. Connect all elements in the sequence described in the instructions.
Attach the panel to the frame using clamps or screws. If there is no factory seal around the perimeter of the roof, it is advisable to treat the joint with silicone before installation for better tightness.
We install inexpensive and luxury products of any production
Experience, qualifications, and knowledge of modern technologies allow us to assemble and connect plumbing fixtures of various levels - economy segment in a simple configuration, multifunctional premium class.
We install shower boxes and corners of different brands:
- Chinese - Serena
,
Parly
,
JOY
,
Nautico
,
Niagara
,
Eago
,
Apollo
,
Mirwell
,
Pegas
,
Fresh
,
Ammary
,
Golf Potter
. - Russian - Aquanet
,
Aqua Joy
,
Arcus
,
IDDIS
,
Erlit
,
Aqualux
,
Radomir
,
Aquarelle
,
River Nara
and other lines. - German - Royal Bath
,
Orans
,
Elegansa
,
Villeroy &Bosch
,
Am.Pm. - French - Jacob Delafon
. - Finnish - Timo
,
IDO
. - Czech - Ravak
,
Luxus
. - Italian - Cezares
.
We provide full support for subsequent maintenance, repairs, and ordering components and spare parts.
Connect communications
Shot: @Alexander Kvasha / YouTube
Connect the internal wiring of the shower cabin hoses according to the diagram in the instructions and secure all joints with clamps. Using flexible hoses, connect the cold and hot water fittings to the corresponding terminals in the wall. Tighten the union nuts with a wrench, not forgetting to install the gaskets.
Make sure the system pressure meets the manufacturer's recommendations. If the water quality is poor, install fine filters at the inlet to extend the life of the steam generator and hydromassage system.
To connect to the mains, use a waterproof, grounded outlet. It is desirable that a separate line with a two-pole circuit breaker and a residual current device be laid to it.
Push the shower stall into place and connect the siphon outlet to the sewer outlet. If the diameters do not match, use a transition collar, treating the edges with plumber's grease or liquid soap. When connecting the siphon with a flexible hose, shape it so that the middle part is raised and forms a water seal.
How to prepare a shower for dismantling
Before you begin the dismantling process itself, you will have to make the necessary preparations. First of all, it is extremely important to get rid of moisture - drain all the water from the pan and wipe the parts dry. After this, you can begin the stage of disconnecting communications and analyzing additional elements.
Disconnection from water supply
One of the main stages of the work is to disconnect the shower cabin from the water supply system, sewerage and power supply, if it has been carried out. Actions must be performed in strict order:
- Disconnect the cabin from the electrical network.
- Shut off the hot and cold water supply using special valves.
- Disconnect the flexible water supply hoses. To do this you will need an adjustable wrench.
- Disconnect the hydrobox from the sewer drain system. It is important to pay attention to the connection method. If a siphon is used, all the work comes down to removing the drain pipe from it. If you have an adjustable tee in front of you, you need to unscrew the clamps and disassemble the threaded connections.
Removing additional elements
After turning off the water supply, it is necessary to dismantle all additional structural elements. We are talking about shelves, dispensers, mirrors, towel holders and other fittings.
After all the equipment inside the cabin has been removed, you can begin dismantling the mixer.
If the shower head is in working condition, it does not need to be disconnected from the hose. When repairs or cleaning are required, the watering can can be easily disassembled. In modern products, unlike older models, the fastening nut is located under a decorative plug. You can easily get rid of it by prying it off with the sharp tip of a thin knife. The watering can can be disassembled into its component parts and the necessary work can begin. An effective way to clean parts from limescale is to soak them in a solution of acetic acid.
If the faucet also needs to be repaired, it can also be disassembled. To do this, you will need to remove the plastic plug and switch. After the nut responsible for fixing the cartridge is unscrewed, it can be replaced.