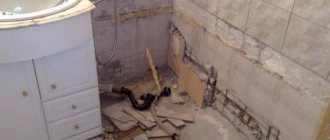
Renovating premises, and especially bathrooms, decorated according to Soviet standards, often becomes quite problematic. In order to lay new tiles efficiently, it is necessary to remove the old coating - paint. Based on the peculiarities of renovation in Soviet times, the question arises: “how to remove paint from the walls in the bathroom”? It is very difficult to clean the surface in such situations, since the coloring agent was applied directly to the concrete coating.
Nowadays, masters are great inventors. They use various tools in the fight against paint: an angle grinder, a gas burner, a hair dryer, a hammer drill, spatulas, scrapers, knives, etc.
The process of cleaning the surface of walls is impossible without noise, dust, and unpleasant odors. Also, its implementation will require a lot of effort and time. To choose the best paint removal option, you need to evaluate both the positive and negative aspects of each approach.
Clean the surface of the walls in the bathroom from paint: what tools are needed
Based on the budget, preferences and capabilities of the person, the list of possible tools may be as follows:
- putty knife;
- axe;
- perforator;
- solvents;
- hammer and chisel;
- sander
Of course, this is not a complete list, and later in the article some of the main options will be discussed.
Using a hammer and chisel
One of the obvious and crude methods, which, however, demonstrates quite high efficiency.
Taking a chisel and a hammer, you can begin to beat off the layer, fragment by fragment. Advantages and disadvantages:
- the opportunity to save on chemicals;
- large time costs;
- the need for monotonous physical labor.
It is recommended to use several types of chisels depending on the surface characteristics.
Spare units are also a good idea, as the chisel may become dull during use. This option is best suited in situations where the wall is planned to be plastered in the future.
Using paint remover
No less monotonous, but less tedious is removing paint using a special caustic substance that etches it. After dipping the brush into the paint remover, you should go over the entire surface that needs to be cleaned. After waiting fifteen minutes, all that remains is to peel off the weakened layer with a spatula.
When carrying out work using paint cleaner, the following points should be observed:
- It is recommended to protect your hands with gloves.
- The room must be ventilated.
- Paint that does not come off the first time should be coated and scraped again.
Using a cord brush
Those who want to remove paint quickly, and without unnecessary movements, can use a cord brush that attaches to a drill.
In this case, the process will not take much time and effort.
All work is carried out using drill attachments and a respirator.
However, there are some hard-to-reach places, such as corners, that may remain unaffected.
When using this method, you should remember that the work will be accompanied by a large emission of dust. It will be necessary to prevent the spread of dust outside the bathroom, as well as to use personal protective equipment.
Grinding machine and diamond cutter
Using power tools is a modern and often reasonable solution. Among the undeniable advantages are speed and simplicity, and among the disadvantages are noise and dust.
A sander with a diamond cutter is an excellent solution for removing old paint from walls. This machine makes it possible to remove even paint that is applied directly to the concrete base.
Ax and warm water
It is acceptable to use an ax as an alternative. This tool is best suited when there are several thick layers of paint on the surface. To facilitate the dismantling process, the surface can be moistened with warm water, as is the case with old wallpaper.
The ax should be small and not sharp so that it is convenient to work with, but at the same time it does not pose a danger.
First, notches should be made along the entire plane, and only after that, between them, begin to remove the coating. This will greatly simplify the process, and in addition, despite the noise, the ax is in many ways superior to a spatula.
Chemicals
The next way to remove paint from bathroom walls involves the use of chemical reagents. This is an effective method, but you need to take care of your own safety in advance. Follow a few recommendations:
- Hands must be protected with gloves. They must be made of durable material that will not allow hazardous substances to pass through and prevent them from penetrating the skin.
- Ventilation of the room must be provided. Of course, the work will be carried out in the bathroom, where everything is closed. But open the windows in your apartment or home to allow some fresh air to flow.
- The respiratory organs are protected with a respirator. It is not enough to simply cover your mouth with a gauze bandage. To do this, you will need to purchase a professional construction respirator that will prevent reagents from getting into your lungs.
To carry out the work, special solvents are used, which can be purchased at any hardware store. Using a brush or roller, they are evenly distributed over the entire surface. Be sure to read the instructions for a specific product, since the duration of action of the substance will vary. For the solvent to take effect, 20 to 30 minutes are most often enough. When the paint softens, it is removed with a spatula. If the product is strong and effective, then this will be quite simple. In the case when not the entire layer of material has been removed, the walls are processed again, following the same instructions. At home, you can prepare your own solution to remove the dye. To do this, you will need to mix 400 g of ordinary soda and 1.4 kg of lime. The mixture is diluted with water so that its consistency resembles thick sour cream. Then it is applied to the surface and left for 12 hours. Subsequently, the solution is scraped off the walls along with the material. If the paint is applied in several layers, and for a long time, chemical reagents may not cope with it. In this case, it is better to resort to a mechanical cleaning method.
Special paint removers
How to remove old paint from bathroom walls
Removing old paint is not the most difficult task that you may encounter when renovating an apartment, and in particular a bathroom. However, this process also has its own characteristics.
Clean the water-based base
Water-based paint is usually used in rooms with high levels of humidity, which is the bathroom. However, despite the fact that water is one of the main components, nothing can be achieved by rinsing. It is recommended to generously wet the walls with plenty of warm water until the paint softens. To thoroughly and evenly distribute the moisture, you will need to use a roller and carry out these manipulations quite quickly, since the moisture dries out quite quickly.
Softened paint can be easily removed with one of the hard tools with a cutting edge.
Quickly remove emulsion from concrete walls
In the case of emulsion paints, to speed up the removal process, you can use the method of active wetting or electric tools. Chemicals in the form of various cleaners and solvents can also come to the rescue.
How to Clean Oil Paints
Oily compounds, like most others, are easily removed from the walls using a thermal method associated with the use of a hair dryer. A simpler option is a combination of warm water and a spatula.
How to remove old textured paint
Old textured mixture can be effectively cleaned from walls using the same methods as for emulsion.
Is it possible to remove decorative painted surfaces with appliqués?
In such a case, the issue is resolved in the same way as with any similar material. The choice of tools is made based on the characteristics of a particular room and the preferences of the master.
Method of using chemical reagents
Chemical treatment of old coating is the least labor-intensive option for removing CM. Following the instructions, before washing the bathtub of paint, apply the chemical to the surface. After the time specified by the manufacturer of the product, the softened paint is removed with a spatula.
The finished composition is applied
When working with chemicals, you must follow all instructions: maintain a time interval, follow the sequence of actions.
- Apply the product while wearing rubber gloves. It is recommended to leave the room while the exposure process is ongoing. The drugs are aggressive, with a pungent odor.
- Disposal of product residues is carried out strictly according to the instructions.
- If the price of a chemical deters you, then it’s worth remembering how quickly the work can be completed. In addition, for standard baths and toilets in Khrushchev, 1 liter of solution is enough.
- When purchasing a product, you need to check whether there is permission to apply it on a vertical plane.
- On a stone wall, old paint is removed with an acid-free solution.
We recommend videos on the topic:
Chemicals are produced:
- in a liquid state it is a concentrate of alkali and acids. They are diluted;
- gel-like - based on organic compounds. Their effect is very mild and does not have an unpleasant pungent odor. Used in closed rooms;
- in powder form - used in pure form or as a solution;
- in aerosol cans - easy to use. Used for processing small areas.
To ensure that the chosen product is suitable for any type of paint, universal formulations are purchased.
- Composition for paint removal "Fail-5". The exposure time comes quickly, within a few minutes. The old dye bursts.
- Anti-krass remover. The CM is removed from the walls, floor, and ceiling. Works on metal surfaces, wood, plastic.
- General construction mortar "Docker S4". Removes all types of paintwork.
What mistakes are most often made?
The main point in the issue under consideration is that cleaning the walls should be done without fanaticism.
You just have to overdo it a little and instead of just a cleaned wall, you will end up with a broken concrete surface that will have to be strengthened, leveled and prepared. It is also worth remembering that the cleaning must be complete until the primary concrete surface is exposed.
The article discusses the question of in what cases it may be necessary to remove old paint in the bathroom, how this operation is carried out, and what tools are used.
What to consider when choosing a paint removal method?
Before starting labor-intensive and time-consuming work, it is necessary to understand what we are dealing with and try to choose a method that will still prove to be most effective with the least amount of labor and time. To do this, you need to pay attention to five determining factors:
- Decide how much money you are willing to spend on purchasing the necessary tools or solutions, and whether you are ready at all;
- What time do you have? After all, it happens that the worker whom you hired to lay the same tiles suddenly gets released earlier than the agreed time and is ready to begin work at your home within a day. Then you will have to prepare the walls at a very fast pace;
- An important role is played by type of base. It can be plaster, cement, brick or concrete;
- Type of paint – acrylic, water-based, oil or enamel. Of course, it is very difficult to do this by visual inspection, but it is still possible to distinguish the oil composition from others. Let’s say right away that the hardest part will be removing oil paint from a concrete base;
- And the last thing is the number of layers of paintwork. A thin layer can sometimes be much more difficult to remove than a thick layer, which breaks off in plates upon impact due to its own rigidity.
It’s best to “test it by the teeth” and try to remove a fragment of paint on a small section of the wall using each of the methods in turn, starting with the simplest ones.
Removing old plaster
To decide whether to remove all the plaster or not, you need to tap it with the handle of a spatula. In those places where there is emptiness, a dull sound will be heard.
To remove old plaster you will need one of the following tools:
- putty knife;
- scraper;
- perforator;
- Bulgarian;
- machine for removing plaster.
The algorithm] for stripping a wall of plaster[/anchor] is simple:
- Beating off old plaster with a spatula or hammer. If it doesn’t come off well, use a grinder, a hammer drill, or a special machine with abrasive discs. Before this, the wall should be moistened with water to reduce dust.
- Cleaning with a wire brush. To eliminate unevenness, the wall must be worked with a brush or sandpaper, and then wiped with a wet rag.
Tip: in order for the old plaster to come off easily, it must first be wetted with water with the addition of starch (2 tablespoons of starch per liter of water).
Important Tips
Tips from professional repairmen:
- When working with chemicals, you must use personal protective equipment: gloves, goggles and a respirator.
- When using electrical appliances, such as an angle grinder, in the bathroom, do not allow the tools to come into contact with water.
- To ventilate the room, do not close the door to the bathroom.
- When removing paint from walls, you need to protect the flooring and plumbing from possible contamination. To do this, they are covered with polyethylene or unnecessary fabric.
If the paint in some areas is difficult to clean off, then you can refuse to completely remove it. Such a coating will not become an obstacle to further repair work.
Thermal methods
With this option of cleaning walls from old, outdated paint, it first softens under the influence of high temperatures. This method of removing paintwork is suitable for places where shock and vibration are not possible. It is impossible to apply thermal effects to areas of the wall with nearby wiring and any decorative finishing.
Construction hair dryer
The paint coating easily softens under the influence of a stream of hot air and begins to bubble. Afterwards it can be easily removed using a regular spatula. The disadvantage of this method is the acrid smell of the heated coating, which can also be toxic.
Carefully! Old Soviet coatings often contain lead. Therefore, there is a risk of poisoning with this metal.
Blowtorch
This device can run on gasoline, gas, or kerosene. The burning flame has a temperature of more than 900 degrees and perfectly softens oil compositions. Softened layers should be removed immediately, otherwise they quickly cool, lose their plasticity and turn to stone.
Attention! Fire safety must be observed. There is a danger of paint burning.
Features of working with water-based paint
Another important question is how to remove old water-based paint. To do this, follow a few rules:
- Before starting work, walk over the entire surface with warm water. Use a large roller. Exposure to liquid and temperature will soften the material. Let the water soak in for 10 – 15 minutes.
- Use a spatula to clean the coating. After the walls get wet, remove the paint using a tool. In this case, electrical equipment will be ineffective, so proven manual cleaning methods must be used.
- While you are cleaning the surface, the water may dry out. Periodically you will need to reapply the liquid to the walls. In addition, you can wet small areas, and after removing the paint base from them, move on to the next wall.
- Use protective film, paper or cloth to protect the floor. Old paint will fall down and can leave marks on the flooring that will be difficult to remove.
- If, after completing the main work, there are areas on the surface that cannot be cleaned manually, you can additionally go over the coating with a grinding machine. Be sure to protect your breathing and hands from dust while using it.
- In cases where the walls are covered with several layers of water-based paint, you can immediately use mechanical cleaning methods or chemical solvents.
Washing technology
When the choice of a suitable product has been made, it’s time to figure out the correct technology for its application:
- For the most effective and deep penetration of the reagent into the layer of old paint, the surface must be free of dust and other contaminants. You can wash the walls using household chemicals, and then scrub them with a stiff brush or coarse sandpaper;
- Now we apply the chemical composition itself. This should be done using a wide brush or roller. Do not wet them too much so that the product flows or drips onto the floor. It is better to direct movements in one direction;
- So that the reagent does not evaporate from the surface so quickly and has time to have the proper effect on it, you can cover the surface with a film. This, of course, must be done with gloves;
- After the recommended time, remove the film and remove the paint;
- At the end, you need to wash off the remaining reagent from the wall and neutralize its effect. The manufacturer will definitely provide recommendations on this matter.
That's all, your walls are ready for further transformation. If one of the above methods does not give full effect, try combining it with other methods. By and large, they are all suitable for removing any type of paint.
Tags:Preparation for room renovation, Enamels and paints
Bath type
Typically, bathtubs made of cast iron are subjected to the painting process, and therefore it is they who subsequently have to be cleaned of the materials that were previously used. Everything is explained simply. The design of cast iron bathtubs is usually very strong and stable, and even decades can not in any way harm it or reduce its durability. Since the appearance, or rather the coating, has a much shorter “life”, therefore, this part of the bath often has to undergo periodic changes. The enamel of a cast iron bathtub also has a porous structure, which means the paint has good adhesion. Unfortunately, this very fact makes it more difficult to remove old paint from the bathtub.
Stainless steel bathtubs are also often painted. Their enamel is not so porous, and therefore it holds up a little worse, which, however, does not interfere with enjoying aesthetic beauty for a couple of decades.
Items you will need in the process of removing paint from a cast iron bathtub:
- gloves;
- sandpaper or drill with an abrasive attachment;
- respirator;
- solvent or acetone;
- oxalic acid.
Bathroom and toilet after paint stripping
So, how to remove old paint from walls is no longer a problem for us. In the next lesson we will continue dismantling work - we will knock down concrete thresholds.
Lesson 1. Planning a bathroom and toilet renovation with your own hands Lesson 2. Where to start a bathroom renovation. Start of dismantling work Lesson 3. How to remove old paint from walls in a bathroom and toilet Lesson 4. How to remove a concrete threshold in a bathroom and toilet Lesson 5. How to prepare a ceiling in a bathroom for painting or a suspended ceiling Lesson 6.
Is it necessary to replace water supply risersLesson 7. How to shut off water supply risers in an apartmentLesson 8. Which pipes are best for water supply in an apartmentLesson 9. Do-it-yourself plumbingLesson 10. How to hang a heated towel rail in the bathroomLesson 11. Which water meter is best for an apartmentLesson 12. Do-it-yourself electrical wiring in the bathroomLesson 13.
Leveling the walls and floors in the bathroomLesson 14. Wallpaper for the bathroom, kitchen, toiletLesson 15. Which tile to choose for the bathroomLesson 16. Notched trowel - a miracle of human inventionLesson 17. Materials and tools for laying tilesLesson 18. How to lay tiles on the floor with your own handsLesson 19. How cutting tiles and what to do when tiling Lesson 20.
How to drill tiles and what to do when tiling Lesson 21. How to lay tiles on a wall Lesson 22. Which bath to choose for your home Lesson 23. How to install a cast-iron bathtub Lesson 24. How to install an acrylic bathtub Lesson 25. Laying tiles on a wall in a bathroom with your own hands Lesson 26. How to lay tiles on a wall external corner of the bathroom Lesson 27.
Sparks from an angle grinder can kill your tiles Lesson 28. How to replace tiles on the floor or wall Lesson 29. How to choose a faucet Lesson 30. How to change a faucet with your own hands Lesson 31. How to install a ventilation grill in the bathroom Lesson 32. How to choose a door for the bathroom Lesson 33. Grille on bath Lesson 34.
Features of removing different types of paintwork
In order for the wall cleaning process to be as productive as possible, it is necessary to take into account the type of coating. Removing different types of paint:
| Paint type | The best means |
| Acrylic | White spirit, acetone, xylene |
| Water-based | Ax and warm water. The walls need to be wetted generously. |
| Oily | Solvent 649, 650, alcohol compositions, mechanical removal methods |
| Enamel | Solvent 647 |
| Drying oil | Organic solvents, turpentine |
Getting rid of old whitewash
Old whitewash can be removed in two ways - dry and wet.
Dry method of whitewash removal
You will need:
- respirator;
- Sander.
A lot of dust during work is a significant disadvantage of this method. All furniture must be removed from the room or wrapped in protective film. The advantage is that the sanding machine will quickly clean the walls of whitewash without damaging them.
USEFUL INFORMATION: Decorative plates in the kitchen interior: how to decorate the wall above the dining table
Wet method
Tools needed to remove whitewash:
- putty knife;
- bucket with water;
- sponge;
- brush.
In this case, the old whitewash will need to be washed away by generously wetting the walls with water using a sponge. The whitewash that has become pliable is removed with a spatula, and the remaining areas are treated with a brush and washed off with water to the base.


