(No rating)
MDF wall panels for the bathroom appeared on the market of finishing materials recently and quickly gained their place among other alternative options for decorating bathrooms.
And this is no coincidence. In this article we will look at what this is connected with.
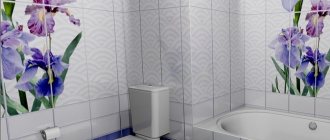
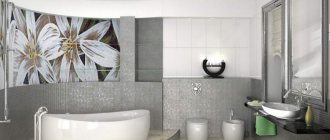
Decorating the bathroom with wall panels
There are a number of advantages that make MDF wall panels for the bathroom an excellent material.
So this is:
- affordable price;
- various textures and colors;
- durability;
- good sound insulation;
- ease of installation;
- ease of care;
- moisture resistance.
These MDF panels are similar to fiberboard, only their density is 670 – 850 kg/m3. The basis for the manufacture of such panels are MDF boards.
Their production is based on finely divided dry shavings, which are pressed at high temperature and pressure. Such panels can be used in rooms with high levels of humidity, that is, in kitchens, bathrooms, and basements.
Their technological characteristics even allow them to be installed in shower cabins. This is confirmed on their packaging by a drop-shaped icon.
Sound and heat insulation, hygiene and durability make wall panels a very high-quality material, and the ability to withstand any load allows cabinets, shelves and other furniture to be attached to the panels.
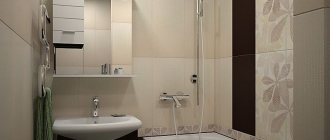
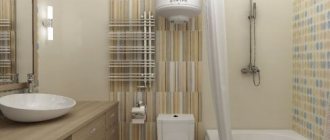
There are various colors of these panels. However, in addition to the variety of shades, there are also panels with imitation of various materials, for example, ceramic tiles, wood, stone and much more. We subconsciously perceive this as the possibility of using such material in rooms with high humidity levels.
If you decide to decorate your bathroom with wall panels, then you do not need to undergo special training; you can easily install it yourself, you just need the desire and a little time.
When installing the panels, no careful preparation of the walls will be required; they will hide all roughness and unevenness, in addition:
- behind the casing you can hide electrical cables and even pipes;
- you can create any design solution in your interior.
A huge variety of decors opens up great opportunities for creating interesting and fashionable solutions; using and combining different shades and textures of panels, you can achieve impeccable results.
MDF wall panels
What are laminated MDF panels
MDF is a sheet material made from fine wood chips pressed under high pressure and temperature. In fact, the abbreviation MDF is not deciphered in Russian (for those who tried to decipher it by type of chipboard or OSB, I personally am one of them), the board is called Medium Density Fibreboard - medium density fiberboard, and MDF is a transliteration of the American abbreviation into Russian .
Variety of MDF panels
The binding component of wood chips is carbide resins (synthetic resins), by adding various components you can give MDF the properties of fire, bio- and moisture resistance. Laminate is made from MDF - this is the most striking representative of laminated MDF.
Which MDF to choose for toilet cladding
There is a large selection of types of MDF panels, especially when it comes to lamination patterns. The panels also differ in size: there are long and narrow, and there are tall and wide sheets. Here I will look at how to finish a toilet with large MDF sheets, which greatly simplify the work (even though they are quite heavy and bulky).
The advantages of large sheets are that a large area is immediately covered and there is no need to fuss with small sheets; accordingly, the speed of work increases. The disadvantages include: bulkiness (it’s better to work together here), inconvenience of dragging a large sheet into a small toilet, especially if there is a door; without a door it’s much easier.
Large MDF panel
How reliable are chipboards as bathroom cladding?
This material is the cheapest in comparison with the other two wood-fiber materials discussed earlier. However, its strength qualities are the lowest, although here too there is a division into separate classes. In particular, for environmental safety, you should choose panels produced according to the E1 standard; their formaldehyde emissions are insignificant, acceptable even for the production of children's furniture. In Europe, these types of slabs are currently produced for the most part.
Suitable for bathroom chipboards
However, the E2 standard is not yet prohibited everywhere, and it is very easy to confuse panels of these two classes in appearance.
Therefore, it is advisable to check the product certificate before purchasing, since in the bathroom with little ventilation, the effect of formaldehyde on the body will be especially strong. Water resistance is the second and no less important requirement when using such panels for bathroom cladding. In this regard, chipboard is much worse than fiberboard and MDF, since the structure is looser. The best indicator for standard wood-based sheets is 20% moisture absorption, and the average is 30%. But this value can only be achieved when the chipboard is completely immersed in water; in general, swelling is less critical.
There are certain brands of class P-A, in which moisture absorption does not exceed 5%. These are materials with a particularly high density (about 750 kg/m2), covered with laminate and, often, varnish, but their cost can be the same as conventional waterproof MDF panels. Attention! Chipboards with the highest water resistance ratings are usually painted green, making them easy to recognize when purchasing.
Preparing the base
The base is prepared as usual - it is cleaned of dust and dirt, everything that falls off is removed. This is necessary so that the glue on which the panels are glued adheres securely. If there is wallpaper in the toilet, it is not necessary to remove it if it is securely glued to the wall, but if tiles are laid, it must be removed.
I recommend: How to best secure the foundation of a brick shed
This completes the preparation for the panels. Of course, if you have large unevenness and differences, they will be reflected in the final finish, you may need to plaster the walls (the easiest way to do this is → “as a rule”). Also, if the surface is a bare concrete wall, it must be → primed with a deep penetration primer (the link describes how to prime surfaces). If the wall is brick, you will again need to do plaster. In other options, the panels can be mounted directly on the base, for example, on fairly even and smooth GGP (tongue-and-groove slabs - a gypsum building material for installing partitions).
Installation
To veneer the walls, you need to carefully prepare for the operation. First, the surface is plastered, achieving its ideal evenness. A layer of antifungal substance is applied over the plaster to help get rid of mold and other problems.
Then a frame of metal strips is installed. It is recommended to install the panels from the corner of the room. This measure will allow the cladding to be completed as smoothly as possible. MDF panels are mounted using dowels or glue. Any person with minimal knowledge and skills in the matter of cladding can carry out the work. If you cannot complete the task yourself, resort to the services of professional craftsmen.
Marking for MDF panels
First of all, let's decide on the type of panels and their sizes. Because the design you like may appear on different types of panel sizes and you will have to choose according to the design. Measure the total area of the walls (walls, not floors) and, based on the sizes of the selected panels, after consulting with the seller and making a 10-15% reserve for cutting, purchase the required number of panels.
Some stores can even help you lay out the panels for your bathroom. We decided on the panels, mentally laid them out on the walls of the toilet, and measured everything. Now let's see what else you will need to cladding a toilet with MDF panels yourself.
Advantages
Moisture-resistant MDF wall panels for the bathroom have the following advantages compared to other finishing options:
- beautiful and original solution in the interior;
- the ability to use different installation options (glue or frame);
- effective masking of communications and defects of the main wall surface;
- ease of cutting;
- a large selection of textures and color schemes for panels;
- high durability and reliability.
Tools and materials
In addition to the panels, we will need:
- “Liquid nails” glue is beige, solvent-based, but can also be water-based with strong fixation.
Solvent-based “liquid nails” glue and a gun for it
- Corners for decorating panel joints in corners. There are special corners made of MDF; in extreme cases, you can also use plastic corners.
Decorative corner made of MDF
From the tools:
- Glue gun.
- Stationery knife (construction knife).
- A jigsaw and a cutting blade with fine teeth (for laminate). You can use a hacksaw with fine teeth, but it will be slower.
- Tape measure and pencil, of course.
We glue MDF panels to the walls in the toilet with our own hands
It is also important to prepare a site for cutting sheets, some place in the nearest room (room).
Marking the first sheet
Mark the first sheet. According to the convenience of work. The disadvantage of large panels is that they do not have any joint edge, and the sheets are simply glued together. This is not particularly noticeable with large panels and it is necessary to either carefully cut the sheets or join them with factory-made edges.
To carefully cut a sheet, stick masking tape over the cut area and draw a cutting line along it, use a hacksaw
I recommend: How to lay laminate flooring correctly and can it be cut with a grinder? (Question)
Cut with a jigsaw.
Mark the sheet and cut it with a jigsaw
You should stock up on at least two stools, since cutting a large sheet is not very convenient. It should be laid on a couple of stools.
Having measured and cut the sheet, we try it on again! Does everything fit, trim if necessary. Here it should be taken into account that the sheets are large and dragging them into the toilet that we are making is not very convenient.
If there are gaps between the corners and the sheet, then make sure that they overlap with the corners. Also, here you don’t have to worry too much about the edges being rough or missing somewhere to the corner of the wall, since all this is covered by the corners.
We glue the MDF panel to the wall in the toilet
Having measured everything, we peel the sheet away from the wall, without having to pull it out, and apply glue to the wall.
Apply glue to the wall
It’s better to apply glue pointwise, in 1-2 cm heaps. We don’t skimp on the glue; solvent-based glue is the cheapest. If you use solvent-based glue, be careful not to smear it on the front side of the sheet and everything around it (especially the floor), because removing it later will be problematic and sometimes impossible.
Glue the sheet, pressing it well to the warp. Please note that the sheet will not be glued completely, but only pointwise, and somewhere it will sag when pressed - this is not a problem, this is a feature of the panels.
Press the sheet for about 5 minutes, gluing it well. Then you can leave it to dry and proceed with further marking and gluing of sheets. We glue the largest areas first, then measure out the smaller ones and glue them. We need to work on this basis.
You can join large sheets using joining corners, as in the photo below.
You can join large MDF panels using such joining corners, choosing the color and symmetrically installing them on opposite walls.
But the joints of large panels are not so noticeable that they can be used.
That's it, we covered the entire toilet with MDF panels. Now it’s time to install and fasten the corners.
Glue the corners
It's time to finish our trim and glue on the corners. We measure the height of each corner and cut the corners to size. An important detail is the junction of the corners. If everything is clear with plastic corners, they are simply cut to fit each other with a utility knife, then with MDF corners you will have to tinker a little longer.
How to adjust the corners to each other
It is best to cut plastic corners into the joint not at 45 degrees, but as shown in the photo below.
It is better to cut corners for gluing MDF corners not at 45 degrees
It will turn out better and more beautiful by cutting off one edge of the corner and leaving the other. This way the joint will turn out more even than when cutting at 45 degrees, and it’s easier this way.
I recommend: Question: Will a country toilet with a timber base warp?
An important nuance - it is better to glue plastic corners with solvent-free glue
. This way you won’t stain the panels when you apply glue to the corner and press it, squeezing the glue out from under the corner (which will definitely squeeze out).
So, everything is clear with plastic corners - they are simpler. Let's move on to the MDF corners.
To trim MDF corners, you will additionally need a miter box.
This is a miter box
The miter box allows you to cut corners at 45 degrees, etc. Let's measure one corner with a small margin.
You need to know how to cut corners on a miter box. This is described in the article about → how to make a joint in a 45 degree corner on ceiling plinths, I recommend that you read it. Everything is approximately the same, only the MDF corner needs to be bent like a corner, pressing the edges of the corner to the edges of the miter box. In general, after reading the article at the link it will become clear.
It is also better to glue the corners with water-based glue, and not with solvent-based liquid nails.
Attaching an MDF corner to a corner
Glue option
You can attach moisture-resistant MDF products in the bathroom with glue only on a flat surface. With the help of solutions, models of various sizes are installed on the wall quite firmly. However, during dismantling this significantly complicates the process. This method will save shower space and also improve the moisture resistance of the room. Sheet panels must be laid on a layer of adhesive not exceeding 5 mm.
Moreover, it is best to apply the adhesive composition with a notched trowel, as this allows various surfaces – panels and walls – to be bonded together more effectively. In order to carry out installation correctly, you need to start from the bottom corner of the product. Then continue laying the MDF to the side until it stops. Thus, by analogy, subsequent rows are applied.
Do-it-yourself panel installation
The protruding glue should not be smeared, but the excess mixture should be removed.
The distance between moisture-resistant products should not exceed 1.5 mm. To increase efficiency, it is necessary to use a sealant with a silicone component. This will make it possible to increase the moisture resistance of the coating. In addition, you can use moldings to decorate the gaps between panels.
This method will not only visually hide the joints, but also improve the operational characteristics of the room. It turns out that MDF panels are a moisture-resistant and environmentally friendly material that has all the necessary qualities for use in a room with high humidity and changes in temperature, i.e. bathroom
Bottom edge decoration
The most dangerous part of MDF is where it meets the floor. It’s good if there is a tiled edge along the edges of the floor - this is the best option.
Trimming of tiles at the bottom along the edges
If there is no such flanging and if it is possible to do it, it is better to do it; if not, then you need to protect the lower edge of the MDF from moisture penetration. Installing a plastic skirting board in a toilet is not the best option, but it is possible.
You can use the same corners: plastic or MDF. Or use special corners, shown in the photo below.
Plastic corner