The bathroom is a room with high humidity. Therefore, fastening PVC panels with self-tapping screws or other metal types of fasteners is not recommended, since rust stains form at the fastening points. It is better to use glue for PVC panels in the bathroom for fastening. Before carrying out work, gluing technology is studied and the desired type of glue is selected.
Calculation of material quantity
Self-calculation of PVC panels is not difficult. It is enough to correctly calculate the area of all walls or ceiling surfaces, and then subtract the area of doors and windows.
The result obtained is divided by the area of one finishing element, after which a margin of 10-15% is added, which is necessary for the installation of overlaps and cuts.
The calculation is carried out according to the formula: S cladding / l panels * h panels
It is also very important to correctly calculate the number of mounting profiles that will be used to install PVC panels:
- profile “internal corners” - measuring the height of internal corners in a room;
- profile “external corners” - measuring the height of external corners, the perimeter of window and door openings;
- molding “universal purpose corners” - the sum of the lengths of all external and internal corners;
- “ceiling plinth” profile - measuring the ceiling perimeter;
- “starting” profile - the sum of the height of the corners to begin installation and the length of all joints.
At the final stage, the total number of fasteners that will need to be used during the cladding process is calculated. The use of a pair of dowel-nails is necessary when installing one meter of mounting rail on brick or reinforced concrete bases. The consumption of nails and screws is one piece per 30 cm, and staples or clamps are one piece per 40 cm.
Installing a lathing frame around the perimeter involves adding a pair of slats to each wall, and the dimensions of such elements should be equal to the height of the wall when installing finishing panels horizontally, and the length of the wall when installing vertical cladding.
Ceiling paneling is a prestigious trend ↑
Repairing the ceiling in the bathroom with plastic panels is also easy to do with your own hands, if you first study the annotations with photos.
As a rule, installation is carried out using the frame method, because it is more reliable than conventional gluing.
The sequence of work does not actually differ from wall cladding. For the ceiling, a special ceiling plastic is chosen, which is slightly thinner and lighter than wall plastic.
Ceiling finishing
Sequence of work:
- Install the wiring under the lamps.
- Using dowels, secure the sheathing around the perimeter of the ceiling, and then across the finishing direction in increments of no more than 30 cm.
- Cut the pieces to fit the ceiling.
- It is easier to do the work together.
Place the first panel at the junction of the wall and ceiling, then secure it with flea screws or clips. - Insert the next section into the fastening groove and seal the connection. Secure with self-tapping screws. In the same way, sheathe the ceiling to the end.
- At the location of the lamp, cut a hole with a construction knife and bring the electrical wire out.
- Decorate the joint between the ceiling and the walls with a ceiling plinth or ordinary polyurethane finishing plinths.
Laying option
Marking
The sheathing must be attached strictly level, which will prevent distortions of the cladding. In order not to measure each batten, markings should be made on the surface prepared for the sheathing:
- the lowest row of sheathing is located a couple of centimeters above the floor level, and the starting point is marked here;
- from the marked point, using a building level, draw a horizontal line along the entire perimeter;
- in a similar way, a line is drawn in the under-ceiling space, along the edge of the cladding;
- a starting beacon is installed at a distance of half a meter from the bottom marked line, and all subsequent marking elements are placed with the same interval up to the top;
- in accordance with the displayed beacons, strictly parallel lines are drawn along the entire perimeter.
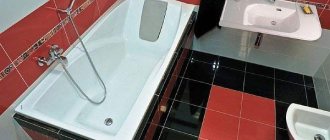
Bathroom interior with PVC finishing
The panels are fixed to the sheathing in a perpendicular direction, so the horizontal frame is sheathed vertically, and the vertical frame, on the contrary, horizontally.
Marking for vertical sheathing involves drawing the first starting line directly in the corner, in the direction from floor to ceiling, using a plumb line, with subsequent lines marked at a distance of half a meter from each other.
Features of PVC tiles and its main types
PVC wall tiles for bathrooms are multilayer panels that have a profiled backing with perforations on the inside and a laminated coating on the front. The polymer is processed under high pressure, giving the workpiece a varied relief.
The material for the manufacture of such panels is polyvinyl chloride, a polymer that has excellent performance qualities.
A decorative design is applied to the outside of the panels by lamination or thermal printing. It is coated with a protective layer of glossy or matte varnish, which protects the image from abrasion and fading.
This multi-stage processing makes the polymer coating resistant to mechanical damage and UV radiation, and also increases its antistatic properties.
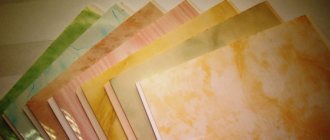
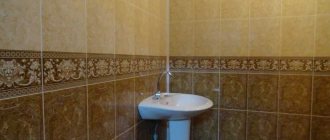
The image on the front side can be very diverse. Products whose front side imitates various textures look interesting: marble, tile, wood.
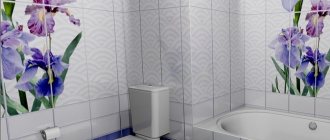
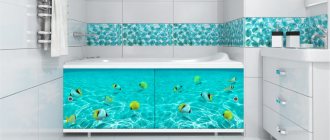
On sale you can also find PVC panels for the bathroom, imitation tiles, decorated with photo printing or 3D images.
The surface covered with PVC panels looks neat and attractive. A variety of textures and colors allows you to choose an option for any interior design.
Depending on the purpose, PVC panels are divided into two types:
- Wall – characterized by increased strength and the ability to withstand mechanical loads. The thickness of such plastic is greater, but its flexibility is lower.
- Ceiling - characterized by a small thickness of products and a high degree of flexibility.
The minimum size for square tiles is 45.7 cm.
Depending on the method of attachment to the base surface, manufacturers distinguish three types of polymer coating:
- self-adhesive tiles;
- with mounting adhesive;
- tiles having a locking connection.
On the ceiling and walls, such polymer tiles are practically indistinguishable from ceramic coatings. The rich variety of shapes and color options of the slabs allows you to combine different textures to implement design solutions that are quite difficult to implement if you use the same natural materials.
Plastic hanging structures easily hide uneven walls or ceiling bases; it is convenient to hide wires and communications behind them
Covering technical structures and communications, cladding made of polymer tiles allows you to leave open access to them in case of preventive maintenance or repair work.
Surface cleaning
Installing plastic or PVC panels using liquid nails allows you to avoid such difficulties as installing a lathing frame and greatly reducing the usable area of the room.
However, in this case, it will be necessary to devote time to better preparing the surface for cladding, including thorough cleaning, putty and primer.
Preparing the wall in the bathroom
During the cleaning process, you need to remove all old finishing materials, clean the surface from rust, mold and mildew.
After the surface is completely cleaned, it is recommended to treat it with special antiseptic compounds, which is especially important in a room with high humidity levels.
Work order
Bathroom renovation is complicated by the fact that builders are rarely friendly with the level. Therefore, there are large distortions on the walls, there are bumps and holes that violate the plane of the plastered surface. Gluing plastic panels in such conditions is problematic. For this reason, they simplify the work by mounting the panels on a frame, which eats up free space.
The main part of the work involves preparing the surface and eliminating wall defects. At this stage, they additionally increase protection against mold and increase adhesion (adhesion) to the glue. You can glue plastic panels in the bathroom in half a day, and preparation will take from 2 to 5 days, depending on the drying speed of the leveling plaster or putty.
But before you start, bring the plastic into the apartment, it must accept the room temperature. Cold PVC bursts and breaks during cutting and installation.
Surface marking
At the initial stage, markings for frameless installation of plastic are not required. Only after the surface of the walls has been leveled, right angles have been drawn, and all existing distortions have been eliminated, will it be necessary to mark the position of the first panel.
The strip can be placed both vertically and horizontally. The first option is more often used, so it is important to place the first part of the cladding strictly level. To do this, determine the main corner of the room, which catches your eye upon entering. Measure the width of the panel from it, and from this mark, using a level or plumb line, lay a vertical line along which the edge of the first strip of plastic will be located.
Removing dirt and other coatings
The old finish that characterized the bathroom before renovation is often affected by fungus or mold. Therefore, get rid of existing coatings without regret. The work is dusty, labor-intensive, and the cleaning technology depends on the type of coating:
- the tiles are knocked down together with glue or mortar to the old plaster or wall;
- old paint is removed with a brush or grinder; it is permissible to use removers and other household chemicals;
- Remove the wallpaper with a spatula; pre-moistening the surface will help.
To remove traces of mold and mildew, the walls are treated with a deep penetration primer with antiseptic additives. Depending on the depth of the lesion, 2-3 times treatment may be required. This primer additionally increases the strength of the wall material, prevents its destruction, and improves adhesion to other finishing coatings.
Leveling with primer
For work, use only those materials that are intended for rooms with high humidity. There is no point in recommending any manufacturer; the compositions are largely similar. But be sure to pay attention to moisture resistance.
Align the walls according to the following scheme:
- After the antifungal primer has dried, large differences in level are removed with plaster. It is better to use sand-cement mixtures with polymer additives. They plaster on pre-installed beacons, it’s easier.
- The remaining defects are smoothed out with thin layers of putty. Lay it in several passes with cleaning after drying.
- Before gluing PVC panels, the surface is re-primed, improving the adhesion of the leveled wall.
The installation of plastic begins only after the primed layer has completely dried. This may take from 1-2 hours to a day, depending on the room temperature.
Applying glue to the wall
This method is used to glue using liquid nails. The glue is squeezed out of the tube with a gun and spread over the surface of the wall with a small notched trowel. In one go, a strip up to a meter wide is processed.
But it is considered more correct to apply glue not to the wall, but to the plastic panel itself, this avoids squeezing the composition into the joints between individual strips of facing material.
The glue is applied in large dots every 15-30 cm; the heavier the plastic, the smaller the distance between them should be. Application in a zigzag continuous line is allowed. Do not coat the edges of the strip with glue so as not to squeeze it out when pressing the panel against the wall.
Fastening panels
The installation technology depends on the characteristics of the glue. Therefore, it is necessary to act in accordance with the manufacturer's instructions. For certain brands of adhesive, a pause of 5-10 minutes should be allowed for the reaction with the plastic to begin. After this, the PVC panel is pressed tightly against the wall, its outer edge is aligned with the level or line drawn when marking the surface.
The position can be adjusted within 2-3 minutes, after which it is better to fix the strip. The following parts are glued in a similar way, connecting the elements into a groove. The last strip is cut to the width of the gap remaining to the corner.
Putty and primer
The bathroom is a specific room, so it is necessary to use special construction and finishing materials that increase adhesive characteristics and serve as additional protection against high humidity.
Applying the finishing coat of putty in the bathroom
The primer and putty must be:
- antifungal;
- moisture resistant;
- moisture-proof;
- moisture-repellent;
- deep penetration;
- strengthening the surface;
- increasing adhesion to other materials.
Primer of walls
Before applying putty and primer compounds, you should make sure that all dust and dirt are removed from the surface, and that high-quality degreasing is carried out.
It is important to note that a deep penetration primer solution is first applied, after which has dried, the surface is puttyed or leveled, and then the re-priming process is carried out.
Recommendations for choosing cladding
When choosing a facing material, be guided by the dimensions of the bathroom. To avoid waste of material, correlate the area of the cladding with the size of the products. But at the same time, you need to make a small supply of material, since the tiles will have to be cut to install them in the corners.
When choosing tiles, take into account the dimensions of the bathroom, following the rule that light shades add volume to a small room
Key points to consider when choosing high-quality polymer tiles:
- Material thickness. For wall cladding, you should choose dense panels with a thickness of 2.5-3.5 mm. If you plan to finish the ceiling, choose “lightweight” options with a thickness of 1-2 mm.
- Profiled substrate. The strength of the tile, combined with elasticity, largely depends on the thickness of the profiled substrate and the balance layer. After all, their main task is to distribute the load and prevent temperature deformation.
- Uniformity of coating color. When creating colored tiles, some manufacturers do not add coloring pigment to the polymer composition, but apply paint to the front side. This is fraught with the fact that the layer will fade faster during operation and be easily scratched.
When inspecting the product, pay attention to the thickness of the front surface. Ideally, the balance layer and the profiled substrate should not be visible through the outside.
To avoid discrepancies in color saturation and texture, it is necessary to select polymer slabs from the same batch
When purchasing tiles equipped with a tongue-and-groove system, it is advisable to try to connect the products together. The joint should be smooth, free of wrinkles and deformations.
Adhesive for PVC panels in the bathroom
Most often, the installation of plastic finishing panels in the bathroom is carried out using the “liquid nails” composition, which allows you to save the usable area of the room.
This installation method has many advantages:
- no damage to the plastic;
- no corrosive changes;
- quick drying with the ability to easily adjust the position on the surface within a few minutes;
- resistance of the adhesive to high humidity and frequent temperature changes.
However, a feature of the neopropylene composition is chemical aggressiveness, so all work must be carried out using a respirator and protective gloves, and at the final stage the room must be well ventilated.
Currently, neopropylene and acrylic “liquid nails” are used, but the second option is safer and more environmentally friendly, and therefore is often recommended by experts for use in residential premises.
Don't plan to spend a lot on decorating your bathroom, but want it to look neat? Moisture-resistant wall panels for the bathroom are a cheap material that will allow you to create an interesting decor.
Types of PVC panels for the bathroom and their properties are described here.
Read all about the pros and cons of finishing a bathroom with wall panels in the following article.
High-quality gluing of plastic panels
Installation of PVC with self-tapping screws to the frame
Installation of PVC with glue or liquid nails
Before performing work, you need to determine the method of fastening. The panels are mounted using self-tapping screws or glued. Each method has its own advantages. The option with self-tapping screws looks more complicated, since you will have to drill too many holes. Such finishing can be dismantled easily and quickly if the need arises. This method is less successful because it will reduce the size of the room. It's better not to use it.
They are installed quickly and cheaply using glue, since a frame is not used, and the dimensions of the bathroom are preserved. The material will be more difficult to dismantle. The finishing should not be too heavy, then the installation will be successful.
It is worth understanding in advance the execution algorithm:
- The glue is applied in dots at a distance of up to 30 cm.
- The heavier the panels, the more often dots need to be applied.
- After applying the adhesive, you will need to wait a few minutes.
- Press the panel against the wall.
The plate immediately detaches and, after a few minutes of waiting, is pressed firmly against the base.
Applying glue
In this section we will look at how to glue PVC panels onto liquid nails. Before starting cladding work, it is necessary to remove the PVC panels from the packaging so that the material gets used to humidity and temperature. “Liquid nails” are applied to the wall surface in dots, in a grid or in zigzags.
Material consumption per wall
The plastic PVC panel is pressed against the wall surface and rolled with a rubber roller. During the first three minutes, you can quite easily adjust the location of the facing element, and the time for complete drying of the glue is about a day.
After installing the last facing element, all seams formed between the ceiling and the wall, as well as other surfaces, must be sealed with conventional silicone sealant.
Preparing the base
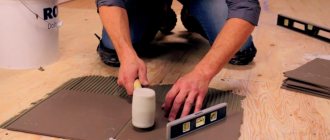
Laying PVC tiles on the floor begins with preparing the surface to be tiled. First of all, the coating is checked for integrity and uniformity of structure. The floor must be clean, dry and level. When cleaning the floor before installation, you should refrain from using acid-based detergents. Unevenness in the concrete floor must be leveled using cement mortar.
Installing PVC tiles on plywood is similar to installing them on a wooden floor. Cracks in the floorboards must be repaired without the use of polymer or plastic materials. The use of staples or nails is not recommended.
The technology for laying PVC tiles on tiles also has some nuances. The glaze from the ceramic lining of the base must be removed by grinding. Cement mortar is used to smooth out joints and irregularities.
Fastening panels
So, let's look at how to glue plastic panels in the bathroom. As a rule, finishing a bathroom with plastic PVC panels is carried out in the following way:
- The ceiling cladding is made using galvanized CD profiles and direct hangers. This type of lathing well compensates for surface irregularities that are traditional for buildings with slab floors, and also allows for hidden wiring of the lighting system to be placed.
- wall cladding is made using plastic sheathing and fixed with clamps. It is not advisable to use a wooden version of the lathing in the bathroom, since wood can quickly deform under the influence of temperature fluctuations and high humidity.
Lathing under the panels
One should take into account the fact that fixing plastic finishing panels using adhesives can negatively affect the repairability of the finish.
Ceiling plinths based on modern foam plastics are perfectly installed even in the presence of curved surfaces, and the resulting cracks can be easily eliminated with ordinary putty.
Not so long ago, bathroom panels gained popularity in our country. All thanks to the low price and good decorative capabilities. Bathroom panels for tiles - you can see photos of the finish in our selection.
Why you need a safety valve for a water heater, we will tell you in this material.
Characteristics of high-quality adhesive composition
The specifics of bathroom operation impose quite stringent and numerous requirements on the adhesive composition.
The requirements are as follows:
- high moisture resistance – this indicator is worth paying attention to first of all;
- resistance to changes in temperature and humidity;
- high adhesion rate, ensuring reliable adhesion of the panel to the wall;
- durability;
- fast setting - it is desirable that it should not exceed 10 minutes;
- the presence of antibacterial additives in the composition that prevent the growth of fungus and bacteria in the adhesive environment;
- absence of pungent odor and toxicity - in a small and damp enclosed space this requirement becomes critically important.
The introduction of these requirements greatly reduces the list of adhesives that can be used in this situation. But, nevertheless, there are a sufficient number of brands on the market that correspond to them.
Therefore, we will consider the most popular and well-proven materials.
Basic installation errors
Despite the simplicity and convenience of installing plastic panels, some installation errors can make the finish short-lived and unattractive:
- bending finishing elements;
- removing the protective film before installation;
- cutting panels with the wrong tool or cutting from the wrong side;
- use of organic solvents or aggressive chemicals for care.
PVC panels are a practical and convenient finishing material, but non-compliance with installation technology becomes the main reason for obtaining a result that differs significantly from the desired one.
What to look for when choosing glue
In order for plastic panels to last a long time and have a presentable appearance, you should take the choice of adhesive seriously. It is worth noting that in construction stores you can find adhesives that are intended specifically for installing PVC boards. However, a situation may arise when there is no such product or the owner of the premises has some preferences.
Usually, those who are planning to do repairs themselves are puzzled of what kind of glue to use The choice of means for fastening is, of course, important, but we must not forget about other conditions.
The adhesive composition for PVC panels must have the following properties:
- After drying, it should be transparent so as not to spoil the appearance of the finish.
- The composition used must be well resistant to moisture, temperature changes, cold, and the like.
- It is important that the glue sets quickly.
- The quality of gluing should be as high as possible.
- It is also worth considering the durability of the fastening.
- The glue used must be safe for health, so you should avoid toxic compounds that have a strong odor.
It would be useful to have antibacterial additives in the glue . A correctly selected composition will ensure that the finishing material is well attached to the wall and the panels will decorate the room for many years, despite the aggressive effects of water and temperature changes.
Caring for polymer tiles
Thanks to the excellent moisture resistance of the material, it is quite easy to care for. The finished surface is easy to clean. Any minor dirt can be removed with a cloth soaked in soapy water.
The main thing when caring for polymer tiles is to carefully handle its “weak points”, that is, the joints of the side edges
To remove dirt stains, you can use cleaning compounds that do not contain abrasive components.
In case of subsequent installation of plumbing accessories - lamps, hooks and heated towel rails in PVC panels, you can always drill mounting holes.
Modern finishing with PVC tiles can transform the interior of a bathroom. The main thing is to show a little imagination when arranging it, approach the issue wisely and use only high-quality materials.
Structure of PVC wall tiles
Vinyl tiles are multi-layer coatings based on polymer and polyvinyl chloride. In addition, the material contains quartz chips, which gives it additional rigidity and strength.
The middle layer of the tile is a pattern applied using a special technology to the base using special paints. It is high definition and can have vibrant patterns.
On top, the pattern is covered with a transparent polyethylene film that does not transmit ultraviolet radiation and protects the tile from fading.
The top layer of PVC tiles are polymers, which protect them from damage, exposure to chemicals and give the coating a beautiful appearance.
Typically, PVC tiles for bathroom walls have delicate light colors. If you need an original design, you can use triangular products and their other shapes, in addition to the classic version in the form of squares. The texture of the finished cladding can be glossy or matte.
