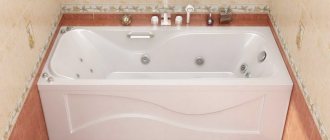
Most people who use a cast-iron bathtub one day come up with the idea of introducing some innovations into their water procedures. Often, modifications concern the installation of a mixer directly on one of the sides of the product or the installation of hydromassage equipment.
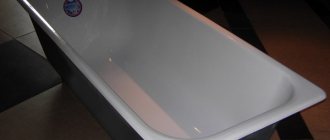
Installation of a cast iron bath.
Whatever the owners are up to, this process can lead to chipped enamel and damage to the bathtub in the absence of sufficient experience and knowledge on how to drill a cast-iron bathtub.
The drilling procedure should be carried out without haste, because the base in which the hole will be located has a high level of fragility.
Advantages of mortise-type faucets on the side of the bathtub
The purpose of this type of faucet is to provide a good flow of water, which will allow you to quickly fill the bath. The choice of mixer depends on many factors. You need to consider the interior of your bathroom and your needs. Some people dream of a cascade, while for others a simple mixer with a shower head is also suitable.
There are many types of mortise mixers on the market, but they all have undeniable advantages:
- create an interior and optimize space in the bathroom;
- avoid splashing water;
- provide comfortable use;
- mask hoses and water supply pipes;
- Fill the bath quickly and accurately.
Mixer on board the bathtub
It doesn’t matter which option you choose. Whether it is a budget option or an expensive exclusive faucet from a famous company, it will have all of the above advantages. The only drawback of such faucets is the need for a hole on the side of the bath.
Attention! In order to make holes, you will first need to decide on the material of the bathtub.
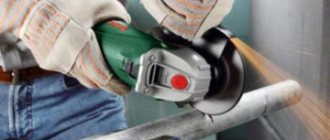
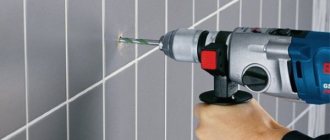
How to drill through cast iron?
You will need:
- Set of tools
- Calipers
- Reduce speed
- Sverlovka
When drilling cast iron, there are no fundamental differences than when drilling ordinary steel, for example, 45ХГС. But it is worth remembering that cast iron is different from cast iron. It can be brittle, it can be viscous, or it can even be like dust or powder. To drill cast iron, you will need the same set of tools as when drilling steel, this is a regular rapid metal drill of the required diameter.
It is worth remembering that the drill angle for cast iron should be 116 or 118 degrees. First of all, you need to carefully measure the placement of the hole; if you make a hole, you won’t fill it. So this is where knowing how to use a caliper comes in handy.
Before drilling into cast iron, it is necessary to reduce the speed on the drilling tool, be it a simple hand drill or an industrial drilling machine. Reducing the speed is necessary in order not to damage the drill. At high speeds, the drill will quickly become dull, or it will bite in the hole and break off.
This is not only a loss of the drill, but also a damaged workpiece. Because in most cases, removing a drill bit from a hole is a very difficult task, and you simply cannot do it without plumbing skills. Even at a high number of revolutions, you can break the hole due to the beating of the drill.
Turners and milling operators, as well as mechanics of any kind, from plumbers to auto mechanics, know very well how to drill cast iron. So, don’t hesitate to ask one of these people. Although they will tell you that this is done in the same way as when drilling steel, there are a couple of differences.
You don’t have to make a large hole with a center punch before drilling so that the drill doesn’t move away from the required hole location. Experienced people don’t do this deepening at all. Since cast iron is softer than steel, you just need to place a non-rotating drill bit on the marked spot and apply light pressure. So drilling will take place without problems.
uznay-kak.ru
Types of baths, their features
Not so long ago, there was only one type in our country. These were old or steel bathtubs of certain sizes and shapes. But today on the market more and more this niche is occupied by acrylic analogues with different designs and shapes.
Now you can see bathtubs of square, round and even wavy shapes. Bathtubs in the shape of a canoe are not that rare. Each type and type has its own advantages and structural features:
- . Acrylic is a synthetic fiber. Such bathtubs are made by pouring material between two glasses of a certain shape and firing in a special oven. The main advantages are: light weight, chemical resistance to various aggressive environments, durability, low heat transfer. One of the disadvantages is the softness of the material.
- Metal baths. We all know what metal is and how it behaves in a humid environment. To do this, the metal base is covered with enamel, which turns yellow or wears off over the years. The main thing, perhaps even the determining one, is the weight of the bath. It is difficult to transport and install. It will take more than one person to lift it into the apartment.
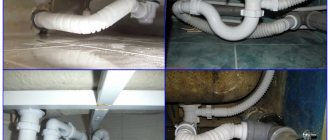
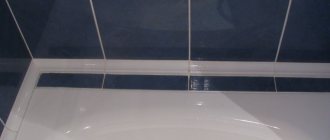
Plumbing connection
A few notes about work safety
In addition to the question of what can be used to drill cast iron pipes, you should not forget about ensuring safety when performing this type of work on your own. This is especially important, since cast iron may contain voids and many other defects.
Most often, existing defects are caused by carbon and other components. Any defect in a cast iron pipe leads to the appearance of a significant amount of dust during drilling. Therefore, you should follow the safety rules:
- the place where the work is carried out must be equipped with an exhaust hood;
- when carrying out work, you need to use a respirator or at least make a bandage of cotton wool and gauze;
- It is imperative to protect your eyes by using safety glasses that have closed edges on the sides;
- the work must be performed wearing special clothing, and also protect your head and hands;
- When starting work, you need to be completely sure that there is no liquid left in the pipe and there is no pressure.
Hole in acrylic bathtub? Easily
It is in this form that you most often have to make holes for the mixer, because most of these bathtubs have an exclusive shape and the manufacturer does not know exactly where it will be convenient for you to supply water. First, let's figure out what tool we need. The main power tool is a drill. We will also need a cutter of a suitable size, a tape measure and a marker.
Advice. First, try on the mixer in the intended location and check whether the water supply hoses are long enough.
First, attach the faucet to the bathtub, and outline the places where you will need a hole. Then find the center of the hole using a ruler and pencil. For most standard faucets, a cutter with a diameter of 35 mm is suitable. Such a hole will ensure the passage of hoses and will allow the installation washer, which, by the way, has a diameter of 40-45 mm, not to fall through.
Attention! While drilling, try not to press too hard as the acrylic may crack and break.
What methods are used for cutting cast iron pipes
Cast iron can be cut using a variety of equipment and using many methods. So, there are special devices that cut cast iron parts. You can also use a hacksaw and a grinder to cut metal.
During the production of cast iron, it is cut, if necessary, using thermal cutting methods. These can be plasma, arc, electric contact, air-arc and other methods.
Under no circumstances should pipes be cut using a gas torch. In addition, cast iron pipes cannot be welded.
To cut a cast iron pipe using the arc method, experts recommend using electrodes of such brands as OZR-1, LIM, ANR-2.
Everything is the old fashioned way. Hole in cast iron bathtub!
The set of tools that will be required to make a hole in a cast iron bathtub will be the same as for an acrylic one. With the exception of a grinder, you will need it to remove the enamel.
You can make a hole in the bathtub yourself
The first stage, as in the previous section, is marking. Next, we will need to remove the enamel in the place where we will make the hole, since enamel is a fragile material, when drilling, chips and cracks form. For experienced craftsmen, it is permissible to drill without removing the enamel, but then it is necessary to constantly maintain the drilling angle. You should start drilling with a small drill, since you will not make a large hole right away, and then increase the diameter of the hole using large drills.
Remember that you are drilling metal, which means the drill will get very hot, you need to monitor this and give both yourself and the tool a rest when required. You should also use only well-sharpened drills, otherwise you doom yourself to drag out the process for a long time.
To summarize, I would like to say that making a hole in the bathroom is not so difficult; you don’t need to call a specialist for this - it doesn’t require any wild professionalism. You just need to follow the rules and be careful.
Drilling process
To carry out such work you will need the following set of tools and materials:
- permanent felt-tip pen with a thick nib;
- a drill designed for drilling metal;
- drill;
- kerosene solution;
- Sander.
First, you should make sure that the work is supposed to be carried out on the surface of a cast iron bathtub.
Many people face a problem when it is quite difficult to determine from the outside what type of bathtub needs to be drilled. A steel product differs from a cast iron product primarily in weight. If the bowl can be lifted without difficulty, then it is a steel product. A cast iron bathtub is heavy and will require two or even three people to lift it.
At the first stage of the work, you should use a marker to mark the place where you plan to create a hole. The mark should have a small diameter so that the drill does not move too far to the side while creating the hole.
How to drill a hole in a cast iron bathtub? You need to do this very carefully. The fact is that the enamel on such a product is very fragile and can be easily damaged. In order to avoid damage to the fragile layer, you should hold the drill at the same angle both during the drilling process and after, while lifting the drill from the hole.
You should also make sure that you use a perfectly sharpened drill designed for drilling holes in metal products. It should not scratch the metal, but stick tightly into it. An insufficient level of sharpening of this tool will allow you to drill a hole, but this will ensure the formation of cracks in the enamel.
In order to drill a layer of cast iron with perfect evenness, you can use a wooden block or a metal plate, in which a hole with the required diameter will be made in advance. It will be possible to drill a hole perfectly evenly through such a workpiece, even if the diameters of the drill and the workpiece differ slightly.
Return to contents
One of the most common mistakes people make when taking on this type of work for the first time is neglecting such a procedure as cooling the tool. In order to speed up the cooling process of the drill and thereby increase productivity and reduce the time to implement the plan, a kerosene solution is perfect.
This tool will not only avoid overheating of the tool while working with it, but also provide much greater wear resistance. Thus, by using this kerosene solution, you can increase the service life of the drill and speed up the process of implementing planned changes in your own bathroom.
If such a solution is not at hand, you can always cool the work site and tools using ordinary water. It is impossible not to cool the metal at all, because when heated, cast iron becomes very hard, which will lead to damage to the drill in the first stages of work.
Another piece of advice that a professional in cast iron drilling can give to an inexperienced home craftsman is a way to avoid damaging the enamel while drilling.
Before drilling a hole, use a grinding machine to remove the enamel layer at its location, as well as 2 mm around.
In this way, you can eliminate the possibility of cracking the enamel, because during operation the tool will not come into contact with it, which means there will be no risk of damage to the bath itself.
To avoid damage to the enamel layer, some experts advise drilling it using a drill for ceramic tiles, and as soon as the boundary of the layers is cut, changing the tile tool in the drill to a metal drill.
If you are planning to install a faucet on the side of the bathtub, we can drill holes in any model of cast iron, steel, acrylic, quarry, or cast marble bathtub.
The cost of 1 (one) hole is 1500 rubles
. (acrylic, quaril 1000 rub.)
A technician’s visit to your home within the Moscow Ring Road costs 2,500 rubles.
Outside the Moscow Ring Road - by agreement.
Drilling holes in a bathtub requires some skill. Of course, you can take a drill or brace yourself and find a drill of the required diameter. And in the process of drilling cast iron or steel, damage the enamel, move a few centimeters away from the desired hole, break the drill and... seek help from a professional. After all, when making a bathtub with hydromassage, the master does this more than once or twice.
Of course, things might not actually be that bad. However, sometimes it is better (easier and cheaper) to entrust drilling holes in cast iron, steel, marble to a professional than to master it yourself. Moreover, this skill may no longer be useful.
Many of us buy acrylic bathtubs, I think this is right because such a bathtub can last for many years. The main thing is to choose it correctly. Also, many of us embed the faucet directly into the bathroom, on the one hand this is also correct, because in this way we can avoid embedding pipes into the wall (which is more difficult to do). BUT not all of us can install the mixer ourselves; the search begins for companies (private owners) that can do this work. Although it is quite simple, and you can do everything yourself in a few minutes...
Guys, today I will present step-by-step instructions with photos, according to which you can embed and install the faucet on your acrylic bathtub. I have a cascade type faucet, that is, the handle, the gander itself and the shower separately, I bought this type because I think it is more aesthetically pleasing, because a regular sink faucet looks terrible (like a cow’s saddle).
What tool will you need?
1) Measuring tool – tape measure, pencil
3) FORSTNER drill (about this drill), DIAMETER 35 MM - NO MORE, THIS IS IMPORTANT!
Mixer
The design of the cascade mixer itself is slightly different from the usual one; it is disassembled into several parts.
1) This is the gander itself, mine is massive.
2) Water on/off handle.
3) Shower gander
4) Hoses, nuts and washers for fastening.
It should be noted that the mixer is assembled directly on the bathtub itself.
Installing a faucet on the side of a bathtub: video
You will need
- — drill with drill Ø2-3 mm;
- - abrasive wheel;
- — repair kit for cosmetic repairs of acrylic bathtubs;
- — repair kit for major repairs of acrylic bathtubs;
- — sandpaper No. 100, 200, 400;
- — universal putty (epoxy, “pe brulex”, etc.);
- — bath enamel (“stakryl”, “epoxin”, “tikkurila reflex 50”, etc.);
- — reinforcing tape with glass fiber;
- - alcohol.
Instructions
Repairing through damage (cracks, holes) in acrylic bathtubs Drill holes with a diameter of 2-3 mm at the ends of the crack. This is done in order to prevent their further development. Clean the damaged area with 100-grit sandpaper and degrease it with alcohol.
Mix the resin from the repair kit for the overhaul of acrylic bathtubs in the proportions specified in the instructions. Apply a layer of resin to the repair area. Apply reinforcing material over the resin. Press it into the resin and apply a second layer of adhesive on top, ensuring that it saturates the material and penetrates all the pores. Wait until the resin hardens. The waiting time is specified in the instructions for the repair kits. Some of them require the application of several layers of reinforcing material. Follow these requirements.
After all layers have been applied and hardened, sand the repair area first with No. 200 sandpaper, then No. 400. Make sure the treated surface is as even and smooth as possible.
Treat the repair surface with alcohol and apply polish from the repair kit for cosmetic repairs of acrylic bathtubs. Polish the repair area with flannel.
Repair of through holes in cast iron and steel bathtubsIf
the hole in the cast iron looks like a crack, drill holes with a diameter of 2-3 mm at its ends with an electric drill. You don't have to do this in an iron bath.
Treat the damage with an electric drill and an abrasive wheel so that a crater-shaped crater forms around the damage. The damaged area must be cleaned to bare metal. The larger the chamfer of the funnel and the flatter its edges, the better.
Degrease the repair area with alcohol. Mix universal putty based on epoxy resins with the hardener in the proportion specified in the instructions. Apply the mixture to the edges of the damage. Apply reinforcing tape to the damage, pressing it tightly to the surface. Apply another layer of putty over the tape. Give it time to harden a little. Repeat the operation with the application of reinforcing tape again. When covering it with resin, try to keep the surface of the damage slightly higher than the surrounding surfaces of the bath.
After the resin has completely hardened, sand the damage first with No. 100 sandpaper, then with No. 400 sandpaper. Try to ensure that the surface of the damage is flush with the surrounding surface. Degrease it with alcohol and apply one of the bath enamels (glasscryl, epoxin, reflex 50, etc.). Since the technology for applying enamels may be different, follow the instructions for the specific material.
The modern interior of a bathroom of any size requires not only the rational placement of all the necessary elements, but also places increased demands on the combination of their style, comfort and functionality. Therefore, installing a faucet on the side of the bath is becoming increasingly popular. The mixer installed on the side of the bathtub looks elegant and original, adding zest to the bathroom interior.
Drilling cast iron pipes
Before you learn how to properly handle a cast iron pipe, and in particular, how to drill a cast iron pipe, you need to understand what it is, where and what it is used for.
The main purpose of cast iron pipes is to drain waste water and for main collectors.
Where to begin? Some features of use
You may need the following tools:
Connection of cast iron pipes. SMU (both ends of the pipe are smooth); SME (one end of the pipe is smooth, the other has a detachable connection)
- electric drill or brace;
- drills with pobedite bits;
- grinder and metal wheels;
- marker for making marks.
There are two types of cast iron pipes:
- SMU (both ends of the pipe are smooth);
- and SME (one end of the pipe is smooth, the other has a detachable connection).
Before you start using pipes, you need to make sure that the location chosen for them does not contradict building codes. It is desirable that there are no turns or slopes. Cast iron pipes are prohibited from being processed; only pipe cutting is permitted. Today, this metal is simply irreplaceable in some types of industry, which is why cutting and drilling cast iron is so important.
In modern industrial conditions, there are many methods and various equipment that solve the issue of cutting cast iron.
In order to cut pipes, you can use a special device for cutting cast iron, a hacksaw for metal, or a grinder with metal discs.
In the process of cast iron production, when it is necessary to cut castings, techniques that use thermal cutting methods are widely used:
- arc;
- plasma;
- electrical contact;
- air-arc and others.
It is forbidden to cut a pipe with a gas torch, or to weld cast iron pipes.
When cutting with an arc method, electrodes of the following brands are used: ANR-2, LIM, OZR-1.
Drilling cast iron pipe
When drilling gray cast iron, as a rule, there is no need to use coolants and lubricants.
What does it mean to drill? Drilling is the process of creating holes in solid metal using a cutting tool - a drill. And now about how to drill a cast iron pipe.
Many people face this problem and don’t know how to solve it. Gray cast iron can generally be drilled easily and does not require the use of coolant or lubricant.
But pipes are different, and in some cases more force is required. To do this, you should choose a metal drill with an angle of approximately 116-118 degrees, and when there are no special tools, you should drill with the smallest size drill, then use drills with a larger diameter, gradually increasing it.
- When the drill burns, you can lubricate it with water. In order to drill through cast iron, a hand drill is also suitable, the speed of which gradually increases. Directly when drilling, the speed should be small, as well as the pressure on the drill.
- In domestic conditions, it is recommended to use drills with pobedite bits; such drills should be used at low speeds, the force should be kept vertical and the cutting bit should be cooled frequently; overheating and blackening should not be allowed;
- In industrial conditions, if it is necessary to drill a cast iron pipe, machines with working tools that have working surfaces with appropriate sharpening are usually used.
Of course, they are equipped with a supply of coolants that ensure the desired operating temperature. In addition to the question of how to drill through cast iron, you need to think about the safety of this work. The array of processed material may contain voids and other defects.
This is often related to the amount of carbon in the cast iron and other components. These defects lead to the release of large amounts of dust and fine chips. In this regard, there are general safety rules:
- equipping the work area with a ventilated hood;
- use of a respirator or cotton-gauze bandage;
- use of safety glasses with closed sides;
- work in overalls, gloves and headgear.
It is also important to remember: before drilling a pipe, you need to make sure that there is no pressure in it and the liquid that it transports!
https://experttrub.ru/youtu.be/nYQnWuDJg14
During the operation of a dacha or country house, sometimes it becomes necessary to make a tap from the water supply or an additional drain into the sewer for the washing machine.
This issue is resolved using the “inset” method. How to insert into a cast iron pipe?
In most cases, it is possible to use a ready-made tee, the diameter of which is slightly larger. You should cut off the part of the pipe where the pipe is missing.
The pipe usually has to be cut lengthwise, a hole drilled and a pipe welded to the remaining part.
The flange is attached to the pipe along the entire perimeter by welding. It is quite difficult to do this without special skills. In this case, you can use sealant and clamps, which will allow you to make an insert into almost any pipe in the house.
Situations often arise in everyday life when you have to work in extreme conditions. One of the most difficult jobs is drilling cast iron, because... it belongs to abrasive materials. There can be many reasons: from remodeling the bathtub to personal technical ideas.
Advantages of mortise-type faucets on the side of the bathtub
The operational task of this type of mortise faucets is to create a strong, stable flow of water to accurately fill the bathtub.
The mixer is installed on the side of the bathtub
Installing a faucet on a bathtub has the following advantages:
- ensures quick and accurate filling of the bathtub;
- prevents water splashing;
- optimizes bathroom space;
- provides ease of use;
- allows you to disguise the shower head hose.
Cascade mixer creates a stream similar to a waterfall
A bathroom with a built-in faucet becomes stylish and as comfortable as possible. Cascading models that resemble a small waterfall look especially interesting.
Important:
Due to the wider diameter of the spout, the load on the faucet structure increases, and the hose placed under the bathtub wears out faster than usual. Therefore, when choosing a faucet for the side of the bath, special attention should be paid to its strength and wear resistance.
Shower with compact head, tap, diverter, single lever tap
In the previous article we discussed the issue - now we’ll talk about the installation features.
Conclusions and useful video on the topic
For reliable adhesion of materials and durability of the coating, it is necessary to follow a clear sequence of preparatory and restoration work:
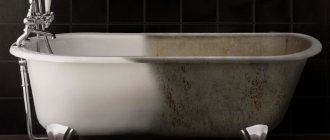
High-quality repair of a cast-iron bathtub means careful restoration of the most important plumbing fixture in the apartment.
Restoration of a damaged surface is possible as a result of the “jewelry” work of a master. The result of painstaking work and many hours of waiting will be a bath without visible chips, scratches and cracks, which will last for another ten years.
Share with readers your experience of restoring damaged enamel of a cast-iron bathtub and carrying out restoration work. Please leave comments, ask questions about the topic of the article and participate in discussions - the feedback form is located below.
Installation stages and features
An experienced craftsman will install a mortise mixer on the side of the bathtub in a couple of hours. For a non-professional who decides to do such work on his own, it will take much more time. First, you will have to study the structure of a mortise-type mixer, since its installation is somewhat different from the installation of a traditional design.
Advice:
If possible, to make the task easier, it is recommended to immediately purchase a bathtub with a hole for the mixer.
To complete the work you will need:
- an electric drill with an attachment in the form of a core cutter of the required diameter;
- adjustable wrench, screwdriver;
- flexible hoses;
- fasteners.
The sequence of work to install the mixer on the side of the bathtub:
How to drill a hole in an acrylic bathtub
How to drill a steel bathtub
Important:
You can make a hole on the side of the bath yourself only if it is made of acrylic or similar composite materials. Cast iron and steel bathtubs should be processed only in factory conditions to avoid chipping the enamel, which will lead to corrosion. But you can take risks if you do everything very carefully.
Many manufacturers of faucets for installation on the side of the bathtub have special mounting panels as an addition to them. Their use makes it possible to strengthen the attachment point, since when creating a hole, the rigidity of the side of the bathtub is significantly reduced.
In practice, craftsmen prefer to do without these additional panels. Often they do not fit and require trimming. They are also difficult to use on rounded edges. At the same time, we must not forget about the functional purpose of the mounting panels. Therefore, if you have any doubts that if the rigidity is reduced, the side of the bathtub will withstand the load, you need to consult with specialists.
Installation and insertion
Well, now that all the preparatory work has been completed, let’s proceed to the insertion.
First, we need to “figure out” where our mixer will be located. To do this, you can use a tape measure, or outline what is said “by eye.” You need to understand that the standard hoses that connect the gander, the handle itself and the shower are about a meter long, and therefore it is advisable to place them side by side (if you need to stretch it to large sizes, for example, the gander is on one side of the bathtub, and the power handle and shower are on the other) you need to buy longer hoses! Think about this in advance). Personally, my distance is just 80 - 90 cm, so standard hoses are enough for me.
Also, I did the markings not using a tape measure, but by eye.
To begin with, I measure the “gander” itself.
After that the pen
And only then the shower connector.
The result is a kind of circle, you need to find the center in them.
The important thing is that you need to find the middle point. And after that, cut into the bathroom with a drill. I wrote above that the drill should be no more than 35 mm, why is this important! Because all mixers have a fastening of just 40 - 45 mm (sometimes more), if you take a drill with a large diameter, the mixer will simply fail! So don’t take risks, look for exactly 35 mm, all the fasteners and hoses from the mixer will actually fit into this hole.
Now we load the drill into the drill and drill out the bathroom, it can be cut very easily with a FORSTNER drill, I use it, and acrylic is a couple of trifles.
The result was three holes, but to our marks. We will mount the mixer, handle and shower in them.
To begin with, I try everything on - everything is fine, nothing fails.
Installing the gander
We put on the decorative platform, lower it into the hole, and secure everything with special washers and a nut.
Installing the handle
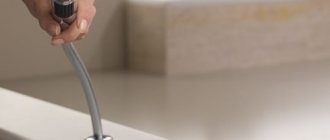
Now you need to install the power handle. To begin with, we connect two hoses for cold and hot water to it, put on a stand and attach it to the bathroom.
Shower connector
And the very last thing (in the last hole), we install the shower mount and the shower itself.
The insertion and installation work is completed, all that remains is to connect all these three parts to each other.
Connecting with each other
I won’t describe it in detail, look at this photo. I took special photographs, everything is detailed there.
If we talk about the connection briefly, it turns out that there are two hoses from the water supply pipes that go into the handle. Next, one hose goes from the handle to the “gander”; the necessary water, which is mixed in the “handle,” is supplied there. A hose goes from the gander to the shower. There is a switch ON the gander that can supply water to the shower or the gander itself. As you can see, everything is easy.
The mixer is embedded, you can install the bathtub in place and connect it to the central water supply. Here is the final photo.
That's all guys, I think my little instructions were useful to you. As you can see, there is nothing complicated, I think in about 30 minutes you can install the mixer yourself, without any special craftsmen or offices. You will also save 1000 - 1500 rubles on installation.
If you are planning to install a faucet on the side of the bathtub, we can drill holes in any model of cast iron, steel, acrylic, quarry, or cast marble bathtub.
The cost of 1 (one) hole is 1500 rubles
. (acrylic, quaril 1000 rub.)
A technician’s visit to your home within the Moscow Ring Road costs 2,500 rubles.
Outside the Moscow Ring Road - by agreement.
Drilling holes in a bathtub requires some skill. Of course, you can take a drill or brace yourself and find a drill of the required diameter. And in the process of drilling cast iron or steel, damage the enamel, move a few centimeters away from the desired hole, break the drill and... seek help from a professional. After all, when making a bathtub with hydromassage, the master does this more than once or twice.
Of course, things might not actually be that bad. However, sometimes it is better (easier and cheaper) to entrust drilling holes in cast iron, steel, marble to a professional than to master it yourself. Moreover, this skill may no longer be useful.
Add site to bookmarks
- Kinds
- Choice
- Installation
- Finishing
- Repair
- Installation
- Device
- Cleaning
Sooner or later, most people have the desire to improve something in the bathroom with their own hands.
Most often we are talking about installing hydromassage equipment or simply moving the mixer to the side.
In both the first and second cases, you will need to drill a cast-iron bathtub. If your hand is not full, complications such as chipping the enamel, the tool sliding from the desired point, or simply breaking the drill may occur. Drilling must be done slowly, because... The material you are working with is also quite fragile.