How to choose
To select a paint composition suitable for a specific situation, you need to take into account some points:
The type of surface that will be painted. For metal and reinforced concrete products, the aerosol version is more suitable, because its resistance to rust is higher; Under what conditions will the item being painted be used?
Painting with a powder composition will be difficult at home, because the presence of heating chambers is unlikely, so a two-component mixture is preferable; Pay attention to the loads that will be exerted on the painted surface. This parameter determines how resistant to mechanical stress the coating should be; Before you make a purchase, you should calculate how much material you will need.
Before you make a purchase, you should calculate how much material you will need.
Polyurethane coatings
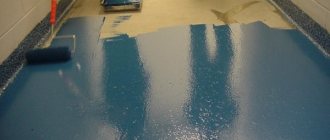
Antistatic polyurethane floor paint is an excellent solution for laboratories, medical facilities, television and radio stations or other areas with a lot of equipment, as it helps to avoid the accumulation of electrical charge.
This finishing material contains polymers, auxiliary binders, dyes and antistatic agents. Polyurethane coatings are produced as a two-component paint that requires mixing before application. This is convenient, since you can prepare only the amount of material necessary for coloring.
After drying, the polyurethane coating has an unusual elastic texture. In the first few days after application, it retains stickiness, which disappears when it completely hardens (about a week). Painting with this finishing material is done from a sprayer in two layers. Among the advantages of this option:
- wear resistance - the coating tolerates frost and heat well and is not affected by dampness;
- smoothness and shine that last for more than 10 years;
- efficiency.
Polyurethane painting process: cleaning, priming, coating. Video
When choosing paints for finishing the floor, you should take into account the condition and material of the surface, its operating conditions, and location. If you do not have experience and do not understand the nuances of the products on sale or decide to choose a new material for yourself, we recommend that you first consult with a specialist practitioner in the field of construction and repair, and only then purchase the material. Be sure to first read up on how to remove paint from a floor if you are doing a secondary paint job.
Scope of application
Epoxy polyester, acrylic epoxy and epoxy paints are widely used in various fields. They form different types of surfaces - completely non-slip, protective, fluorescent, matte, glossy, textured, quick-drying.
The following compositions are used to paint:
- travel accessories;
- household items;
- internal and external parts of passenger cars;
- electrical appliances;
- decorative garden figurines;
- office furniture;
- radiators, heaters;
- toys;
- floors and walls;
- facades;
- containers with chemicals.
Epoxy paint can be used to paint concrete bathroom floors. This will protect them from moisture, and the neighbors below from leaks. In addition, this is an excellent alternative to ceramic tiles. This coating can be used to protect coils and other metal parts in bathrooms and kitchens from corrosion. If you cover wood with this paint, it will be reliably protected from rot and insects.
Types of paints for concrete
When figuring out what paint to paint a concrete garage floor, the user must choose from the following options.
- Two-component epoxy paints. These epoxy resin compounds are available as a base compound and a hardener. Before applying to the surface to be painted, they must be mixed, and the amount of components to be mixed depends on the area of the treated area - the composition hardens within 2...3 hours, so it is impossible to mix “for future use”. The main characteristics of the composition are frost resistance, good resistance to friction and other mechanical damage, exposure to aggressive substances and ultraviolet radiation. A useful property of epoxy paints is that they dry as a result of a chemical reaction of the components, rather than the evaporation of water, so they can be applied to a concrete screed that has not fully hardened (has reached its design strength).
- Water-based acrylic paints. Designed for relatively deep penetration into the pores of concrete, resistant, insensitive to ultraviolet radiation and chemical influences. They often have polymer additives to improve performance. They dry quickly (unlike epoxy), but are more susceptible to temperature changes. The best application option is a spray gun.
- Polyurethane paints. They can be one- or two-component, are water-dispersed and require at least 24 hours to dry. In terms of performance characteristics, they are close to acrylic.
- Rubber paints. This is the name for polymer water-dispersion compositions based on acrylates. In fact, these paints are considered varieties of acrylic, but have a different texture - the surface after painting resembles the smallest gravel chips. This makes the composition suitable for painting surfaces where high roughness is required; the application of rubber paints facilitates the adhesion of car wheels to the floor. Due to its increased resistance to temperature and humidity changes, it is suitable for solving the question of how to paint a concrete floor on the street near the garage;
- Homemade compositions. These include polystyrene foam varnish for painting concrete floors. The product is obtained by dissolving polystyrene foam in gasoline/acetone/other solvent or by heating the foam.
You can also choose the type of paint based on the cost of the composition, however, this way of solving the problem of choice is justified only with a limited budget. From a long-term perspective, without repairing the floor every two to three years, rubber and epoxy paints, as well as other options for covering a concrete garage floor, can be considered optimal.
Pros and cons of colored concrete
Colored concrete has the following advantages:
- They improve the appearance of structures or surfaces, since the gray colors of the concrete composition look faded and unpresentable.
- With their help, it became possible to create the desired design to suit the style of the buildings.
- The durability of colored coatings is ensured due to high-quality materials that do not allow the color to fade or fade.
- The manufacturing technology is not complicated, and the colored solution is not much different from the usual one.
- Do-it-yourself cooking is possible.
The following disadvantages are observed in colored concrete:
High cost of materials
Not everyone can afford high-quality pigments and paints, and you shouldn’t skimp on these materials, since the brightness and durability of the finished product depend on their quality. It is important to approach the preparation of the solution with your own hands with special care and precision. Failure to comply with the proportions will deteriorate the quality of concrete and reduce strength
To avoid mistakes, you should carefully study the cooking instructions.
Advantages and disadvantages of epoxy paints
The epoxy itself does not turn yellow over time and does not wear off for a long time, even if it is used to paint the floors in aircraft hangars, car parks, service stations, repair shops, production shops - i.e. in places where there is very high mechanical friction on the surface and high pressure on the floor. High-strength epoxy self-leveling floors are widely used in many industrial facilities.
It was previously stated about another remarkable property of epoxies - resistance to atmospheric conditions, i.e. This paint can be safely used on open surfaces, roofs, walls, and on metal joints, for example, in stadiums. But its undeniable advantage is that it can be applied to fresh, wet concrete. When constructing projects that are delivered strictly on time, this advantage is sometimes decisive in favor of epoxy paints and varnishes.
Epoxy paints prevent the growth of pathogenic harmful bacteria and protect surfaces from corrosion.
They protect wooden surfaces from rotting and prevent harmful insects from penetrating into the surface, i.e. prevent the occurrence and development of biocorrosion.
Floors or walls painted with a thick layer of colored enamel look much more expressive and attractive.
However, the advantages of this paint can sometimes become its disadvantages. Its main drawback is its two-component nature. Those. Before directly using this type of paint, it must be mixed. Sometimes problems are observed when re-painting with such enamels.
Epoxy paint is famous for its durable qualities, ability to restore, bright colors even after exposure to aggressive environments, however, this becomes the main disadvantage if you need to change the color to another - given all the properties of epoxy, this will be quite difficult to do.
Choosing a concrete floor paint
Concrete floor painting scheme.
For painting concrete bases, in most cases, epoxy and alkyd paints are used, which have excellent antistatic and anti-slip properties and are resistant to chemical attack. Before use, the epoxy paint must be properly prepared, mixed, and tinted; alkyd paint is purchased ready for application. Before finishing with alkyd paint, the surface should be primed; epoxy does not need this.
In addition to paints, primer mixtures are often used, which are divided into deep penetration and polyurethane. To give the base increased brightness, tinting impregnations are used to paint the surface in the desired color. The decorative effect of the coating can be increased by coloring it with flocks and glitters, with which you can obtain a durable color that will not fade in the sun.
When choosing a particular type of paint, you should take into account some features of the room. For example, in industrial facilities where the base is under strong mechanical influence, a highly reliable coating is required. Therefore, wear-resistant mixtures are used for these purposes.
Rollers for painting the floor.
For garage buildings, substances containing epoxy enamels and solvents are better suited. To decorate floors in living rooms, you should buy a water-based composition.
In the modern building materials market, the choice of paints is simply huge, so next we will consider the main coloring agents for finishing a concrete base.
Acrylic paint for concrete coatings
It is an aqueous mixture based on acrylic resins with the addition of polymer elements. With the help of this substance, it is possible to prevent the destruction of the concrete base, since its application creates a protective layer that prevents various mechanical and chemical influences. Acrylic paint creates a durable and reliable coating, so it can be safely used for finishing balconies, basements, garages, etc.
The main advantages of acrylic paint are:
- environmental friendliness;
- waterproof and moisture resistant;
- ease of application;
- quick drying;
- increased weather resistance and corrosion resistance.
This substance can be applied using a brush, roller or spray.
Epoxy paint for concrete
Painting scheme using a spray gun.
This type of finishing material allows you to create a fairly reliable coating with an attractive appearance that will serve you for many years. Epoxy is resistant to external negative influences and chemicals.
Epoxy paint does not wear off over time and does not lose its beautiful appearance. Having increased resistance to weather conditions, it is perfect for covering the base in open areas.
Among the disadvantages of this coating it is worth highlighting:
- two-component - before you start painting, it must be stirred;
- the possibility of some problems arising when re-painting: if you plan to change the color of the base, it will be very difficult to do this.
Use of polyurethane enamel
In most cases, these mixtures are two-component, although this does not in any way reduce their performance characteristics. They can be used to finish floor coverings both outside and inside the building. Among the main advantages of polyurethane enamel, the following should be highlighted:
Primer consumption table for concrete.
- high weather resistance;
- environmental friendliness;
- high resistance to mechanical and chemical influences;
- layer-by-layer drying (the period lasts about 5 hours), which allows you to spend a minimum of time on finishing work;
- has a simple application technology that uses inexpensive equipment;
- after applying the enamel, you can walk on the floor within a day, and fully use it after 3 days;
- forms a very smooth surface.
This composition is applied at a room temperature of at least +5°C and a humidity of no more than 75%. Due to the fact that the enamel is two-component, it should be mixed well before use. It is recommended to paint the concrete base in 2 stages: first apply a thin, uniform layer, and after it dries, treat the base with a second layer.
Floor preparation
To obtain a high-quality coating, it is necessary to follow the technological sequence of applying the epoxy composition. Preparing the surface for painting is an important step that determines how long the paint will last on the concrete. The preparation process is significantly different for a freshly poured and an old concrete floor.
Fresh cover
You can start painting a fresh screed 5 days after production. The concrete becomes hard enough to walk on and has a moisture content suitable for waterborne paint.
For this, it is most convenient to use a special trowel. If there is none, then clean the surface with a stiff brush, then remove dust using a powerful vacuum cleaner. The epoxy coating can then be applied to the floor.
Old screed
Preparing the old coating is done differently. If a fresh screed is painted while it is still wet, then the old concrete must be completely dry before work. Otherwise, the epoxy paint will begin to peel off. Surface humidity is determined using a special device. If this is not available, a simple method is used: a plastic film measuring 40 x 40 cm is glued to the concrete floor with tape. If after a day perspiration appears on it or the surface under the film becomes wet to the touch, then the floor is not ready for painting. If the surface is dry enough, then it is further processed:
Painting a concrete floor in a garage
Peculiarities
The photo shows the paint application process.
To better understand the features of painting a garage floor, you should find out the specifics of the operation of such a coating. It is especially important to pay attention to the main wear factors and the conditions in which the applied paint will be exposed (find out here where and how anti-frost additives are used in concrete).
For convenience, we have compiled a list of such factors and features characteristic of garages and auto repair shops:
- The car will be parked and driven in the garage, so the first requirement for the coating is high resistance to mechanical wear and abrasion due to constant wheel load;
- You should also take into account the fact that water will fall from the car onto the floor, and in winter there will be especially a lot of it. Therefore, requirement number two is the moisture resistance of the coloring composition that you are going to use;
- A garage is a place where it is impossible to prevent contact of the floor covering with substances such as gasoline, diesel fuel, engine oil, and various anti-corrosion and anti-freeze liquids. This leads to the third requirement for paint - chemical resistance;
- Finally, garages are not always heated, and therefore the fourth requirement is frost resistance and resistance to temperature changes. The coating must be elastic and easily tolerate thermal expansion.
The coating must be sufficiently durable.
Important! We found out that concrete paint for garage floors must be durable, wear-resistant, moisture-resistant, chemically inert and can easily withstand freezing temperatures.
Selection of materials
It is important to choose the right material, because an expensive or rare car can be stored in the garage
Now that we know what requirements are put forward for the coating, we can start choosing paint.
We will not consider all possible options, but will only highlight the most suitable of them:
- Acrylic latex compounds for concrete floors . They are characterized by absolute safety and environmental friendliness, high quality color rendering, resistance to wear, moisture and chemicals. Disadvantage – high price;
- Polyurethane paints and enamels . They come in one- and two-component types, forming a super-durable coating that is not afraid of moisture, increased friction, temperature changes, chemicals and other wear factors;
- Epoxy compounds for concrete screeds . They come in one- and two-component types and are characterized by ultra-high strength to all types of wear, including winter conditions, high humidity and chemically aggressive environments;
- Alkyd-urethane enamels provide a wear-resistant glossy surface, have good hiding power and last quite a long time, although they are inferior in strength to previous options.
Types of epoxy-based compounds and their properties
Epoxy paints are two-component - resin and hardener, powder, aerosol (used mainly for painting car parts). For domestic needs, mainly compositions based on cold-curing epoxy resin are used. Such paints harden after a day or more without additional exposure to the surface.
Manufacturing requires high-strength coatings, and these can only be obtained from hot-curing epoxy resin. Epoxy powder paints use a hot-curing resin, while two-component and aerosol paints use a cold-curing resin.
The general properties of epoxy paints distinguish them from other coatings:
- create a durable surface.
- Suitable for painting both floors and walls.
- are waterproof, so can be used as waterproofing in bathrooms and for painting swimming pools.
- resistant to mechanical stress.
- resist various aggressive chemicals.
- have excellent adhesion to concrete, plastic and metal surfaces.
- Suitable for finishing floors in residential and industrial premises.
- a rich color palette and many textures allow you to embody interesting design ideas.
Aerosol paints are most often acrylic epoxy. They are characterized by high anti-corrosion properties, resistance to various chemical influences, including aggressive ones (suitable for outdoor use), and a high degree of self-cleaning (dust and dirt do not stick to the painted surface). Aerosol acrylic epoxy compounds form a durable glossy coating that is resistant to scratching and chipping.
There are several varieties of epoxy powder paints, which differ from each other in their technical characteristics:
- Standard. The polymerization process occurs in a chamber at a temperature of +220°C in the first 10 minutes of treatment.
- Low temperature. The polymerization process occurs in a chamber at a temperature of +180°C in the first 20 minutes.
- Polyester. They have high wear resistance, a rich palette of colors, textures (metallic, antique, clear varnish), gloss levels, and are low-toxic. They are used to provide maximum surface protection from friction and often replace primers.
- Epoxy-polyester. Such paints are inexpensive, have average abrasion resistance, are resistant to sunlight (do not turn yellow), high temperatures, scratching and other mechanical stress, and are resistant to aggressive chemical solvents and rust. At the same time, they are decorative - they are used as film coatings for precious metals and perfume bottles.
Coloring compounds
Painting will extend the life of your floors. After all, she:
- will protect the concrete coating from destruction. After all, no matter how strong concrete is, under the influence of various mechanical and chemical factors, it gradually wears out.
- will smooth the concrete surface and eliminate its minor defects, such as cracks, potholes, chips, preventing moisture from getting inside, thereby creating additional protection. Since concrete has a porous structure, it absorbs up to 90% of all liquid that gets on it, and this can destroy it and ruin the appearance of the coating.
In addition, the correctly selected composition for facing a concrete floor will provide it with additional qualities. It will provide resistance to various chemical reagents, reduce static electricity, and prevent slipping on the surface.
Today, there is no shortage of paint and varnish materials in hardware stores. This is where you have to rack your brains about what you can use to paint the concrete floor. Since concrete is a wear-resistant and durable material, you need to choose the appropriate paint for it.
You will have to apply more than one layer of this paint in order to paint the floor well. Such cladding quickly becomes unusable during operation. And so that you don’t have to repaint the floors soon, it’s better to cover them with special paint for concrete.
Typically, materials based on polyvinyl chloride, epoxy resins, polyurethane or latex are used to paint concrete floors. All of them are designed to protect the concrete base from various damages. Before purchasing a product, read its composition and properties as described on the packaging.
Buy concrete primer from the same hardware store. After all, before you start painting, the floor should be primed. This will give it additional strength and increase its service life.
Painting should be done in a well-ventilated area at a temperature of at least 10 degrees Celsius. Air humidity should not exceed 80%.
Usually, the floor is painted with a brush or roller, depending on how convenient it is. If possible, use a spray gun. The concrete floor is covered with two layers of paint. As a general rule, you should wait 24 hours before painting the surface a second time.
You can walk on a painted concrete floor within 24 hours. For heavier mechanical loads, the surface will be ready only after three days. If you painted a fresh concrete floor, the paint will take longer to dry.
Paint option for concrete surface.
For painting concrete, special composites are used, made from substances of different chemical compositions:
- oil and latex paints;
- enamels;
- varnishes;
- water-based acrylic and epoxy emulsions.
The difference between the compositions lies in their protective, operational and technical characteristics.
For example, one type of paint is intended only for interior coatings, another is used for exterior and interior surfaces, tolerates low temperatures and exposure to a humid environment, and is not susceptible to mechanical stress.
Therefore, when choosing a composition for treating concrete surfaces, you need to take into account its operating conditions:
- presence of aggressive media (acids, alkalis, etc.);
- concrete corrosion;
- influence of sunlight;
- mechanical loads in wet or dry climates;
- sudden change in temperature.
You can paint a concrete path in summer cottages using an inexpensive material - stain. They use water-based formulations with different types of active substances - acrylic and acid suspensions.
Thanks to this, materials treated with acrylic stains have the following properties:
- vapor permeability;
- durability;
- resistance to any precipitation.
After drying, the color becomes more saturated and resembles the shade of wet stone.
Acid stain is made with the addition of a weak solution of acids. This suspension, unlike classical impregnations, penetrates deeply into the concrete body through a branched system of capillaries, simultaneously entering into a chemical reaction with the components of the material.
The coloring matter, interacting with calcium dioxide, creates solid colored insoluble compounds in the structure of the cement stone. The decorative properties of acid stain allow you to imitate the texture of natural stone.
Concrete path painted with stain.
Rubber paint
After this substance dries, a durable elastic film is created on the surface of the concrete, protecting the base from the formation of cracks, fungi and mold. The coating has a matte tint, is non-toxic, washes well and has a long service life.
Advantages:
- versatility - suitable for any surface;
- high degree of adhesion - does not peel off, does not delaminate;
- the paint is resistant to ultraviolet radiation and temperature changes;
- waterproof;
- tolerates impact mechanical loads well.
Epoxy paint is a mixture of mineral fillers and pigments in a liquid resin that gains strength under the influence of special hardeners. It is used to create colored protective and decorative coatings on old or new concrete bases.
READ MORE: Concrete floor grinding technology
Epoxy paint creates a glossy effect.
Performance properties:
- moisture resistance;
- possibility of applying layers of paint on surfaces with humidity up to 15%;
- high mechanical strength;
- abrasion resistance;
- high adhesion;
- does not contain organic solvents.
Paints based on acrylate synthetic resins are resistant to atmospheric influences, temperature changes, are inexpensive and have a long service life (up to 15 years). This is an environmentally friendly product that does not emit toxic substances. The material dries quickly and has no pungent odor.
The aqueous emulsion can be applied to concrete surfaces without the use of complex equipment - with a brush or swab. 1-2 layers are applied at a temperature not lower than 5 °C. Painted surfaces are highly wear-resistant and resistant to short-term exposure to alkalis, acids and chemically active detergents.
Polyurethane varnishes
Film-forming polyurethane compositions are made based on polymers of the urethane group. High mechanical strength and wear resistance are the main features of these materials. They can be applied to concrete surfaces even at an ambient temperature of -30 °C.
Before use, two-component suspensions are combined with a catalyst and applied in a thick layer. The quality of the coating in this case is much higher than as a result of using one-component compositions. The disadvantages of this composition are the impossibility of processing products at low temperatures and the high speed of setting of mixtures - the solution prepared at the construction site must be applied within 1 hour.
Wear-resistant acrylic paint for concrete floors VDS-30
general information
The modern market for construction and finishing materials offers a wide range of products that can be successfully used for painting concrete floors. When choosing a specific option, you need to take into account not only the owner’s personal preferences and available budget, but also the purpose of the room being improved. You can find brief information on this matter in the table.
Table. Choosing paint for finishing concrete floors
| Compound | Features of operation |
| Epoxy and acrylic compounds | They differ from their “brothers” in their antistatic and anti-slip properties. Excellent for painting the structures in question in a wide variety of rooms. Finishing materials ensure surface resistance to chemicals and guarantee a wonderful appearance of the structure. The epoxy composition must be prepared before application; in the case of using alkyd paints, there is no such need. Along with this, before treating the surface with an alkyd agent, the base must be primed. If you use epoxy paint, you won't have to do this. |
| Primers | Allows you to restore the appearance and performance characteristics of neglected concrete surfaces with noticeable signs of wear. |
| Tinting products | Special impregnations that allow you to give concrete any desired color. In most cases, they are used in combination with other means discussed in the table. |
| Polymer compositions | Allows you to hide unevenness and other surface defects. Using this product, any concrete floor can be made monolithic. |
| Flocks and glitters | They make the appearance of the surface more decorative, providing additional protection for the floor from ultraviolet exposure. |
| Wear-resistant compounds | The best solution for rooms with frequent high mechanical loads. They contribute to a significant increase in surface strength and extend its service life. |
| Polyurethane enamels and varnishes for concrete | They are used primarily in home construction for finishing thin-layer coatings. |
| Paints based on epoxy enamels and solvents | Typically used in garages and other premises with similar operating conditions. |
| Water based paints | Best suited for finishing floors in living rooms. |
| Polyurethane elastomers | Used in corridors, hallways, loggias and balconies. |
| One-component polyurethane products | An excellent choice for rooms with high humidity levels. |
- What paint to paint? We take a special one for concrete for outdoor use, it’s called “Paint for concrete surfaces.” It is easy to find in any hardware store.
- What we paint with - a roller! Moreover, the larger the area you have, the more of them you will need. Stock up on 2-3 rollers, they deteriorate quickly
- Sealant for covering the top, and it must be waterproof. This way the paint will last longer.
Solvent for epoxy paint
It is advisable to avoid using solvent for epoxy paint, as its use reduces the quality of the paint itself and causes damage to the final product.
However, it often happens that the paint is not used and subsequently, in order to be able to use it further, it must be diluted. A solvent is used for these purposes. After adding solvent to the paint, its viscosity decreases sharply, the paint becomes more fluid, and is easy to apply with a roller or brush to the surface to be painted. When a solvent is added, the moisture-resistant and strength characteristics of the paint change; it becomes less flexible and durable; after drying, such paint can crumble and break.
To minimize such negative consequences, the ratio of paint and solvent is carefully selected, the resulting composition is stirred and tested, if the quality is not satisfactory, the procedure is repeated.
Drying the surface
To completely dry the floor, you need to create the appropriate conditions. The temperature should drop below 18 degrees, humidity no more than 80%. Such conditions guarantee proper drying of the applied paints within 24 hours. After two days, the floors can easily withstand loads, and the acquisition of all chemical resistance properties occurs in a couple of weeks.
Comparison of floor appearance before and after
The article discussed the question of how to paint a concrete floor. Based on this material, you will be able to figure out the choice of the right paint and apply it to the concrete floor without outside help.
Painting process
After selecting and preparing the tools for work, you can begin painting. However, this should be done no earlier than a week after pouring the concrete. This will allow it to dry completely, which will prevent future deterioration under additional coating.
Surface preparation
You need to start preparing by completely cleaning the concrete floors and leveling them. To do this, use a grinder or a regular spatula, which will take much longer. All protrusions and irregularities are eliminated, creating a homogeneous and uniform layer of concrete. Sweep away all the dirt and debris with a broom, and then remove the dust with a stronger tool. You can use a manual or industrial vacuum cleaner for this. Additionally, you can treat the surface with a special solution that will prevent dust from settling on the surface, this will facilitate the finishing procedure.
Cleaning the floor before painting
Primer
After the concrete is completely cleaned, it needs to be treated with a primer. It is needed to increase adhesion and prevent delamination of the coating. The primer you choose is based on the paint you are using. Typically they have the same brand and a similar name. There is usually no need to prepare a primer - pour it into the cuvette and begin distributing it. However, you can also use a concentrated solution, which will first need to be diluted according to the manufacturer’s instructions. The composition is applied in one or two layers at high indoor humidity and positive temperature. It dries quite quickly - often it takes about half an hour for one layer to dry, after which you can re-apply primer to paint the concrete.
Priming a concrete floor
Applying paint
After thoroughly drying the primer layer and cleaning the surface, painting can begin. However, before you paint your concrete floor, choose a tool - brush, roller or sprayer. It is better to distribute a varnish-based composition with a spray - it will be enough to apply just one layer, but it is better to apply acrylic paints with a short-nap roller. The dyeing technology is quite simple:
- Preliminarily cover the walls near the baseboard with masking tape (perhaps two widths) so as not to stain them with paint when using a brush or roller.
- Start applying the first layer. On large areas you can use a sprayer, but on joints and corners it is better to use a roller or brush, which will paint the coating more accurately.
- A day after applying the first layer, you can apply the second layer of dye. Similarly, after a day you can apply a third layer if necessary. The second and third layers should be thinner than the first so that the coating looks neat and dries evenly.
- After three days, the coating dries completely, and you can remove the masking tape from the walls.
Applying paint to a concrete floor
Drying
After applying the final coat of dye, you should wait several days to give the surface time to dry completely. When applying a regular, thin layer, it is enough to wait three days. A thick layer of paint requires up to five days of drying. For normal drying of floors, you need to comply with the conditions - humidity up to eighty percent, and air temperature about twenty degrees. If the conditions are not met, the surface will take longer to dry. Consider the freshness of the concrete. If less than two months have passed since the floors were poured, the staining result may take about a week to dry. Fully cured concrete floors dry much faster. Only after the concrete floors have completely dried can they be loaded, furniture installed, and the room operated normally.
Please note: Decorative wall painting
Application technology
Before proceeding to the direct application of the dye to the surface of the floors, several preparatory steps need to be carried out. They will be discussed in more detail in the following chapters.
Before proceeding to the direct application of the dye to the surface of the floors, several preparatory steps need to be carried out.
Preparing the concrete surface
The preparation of the concrete base itself will determine how long and well the paint will last. Moreover, the actions differ on concrete structures that have just been built from those that are already standing for a long period of time.
A fresh screed can be painted five days after creation. At this time, the concrete hardens well enough and has the necessary moisture content for applying paint to it.
This process can be performed using a trowel or a stiff brush. All dust should be vacuumed up after this.
If painting is carried out on an old concrete surface, then, on the contrary, it must be thoroughly dried. Otherwise the epoxy will start to peel off. The moisture content of the base is determined using a special device. If it is absent, you can glue a film to the surface, after 24 hours they look to see if it is covered with moisture and if it is damp to the touch. If the film is dry, then you can proceed to painting; if not, you should wait until the floors are completely dry.
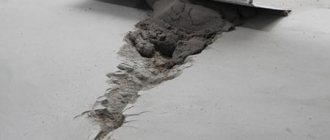
Next, an inspection is carried out for the presence of flaws. Those places where there are large cracks are expanded to 5 millimeters; such defects will be covered with epoxy putty. The surface is also cleaned and vacuumed.
The surface is leveled, all existing defects are removed from it.
Precautionary measures
Two-component compositions, which are the most popular, must be mixed for painting. At this time, they can release substances harmful to human health. Therefore, work must be carried out in protective clothing, special glasses and rubber gloves are worn, and a respirator is also required.
The room must be provided with good ventilation. Do not use utensils that are used for food purposes. If the mixture gets on the skin, it is immediately cleaned with denatured alcohol or white vinegar; it is not allowed to harden on the skin.
The room must be provided with good ventilation.
Flow calculation
The paint consumption for self-leveling floors is indicated on the packaging and is calculated per 1 square meter. Accordingly, to find out how much material is needed, you need to calculate the area, and also decide how many layers will be applied to the floor.
When calculating the area, all recesses and recesses are taken into account; if the room is complex in structure, then it is divided into several zones, and then their areas are summed up. The average consumption, which is usually equal to 1 mm per 1.5 kg (the exact figure is indicated by the manufacturer on the packaging), is multiplied by the layer thickness and the area of the room.
When calculating the area, all recesses and recesses are taken into account.
Can I use a spray gun?
A spray gun simplifies many types of painting work and saves paint. But in the case of working with epoxy enamel, its use is impractical. After all, enamel is distinguished by its rapid rate of hardening, so it can simply ruin the device itself.
Therefore, it is better to paint with a roller or brush. After painting, you can immediately throw them away; they will become unusable.
It is better to paint with a roller or brush.
Applying paint to the surface
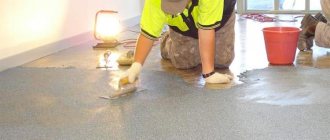
First, a primer mixture is applied to the surface; it serves to improve adhesion to the material. After complete drying, which takes 24 hours. Immediately before painting, the two components of epoxy (hardener and resin) are mixed, the proportions are indicated on the packaging, you must strictly adhere to them. Mix thoroughly, bringing the composition to homogeneity.
The paint should be applied with a roller or brush; the first layer will be rough. Typically, at least two layers are applied, and you can proceed to applying the second after a day.
Typically, at least two layers are applied, and you can proceed to applying the second after a day.
Step by step painting instructions
When using any paint and varnish coatings, high-quality preparation of the base is required. It is recommended to paint new surfaces only 3 weeks after completion of concrete work.
The old concrete base must be dry and durable, it must be processed according to the following scheme:
- Remove all detachments, clean off mold and mildew.
- Blow off the surface with compressed air.
- Fill cracks and potholes with cement-sand mortar or repair mixtures.
- If the condition is unsatisfactory, remove old oil paint using a hair dryer or grinder.
To apply paint, you can use cotton or foam swabs. Brushes with natural bristles are suitable for acid stains and polyurethane varnishes. Synthetic brushes can be used to apply all types of water-based paints.
To treat large areas, use fabric rollers or a spray gun.
Another way to paint concrete is with a brush.
When using new or old brushes, be aware that bristles may fall out during painting and remain on the finished surface.
To prevent such situations, before work, brushes must be stretched with your fingers and blown with air, then dipped in paint and checked for quality on a piece of cardboard.
To paint horizontal substrates, medium-sized flat (flat) or round brushes are most often used. The length of the bristles and the width of the tool are selected depending on the surface area, the chemical composition of the emulsion and the thickness of the paint and varnish material.
It is recommended to sand the flutes before use; do not rotate the brush.
Adjustments must be made until the tip of the tool becomes wedge-shaped - it allows for more precise painting and does not go beyond the boundaries of the surface being treated.
After preparing the tool, dip the brush into the paint up to the middle of the bristles, then wring it out and begin painting work. The emulsion should be applied to the concrete surface slowly and evenly, blending thoroughly. The final pass is made parallel to the long edge of the structure.
When processing a relief structure, the paint must be applied in small portions, avoiding drips and thick deposits, since in this case the coating will wrinkle when curing.
Before starting painting, you need to adjust the nozzle to the most efficient operating mode, fill the tank with emulsion, turn on the spray gun and check the quality of the applied layer on any flat surface (sheet of plywood, cardboard, etc.).
Painting a concrete path should begin from the nearest area. The movement of the spray gun when spraying should occur in several directions - forward (away from you) and from left to right at a distance of 15-20 cm from the surface to be treated. Each subsequent layer should overlap the previous one by 3-5 cm.
A paint sprayer is a good way to paint concrete.
The composition must be applied in sections 60-90 cm in length. It is not recommended to paint the entire base area in one pass - this may lead to uneven distribution of paint over the surface of the path.
READ MORE: Fiber for screed: consumption per 1m3, how much to add
When working with a spray gun with a bottom liquid supply, you need to ensure that the emulsion does not block the air pipe when tilting the tool.
The sprayer should not describe an arc of too large a radius during movement or be strongly inclined towards the base. Failure to comply with these rules will lead to the appearance of dark stripes and spots of different shades on the treated surface.
Application of a roller
For flat horizontal surfaces, the most effective painting method is with a roller. To make work easier, the roller can be extended using a telescopic rod, which is inserted into the hollow part of the tool handle.
Before starting work, the fabric surface of the roller must be impregnated with a colored composition. To do this, the tool is lowered into a bucket of emulsion and squeezed on a plastic grid that is attached to the paint container. Then take a piece of plywood and run a roller over it several times until the cover is saturated with paint.
Each subsequent layer of paint should cover the previous one by a quarter of the roller length.
Step 1: Cleaning the Concrete Floor
The first step is to clean the surface of the concrete.
- To do this, apply a degreaser and cleaner to it and leave for 20 minutes.
- After this, you need to thoroughly clean the surface with a stiff brush and then rinse it with water.
ATTENTION: The floor must be completely dry from water; a fan can be used to speed up this process.
Step 2: Basic Floor Painting
First we will paint the entire floor gray.
- To prevent paint from accidentally getting on the walls and baseboards, cover them with masking tape (you can also use newspapers or oilcloths).
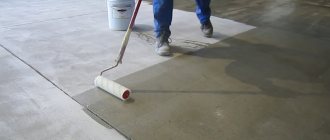
- After this, you can take a roller and apply paint.
- Once you have applied one coat, leave it to dry for 4-6 hours before applying a second coat.
TIP: Now it will take 3 days for the paint to dry completely, so you will have a short break.
Step 3: Marking the Lines
Now let's move on to the creative part of the project, namely, applying the stripes. After a three-day wait, you can safely get to work without fear of damaging the floor. Here we will make stripes 60 cm wide, you can make them narrower or wider at your discretion.
To mark the stripes we will need masking tape. And remember that accuracy is important here.
- Measure 60 cm from the wall and apply a strip of masking tape.
- When making markings, keep in mind that the tape has a certain width.
- The stripes that will be painted white should be 60 cm wide between the inner edges of the tape, and the stripes that will remain gray should be 60 cm wide with the tape.
LIFE HACK: To make sure you don’t make a mistake in your calculations, double-check the width of the stripes after you apply the tape! Also, to make sure you don’t make a mistake, you can make marks on the tape in the form of arrows pointing to the stripes that you will paint white.
Step 4: Painting the Stripes
Now you can paint the desired stripes white and leave them to dry for 48 hours.
Step 5: Apply Sealant
- Once the paint has dried, you can remove the masking tape and apply a protective waterproof sealant to the entire floor surface.
- It is applied with a roller, just like paint. Leave to dry for 2 days, and after this time your new floor will be completely ready for use!
ATTENTION: You can even wash such a floor with a garden hose (of course, having initially removed all the furniture from it), or with a mop and rag.
This is what happened as a result!
Painting a concrete floor gives a quick and beautiful result, and requires a relatively small investment. And with a new floor, your home will become even more comfortable and beautiful!
Technology for producing colored concrete at the mixing stage
In general, coloring is possible at the stage of preparing the solution or after the mixture has set. The first method is more common and allows you to paint the entire mass of concrete, so when the top layer wears off, the color remains unchanged and is not required to be renewed annually. The disadvantage is that the pigments cannot be called cheap, and a significant amount is introduced into the composition. However, the technology is actively used when pouring concrete paths, platforms, and creating curbs, tiles, and paving stones.
Test batch
Before preparing the material in large quantities, a test mixture should be prepared. This will allow you to determine the required amount of dye for a specific shade. The next time you mix, follow the dosage exactly so that the shade always remains the same.
The following must also be taken into account:
- If the pigment is introduced in a large volume, cracks may appear after drying. The dry powder will absorb some of the water and will not be enough to completely mix the cement. It is recommended to introduce moisture-retaining additives;
- When adding dye, the color saturation can change up to a certain point when the excess pigment is no longer able to affect the shade. Saturation parameters are based on the characteristics of the cement. As a rule, 5-6% of the total mass of cement is enough for complete saturation. You should not exceed these indicators, as the strength and frost resistance of concrete will decrease;
- The volume of dye depends on the required shade. For pastel colors, 1-2 kg is enough, for colors of medium intensity - 3-4 kg, for the most saturated colors - 4-6 kg, for light and bright colors a larger amount is taken, for dark ones - a smaller amount.
Technology for mixing colored concrete
When mixing colored concrete, the use of gravity-type mixers is undesirable. To ensure that the powder can be distributed efficiently, forced-action concrete mixers with a rotary paddle activator should be used.
According to technology, the time of introduction of pigments is of particular importance, which directly affects the result.
The following scheme is the most successful:
- first stage: dry preliminary mixing of filler + pigment (15-20 sec.);
- second stage: mixing after introducing cement (15-20 sec.);
- third stage: stirring after adding mixing water (1-1.5 min.).
The more water in the mixture, the lighter the material will be, in turn, the more cement, the richer the color.
It is especially important to mix the filler and pigment. The filler's own moisture content has a beneficial effect on the result.
Seal
The density of concrete, in principle, does not have a noticeable effect on the color, but insufficiently compacted material becomes porous and tends to form efflorescence. This in turn will cause a change in the appearance of the color coating. It is impossible to completely eliminate efflorescence, but the process can be kept within acceptable limits, which requires only high-quality compaction of concrete.
Hardening
Hardening conditions, on the contrary, can become a serious cause of discoloration. First of all, this process is affected by temperature. A higher temperature provokes the formation of tiny needle-like crystals, due to which the shade will appear lighter, in contrast to the shade of the same concrete, which hardened at lower temperatures.
The greater the temperature difference, the more obvious the color difference becomes. Therefore, when hardening, it is better to observe the following:
- If possible, constant air temperature and humidity should be ensured;
- humidity should be high;
- it is recommended to avoid drafts;
- It is recommended to keep water evaporation to a minimum;
- During hardening, water should not get on the base.
Selecting the composition for the floor in the garage
The following types of paint and varnish and industrial mixtures are used for mineral surfaces:
Strengthening impregnations and primers
The purpose of such compositions is to “bind” the particles of the concrete floor, increase the strength and resistance of the surface to wear, cracking and staining, and water. Available in:
- liquid compositions based on acrylic, bitumen, styrene-butadiene, epoxy and other synthetic elastomers;
- dry mixtures for industrial use (warehouses, parking lots, aircraft hangars, shopping malls, museums, multi-level garages, etc.), packaged in paper bags and buckets weighing from 10 kg.
Of the first category, the best known are the so-called deep penetration primers, primers and hardening impregnations (Protexil, PLITONIT Primer-3, UZIN PE 425). Sold in canisters and sealed buckets with a volume of 1 liter or more. The compositions do increase the hardness of the cement stone and minimize dust formation, but do not completely solve the problem.
Often, so-called liquid glass (an aqueous alkaline solution of sodium and potassium silicates) is used as an analogue of deep penetration primers. But, as experience shows, although this is cheap, it is also short-lived and not reliable enough.
But the peculiarity of dry mixtures is that solutions mixed with water should be literally rubbed into the surface with a spatula or any other hand tool. As a result, the top layer of concrete is compacted, dust-free, and wear resistance and strength increases by 1.5–3 times (Sikafloor-2 SynTop, Korodur Neodur HE 2, Weber Cerinol HB).
The disadvantages of dry industrial mixtures are obvious - high cost and the need to purchase a whole range of auxiliary products (primers, additives, special varnishes, sealants, mastics, concentrates for concrete care, etc.).
Colored enamels for concrete
This group includes both classic floor paints like PF-266, NTs-132, and modern modified compositions. The first ones are produced in accordance with GOST 6631-74, 6465-76 or specifications developed by Russian factories’ own laboratories. Traditional enamels are easy to apply with your own hands using regular brushes or rollers. This creates a glossy seamless coating that is resistant to foot traffic, chemicals, water and solutions of alkalis and acids. But car tires wear out the enamel quickly - in about 2-3 years. The disadvantages are also a strong odor, small layer thickness, and vulnerability to shock loads. So the use is justified only by the speed of application and the low cost of the compositions - from 90 rubles / kg.
Modified one-component paint for concrete garage floors is produced in a wide range by Russian and foreign factories (Vepox, Polyflex 1101, Texipol). Its features:
- made on the basis of polymer resins (acrylate, epoxy, polyurethane, urethane-alkyd);
- after painting, it forms a waterproof solid film on the surface up to 50 microns thick with some anti-slip effect;
- ensures the floor's resistance to abrasive wear, water, mineral oils, fuels and lubricants, detergents, alcohols, solutions of acids and alkalis;
- has good decorative properties due to a wide palette of colors, the possibility of tinting by hand and machine, as well as varying degrees of gloss - from 10% (deep matte) to 80% (high gloss);
- will cost the buyer from 220 rubles/kg and more.
The least durable and affordable enamels are acrylic. Although manufacturers claim that this type of product can withstand the abrasive load from car tires well, in practice the paint does not last long - 1-3 years. After which you need to update the layer.
They are easy to paint mineral floors with a regular brush or roller. Polyurethane compounds have much better wear resistance, but their cost is also noticeably higher. In any case, the thickness of the finished layer is small, so the coating will have to be renewed every 2-7 years, depending on the intensity of use.
When purchasing enamel, pay attention to the “area of use” clause in the instructions. For example, the packaging of Dufa Betoplast clearly states “not for use on garage floors.”
Polymer compositions for industrial coatings
This is a class of so-called self-leveling thin-layer compositions for internal and external use. Manufacturers claim that they have all the advantages of varnishes and paints at the same time.
Work technology
Regardless of which dye is chosen, painting concrete floors is a multi-step, complex process. The appearance and performance properties of the finished coating depend on how well each stage is implemented.
Preparation
Work cannot be carried out without preliminary surface preparation. This stage involves dust removal, hardening and priming of the base coat.
All manipulations must be carried out in the specified sequence:
- the concrete floor is thoroughly cleaned of dust, dirt, and possible debris;
- the clean coating is inspected for the presence of reliefs and damage, which are corrected with putty materials;
- When all defects are eliminated, the floor is sanded. The smoothest possible base will ensure high adhesion to paint;
- Remaining dust particles are removed using an industrial vacuum cleaner.
Strengthening the base:
- the floor, free from dirt and dust, is strengthened with the help of special toppings;
- the selection of topping depends on many factors, but the standard composition is made up of such components as dyes, quartz, cement, plasticizer;
- Properly selected material will protect the surface from abrasion and dust formation.
Padding:
- the main purpose of priming is to increase the adhesion of the base surface and paint;
- modern compositions simultaneously remove dust and impregnate the concrete base;
- the choice of composition is made according to the place of work - for internal or external;
- You can purchase a universal composition on a quick-drying acrylic base.
The use of toppings is especially effective when working in places with high loads - garages, parking lots, rooms with high humidity
Painting the floor
All manipulations can be carried out with your own hands, without the involvement of professionals.
The master must stock up on a set of tools:
- paint brush;
- masking tape;
- handle for a paint roller - clasp;
- rollers - the number is calculated based on the processing area;
- safety glasses, respirator, gloves.
Coloring
The temperature of the concrete floor should not be lower than +5 degrees, otherwise the paint will not lay down in a beautiful and uniform layer. Work is carried out at a relative humidity of no more than 80%, t +15 and above.
When the base is prepared, basic manipulations are performed:
- areas that are not suitable for treatment are protected with tape;
- the container with paint is opened and mixed using a mixer (a hammer drill with a special attachment);
- part of the composition is poured into the paint tray;
- the roller is dipped into the tray, the remaining paint is removed, and the first layer is applied;
- the coating must dry for at least a day;
- the floor is painted with a second layer;
- a day later, a visual inspection is carried out and a decision is made to apply the third layer.
If it is necessary to protect the concrete floor from wear, an option such as painting will achieve the desired result.
To achieve the best result, you should choose compounds with maximum hiding power, which will allow you to process the concrete well
Other groups of concrete paints and their application technology are discussed in the second part of the article.
Concrete paint, application technology and testing of its strength are shown in the video:
Stages of preparing a concrete floor for painting
The quality of processing of the concrete floor surface directly determines its service life and technical characteristics.
Work on preparing a concrete floor for painting consists of several stages:
- Getting rid of dust;
- Increased strength level;
- Surface priming.
Before starting work, you should inspect the concrete surface. Detected stains from paint, varnish, bitumen, fuels and lubricants and others are removed using any detergents.
Based on many years of experience, it has been proven that floors made of concrete emit a certain amount of dust. Before painting, the concrete surface is treated to reduce dust emissions.
First of all, they remove debris, sweep the floor, and putty various uneven areas on the concrete surface. At the next stage, the surface is sanded using a grinding machine. This increases the adhesion of the paint to the concrete base.
Dust formed after grinding is removed using an industrial vacuum cleaner.
The next stage of preparatory work is strengthening the concrete floor surface. It is strengthened with the help of special compounds - toppings.
They are impregnations made from quartz and cement mixtures, dyes and plasticizers, providing the concrete floor with protection from dust formation and mechanical damage. With the help of toppings you can significantly improve the decor of a concrete surface. The floor acquires a grainy or perfectly smooth coating.
The composition of the toppings helps fill the pores in the concrete coating, prevents its destruction and provides high strength.
Priming stage
A concrete surface primer is needed to increase the level of adhesion of the paint to the concrete coating. Primer mixtures saturate the floor surface and reduce dust emission.
Primer mixtures are used both indoors and in open areas exposed to atmospheric phenomena. They are quick-drying acrylic-based dyes that provide concrete floor protection from harmful substances. These can be: water, saline solutions, gasoline, mineral oils.
It is possible to achieve high-quality work on painting a concrete floor using tools specially designed for this. They will help provide reliable coverage with a long period of operation. During work, we must not forget about personal protective equipment.
The set of equipment for painting a concrete floor should include the following equipment:
- paint brush;
- paint rollers;
- removable handle for the roller - clasp;
- respirator;
- safety glasses;
- masking tape;
- a pair of protective gloves.
- During painting work, the temperature of the concrete surface should not be less than 5 degrees Celsius, and the minimum temperature of the coating indoors should be 10 degrees.
- The air humidity level should be no higher than 80%. The main functions of dyes for concrete floors are to improve its protective properties and remove dust from the base.
- The composition of the paint affects the set of technical characteristics of the coating. The resistance of the concrete surface to low temperatures, chemicals and mechanical damage increases. The floor acquires a presentable appearance.
READ MORE: Garage floor made of planks
After completing the preparatory work, you can begin the procedure of painting the floor.
Painting is carried out in the following sequence:
- First you need to mix the enamel thoroughly;
- Monitor the room temperature;
- Using a roller or paint brush, apply 1 or 2 layers of paint to the concrete surface. When working with a sprayer, the number of layers increases to three.
- The drying period for each layer should not be less than 20 hours.
- Dyes for concrete floors have a high covering ability. The application of the first layer already ensures complete coverage of the concrete floor, creating an evenly colored, flat surface. As a rule, from 80 to 100 milliliters of dye per 1 sq.m. are consumed per layer.
- 3 hours after application, the paint stops sticking. After 8 hours, the painted floor can be walked on. The surface finally dries out after 4 days, and then the concrete floor will be protected from mechanical influences. During preparatory work and painting the concrete floor, it is important to ensure that the room is ventilated.
How to paint a concrete floor to avoid dust, you will decide from the above. For this, it is quite important to carry out the correct preparation. This will ensure high-quality adhesion of surfaces. Moreover, everything can be done with your own hands, and then the final price will not be high.
Concrete surfaces, despite their strength, are susceptible to destruction from time to time. One of the ways to delay this process is by painting the material. We will try to find out how and with what to paint a concrete floor outdoors, as well as indoors, in this article.
Before you paint outdoor concrete with your own hands, you need to prepare the surface. This must be done, then the colorful material will stay on the plane for a long time. The preparation is as follows:
- It all starts with cleaning the concrete base from debris, dust, dirt and greasy stains. If there is old putty or paint on the surface, their condition is assessed. If necessary, old layers are removed. Use a chisel or hammer to remove the tiles.
- All identified sinkholes, cracks and potholes are sealed with special repair mixtures. The repaired areas are leveled with a grinding machine or fine-grained sandpaper.
- First, all damaged areas are treated with a primer, and then the entire surface. This improves the adhesion of the coating and concrete and reduces paint consumption. The primer is applied in 1-2 layers, each thoroughly dried.
- A concrete structure without any traces of cracks or pores is ready for painting. The work is carried out based on the recommendations of the paint manufacturer.
The surface after painting should be uniform, without streaks or streaks.
There are two fundamentally different technologies for painting concrete surfaces: deep painting and surface painting. During deep painting, chemical processes occur due to which the paint literally eats into the concrete, resulting in a very durable color. Surface painting is much cheaper and is what is used most often. The strength and durability of the coating depend on the quality of the paint.
You can apply the coloring composition to concrete with a roller, brush or spray. The surface should be pre-cleaned and, if necessary, coated with a primer. The color coating needs updating from time to time.
