How to glue fiberboard to concrete?
Fibreboard or, as it is correctly called, fibreboard, is the most popular sheet material used in various fields and areas. It is especially popular in carrying out construction and various types of repair work.
For example, it is very common to put fiberboard on the floor, making it either a base for different types of floor coverings, or a full-fledged and independent floor covering. Its undoubted advantage is also that it can play the role of a heat and sound insulating material.
- Why fiberboard?
- Preparing the floor and material
- Do-it-yourself installation of sheets
Pros of choice
Fiberboard is made by hot pressing waste from wood processing (sawmilling), to which synthetic resins and antiseptics and other stabilizing agents are added. Due to this, such flooring has a number of fundamental differences that make it more profitable than natural wood flooring. Moreover, if you correctly paint the fiberboard and open it with a special varnish.
After these procedures, it acquires a dense structure that holds self-tapping screws, nails, and screws well, and resists mechanical damage. Laying fiberboard is also beneficial because it is not expensive, and it is not at all a pity to actively use it, which, in fact, is typical for any floor, especially in residential and other regularly visited premises.
It is worth noting that many experts recommend painting the floor of this material with waterproof paint or using water-repellent varnishes. This is necessary because the material contains water repellents, which can become deformed from excess moisture.
In addition, such flooring without proper protective coating can wear out quite quickly. And lastly, it’s worth painting it, if only because the visual appeal of fiberboard is not particularly high. Here the wooden floor, with all its shortcomings, is definitely superior.
Preparing the base
Laying fiberboard involves preparatory work. First of all, this is the maximum approach of the humidity of the sheets from which the flooring will be laid to the humidity of the room itself. Otherwise, there is too great a chance that the sheets will noticeably warp over time. Establishing compliance occurs as follows: in the same room, the back side of each fiberboard sheet is moistened with warm water and the back sides are placed on top of each other, after which they are left for a day.
The procedure is simpler if the flooring is laid in a regularly heated room. In this case, it is enough to simply leave the sheets on the edge in the room for two days.
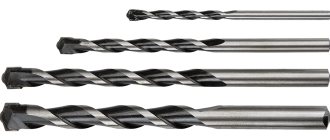
Laying is done on a wooden floor or cement-sand screed. If there was no primer on the screed, then before you start laying fiberboard, it is better to apply the required layer and let it dry. Instead of a standard primer, it is recommended to use bitumen dissolved in gasoline in a ratio of six to one. Before applying, you need to thoroughly clean the base.
Glue or cold mastic is applied to the entire surface of the screed, covered with a primer. The mastic layer should not exceed more than 0.6 millimeters, and the glue layer should not exceed 0.3 millimeters. The slabs, before laying, must also be lubricated with glue in the lower part before laying.
It is recommended to place hot mastic only on the area where the slab itself will be attached at the moment. This is necessary so that the mastic does not have time to cool (its temperature should not be colder than one hundred and forty degrees). Its layer, equal to one millimeter or less, is leveled with special rubber combs and the flooring is immediately fixed.
Laying process
Fibreboard should be laid so that there is a gap between the plates. Optimally, they should retreat from the walls by no less than five millimeters, but no more than ten. It is recommended to mount the first slab in the corner opposite the exit. You will need to press it tightly and check with a level that it is horizontal (in all directions).
The remaining slabs in this and the next row should be laid in the same way. The gaps in the joints should be no more than three millimeters.
There is no need to nail anything, but when drying, you can place a uniform weight on the slabs.
If the flooring is adjacent to vertical pipelines, you will need to leave a gap around the entire circumference of the pipes and fill it with a solution, preferably cement-sand.
Installing fiberboard directly onto a wood floor will involve the same procedure. The difference is that it will have to be laid without a bitumen primer, but using nails as fastenings to the boards.
Fibreboard laying process
Painting a fiberboard floor is fairly easy. For external work it is recommended to use alkyd enamel. You can also paint with painting compounds (with water-repellent properties).
How to glue hardboard to concrete
SALE OF CONCRETE FROM THE MANUFACTURER without intermediaries at wholesale prices
The productivity of concrete plants is more than 5000 cubic meters of concrete per day.
Delivery of concrete in St. Petersburg and Leningrad. areas.
Delivery of high quality concrete and concrete mortar
You can only buy concrete at the lowest possible price from the manufacturer.
The Union of Concrete Plants of St. Petersburg and the Leningrad Region carries out direct sales of concrete and delivery of concrete to the site, bypassing a whole network of chains of intermediaries and resellers, which guarantees benefits in the cost of concrete for construction organizations and individuals.
BrandClassPrice, rub.
| M-100 | B7.5 | 2 350 |
| M-150 | B12.5 | 2 450 |
| M-200 | B15 | 2 590 |
| M-250 | IN 20 | 2 730 |
| M-300 | B22.5 | 2800 |
| M-350 | B25 | 2 960 |
| M-400 | B30 | 3 070 |
| M-450 | B35 | 4 520 |
| M-500 | B40 | 4 770 |
BrandPrice, rub.
| Solution M-100 | 3 020 |
| Solution M-150 | 3 170 |
| Solution M-200 | 3 320 |
| Cement laitance | 4 120 |
Download the full price list
Orders completed today
how to glue hardboard to concrete . how to glue hardboard to concrete in St. Petersburg . how to glue hardboard to concrete in St. Petersburg .
How to glue fiberboard door trim to concrete or plaster?
|
|
www.stroyka74.ru
How to lay linoleum on fiberboard
Let's look at how to properly lay linoleum on a fiberboard backing. The material is rolled and can be stored rolled up for a long time. Before laying it, you need to spread it out and let it lie on a flat surface for some time so that the waves disappear and the canvas acquires a uniformly flat appearance. It is believed that 2-3 days are enough for this, but in practice sometimes it takes a week or more. It depends on the quality, grade, type of linoleum. The correct choice of material determines the success of the entire endeavor. If there is not enough experience working with such coatings, it is better to choose baseless types with a thickness of about 3 mm. This linoleum is quite heavy, it quickly and easily takes on an even, flat shape.
Thick baseless material
The coating is laid in 2 ways:
- The canvas is spread on the floor, the edges are placed under the baseboard. This option is good for heavy and fairly thick linoleum. It does not change linear dimensions and does not form bubbles and remains immobile. Most often, this method is used in small rooms where one strip of coating is enough.
- Strips of linoleum are glued to the base using special adhesives. This method is much more complicated and requires experience and a certain skill. Glue is applied to the base and the material itself. If there is a pause during installation, the composition sets and becomes unusable.
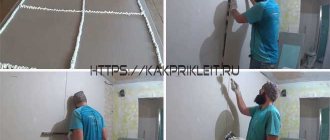
Wallpapering fiberboard walls
To solve the question of how to hang wallpaper on fiberboard, you need to decide on the type of coating. This can be paper-based wallpaper, non-woven or vinyl rolls.
Standard adhesive is suitable for paper-based cladding. Non-woven and vinyl coverings require a special adhesive composition.
Covering fiberboard with wallpaper consists of several operations:
- The rolls are cut into strips of the required length.
- The pieces are put into one pile. For leveling, a load is placed on the strips. To do this, you can use an upside down table and other pieces of furniture.
- According to the instructions, dilute the dry mixture with warm water (20 - 25 0 C). Water is added gradually, while the solution is constantly stirred. Stirring removes air bubbles and prevents clots from forming.
Level the canvas in all directions
- All windows in the room must be tightly closed. Any weak air flow in the space of the room will lead to the fact that the glued wallpaper can instantly fall to the floor.
- Using a wide brush, apply glue to the back side of the next piece of wallpaper.
- Wallpaper on the wall is smoothed with a piece of rags or a rubber roller. Level the strip from top to bottom and in the transverse direction - from side to side.
- When bubbles form on the surface of the coating, they are pierced with a needle and the swollen area is smoothed out.
- At the inner corners of the walls, one piece of coating is overlapped with another strip by 10 - 15 mm. This will hide minor angle deviations from the vertical. The same applies to the outer corners of the room.
When working with non-woven fabric, glue is applied not to the strip, but to the wall.
Wallpapering on fiberboard occurs according to the following scheme:
Laying a wood-fiber base under linoleum
Among other things, it is important to properly prepare the fiberboard floor. You can lay the material in three ways:
- Stick on the base;
- Place on dowels;
- Leave it free.
The specific method is selected based on the base material. If you plan to lay linoleum in a private house without a basement and with earthen floors, then fiberboard cannot be used. Even with insulation and double waterproofing, moisture will still reach the wood-fiber base, and the linoleum will rot. At a minimum, you will need to make a concrete screed and ventilation.
Before processing, the gap at the joint is at least 1.5-2 mm
How to lay fiberboard on concrete
It is possible to lay a fiber board on a concrete screed only if the cement-sand base is insulated and its surface is waterproofed with an acrylic primer. Fiberboard sheets can be laid on a resin or bitumen base. The material is laid on a still cooled but still viscous base and leveled using the rules.
You can lay hardboard under linoleum on a concrete floor using dowels. This method is used if the dimensions of the rough base are large enough and the concrete site does not have an ideal surface.
Dowel fastening in a two-layer slab
Installation of fiber-bonded substrate on wood
Laying hardboard on a wooden floor under linoleum is done either with glue or paint. Attempts to fix the fiberboard with staples or nails lead to the fact that the fastener heads are gradually squeezed out of the boards and pierce the linoleum.
Before laying the hardboard, the floors are thoroughly sanded, the paint is removed, and the tops of the floorboards are cut off by 3-5 mm with a sanding machine. Using a building level and profile, check for the presence of “humps” and “bumps”. The joints between the floorboards are puttied and sanded.
Upon completion of preparation, the wooden floor is primed, after which the fiberboard can be laid with glue or oil paint.
After rubbing the joints, they are sealed with sealant and tape.
How to glue hardboard to concrete
How to glue plywood to a concrete floor?
Why is this necessary? What must be observed during installation work? We will try to give answers to all these questions in this article. Creating a high-quality subfloor with your own hands
General provisions
Plywood consists of several thin layers of wood veneer glued together with a waterproof solution.
Has a lot of positive aspects:
- An absolutely flat and smooth surface, suitable for laying over any topcoat. If the screed has some flaws, then all of them will be eliminated with wooden flooring.
Photo of a leveled floor using wood-laminated board
- Affordable price. The use of predominantly coniferous veneer allows maintaining low costs.
- Low thermal conductivity. Unlike cold concrete.
- Soundproofing. Will isolate you from the noise of lower neighbors if you live in an apartment.
- Ease of processing. Sections can be easily cut into more convenient sizes.
Tip: it is recommended to use an electric jigsaw for cutting. It will greatly simplify the task and allow you to achieve a better result.
Using a jigsaw to cut a sheet of plywood
- Simple instructions for installation work. If we compare, for example, with the “wet” method of leveling a concrete floor, the use of wood-laminated boards is more accurate and clean, not to mention the mass of the above advantages that a rough plywood base will provide you with.
- Moisture resistance. Pine needle resins in combination with waterproof impregnation guarantee the absence of hydrophobicity.
Advice: in rooms with particularly high levels of humidity, it is recommended to use products marked FSF, which means the participation of phenol-formaldehyde glue in their manufacture, which is characterized by increased water-repellent properties.
- High strength and wear resistance, allowing you to adequately endure all the hardships and loads that befall the underground.
- Ecological cleanliness. The composition includes only natural ingredients.
Taking into account all the advantages of the building material in question, its widespread use in the arrangement of floor structures becomes clear.
Suitable types of glue
What is the best adhesive for installing plywood on concrete floors? Let's look at several options that have their own positive and negative qualities.
Dispersive
Container with water-based adhesive solution
The components of this glue do not dissolve, but are located and mixed in a water-dispersion medium.
This structure ensures the environmental purity of the solution, due to which only absolutely harmless and odorless water molecules evaporate during the solidification process.
But you should also be aware of the difficulties that arise when using a water-based adhesive:
- The need for additional fixation with steel screws and plastic dowels.
Advice: if communication elements are located in concrete, then without a detailed diagram of their location, you should refuse to use dowel-nail fasteners. Because you can damage the wiring, after which you will need to cut the reinforced concrete with diamond wheels to get to the breakdown and eliminate it.
Diamond drilling of holes in concrete for repair of underground communications
- A long curing period of at least one week.
Before use, the solution is diluted with water or a special primer. Consumption is approximately 1.2 kg of glue per square meter of concrete.
Alcoholic
Sample of alcohol adhesive solution
This glue is made on the basis of artificial resins or solvents. The presence of a specific odor forces you to use a respirator during work and thoroughly ventilate the room.
But you will also get many benefits:
- Drying usually occurs within three days under normal conditions.
- The cracks and voids are well filled, which allows you to achieve a higher density of the rough base.
- Remains elastic after hardening, which prevents cracking.
In the case of using this solution, additional fixation with self-tapping screws and dowels for concrete is also desirable. Its consumption reaches one and a half kilograms per square meter of cement surface.
Two-component
Polyurethane two-component adhesive for plywood on concrete floors
The cost of such a composition is higher than that of its analogues, but there are also more significant advantages:
- No additional fastening is required using the self-tapping dowel system. And this is a significant saving of time, money and effort.
- The shortest curing period is two days. That is, after 48 hours you can start sanding the wood-laminated board.
- Highest strength.
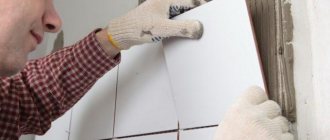
How to glue fiberboard to liquid nails?
If you decide to use this adhesive for gluing cladding material, you must carefully read the instructions, which indicate the basic requirements for operation: ambient temperature, gluing time and drying time of the adhesive.
Recommended gluing sequence:
- The surface must be thoroughly cleaned of dust and remnants of the old coating, giving it ideal evenness and cleanliness.
- Glue can be applied pointwise to the back surface of lightweight material. For heavier ones, use a snake. It is more convenient to do this with a special gun.
- The fiberboard coated with glue is pressed tightly against the wall and held in this position for several seconds.
- The time for complete polymerization of liquid nails can take a whole day. At this time, you should not expose the fresh coating to physical stress.
Subtleties of choice
All recommendations for the purpose and consumption of liquid nails can be gleaned from the instructions on the packaging. But imagine, you came to the store, and there were dozens of their varieties. Re-reading everything is not an easy task. What to do? Especially considering that sales consultants are not always competent - not only in small stores, but also in large construction markets.
Of course, study the necessary information first.
Quite often, customers are offered to purchase universal neoprene-based adhesive - “Moment Installation Extra-Strength” (Henkel). This is a really good choice for holding heavy siding such as metal siding, natural stone, wood, etc.
But if you need to glue foam materials, such as polystyrene, this option will not work. The best liquid nails in this case are water-based “Moment Installation Super-Strong” (please note that they are not suitable for gluing Teflon, polypropylene and polyethylene!).
Macco LN601 neoprene based adhesive is intended exclusively for interior use. However, it is universal, since it will qualitatively and reliably glue any panels to the wall - plywood, plasterboard, wood, chipboard, plastic and metal moldings. Unfortunately, LN601 is not suitable for tiling a bathroom with ceramic tiles or installing mirrors.
Is it possible to lay fiberboard under linoleum?
Craftsmen began laying linoleum on it the very next day after the start of sales. But there are still experts who believe that laying material on hardboard is short-lived and ineffective, although practice clearly confirms the opposite. Is it a different matter that linoleum flooring on fiberboard is important to scrupulously adhere to the technology. If you do not take the waterproofing of pressed fiber seriously, then you need to immediately lay the material on plywood that is impregnated with bakelite and inhale phenol, and also formaldehyde for the rest of your days.
When installing hardboard on a linoleum floor, there are the following critical points:
- Compressed wood fiber sheets or boards have an excellent degree of thermal insulation and high shock-absorbing properties. At the same time, a thin sheet, only 0.3-0.5 cm, perfectly adapts to the linoleum sheet. If on plywood or OSB, linoleum can break at the joints, and then when installed on fiberboard, the 2 materials will behave as a single whole.
- Before laying fiberboard, it is necessary to solve the problem with waterproofing, especially if the materials will come into contact with moist, cool air or a surface whose temperature is below +7 degrees.
A few questions about laying fiberboard under linoleum
Before we begin to reveal the technology for laying linoleum on fiberboard, it is worth considering several issues related to this topic.
Why do you need to put fiberboard sheets on the floor under laying linoleum?
The technology of installing linoleum floors on a fiberboard base is no longer new. The use of fiberboard flooring under linoleum was invented back in the USSR. This method has proven itself well, therefore it is widely used for installing linoleum floors in apartments and private houses.
Important! Thanks to the smooth, flat surface of the fiberboard, you can quickly prepare the floor for high-quality installation. Therefore, this material is used as a basis for many different types of finishing coatings.
What are the features of fiberboard?
It is worth noting the following features of fiberboard:
What should you protect fiberboard sheets from, and what are the common mistakes?
It is worth remembering that fiberboard is a wood board, so it will absorb moisture. If this coating provides a dry and smooth surface for the finishing coating, then the coating itself must be protected with a waterproofing layer, otherwise moisture will flow to the linoleum and deteriorate the quality of the fiberboard sheets.
You can use a coloring composition - a moisture insulator
It should also be taken into account that under the influence of moisture the linear dimensions of the sheets may change. Consequently, when drying or increasing humidity, the gaps between them will increase or the seams will warp. Acclimatization of the slabs is mandatory for technologically correct installation.
The base should not have protrusions. The presence of defects in the base can cause cracks and fractures of the slabs. Therefore, if it is a concrete floor, then it is leveled with a self-leveling compound, and the plank base is planed. In this regard, you need to know how to level and lay the slabs. Properly laid sheets can last for a long time.
Step-by-step guide to installing hardboard flooring
Very often we have to repair the floor. This may be due to its unevenness, damage, the need for insulation, sound insulation, or simply updating. In view of the huge abundance of building materials, many are lost in choosing: which one is best? Whatever your choice: linoleum, parquet or laminate, you cannot do without a good and reliable foundation. Such a common building material as hardboard is perfect for it, the price of which is absolutely acceptable for such work.
The content of the article:
- Production technology
- Stage 1: preparation of surface and materials
- Stage 2: adjustment
- Stage 3: styling
- Stage 4: final processing
- Additional material on this topic
- Return to Yandex search
- or write a comment
Many people have heard the name hardboard, but most don’t even know what it means. This is one of the types of fiberboard (fibreboard).
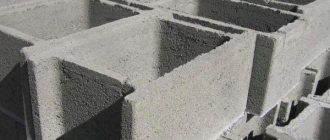
Production technology
Hardboard is a material made from waste from the forestry and woodworking industries. The main waste is various types and sizes of sawdust, shavings, wood fiber, etc. They are mixed with special binders based on polymer resins, after which they are mixed and placed in a hot press. The material is produced in the form of a solid strip, which is subsequently cut into sheets.
On one side, the sheet has a smooth surface, which is called the front side, on the other side, the surface is corrugated and is called the back side. The front side has a more aesthetic appearance, while the back side adheres better to various adhesive mixtures. In addition to the polymers that make the sheet durable, rosin and paraffin are also added to its composition, which give it water-repellent properties. Thanks to this composition, this type of material is absolutely environmentally friendly. In addition, regardless of the type of exposure, it does not emit any harmful substances.
Let us dwell in detail on laying hardboard on the floor.
Stage 1: preparation of surface and materials
First, we need to clean the surface on which we will lay the sheets from various debris, dust and dirt.
If you will be laying hardboard directly onto a concrete screed that you have recently made, it is important to ensure that it is sufficiently dry. Otherwise, hardboard for the floor will draw moisture from the concrete and, as a result, deteriorate (warp, swell). Before laying the sheets, the screed must be primed. This will significantly extend the service life of the hardboard base. In addition, for the same purpose, many craftsmen recommend impregnating hardboard sheets with drying oil before laying. In the room itself where the work will be carried out, it is necessary to maintain a dry (humidity no more than 58 - 59%) and warm climate, and the air temperature should be at least +5 degrees C.
The sheets themselves, in accordance with generally accepted standards, must be laid out in a dry room and left for a day in order to prevent warping.
Stage 2: adjustment
The fiberboards are laid out on a dry floor, adjusting them to the required dimensions. Where necessary, the sheets are cut to accommodate protruding corners and pipes.
At this stage, the fiberboard is laid, but without gluing or fastening to the floor. In this way, you can avoid unnecessary costs in the form of damaged sheets, because adjustment is much easier when the sheet is not lubricated with an adhesive. It is important to remember that the slabs must be laid staggered and not allow the 4 corners to converge in one place.
Stage 3: styling
Having prepared the base under the window, we proceed directly to laying the sheets and securing them. If you decide to glue the slabs directly onto concrete, you can use rubber mastic KN-3, construction adhesive KS-3 (the base must be non-water-based), BOSTIK kp2 (kp5). Some craftsmen also use highly heated bitumen (up to 180 degrees C). After heating, it needs to stand for 2-3 hours for the moisture to evaporate. After this, it is laid on the floor and the sheets are glued.
During the gluing process, it is important to make through cuts in them. This will prevent them from deforming. In addition, immediately after laying, the hardboard sheet must be pressed well with the help of some heavy object. When the glue has dried, you can begin gluing the second layer of fiberboard, if necessary. Only after completion of this work is it possible to lay linoleum on hardboard.
The following video shows this process clearly.
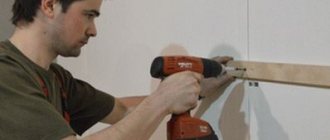
One of the best options is to lay the slabs on wooden joists. To begin with, it is advisable to spread a waterproofing film over the entire floor plane. After this, the logs are attached to the floor at a distance of no more than 30 cm using dowels. In uneven areas, use shims under the slats to level the floor. Next we make the transverse lathing. The cell size should not exceed 30x30 cm. When the sheathing is ready, we can attach the sheets to it using self-tapping screws. The distance between the screws along the perimeter of the slab should be 15-20 cm, and on the internal plane - 20-30 cm.
All work is greatly simplified and accelerated if you attach hardboard to a wooden floor. In this case, it is enough to adjust the sheets to the size of the room and simply screw them to the floor with screws or nail them. You can first lay a waterproofing or soundproofing coating.
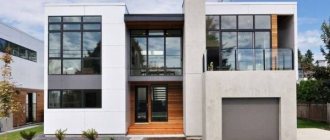
How to lay fiberboard on the floor with your own hands - step-by-step instructions and tips!
Fiberboard, or fiberboard as it is called, is most often used in construction and renovation. It can be used as a base for flooring or act as an independent flooring. A special feature of fiberboard is the ability to be laid on any type of surface, including old coatings.
Fiberboard (Fibreboard)
Fiberboard slabs can hide many defects of the lower base, for example, cracks, crevices or uneven places. In most cases, fiberboard with a thickness of 3 mm is used. Slabs that are resistant to moisture and impregnated with oil are mainly placed on the first floors of buildings. On uneven bases, slabs with a thickness of 6 mm are used.
BrandDescription
| M-1 | Soft slabs |
| M-2 | Soft slabs |
| M-3 | Soft slabs |
| T | solid slabs with untreated front surface |
| T-P | solid slabs with tinted face layer |
| T-S | solid boards with a face layer of fine wood pulp |
| T-SP | solid boards with a tinted face layer of fine wood pulp |
| ST | hard slabs of increased strength (superhard) with untreated front surface |
| ST-S | hard boards of increased strength (super hard) with a front layer of fine wood pulp |
Advantages of the material
Fiberboard
The advantages of this building material are as follows:
- low cost;
- ease of installation;
- environmentally friendly, since the board contains natural wood;
- dense structure, due to the fact that fiberboard is produced by hot pressing of sawdust. The addition of antiseptics and synthetic resins gives it better properties even compared to natural wood flooring;
- high resistance to mechanical damage;
- strength and durability, but subject to proper use. This involves creating a protective layer of waterproof paint or water-repellent varnishes, which, moreover, can significantly improve the appearance of the coating;
- Excellent heat and sound insulation, which is why fiberboard is often used as insulation. The slabs are laid on the first floors of multi-storey buildings, as well as in private houses, that is, in cases where the floor surface cannot be raised to a greater height. Insulation of any floors is usually carried out using types of fiberboard such as PT-100, as well as M-20. Different coatings are laid on top of the fiberboard. The exception is thin linoleum or ceramic tiles;
- The flat surface of this material allows you to get a perfectly flat floor on which you can install any covering.
Dimensions of fiberboard sheets
Stage 1. Preparation of slabs
Before laying the fiberboard, preparatory work is carried out. They consist in preparing sheets of material for room humidity. This way you can protect them from swelling. To do this, each fiberboard sheet is moistened on the reverse side with a brush with a small amount of warm water. Then all the sheets are folded with their backs and left alone for 24 hours. But in a constantly heated room, this procedure can not be performed, but simply keep the sheets of material in it for 2 days.
It is advisable to leave the slabs moistened with water for 24 hours indoors before installation.
Fibreboards are used to level surfaces with small level differences. For large uneven areas, you need to lay the flooring with logs or pour a mixture that will level the surface. Whether the floor is level or not can be checked with a level, which is used to make marks at the same height along the entire perimeter of the walls. After connecting the marks with one common line, it will become clear whether the floor requires leveling.
Level for checking the evenness of floors
Stage 2. Base for laying fiberboard
The base can be a wooden floor. When laying fiberboard on a wooden floor, slabs with a thickness of about 6 mm are used.
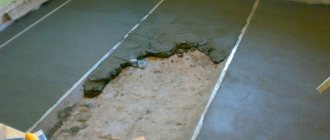
A perfectly flat surface is also obtained by using a sand-cement screed, which is made in accordance with the drawn line. Before starting work, sand no more than 50 mm thick is poured onto the coating, which must first be cleaned and well dried, and the finished solution is distributed on top of it.
The photo shows a self-leveling screed poured in a thin layer onto a concrete base
Then a primer or bitumen dissolved in gasoline is applied to the screed. In this case, it is important to wait about 8 hours for them to dry until they begin to “come off.” Only after this can you lay fiberboard sheets on it using mastic or glue.