Subject to special requirements for room ventilation, a plasterboard ceiling in a bathroom will provide protection from repeated accidental flooding by upper neighbors, no worse than a stretched PVC sheet. Working with large-format material for rough finishing is much faster and easier without professional skills.
It is possible to create a perfectly flat plane or several decorative levels with original spot LED lighting. All communications are laid in a hidden way.
Primary requirements
The ceiling structure in the bathroom must meet a number of basic requirements, presented:
- high resistance to high moisture;
- long service life;
- availability of regular coating maintenance;
- harmonious combination with lighting and details of the entire interior;
- thermodynamic stability;
- environmental cleanliness;
- fire safety;
- ease of self-installation;
- maintainability;
- compatibility of finishing with structural elements.
An important indicator is the correct choice of drywall and frame elements, which will allow you to independently create a durable and easy-to-use ceiling structure.
The high hygroscopicity of plasterboard somewhat complicates its use in rooms with high humidity, including bathrooms, so it is recommended to use cement putty and plaster based on high-quality Portland cement as finishing materials.
Cons of a plasterboard ceiling in the bathroom
Of course, there are also disadvantages:
- Suspended ceilings reduce the height of the room. Minimum for the thickness of the profile used when installing the frame.
- Drywall, even if it is moisture resistant, is not intended for constant contact with water. The ceiling structure requires careful finishing after installation to prevent moisture from penetrating under its surface. This can lead to the formation of mold or mildew under its surface, which will inevitably lead to rapid dismantling and repair. Therefore, it is necessary to putty and seal the seams very carefully.
USEFUL INFORMATION: Wallpapering plasterboard: is it possible to do without putty?
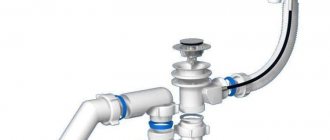
Hood
The presence of a properly organized hood is a prerequisite for using a plasterboard ceiling in the bathroom.
The installed exhaust fan must have a capacity of at least 25 m3/hour. With a combined bathroom, such indicators necessarily increase to 50 m3/hour.
It should be noted that standard fans with a diameter of 10 cm are characterized by a productivity in the range of 90-110 m2/hour, so choosing a decent model of such a device can be quite problematic.
Turning on the fan cannot depend on the lighting in the room, and the operation of such a device must be as silent as possible, which is ensured by special bushings and special sliding bearings. In order to effectively ventilate the entire space above the ceiling structure, it is advisable to install a fan in the ventilation duct, and a regular decorative ventilation grille directly in the ceiling.
It is advisable to connect the exhaust fan not using a switch, but using a standard dimmer, which allows you to conveniently regulate the speed of the installed ventilation impeller.
Bathroom ventilation
To reduce the cost of 1 m² of housing and operating costs in the Russian Federation, natural ventilation of the following scheme has been adopted in apartment buildings since Soviet times:
- air enters the living rooms through the loose narthexes of the window blocks;
- passes through rooms and corridors to two or three exhaust ducts available in the apartment - in the bath, toilet and kitchen.
To ensure air exchange, it is necessary to install supply valves in completely sealed PVC windows. Gaps of 0.8-1.5 cm should be left between the doors of all interior doors, without exception, and the floor covering. Otherwise, there will be no circulation and the air exchange rate will decrease.
Supply ventilation valve for PVC window block.
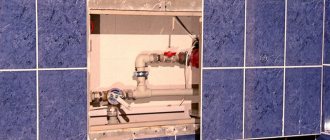
According to the standards of SP and SNiP, ventilation ducts must have a size of 15 x 15 cm. The upper edge of the hole must be at least 20 cm below the floor slab. Taking into account the ceiling height in an ordinary apartment - 250 cm (in practice 240 - 245 cm) and the distance from the finishing the floor to the bottom of the bath is 13 - 18 cm, lowering the drywall below the ventilation duct does not make sense. Otherwise, a person standing at full height in the bathtub will feel uncomfortable from the hanging ceiling.
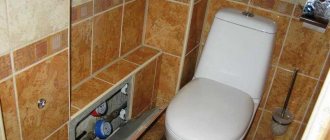
Exhaust ventilation ducts remain below the plasterboard ceiling.
A distance of 20 cm is enough to mount the hangers and profile above the ventilation duct opening. The exceptions are large-sized apartments with ceilings of 3 m, for special projects, and country cottages. In these cases, the shaft remains inside the gypsum plasterboard structure.
Therefore, you need to not just cut a hole in a sheet of drywall, but connect it with your own hands to the shaft with a special flexible hose, a rigid plastic or metal box, or an air duct. This will prevent the destruction of plaster and cardboard by moist air, which is what is removed by natural ventilation from residential and functional premises.
In turn, air exchange should be ensured inside the space between the drywall and the floor slab. This will allow excess moisture to be removed after possible flooding by upper neighbors.
Frame
It is recommended to make a frame metal base for installing plasterboard sheets from a galvanized profile. In accordance with the marked perimeter of the bathroom, a guide profile is installed, to secure which dowels are installed every half meter.
Metal profile frame
Focusing on the drawn transverse lines, with a distance of half a meter, the suspensions are attached to the ceiling base. The load-bearing ceiling profile is installed on the hangers and secured with self-tapping screws, and then the transverse elements in the guide profile fixed on the walls.
Only after the entire frame base for attaching the plasterboard ceiling has been completely assembled, is it possible to begin the process of insulation, soundproofing, and laying all communications.
Installation of lighting fixtures
To install lighting, the sheets already have holes, so all that remains is to extend the wires for the spotlight outward by 15 cm, connect the device, then insert it into the hole and install it - the latches themselves will secure the device in the desired position.
On a note! To cut holes for lamps, a drill with an attachment of the required diameter is suitable.
Wiring
The power distribution for all lighting and ventilation equipment must begin after assembling the frame base. At the first stage of electrical work, it is necessary to determine a detailed schematic plan of electrical wiring, which marks the exact location of all points and nodes, including sockets, switches, ceiling lights, blocks and junction boxes. The finished diagram is transferred to the surface in the bathroom.
Installation of wiring under a plasterboard ceiling
The wiring must be laid inside a special corrugated PVC pipe, which will completely eliminate damage to the insulating layer of the wires under the influence of sharp edges of metal profiles.
Block 1
Materials and tools for work
The master will need the following set:
How to make a plasterboard ceiling with your own hands and step-by-step instructions
- sheets of moisture-resistant drywall in an amount equal to the area of the room plus 5% for reserve (trimming);
- ceiling metal profile, guide rails;
- U-shaped hangers;
- crab connectors;
- fan;
- ventilation grille;
- deep penetration primer with antiseptic;
- roller;
- metal scissors or grinder;
- screwdriver;
- dowels, small screws (bugs);
- construction and laser level;
- knife for cutting sheets;
- ladder.
Advice! Instead of a stepladder, a durable table or cabinet is suitable; it is more convenient to lay out sheets and tools on them. The craftsman will also need putty, serpyanka, spatula, and materials for finishing.
Binder
Self-filing of the frame is one of the most important stages of construction and finishing work, which includes the installation of plasterboard sheets on the ceiling, represented by moisture-resistant gypsum fiber boards.
Before you begin installing them, you need to treat the back side of the sheets with a cement-based waterproofing compound.
To make holes for built-in lighting fixtures and ventilation, a 10-12 mm drill and an electric jigsaw are used, and it is recommended to cut the plasterboard sheet itself with a sharp construction knife. The building material is attracted to the frame base with self-tapping screws, which are fixed at a distance of 15-20 cm from each other. You must retreat about one and a half centimeters from the edge of the sheet.
During the filing process, gaps of no more than 10 mm wide are left between the plasterboard slabs and around the perimeter of the entire bathroom. Subsequently, a waterproofing mixture is pressed into such gaps, which will serve as high-quality protection for the ends of the plasterboard sheets from increased moisture.
It is important to remember that in the process of filing drywall, the head of fasteners in the form of self-tapping screws must be immersed in the finishing sheet by approximately 1 mm, and all the resulting recesses will subsequently be puttied.
Installation of GKLV or GVL
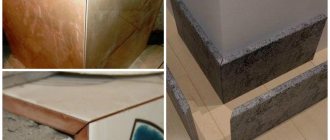
First, the sheets are cut with a construction knife. Marks are applied with a pencil, not a marker - the latter can be visible even through a layer of putty.
For work, use a sharp mounting knife with a blade width of 12 mm. Cut through the cardboard layer and half the depth of the gypsum board. The core is broken along the marked straight line. Then the cardboard is cut on the other side. If the factory chamfer has gone to waste, it is made independently. To do this, the edge is processed with a roughing plane, and the edge is cut with an edge plane at an angle of 22.5° to a depth of 2/3 of the thickness.
It is not recommended to use a hacksaw - the sheets come out with jagged edges and crooked edges, so it is difficult to join them later. You can also use a jigsaw with a fine-toothed metal file or a grinder (creates a lot of dust, suitable for drilling holes in the blade).
GVLV is cut in almost the same way. The panel is cut to a depth of 2/3 of the thickness and broken, placing a rule or another sheet under the bottom. This can also be done with a grinder or jigsaw, but it is better to use a vacuum cleaner at the same time to get rid of small debris.
It should be noted that gypsum boards and gypsum boards have a front and a back side (facing the interceiling space). As a rule, the “wrong side” is rougher and contains markings, and on the front part there are factory-made recessed edges, which then need to be puttied.
Despite the fact that waterproof materials are used, waterproofing, which is also done by hand, will not hurt. To do this, before installing on the sheathing, the sheets are treated with waterproofing products - for example, mastic. On the reverse side, after installation, pasting materials are used - roofing felt, glassine, roofing felt, and penetrating insulating products are applied in a layer of 1-3 mm. Acrylic paint is effective.
Installation of gypsum boards on the frame is carried out in the following order:
- The sheets are lifted to a height using a special lifting device.
- The panels are fastened crosswise with screws with a diameter of 3.5 mm and a length of 25 mm in increments of up to 170 mm; at least 10 mm are left to the factory edge of the sheet, and 15 mm to the cut edge. The screws must enter the slabs at right angles and penetrate the metal frame to a depth of at least 10 mm. The heads are recessed into the panel by 1 mm.
- A compensation gap of 3–5 mm is left from the wall so that the material does not crack during thermal expansion.
- Adjacent sheets are mounted with an offset no less than the pitch of the supporting profile. The edges are joined only on the supporting frame.
Holes for lamps are cut before or after installation - it all depends on the chosen tool. So, a round crown allows you to do this on a ready-made binder, and a jigsaw - only before installing the panels.
Installation of GVLV is almost the same as GKLV. But this material will require special fasteners with double threads and a sharper conical head, which fit better into a dense sheet. Self-tapping screws are placed at a distance of 150–300 mm. The side edges are coated with glue on the sides that come into contact with other panels.
Gaps of about 1 cm are left between the GVL slabs, which are subsequently sealed with a waterproofing mixture. This will protect the ends of the sheets from moisture getting inside. The slabs around the perimeter of the room are also processed.
Puttying
Treatment of ceilings based on plasterboard sheets in rooms with high humidity, including the bathroom, is most often carried out with a cement composition. You cannot use standard gypsum putties for this purpose, which can crack due to changes in humidity.
Universal mixtures are represented by plastic polymer putties, the consumption of which is significantly lower than other compositions, and the main disadvantage is the rather high cost.
Experts recommend using gypsum finishing or universal putty for puttying the ceiling, for example ABS Saten and Eurogips Saten, which have a good consistency and are very easy to apply. Such compositions need to be mixed in small quantities as they are used.
Before puttingtying the entire surface, self-adhesive serpyanka is glued along all the seams, and then tightly filled with putty, which minimizes the risk of cracking.
Drywall for the bathroom: installation features
With this installation method, the material is glued directly on top of the wall using moisture-proof tile adhesive. For greater reliability of the structure, it is better to additionally fix it to the walls using screws or dowels. In this case, the choice of fasteners depends on the base of the partition. In addition, to extend the life of the material, it would be appropriate to additionally lay a layer of insulation at the junction of the panels, as well as near their junction with the floor. It must be said that today’s technologies make it possible to practically adapt to the conditions of bathrooms any material.
In this case, drywall is no exception. Only an extremely unskilled tile maker can argue with this. Any master with knowledge of modern installation technologies knows that proper processing of drywall in the bathroom guarantees an excellent result.
Typically, finishing a bathroom with plasterboard involves two methods of installing it. In the first case, the panels are fixed directly to the wall. True, for this, the walls must be relatively smooth, without protrusions and significant defects. This installation method is suitable for finishing walls or covering them with waterproof wallpaper. If you plan to use ceramic cladding, which has an impressive weight, as a finishing coating, then the optimal solution would be to attach the sheets to a metal frame.
It will perform a load-bearing function and reduce the risk of collapse of the entire structure due to increased load.
Finishing
After applying two layers of putty, the entire surface is thoroughly sanded, after which it is primed for painting or any other finishing method. The most popular option today is finishing the ceiling surface in the bathroom with special glass wallpaper.
This finishing material serves as a very effective protection of the structure from high humidity. The surface is covered with moisture-resistant wallpaper using special glue. At the final stage, all lamps and fans are installed, as well as their correct connection to the electrical network.
Modern glass wallpaper can have a smooth structure or have some kind of pattern on which a layer of waterproof paint can be applied.
Wall covering and installation of plasterboard partitions
Drywall is a universal material that is actively used in the process of repairing rooms and finishing work.
With its help, it is possible to perfectly level surfaces and arrange complex structures, for example, niches or arches. But plasterboard for the bathroom is not used so actively, and there is an explanation for this: most apartment owners think that plasterboard cannot be used in wet rooms.
In reality, this is not entirely true. And if you follow the recommendations of experts and choose the right finishing material, then plasterboard can be used in bathrooms.
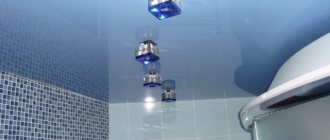
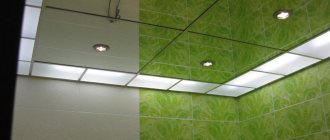
Photo
Multi-level plasterboard ceiling design
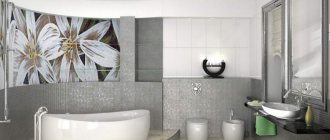
Finished ceiling
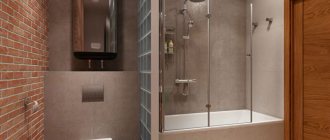
Bathroom interior with plasterboard ceiling
Practical experience
Let's look at a small practical example. There is a house and it has two combined bathrooms. In each of these rooms the walls are made of gypsum plasterboard.
Practical experience shows that plasterboard walls in the bathroom are a completely appropriate solution
For the construction of the attic bathroom, we chose simple white plasterboard, which is usually used for wall cladding.
What is the result?
- We lived in the new house for five years, the attic floor was built four years ago;
- There are no signs of destruction on the walls, the mechanical strength has remained unchanged;
- The plasterboard walls in the bathroom look great - they were not damaged even by the claws of a pet;
- But the material has one drawback - it’s not easy to hang a shelf, a water heater, or a cabinet on gypsum plasterboard, but this is so often necessary;
- However, this situation can also be solved - you only need to glue a sheet of plywood to the back side of the sheathing when building the wall (15 mm material is suitable).
If you plan to install a boiler of 50 liters or more, it is still worth assembling a full-fledged wooden frame inside the wall. The easiest way to get such a structure is from thick timber. It can easily cope with loads and transfer the impact from the wall to the floor.
Reviews
Many craftsmen lay several layers of moisture-resistant putty on the ceiling of plasterboard sheets in the bathroom, which allows them to achieve an ideal plane.
However, it must be remembered that each applied putty layer must be primed, which will prevent the putty from peeling off and further falling off.
As operating practice shows, the main advantages of installing plasterboard ceilings in the bathroom are the ability to quite easily hide even pronounced unevenness on the surface, as well as install additional lighting fixtures.
Among other things, there are almost no difficulties when installing it yourself.
Block 2
Selection of materials
To finish the ceiling in the bathroom, special waterproof sheets are used, which are labeled as GKLV. They are painted light green (but there may be variations, so look at the markings first). The composition includes hydrophobic impregnation, which does not allow water and steam to destroy the panel.
Waterproof sheets are heavier than classic plasterboard. So, if with a thickness of 9.5 mm (optimal for the ceiling) their weight is 22 kg, then gypsum boards - 27 kg. But if we are talking about an attic in a private house, then you need a 12.5 mm sheet (wall).
Another option that can be used in the bathroom is GKLVO (moisture-resistant). But in this case, the price of the product also increases. There is no need to spend money on such a coating if there is no risk of fire in the bathroom.
When in doubt whether it is possible to make a ceiling from plasterboard, GVLV (waterproof gypsum fiber sheet) is often preferred. It costs more, but is more durable and resistant to water. The material is made from a mixture of building gypsum reinforced with dissolved cellulose; there is no cardboard shell. Supersheet, as it is also called, is distinguished by its high density.
In addition to the basic material, you will also need:
- priming impregnations for wet rooms, which may additionally contain fungicides, silicone, latex, including Ceresit CT17, Rusean, Eunice;
- putty - for example, Vetonit VH;
- moisture-resistant emulsion paint - for example, antibacterial Akzent, Kitchen Akzent, lactex Kompozit Interior, latex-silicone Sniezka Kuchnia-Lazienka, Sadolin Vatrum, Tikkurila Luja, Ft professional Protector.
Shapes and size
The shape and size will depend on the area of the room. Drywall sheets can be of different sizes from 200x120 cm to 300x120 cm. The thickness is usually 7.5-8 mm. The form depends on the imagination and approach of the designer. The most common shapes are triangle, square and circle.
Puttying and finishing of installed sheets
A universal or finishing putty is used; it is prepared in small portions of no more than 2 liters, so that you have time to work before it hardens. You need to dilute the putty in a perfectly clean container, adding the putty to the water, and not vice versa. When filling joints, reinforcement is used with serpyanka - a rolled fiberglass mesh.
Using serpyanka allows you to avoid cracks on the surface. After 24 hours, you can apply a second layer of putty to completely cover the reinforcing mesh and screw heads.
Recoating with putty also requires drying. The dried surface must be sanded with sandpaper manually or using a power tool and coated with an acrylic primer.
Painting of the prepared ceiling is carried out using rubber water-dispersion paint on an acrylic-latex base. This paint is impermeable to water and has no odor like most water-based paints.
- Slatted ceiling in the bathroom: installation features, installation rules and optimal combinations of materials (125 photos)
Plastic ceiling in the bathroom: 110 photos of choosing optimal designs, panels and lighting
PVC ceiling in the bathroom - 115 photos of examples of using panels and recommendations for their installation
You can install tiles on the side surfaces. You can glue it not with tile adhesive, but with silicone sealant.
If you meet all the necessary requirements described in this short instruction on how to make a plasterboard ceiling, then such a ceiling will last for many years. But it is still advisable to use such a ceiling if you want to create multi-level design structures with built-in lighting.
If you need to create an ordinary flat ceiling, then it is better to use classic plastic or metal materials.
Ceiling device
When constructing a single-level structure, plasterboard is attached to the lathing, for the construction of which a steel profile or wooden beam is used.
The last type of material is not popular because it:
- susceptible to rotting;
- may warp under high humidity, which will cause cracks to appear on the ceiling;
- of interest to insects.
In addition, the difference between these materials is not so great that one should try to save money in this way.