In rooms with humid processes, air humidity inevitably increases. Water vapor rises up and penetrates through the finishing materials into the ceiling structure. Here, moisture accumulates in the insulation and load-bearing elements of wood, eventually causing them to rot and become damaged by mold. All this negatively affects the strength and durability of the entire floor structure. Therefore, a vapor barrier for a wooden ceiling is simply necessary. We will tell you what is the best vapor barrier and waterproofing, how to choose the material and install it.
External insulation - the complexity of the task
External insulation of a wall that does not protect from the cold for apartment buildings is an almost unsolvable problem:
- performing thermal insulation work on the facade requires many permits and approvals;
- facade work at height is specific and therefore very expensive;
- if there is an elevator shaft or other communications behind a cold wall, then work there is impossible.
Laying tiles - a classic of the genre
Recommendation. Before installation, tiles that have been unpacked and checked for defects must be laid out over the floor area without gluing. This procedure will help you find the optimal place to start work and eliminate the location of cut fragments at the entrance.
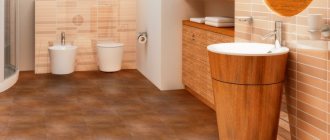
Any tile on the bathroom floor is laid according to a single pattern. The performer will need a standard set of tools and devices, including a level, a container for adhesive solution, plastic crosses, a trowel and a special spatula equipped with teeth, the size of which depends on the size of the elements and the degree of unevenness of the floor.
A spatula with teeth, the size of which depends on the degree of unevenness of the floor and the dimensions of the tiles
In order not to buy excess tiles and not to suddenly buy additional material that runs out during the work process, study the rules for calculating the required amount of tiles: .
The technological sequence of the process of laying floor tiles includes:
- determining the most appropriate direction of the rows, choosing a rational location of the starting point;
- preparation of the adhesive solution, carried out according to the instructions attached to the material;
Important. After the first batch, the adhesive composition needs to sit for approximately 10 minutes. Then secondary mixing is carried out, which is required to obtain a homogeneous mass. Excessively liquid consistency of the glue (signaled by spreading grooves) is corrected by adding a dry mixture to the solution and then kneading.
- applying the adhesive composition to the surface, the glue must be evenly distributed over an area of 1 m² with a notched trowel; it is not recommended to apply the adhesive solution over a large area, since the composition hardens quickly;
You should know. The adhesive solution can be directly applied to the tile if the contractor considers that this method is more convenient and economical.
The use of plastic spacer crosses will ensure that the direction is followed and the formation of beautiful, even seams
- to ensure the identity of all butt seams, spaced plastic crosses are used; they are placed at the cross intersections of the rows of tiles between four adjacent elements;
Important. Excess binder material must be removed immediately so that hardened stains and sagging do not spoil the aesthetic properties.
- gluing of the cut elements is carried out after laying the main mass; they are placed in areas least susceptible to dynamic loads and in areas that are not “conspicuous”;
- Filling the joints with grouting compounds is carried out no earlier than one day after gluing the tiles; the grout is applied with a rubber spatula.
Important. Before laying tiles over the “warm floor” system, the heating equipment must be turned off and not turned on until the consumables used have completely hardened.
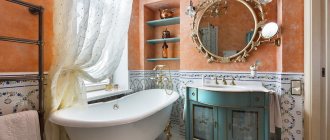
Insulation from the inside: technical difficulties and positive aspects
As a rule, insulation work must be carried out from inside the bathroom. The only technical obstacle to internal insulation may be a shift in the dew point: the place where condensation appears from the interaction of steam and cold air. The solution in this case is simple: use a vapor-proof material.
There are many positive aspects from carrying out insulation work:
- the bathroom will finally always be warm;
- insulation will hide construction defects and uneven walls;
- “along the way” you can hide communications;
- as the temperature in the bathroom rises, the entire apartment will become warmer;
- with a successful “rehearsal” in the bathroom, you can start insulating the apartment as a whole;
- Doing the work yourself will not only increase your inner self-esteem, but will also save significant money.
Materials for thermal insulation of rooms with high humidity
Laying mineral wool on a metal frame
First of all, let's focus on the choice of materials.
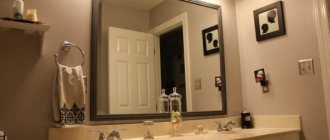
Since the bathroom is a room with high humidity, the materials for cladding must have certain technical characteristics:
- Low water permeability;
- Strength and durability;
- The finish should be easy to clean with any, even aggressive detergents;
- The vapor permeability of the finish should ensure free circulation of air under the skin;
- The lining in the bathrooms, as required by the instructions, is made from materials that are not susceptible to fungus and mold.
Floors: insulation for comfort
In apartments, bathroom floor insulation is rarely carried out in order to increase the air temperature. The floors in the apartment cannot be cold because they are located above heated rooms. Insulation of bathroom floors with electric or water heating is carried out to increase comfort; it is necessary to lay a waterproofing film under them.
Installing additional coverage on bathroom floors is not always advisable; this leads to the creation of a load on the floors and additional door thresholds appear.
Technology for installing ceiling insulation in a bathroom
Steam and waterproofing of the ceiling in the bathroom is carried out in several stages. Before installing the vapor barrier, all gaps and cracks in the ceiling are sealed. Any composition for working with wood is suitable for these purposes. After this, all wooden structures are treated with an antiseptic primer. Further work is carried out after the primer composition has completely dried.
It is better to work with three people - two lift the strip of material to the ceiling, and the third secures it. The insulating material is pre-cut into strips, the length of which is 200-300 mm greater than the width or length of the ceiling. This is necessary in order to install vapor barrier material on the walls, as required by technology.
The vapor barrier is attached with the strips overlapping by 15 cm. For fixation to the ceiling, a construction stapler is used. All joints are taped with tape. To avoid damaging the material, secure it through strips of thick paper. After installing the vapor barrier membrane, it is pressed tightly against the beams using sheathing slats. These can be wooden or metal profiles depending on the type of finishing.
At the last stage, we seal all joints connecting the vapor barrier product to the wall surface. This stage should not be neglected, because the effectiveness of the vapor barrier depends on the quality of sealing of all joints and junction points.
Selection of material for insulation: main characteristics, installation methods
The material for thermal insulation should be selected according to its main characteristics:
- minimal vapor permeability - to keep the walls dry;
- thermal conductivity should also be minimal;
- flammability class of insulation and cladding – G 1;
- the material must not contain or release toxic substances ;
- An important indicator in many cases is the speed of installation of insulation and its cladding, the availability of technology for carrying out insulation work independently.
Let's sum it up
We employ professionals who thoroughly know the nuances of this work. We will choose the optimal method of insulation, taking into account the design features of your home, select a good insulation material, and carry out quick and high-quality installation. You can completely rely on our experience and professionalism.
To contact us, go to the "Contacts" page, there you will find all the necessary information.
Calculate the cost of painting and insulating your home right now
High-quality insulation of premises is impossible without thermal insulation of the ceiling, since about 30% of all heat loss occurs through the ceiling of the room. Before starting thermal insulation work, it is necessary to decide on the choice of thermal insulation material, as well as become familiar with the technology for carrying it out.
What to glue the insulation on
It is difficult to think of applying an insulating layer to a metal surface in any other way than gluing.
The adhesive mass must meet the requirements of operation in a humid environment and constant temperature changes. The best option for gluing is polyurethane foam. According to the calculations of home craftsmen who have already used foam for these purposes, a container with a volume of half a liter should be enough.
How to insulate a metal font with your own hands?
Below are detailed step-by-step instructions for insulating an iron bathtub using foil polyurethane foam (penofol).
For detailed instructions on thermal and sound insulation of a bathtub using polyurethane foam, see our special article.
Step 1. Place the bathtub against the wall or lay it upside down on the floor, after covering it with cardboard or cloth. This is necessary to avoid damage to the enamel.
Step 2. The next step is to degrease the surface. A universal degreaser is perfect for this. But if you don’t have it, it doesn’t matter, you can use alcohol or regular dishwashing detergent. Wipe the entire surface thoroughly and let it dry for 10-15 minutes.
Step 3. If you have insulation in rolls, cut a piece of the required length so that the bowl is covered crosswise from side to side, as shown in the photo. Don't forget to peel off the film from the adhesive layer.
After you have glued the sheet to the bathtub, you need to trim off the excess and once again iron the insulation tightly with your hand so that there are no bubbles.
Step 4. Measure the width of the most even areas and cut strips of 15-25 cm. Then glue them to the bowl in the same way, cutting off the excess.
Step 5. Next, glue the remaining empty spaces with the same small strips.
Don't forget to cut a hole for the drain.
Step 6. Tape the insulation joints with reinforced tape.
Step 7. Remove the insulation from the mounting points of the legs.
Private house: insulation features
Insulating a bathroom in a private house has its own characteristics, but mostly of a positive nature.
The owner of the house decides on which side it is better for him to insulate the house.
The height of an individual house does not require the involvement of a team of climbers. You can work in your own home at night without fear of disturbing your neighbors; there is always a place to store materials; the owner usually knows all the shortcomings and subtleties of building his home.
Insulating a bathroom from the inside in a private house is no different from similar renovations in an apartment.