Correct cable routing
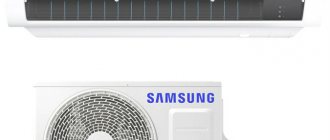
The air conditioner consists of two blocks:
- external, which is mounted outside the premises;
- internal, mounted in a room of a house or apartment.
The household appliance is connected to the electrical wiring of the room using a cable (cord) that runs from the indoor unit of the air conditioner, while the outdoor unit receives power from it.
The cable intended for the electrical connection of the indoor and outdoor units of the air conditioner and the cord for connecting the device to the household electrical network are included in the package with the purchased air conditioner, and the plug socket for connecting the air conditioner is installed independently, in close proximity to the device (namely, to the indoor unit).
If the electrical wiring line for a powerful electrical appliance was provided in advance, the connection should not cause absolutely any difficulties
If such a line was not initially provided, you should pay attention to one of the following connection methods:
- One of the simplest options is to connect an outlet to power the air conditioner directly in the distribution box of the room in which it is planned to be installed. However, this seems possible only in the case when the electrical wiring going from this junction box to the electrical distribution panel of the apartment or house can withstand the load of all devices simultaneously connected to the electrical network, in particular, the air conditioner.
To determine the possibility of a safe connection to a given distribution box, it is necessary to calculate the total load of all available electrical appliances connected to this box, and then compare the indicators with the load capacity of the wiring line through which it receives power directly from the distribution panel of the house or apartment.
- You can use a hidden method to lay a newly installed electrical wiring line. For these purposes, you need to groove the wall, lay a cable, connect it to the junction box, then to the previously installed plug socket and, finally, seal the groove.
- You can also install a new open wiring line from the junction box directly to the air conditioner outlet using a special plastic cable duct.
Tips for correctly connecting electrical wiring to the box
If the distribution box is located at an excessively large distance from the place where the outlet for the air conditioner is planned to be installed, or if there is no outlet in the room, the outlet can also be connected with a cable from any other nearby outlet that supplies a relatively small load and is connected to the electrical wiring line with high load capacity.
When laying the electrical wiring line that powers the outlet for the air conditioner, you must ensure that a highly reliable contact connection is ensured. To connect or branch a cable, specialists most often use reliable, compact and easy-to-install terminal blocks, which are especially relevant when connecting an outlet with a cable.
On the line from which the socket for this household appliance is connected, or on the line supplying it, for additional protection of the electrical wiring, you can install a special residual current device or the simplest circuit breaker in the distribution panel.
When choosing such protective devices, it would be advisable to take into account the actual load of electrical appliances, as well as the permissible load for all electrical wiring elements. All these devices will provide the most reliable protection not only for electrical wiring, but also for household electrical appliances connected to the network.
Location of socket for air conditioner
There are no regulatory documents on the location of the connection point for climate control systems to the electrical network. But you need to take into account the general rules for arranging lines. If this is done at the repair stage, it is necessary to form grooves - they run vertically or horizontally. Diagonal placement is prohibited. An alternative is to install wiring in protective boxes on top of the wall. Relevant for wooden walls.
When choosing where to locate the connection point, you need to consider:
- general design of the room;
- arrangement of furniture and other interior items;
- length of the power cord from the indoor unit.
The latter can be extended. To do this, remove the plug and connect the wire contacts to another using a special sleeve. Be sure to use insulating tape and heat shrink material. This way you can correctly position the connection point with the electrical wiring, regardless of the location of the indoor unit of the air conditioner.
Connecting the split system to an outlet
Most often, when a small air conditioner is purchased for an apartment or house with a completed renovation, the outlet closest to it is used. In this case, there is no point in extending the wire and running it somewhere far. It looks like a cable is extended from the indoor unit to a socket (usually somewhere below), and a plug is installed on it. Sometimes users install an outlet directly next to the indoor unit, which also does not always look good.
But if renovations are being carried out indoors, and you need to provide a power point for the air conditioner, then we recommend that you abandon all plug-sockets and draw a separate line from the electrical panel, regardless of the power of the device. At the same time, install a separate machine on it. In this case, you will not have extra wires and sockets on the walls, and the power cable will be reliably protected. In order to determine the location of the cable connection for the future air conditioner, it is better to contact specialists or look at the recommendations for connecting the power cable. There you will also find the dimensions of the indoor unit, which will also come in handy if you still want to install an outlet near the unit.
It is important to consider: if you do not know which block the power supply will be connected to, then when laying the “route” you must leave an additional cable between the blocks
Rules for connecting to the network
There are different ways to connect air conditioners. You need to select them depending on the network parameters and individual conditions:
- Using a distribution box. The new power point in the room is connected in the distribution box in the same place where the split system will be installed. If you decide to turn on the device through the box, a plug or electrical outlet will not be needed. Difficulties with this option will arise if the total power of the room’s appliances is higher than the network can withstand. The socketless method implies the presence of very reliable contacts for connecting wires using high-quality terminals. Due to a number of inconveniences, this connection method is rarely used; usually a cord with a plug or socket is used to turn on the device. If the distribution box is located far from the future location of the air conditioner, you can connect the outlet using a cable from another electrical point located nearby.
- Hidden way to turn on. Since this technique requires trenching the walls, it makes sense to use it at the stage of apartment renovation. Using a hammer drill, you need to make grooves in the wall and lay the wires in the resulting holes. One end of the wire is connected to the junction box, the other to the electrical outlet. Then all the holes need to be carefully filled, plastered, and finished. The socket is made directly next to the air conditioner; it will be very convenient to turn it on. With the hidden method, the wires are not noticeable at all, the connection is reliable and safe. No external factor can cause problems with the wiring.
- Open method of inclusion. If it is not possible to do hidden wiring, there is only one option left - open wiring. Usually it is performed if the renovation of the premises has already been completed. From the junction box, the cable is laid along the wall directly to the air conditioner. It is run along the baseboard with a cable channel, and a wall cable channel is mounted (this is necessary to give a more aesthetic appearance to the room). If desired, the cable can be secured with small nails without a cable channel.
The air conditioner itself has 2 blocks - external, internal. Experts install the external unit outside the house, the internal unit - in the room. The unit, which is located outside the premises, is powered by the internal one, the latter is connected to the network. Both cords are always included with the device; you need to buy a socket yourself. To connect both blocks do the following:
- remove decorative panels;
- remove terminal protection;
- dismantle the cable clamps;
- insert cables into the intended holes;
- the ends of the cables are cleared of braiding and secured with terminals;
- decorative panels are returned to their original place.
Afterwards, the device can be connected to the network and used. Correct installation and provision of the necessary network parameters are a guarantee of comfortable use of the split system.
Why should you not leave devices unattended?
Electric current passing through metal conductors can have several types of effects on the environment. In residential buildings, the thermal effect of electricity is of greatest importance - the ability to cause heating of the conductor through which current flows. If the metal heats up above the ignition temperature of surrounding materials, it will cause a fire.
A device designed with this action in mind has certain protection against overheating and spontaneous combustion. To cool heating parts, thickened conductors, radiator fins, cooling fans, etc. are used.
However, there are several reasons why overheat protection may not be effective:
- Use of thin conductors, poor-quality soldering, lack of heat-dissipating elements. Such shortcomings are typical for low-quality, cheap equipment from “no-name” manufacturers.
- Decrease in the quality of electrical contacts (oxidation, loosening of clamping screws, etc.).
- Short circuit in the network. In this case, a current flows through the device, the value of which is noticeably greater than the calculated parameters.
- Violations of electrical installation rules. One of the most serious violations is the direct connection (using twists) of aluminum and copper wires. This compound quickly oxidizes and begins to heat up.
Even an electrical device operating normally can heat up. Only timely detection of overheating can prevent a fire. Therefore, leaving a running electrical appliance unattended is dangerous!
Installation of sockets and switches - main points
It is not recommended to independently connect sockets and switches without basic information. At first glance, this is a fairly simple process, but it requires primary knowledge of electrophysics.
Features of preliminary preparation for installation of products during repairs.
- In hard wall surfaces made of concrete or brick, it is necessary to prepare mounting holes with a diameter of no more than 50 mm using a hammer drill or impact drill;
- then you should lay a groove from the shield or from the place of transfer to the place where the box is secured. The groove is performed only at right angles along a line parallel or perpendicular to the floor;
- then the cable is laid in the groove, after which it should be fixed with alabaster. For switches, a cable with a cross-section of 1.5 square is suitable, for sockets - 2.5;
- Terminals should be used to connect wires of different materials (aluminum and copper). From ordinary twisting, the wires can oxidize, which will become an obstacle to the passage of current;
- Before installing the socket, it is necessary to secure the socket box in the mounting hole using alabaster. Alabaster should fill all the voids.
This is the basic preparatory work before installing sockets and switches. It will take some time for the alabaster to completely harden.
Chasing a concrete wall
Related article:
Nuances of installing sockets and switches
Before installation, you need to decide at what height from the floor it would be better to install electrical appliances. Switches should be located at arm's length. The distance to the doorway is about 20 cm.
For sockets, the recommended distance from the floor and from the corner is no more than 40 cm. For installation in the kitchen, it will be convenient to place them 15-25 cm from the surface of the countertop.
Before connecting the wires, it is recommended to strip their ends and solder them with tin. Rosin is also suitable for these purposes. An alternative is to use crimps that are attached to the ends of the cable. After installing the cable ends into the terminals, tighten the screw tightly.
Correct cable connection
Installation of an air conditioner socket
Having decided where the connection point should be and choosing a model, you can begin installation. First, make sure that the power supply is off. For this you need an indicator. The wire cross-section is at least 2 mm. Do not use aluminum wiring; at high power it heats up; do not directly connect to metal elements of electrical circuits. This will lead to oxidation of the contacts. Use copper electrical wires. For wooden walls, only overhead or external models are allowed.
The actual height of the outlet must comply with accepted standards. You need to correctly measure the distance from the floor, ceiling and windows. Use the center as a reference point, not the edges of the outline. When grooved, the depth and width should be 1-2 mm larger than the cable dimensions.
For the work you need a wall chaser, a hammer drill, an attachment for forming a niche in the wall, electrical tape, and heat-shrink tape. When processing concrete or brick surfaces there will be a lot of dust; it is recommended to cover the furniture with film or temporarily remove it from the installation area.
Installation procedure
- Make grooves and a hole.
- Install the wiring.
- Strip the ends of the wires by 0.5-1 cm.
- For hidden models, loosen the fixing screws in the wall mounting hole; for surface-mounted and external models, remove the back cover.
- Secure the cleaned wires (phase, neutral, ground) to the appropriate terminals.
- Check the connection is secure.
- Install the housing into the wall and secure it.
By the way, we recommend a useful article about house plants that you should definitely grow at home to purify the air.
Use an indicator screwdriver to check for electrical continuity. The housing must be securely attached to the wall; even with possible sudden jerks of the plug, it remains in place.
Troubleshooting procedure
All sockets in the apartment do not work
Possible reasons for such a malfunction can be formulated as follows:
- there is no general power supply to the apartment;
- there is a malfunction in the input distribution panel;
- All sockets in the apartment are powered from the panel from one group, the wiring of which was damaged or de-energized.
The general absence of tension is easily determined. If the input circuit breaker is turned on, the outgoing circuit breakers are also turned on, but the electrical appliances in the apartment do not work (including in the kitchen), and there is no light in any room, which means there is no power at all. We are finally convinced of this by checking with an indicator the presence of voltage at the input circuit breaker.
If there is voltage at the input terminal of the machine and there is no voltage at the output terminal, turn off and turn on the machine again. If nothing has changed, the switch is faulty and must be replaced.
In the same way we check all outgoing switches. Among them we find the one from which the socket group is powered. If voltage is supplied to the line, but the socket group does not work, you should look for a broken wire. Power supply to the socket group can be provided through distribution boxes or via a cable. In the first option, you need to open the first box from the panel and ring the wires to determine the location of the wire break. In the second option, the socket closest to the panel is opened, the wires coming from the panel are disconnected.
Sockets do not work in one or two rooms
If a distribution panel is installed that has an input circuit breaker and several outgoing circuit breakers, we try to determine which of the circuit breakers supplies the section of the wiring where the sockets do not work. Most often, socket and lighting wiring in one room or two rooms are combined into one group, powered by one machine. Sometimes sockets are installed on the same wall in different rooms. We check whether all machines are turned on; if so, we check the presence of voltage at the input and output of the machines. If there is a disabled machine, we turn it on. If the lowered toggle switch in the panel does not rise, there may be two reasons:
- the mechanical drive of the machine is faulty and the device must be replaced;
- The circuit breaker has just been tripped by the protection and the thermal release has not yet cooled down.
In the first case, you need to purchase a machine of the required rating and replace the faulty one with it. In the second case, we look for the location of the damage. Since the wiring in modern apartments is hidden, access to the wires is possible only in panels, junction boxes (if they are installed and not walled in the wall) and in the sockets themselves.
Armed with a multimeter, we measure the resistance between the phase and neutral wires of the found group, of course, turning off the voltage. We make this measurement from the input panel. When detected, we try to trace the route of the electrical wiring group that interests us. You need to find a junction box that has two wires coming into it, indicating a short circuit. If the box found has a lid, open it, remove the insulation from the twists, disconnect the wires and release the pair that showed a short circuit. We measure the resistance of this pair towards the input panel. A resistance close to zero means that the damage is located in the wiring section between the input panel and the junction box. If it is not possible to remove the wires, all that remains is to lay new wiring in this area.
Damage to hidden wiring rarely occurs on its own. There are often situations when a wiring fault is discovered after repair. When drilling holes in walls, for example to hang a cabinet or shelf, the wiring or its insulation may be damaged. To prevent this from happening in the future, we recommend that you read our advice on how to do this.
A short circuit can occur after the electrical wiring is flooded, when heating or water supply pipes break, or after a flood in the bathroom of the upstairs neighbors. The wiring insulation may have minor defects that do not appear while the wires are dry. When moistened, cement dust with water forms a conductive medium, resulting in a short circuit, insulation burnout and sintering of wires together.
Problems with one outlet
If one outlet in the room does not work, one of the reasons may be a weakening of the contact, as a result of which the wire may simply fall off. In this case, troubleshooting comes down to the fact that you need to remove the socket from the groove and check its connection. The video below clearly demonstrates the repair technology:
Heating in modern country houses
The principle of organizing a dacha heating system, thought out at the stage of designing a house, is no different from the heating systems of cottages and residential buildings. The decisive point is the presence of heating mains. But, as a rule, they are not. The second difference is the implementation of an economical, periodically used heating option, rather than a daily operating one.
To do this, any system must provide: rapid heating of the room of the required area, drainage of water from the pipeline during water heating and have high power for effective heating of houses with low thermal insulation properties.
The heating system in the country begins with the installation of the selected type of boiler and piping the house. It is better to entrust such necessary work as preparing the premises for the boiler room, organizing the devices necessary for ventilation of solid-state boilers, installing the pipeline, starting and testing to experienced specialists. The boiler can be electric, diesel, solid-state and gas.
There are hybrid boiler models that use solid fuel and electricity to operate. Their cost is much higher and they are not always profitable for a dacha where they do not live permanently in the winter. A wood-burning boiler is the easiest to withstand temperature changes in winter.
It also falls into the category of economical options. The convection type of wood boiler is the most common. It has a low noise level, which makes it possible to install it in basements. A large selection of modern boiler models makes it possible to increasingly use water heating.
When building a large dacha, it is the best heating option. Its essence lies in the possibility of constant circulation of water heated to the desired temperature through pipes to the batteries located in the house and back. To lay the pipeline, pipes made of metal, polypropylene or metal-plastic are most often used. They can be used for many decades only if properly preserved for the winter.
Another problem is the timely replacement of water filters, in the absence of which, the pipes quickly become clogged with various deposits of impurities contained in the water. Not only water, but also saline solution, glycerin, and propylene glycol can be used as a coolant.
Each of them has its own advantages and disadvantages. Glycerin, for example, does not harden and retains its fluid properties even at temperatures of 30° below zero, which prevents pipes from bursting. It's very expensive. Propylene glycol is not toxic, but its specific heat capacity is worse than the harmful ethylene glycol. In connection with the growing volume of construction of dachas from modern materials, it is most appropriate to involve experienced specialists in the implementation of your own heating system.
To keep your dacha warm in winter, you must choose one of the heating options. In this case, early insulation of the house is a very important point. Otherwise, efficiency sharply decreases and energy consumption increases. And it will be difficult to stay warm.
Practical recommendations for organizing heating in the video:
Requirements
The electrical connection diagram for an air conditioner intended for domestic use has significant differences from the installation procedure for devices for industrial and semi-industrial use. The latter are connected to a three-phase network. Household ones operate on single-phase.
Connecting the air conditioner to the electrical network is done in two main ways:
- By direct connection to the power supply system via an outlet;
- By laying a dedicated line to the electrical panel.
For household air conditioners, the latter method is practically not used. They are usually connected via a socket. Before this, a number of preparatory work is carried out in compliance with the Installation Rules and a number of other regulatory documents. To avoid mistakes, it is worth figuring out how to connect the air conditioner to the electrical network using the chosen method so that the equipment lasts long enough.
Installing an outlet
Before purchasing a socket, you should remember two rules:
- The parameters of the outlet and the requirements specified in the air conditioner passport must match each other's characteristics.
- The connection is made only through an automatic device - a protective connection device.
It is recommended to purchase Euro sockets, because... they are highly reliable when connecting powerful devices to them. There is no need to do the initial installation yourself; it is better to entrust it to service specialists.
You can check the voltage using a multimeter.
Basic safety rules when working with electricity should be taken into account:
- after disconnecting the network, you should use a special tool to check the absence of current - a voltage indicator will do;
- tool handles must be covered with insulating material;
- you should warn relatives and neighbors that the electricity will be turned off for a while, otherwise it may be activated without the knowledge of the person installing the network.
Installation of SPLIT systems
In the air conditioning industry, one of the most commonly used types is split air conditioners. These systems consist of two separate parts: an outdoor unit and an indoor unit, which are connected to each other using copper piping to form a closed circuit. Currently, most manufacturers offer split air conditioners that can operate in cooling or heating mode. The heating process is carried out by a heat pump by changing the cycle. To ensure the design operating mode, it is necessary to follow the rules for installing the outdoor unit of the air conditioner and select the correct power.
Assembly of split air conditioners.
Select the desired location for installing indoor and outdoor units. When choosing a location, you need to ensure uniform air distribution in the room and ease of use of the system. Excessive drafts should not be allowed in areas where people are constantly present. When installing the indoor unit, you should consider access to the device for the purpose of cleaning filters and disinfecting the evaporator. After choosing the correct installation location, the indoor unit is first assembled. It is mounted on the frame, marking the center position, leveling and securing the structure. Then a hole with a diameter of 65 mm is made in the wall so that it is covered by the indoor unit, through which the installation of pipes, electrical and condensate drainage will be carried out. The hole is made with a slight slope from the outside. It is recommended to install a protective sleeve in the hole, and on the side of the outer wall - a socket that covers it and increases the aesthetics of the installation. Draining condensate from the indoor unit should always be done naturally, if possible, ensuring a pipe slope of approximately 3%. The condensate pump solution should only be considered as a last resort. The pump is a mechanical part that serves to discharge condensate and increases the reliability of the air conditioning system. After installing the condensate drain system, you need to check its permeability by pumping about 2 liters of water through the drain into the drip tray. If the air conditioner operates year-round, a heating cable must be installed in the drain pipe. Before hanging the indoor unit on a rack mounted on the wall, you must connect a cooling unit to it
The connection must be made as a screw connection, so special care must be taken to ensure that the refrigeration system is secure and sealed. When tightening screw connections, you must use a paste on the outer surface of the socket that prevents the nuts from self-twisting. It is necessary to insulate the pipe connections on the indoor unit, which will prevent moisture condensation on the outer surface of the pipes and the formation of streaks on the wall below the indoor unit
The outdoor unit is installed on an L-type support structure. The device must be installed at a safe distance from the wall to ensure free air flow through the condenser for subsequent maintenance and cleaning
It is necessary to insulate the piping connections on the indoor unit to prevent moisture from condensing on the outer surface of the pipes and causing streaks on the wall below the indoor unit. The outdoor unit is installed on an L-type support structure. The device must be installed at a safe distance from the wall to ensure free air flow through the condenser for subsequent maintenance and cleaning.
Preparing to install an air conditioner
Before you begin installing an air conditioner outlet, you need to consider various options for connecting the cooling system:
- the connection point is connected directly to the junction box. In this situation, they do without a socket and plug. But with this connection method, it should be taken into account that the electrical wiring used must withstand the load during the simultaneous operation of all household devices connected to it. The distribution panel is additionally equipped with a system that controls automatic shutdown in case of overload;
- If an air conditioning device is installed during general repair work, a closed structure is most often used during installation. A special channel is installed in the wall. It houses the cable. One end is connected to the distribution panel, and the other is secured to the outlet terminal. At the final stage, the channel is sealed. At the same time, the interior of the room does not deteriorate. The wiring is not influenced by external negative factors;
- Installation of the socket under the air conditioner can be done in an open way. This method is used if the repairs have already been completed and residents do not want to further damage the wall. One of the ends of the wiring is connected to the junction box. A socket is connected to the other end. The cable is located on the surface of the wall covering. It is placed in a decorative box.
When can't an air conditioner be plugged into a power outlet?
Climate control equipment can be connected to the household network both in an apartment and in a country house, but for this certain conditions must be met. Otherwise, there is a risk of an emergency.
Thus, it is prohibited to connect air conditioners to a power outlet if:
- no good grounding;
- the electrical wiring is in poor condition (for example, the room has only old-style aluminum wiring, which will not be able to withstand the load from the air conditioner);
- there are no devices that equalize voltage drops (this is especially dangerous in houses with wooden floors);
- the cable has insufficient cross-section for connection, etc.
Climate control equipment requires proper electrical wiring. It is sensitive to voltage changes and may become unusable if there are any problems on the power line.
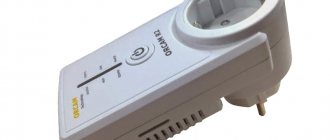
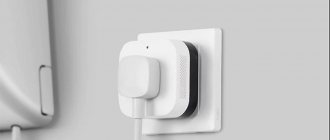
Before installing and connecting a household air conditioner to the network, you need to check the operation of the electrical outlet using a special tester
You can check the functionality of the outlet at home. To do this, you just need to buy a tester and read its instructions.
Air conditioner socket
Today we’ll talk about whether an air conditioner needs an outlet and how it connects to the power grid.
Most household air conditioners are wall-mounted split systems that operate from the mains. In order to be able to “de-energize” it, it must be connected through an outlet or circuit breaker. If the device is of a non-inverter type and its cooling capacity is up to 4 kW (“seven”, “nine”, “twelfth”), then it can be plugged into an outlet. In fact, you can connect inverter air conditioners up to 4 kW through it, but it is advisable to observe the phasing.
The most common installation errors
Installation is not easy, and even complete compliance with the installation instructions for an air conditioner is not enough for the unit to work properly. Errors in assembling air conditioners are:
- Poor location of the indoor unit.
- Incorrect connection of the factory section installed in the device with the rest of the system. This violation can lead to leaks and losses of refrigerant.
- Weak fastening of the external unit of the air conditioner.
- Incorrect connection of the unit to the external unit, which may result in leakage and loss of refrigerant.
- Unintentional pinching of copper piping when bending the installation. It should be remembered that the copper pipe must be correctly bent with a right bend angle. Otherwise, it is flattened, and the refraction of the cross-section leads to restricted refrigerant flow and improper operation.
- Inappropriate length or installation height, lack of bracket for the outdoor unit of the air conditioner.
- Incorrect routing of condensate unit.
- Incorrect connection of the drain to the sewer system, for example, the absence of a siphon, the connection directly creates foul odors coming out of the air conditioner.
- Incorrect choice of device cooling power. The norm is 1 kW per 10 m2 - in homes, offices and other institutions, which will significantly increase the cost of installing an air conditioner.
- Installation of a condenser without shock-absorbing washers, which leads to the transfer of vibrations from the device to the building.
- There is a pressure problem in the system after the refrigerant is released and the air conditioner is turned on.
Unprofessional installation carries a high risk. The subsequent trouble-free operation depends on the diligence and precision of the assembly performed before installing the air conditioner in the apartment. It is worth remembering that even the most advanced device will not work for long if the assembly is done carelessly and in violation of basic rules.
Do-it-yourself connection and connection of air conditioner interconnect cables
After installing the air conditioner, it is necessary to lay an inter-unit cable from the indoor unit to the outdoor one, and stretch another wire from the indoor unit to the electrical system terminals. The interblock cable is mainly used with 4-5 cores of different colors to prevent errors in connecting both blocks. The cross section is selected 2.5 mm 2.
The essence of the connection in general terms is as follows:
- remove the front panel and the protective cover of the unit;
- stretch the cable and place it on the side of the module;
- strip the ends of the wires, insert into the terminals and tighten with screws;
- fix the cable at the outlet of the unit;
- close the module with the lid.
After connecting both units, you should carefully check that the work was done correctly. Next comes testing of the assembled circuit and a short-term start-up of the system.
Otherwise, the connection diagram for the air conditioner to the household electrical network is individual for each model, as is the case with powerful three-phase split systems. In this regard, connection details should be specified in the attached instructions.
Selecting operating temperature
After connecting the refrigerator to the mains, you should not immediately fill it with food. It is better to give him time to adapt to the temperature regime. Typically, the refrigerator operating cycle consists of 10 minutes of operation and 20-30 minutes of rest. In order for the refrigerator to start normal operation, at least three cycles must pass from the first start. Some models may take up to three days to become operational.
Depending on the model, the cooling mode may vary. It is recommended to first set the temperature inside the refrigerator to +5 degrees and check the condition of the food. If you find that they are spoiling quickly, the temperature should be reduced.
When setting the optimal mode in the freezer, it should be taken into account that the temperature in it should not be above zero. For long-term storage of products, modern manufacturers recommend a temperature of no lower than -30 degrees, but in practice -20 is usually sufficient. Moreover, the reproduction of microbes stops already at -18 degrees.
The temperature inside the refrigerator can be adjusted using a mechanical thermostat. In this case, the temperature is adjusted by turning the control knob from 1 to 7 or according to the scale drawing to o or “colder”. “1” on the scale corresponds to the highest operating temperature, and “7” or “max” corresponds to the lowest.
Modern refrigerators are often equipped with an electronic temperature setting method. For this purpose, there is a control panel on the door of the unit. The required temperature mode is selected by simply pressing a button. The most advanced models are equipped with touch control panels.
Electronically controlled refrigerators use special sensors - thermistors - instead of thermostats. They are installed on the evaporator, in the refrigerator and freezer compartments, and even on the ice maker, if such an option is present. The sensor readings are sent to the electronic control board and, after processing, serve as a signal to turn the compressor on or off. The electronic control method provides finer and more precise adjustment of the refrigerator’s operating modes.
Air conditioners for a one-room apartment
Many buyers are often confused about the possibility of high-quality cooling/heating of both the room and the kitchen with one indoor unit. Even when placing the device in the hallway, which is equidistant from other rooms, the coolness or heat will not flow there enough. When the stove or oven is turned on, the coolness will instantly go away, but in the hallway it will always be very cold.
An air conditioner with increased power is also not a solution, since it will often operate in stop-start mode, and this renders the main part of the system unusable - the compressor.
Then how to install an air conditioner in a one-room apartment and which type should you prefer? There are three options here:
- installation of two split systems separately in the kitchen and room;
- installation of a multi-split system with one external and two internal units;
- installation of a duct air conditioner (in a one-room apartment, a low-pressure model is sufficient).
The only disadvantage of the first option is the presence of two external modules on the facade of the building. Installing a ducted air conditioning system is quite acceptable, but it will cost much more. In addition, you will have to pull out air ducts, install them in a false mezzanine or wall, and most importantly, this can only be done in apartments with high ceilings.
With a ducted air conditioner, such a nuisance may arise as the spread of kitchen aromas throughout the apartment, because the air duct system connected to all rooms will mix the air taken from them and then distribute it to all zones. This air conditioner is ideal for several rooms in an apartment.
If funds are very limited, then you can install one wall-mounted split system, but in such a way as to cover all the rooms as much as possible. In an apartment with zones arranged as in the picture, usually the best option for installing an air conditioner is above the doorway in the room. The air will be reflected from the opposite wall and enter the corridor and kitchen in 30% of the volume of the total air masses circulating throughout the apartment.
As an option, install the block opposite the opening. But in this case, only 30-40% of the cooled/heated air will remain in the room, and 60-70% will disperse to other zones. This arrangement of the air conditioner is more suitable for a small room, where the temperature change is felt much faster and the flow divergence is better.
You should not buy a window air conditioner for a small room. Even modern models make noticeable noise, which is unacceptable for a sleeping area. It is better to choose an air conditioner for a small room with less power. Appliances up to 2-2.5 kW are hung in a room with an area of up to 15 m².
A window monoblock can replace a split system in the kitchen. It works properly in areas up to 15-18 m². But you will have to find a special place to collect splashing condensate, because under the window there may be a walking path or a recreation area.
Sometimes the question arises of the correct placement of an air conditioner in a room with an adjacent balcony. There are no deviations from the rules in the installation of the indoor unit. It is recommended to hang the outdoor module on the facade or on the side of the balcony/loggia. The option of mounting inside is possible, but only if there is no glazing. An elongated route is laid between the blocks, which passes through the balcony onto the street at a slope.
Electrical layout in different rooms
Recommendations for installing sockets in rooms (kitchen, bedroom, bathroom) may differ from each other. This is due to the level of humidity, the number of household appliances connected to the electrical network, and fire safety standards.
Electrical wiring in kitchens
There are no exact instructions for the location of electrical connection points and sockets in the kitchen, but recommendations have been compiled based on the operating characteristics of a given room and the possible number of connections for household appliances. Thus, the PES requirements state:
- Switches and plug sockets are located at a distance of 60 cm from the door, the same requirements apply to the kitchen sink;
- The distance to the gas pipeline is from 50 cm.
They also provide a number of tips on the location of electrical connection points for various kitchen appliances and household appliances:
- To connect a dishwasher or refrigerator, choose a height of 10–20 cm from the floor. There are models of equipment where the manufacturers have installed a short wire for connection; they make separate “power” points at a height of 0.5 m.
- Small-sized electrical appliances: microwave, toaster, multicooker, blender and others are connected to sockets installed 20 cm up from the countertop or 110 cm from the floor covering.
- For the hood, it is recommended to make a separate connection point to the electrical network, 2 m away from the floor. At the same time, there should be at least 20 cm from the middle of the device to the outlet, which is necessary for ventilation.
- If built-in household appliances are involved in the kitchen layout, then to “power” them, separate sockets are made behind the cabinets for convenient and permanent connection of appliances. It is recommended to install them from 30 to 60 cm from the floor and make sure that the connected cable is not pinched by furniture.
- To connect lighting under shelves and cabinets in the kitchen, use sockets mounted above the furniture at a distance of 5–10 cm. The switches are brought to a height convenient for users.
To calculate power, indicators are taken from the technical data sheet of household appliances or average indicators:
- the oven and hob have their own sockets with a current of 32 to 40 A;
- a separate line is needed for a heating element with a power of 3.5 W or more;
- For a refrigerator, microwave or toaster, a regular 16 A socket will do.
Such recommendations will help you correctly draw up a project and distribute sockets. The switch for general light in the kitchen is placed on the wall at a user-friendly distance from the floor (from 60 to 90 cm).
Nuances of location in the bathroom
The main requirement when choosing the height of sockets in the bathroom is protection from water penetration. To do this, you need to choose a model with an RCD - a special splash guard. There are several recommendations for connecting electrical appliances:
- for a washing machine, a height of 1 m is maintained;
- for water heating devices - at least 180 cm;
- If it is necessary to turn on additional appliances, another socket is mounted near the sink at a height of 110 cm.
The general light switch for the entire room is located outside the bathroom and is installed at a convenient height for operation.
How to conduct current in the bedroom or living room
The installation height of electrical connection points in bedrooms and living rooms is not regulated. These rooms do not have points of contact with the gas pipeline or high humidity, but there are several general recommendations for the location of entry points into the power line:
- the average height of sockets from the floor is 70 cm;
- auxiliary sockets near the table are mounted at a level of 0.3 m from the floor covering, where a block of 2–3 sockets is made;
- behind TVs or other household appliances, “power” points are installed at a height of 1.3 m from the floor surface, and additional Internet sockets are also installed there.
There is one switch at the entrance to the room at a height of 90 cm from the side of the door handle.
Installation of sockets in the corridor of apartments and private houses is optional. At the discretion of the premises owners, install one or two entry points into the power lines to connect a vacuum cleaner or telephone sets.
Do I need a circuit breaker or RCD?
Protection of electrical communications in buildings from short circuits and overloads is carried out by automatic switches. Safety for human health and life from possible current leakage is ensured by a residual current device (RCD). This low-voltage device is not protected from overcurrents, so it is installed together with the machine. There are also differential circuit breakers, which include an RCD and an automatic circuit breaker.
What is more rational to install: a difavtomat or an RCD with a machine? So, the differential switch will take two module spaces on the panel (more expensive ones will take one), and the RCD and the circuit breaker will take three. To save space on the distribution panel, preference is certainly given to a circuit breaker.
As for electrical installation work, it is somewhat easier to install a difavtomat than to link a pair of RCDs plus an automaton.
It is more convenient to diagnose problems in electrical networks with an RCD. In this case, each of the devices operates independently of each other. The differential switch will not be able to identify the specific cause of the failure, since it shows the diagnosis without triggering the modules. Here we have to analyze each diagnosis separately.
If we talk about repairs, then in a pair of RCDs and a circuit breaker, one failed element is replaced. This is much more economical than changing the automatic transmission completely.
Installing an RCD with a circuit breaker will be 1000 rubles cheaper than a differential circuit breaker. However, experts advise that when laying one line, choose the second option, which, along with reliability, saves space on the panel. The socket for a medium-power household air conditioner is also installed with an automatic switch.
When connecting several air conditioners or other household appliances, the advantage is on the side of the RCD, which serves 2-3 lines simultaneously.
Connecting the split system to the network must be carried out carefully and accurately. If you are not confident in your knowledge of electrical engineering and have sufficient experience, you should seek the help of professionals.
Pocket warmers for smartphones
A budget option for reusable heating devices for those who do not need long-term heat. Inside these small inserts there is a gel, which, after activation, can give off heat for about 20 minutes. However, after each use it will have to be kept in boiling water for 5 minutes - which is not very convenient. But these stylish liners can warm not only your hands. Users share their life hacks: in severe frost, they put them in their pocket with their smartphone - and the battery does not die from the low temperature. Some of the models can also, if necessary, be used as “coolers” in the heat - after cooling in the refrigerator, The most popular models of gel heating pads: For Pro Hand and Body Warmers, Hotsy!
and
Hand Warmers - HotSnapZ Reusable Round & Pocket Warmers.
conclusions
As practice shows, the main cause of problems with a refrigerator is often its incorrect installation and connection to the electrical network. That is why it is better to entrust the installation process to a specialist, especially if you have purchased an expensive unit equipped with a large number of modern functions. The key to its successful operation is also the use of a voltage stabilizer or relay. These devices will be able to reliably protect your home appliances from such unpleasant phenomena as power surges.