Installation height of inclined hood above the stove
Recently, inclined hoods have become widespread. They are the most aesthetically pleasing and fit better into modern interior styles. For them, the installation height is slightly less:
- for gas stoves - 55-65 cm,
- for electric and induction cookers - 35-45 cm.
Why is it important to adhere to installation heights?
It is extremely important to install the hood at the height recommended by the manufacturer - only in this case will it work for a long time and perfectly clean the air from smoke and drops of fat formed during cooking.
Installation at the lowest height can lead to a fire, interfere with cooking and is not aesthetically pleasing.
A very large height will not allow you to capture all the contaminants entering the air, and the efficiency of the hood will decrease.
Installing a socket for a hood
The placement of the socket where it will be connected depends on the installation height of the hood above the stove. Traditionally, the socket is mounted directly above the hood. A good option is to fix the rosette approximately 10-30 cm above the strip of hanging slate. At the same time, do not forget to move the hole for the rosette 20 cm away from the axis of symmetry of the hood, since the exhaust duct runs through the center.
Why is it most convenient to make a socket for a range hood at a height of 110cm?
This installation height was not just taken “from the ceiling”; below I will give calculations that confirm its correctness.
First of all, you should determine the installation height of the hood. There are a lot of opinions on this matter, but we will build on the values recommended by kitchen hood manufacturers; they consider this arrangement to be the optimal value between the efficiency of the device and the ease of use of the hob.
For electric stoves or hobs – 65cm
For gas stoves and hobs – 75cm
The height of the hoods themselves can be different and on average is: 15-30cm
In this case, through simple calculations, it turns out:
75cm (height from the countertop to the hood) + 30cm (size of the tallest hood) + 5cm (reserve for half the height of the socket) = 110 cm – this is the installation height of the socket from the countertop.
The height from the floor will be different, on average you need to add another 80cm (the minimum height from the floor to the top of the kitchen countertop), accordingly it turns out that the height of the outlet for the hood from the floor is 190cm.
The width of the decorative casing of a kitchen hood, depending on the model, may be different, so it is better not to take risks and not to displace the socket from the installation axis of the stove or hob - do it right in the center.
For clarity, let's look at the basic configurations of kitchen units and how a socket at a height of 110 cm from the countertop fits into them for the hood.
Connecting an electrical outlet
The socket is connected after all preliminary work has been completed:
- cable installed;
- the location where to install has been determined;
- installation of sub-socket boxes (mounting installation boxes);
- devices with the required level of IP protection were purchased.
Once all these steps have been completed, you can proceed with the actual installation.
The connection looks like this step by step.
- Turn off the circuit breaker (circuit breaker) in the panel. Despite the fact that this work is not difficult, one should not ignore such an aspect as safety.
- Check that there is no voltage. Before removing the front panel and touching the stripped wires and contacts with your hands, you must make sure that there is no voltage. This can be done with a simple electrical voltage indicator, multimeter or tester.
- Strip the wire. Before connecting, you need to prepare the wire peeking out of the glass. If the installed electrical cable or wire has double insulation, then 15-20 centimeters of outer insulation are removed from it. After which it will become more pliable for connection. If paired wiring with single insulation is carried out, then it is necessary to separate the cores by 5-10 centimeters.
- Connect a new outlet. First you need to connect the lead wire to the contacts. To do this, approximately 5-10 millimeters of insulation is removed from the current-carrying cable cores. The exposed part of the cable is inserted into the terminal and firmly fixed with a screw. When tightening the screw, do not use incredible force, otherwise the cable may be pinched. If grounded outlets are connected, the grounding conductor is connected to the proper terminal (grounding terminal). This contact is connected to the grounding “whiskers”. Before connecting the grounding conductor of the cable, you must make sure that this conductor is the “ground”.
- Place the socket in the installation box. After connecting all the supply wires, you should place the working part (conductive elements) of the socket in the installation box. It must be mounted evenly, without distortion, flush with the wall. The supply wires are carefully hidden in the installation box. After placing the socket in the required position, it must be securely fixed. For this purpose, it is equipped with specialized clamping “feet” (or fastening antennae) with screws. When screwing in the screws, the fastening antennae diverge, thereby securing the socket. New generation electrical sockets do not have fastening lugs. They are secured with screws located in the installation box.
- Screw on the front panel. After installing the conductive elements, you can screw on the front panel.
To learn how to properly connect a hood in the kitchen, watch the following video.
Installation and connection rules
The outlet for the hood is installed only after the entire range of preliminary work has been carried out. These include the following:
- cable management;
- marking the installation site;
- installation of electrical outlet boxes.
After all this, you can begin installation. The whole process can be described as follows:
- Turn off the power by turning off the circuit breaker at the electrical panel. Although installing an outlet cannot be called difficult, it is best to be on the safe side and completely cut off the power in the kitchen.
- Make sure there is no voltage. This should be done before removing the front panel. The test can be carried out with a tester, a multimeter, or even a simple voltage indicator. After this, you can safely touch the exposed wires and contacts.
- The wire must be stripped. If it has double insulation, then it is necessary to remove it by at least fifteen centimeters, or even more. This way you can achieve the greatest reliability when connecting wires. And if the insulation is single, then it is enough to expose the wire five to ten centimeters from the edge, not forgetting to separate the wires.
- The next stage is the most important - connecting to the electrical network. The first step is to ensure the connection of wires and contacts. The exposed part of the wire is inserted into the terminal and then secured with screws. There is no need to tighten it too much - just ensure that the wire is securely fastened.
- The grounding conductor must be connected to the appropriate grounding pin on the outlet. You should make sure that the connection is correct - the alignment of the core and the contact.
- The socket can now be inserted into the installation box. But first you need to make sure that all supply wires are securely fastened in the appropriate contacts. During installation, it is necessary to ensure that there is no distortion relative to the wall. The wires must be securely hidden in the installation box.
- Once the socket is accurately positioned in the desired position, you can begin to fix it. It is secured with special clamping tendrils. These elements are equipped with screws; when tightened, the tendrils diverge, securely securing the socket in the socket. However, this type of fastening is somewhat outdated and can no longer be found in modern models. New models are directly fixed with screws, which are placed in the installation box.
- All that remains is to screw on the front panel, and the installation will be completely completed. But you should make sure that all the wires are hidden, and the socket itself is securely fastened and not skewed.
Which cable to choose for the kitchen
Next, you need to calculate the cross-section of the common supply wire of the electrical panel and the outgoing wiring to each pantograph.
Here, follow the rules: for device loads up to 3.5 kW - copper cable VVGng-Ls 3 * 2.5 mm2
for device loads up to 5.5 kW - copper cable VVGng-Ls 3*4mm2
with a total load of all devices up to 10 kW - copper cable VVGng-Ls 3*6mm2
with a total load of all devices up to 15 kW - copper cable VVGng-Ls 3*10mm2
Why there should be a brand VVGnG-Ls is discussed in detail in the article below:
Even if you have a house with an old grounding system (without a third protective conductor), still do the wiring with a 3-core cable. This will save you in the future from additional costs for reconstruction and replacement of wires.
As a last resort, the third wire will be a backup for zero or phase, in case of a possible break or other damage.
Installation methods
Socket for pendant hood
There are several options for installing an outlet under a kitchen hood. They are distinguished according to the following criteria:
- for built-in modifications of exhaust devices;
- for samples of suspended hoods;
- if possible, install the socket in a protective casing.
In the first case, the socket for the built-in hood is most conveniently located inside the wall cabinet itself. For hanging models, the area above the top panel, located near the air duct, is optimal. In this case, the power cord is securely hidden behind the structure and does not spoil the overall appearance of the kitchen. The last of the proposed options is good in itself, since the outlet is securely hidden, its location does not violate any of the requirements of current standards.
Where to make a socket for the hood?
When planning electrical wiring in the kitchen, many people ask the question: “Where should I make a socket for the hood?”, and this is correct, because if the location is wrong, the socket can interfere with the installation of kitchen units or equipment, the operation of the hood, and in addition, ruin the interior of the kitchen with hanging wires.
In this article I will tell you where the best place to place an outlet for almost any hood is, in addition, I will describe some standards, options and installation features.
Selecting an electrical outlet and cable
It is worth paying close attention to the outlet itself:
- The manufacturing material must be resistant to high temperatures. The best solution would be to take an expensive device made of heat-resistant plastic that can withstand accidental heating. Cheap ones will quickly turn yellow and darken;
- there should be no play in all connections;
- the holes for the plug must be protected by sliding curtains;
- The last thing you should think about is how the outlet will fit into the design. But you shouldn’t forget about it!
The cable also needs to be chosen carefully. You need to find out what the power of the kitchen hood is, and then select the appropriate cable for it.
It is quite possible that in the future not only the hood will be connected to this point, so it is important to take this into account. Modern devices have a power from 100 to 400 watts, and the current does not exceed 2 amperes
If you take a cable with a cross-section of one and a half squares, then it will be enough not only for the hood, but also for another electrical appliance, but not very powerful
Modern devices have a power from 100 to 400 watts, and the current does not exceed 2 amperes. If you take a cable with a cross-section of one and a half squares, then it will be enough not only for the hood, but also for another electrical appliance, but not very powerful.
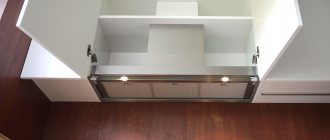
How to install (fix) a flat kitchen hood?
A flat, or as it is also called, a suspended hood usually does not have an air duct, but is equipped with a filter for air purification.
By the way, any model of hood can be started in recirculation mode (air purification with a built-in filter) or in air exhaust mode, depending on your desire and capabilities.
It should be remembered that filters need to be changed at least twice a year.
The installation of the hanging hood itself is very simple. The exhaust device has a special mount; you just need to transfer marks to the wall, the distances between which will correspond to the holes on the mount.
All that remains is to drill the wall, hammer in the dowels and attach the awnings with a screwdriver or screwdriver. We attach the exhaust device to them and connect it to the network.
Choosing a place for an outlet for a hood: rules and standards
When the outlet has already been selected and purchased, you need to choose where to place it.
The main rules for choosing a place for sockets for the hood:
- You need to decide exactly where and at what height the hood will hang (probably the most important rule). This is necessary so that when choosing a place for an outlet, you can comply with other rules and restrictions (distances to pieces of furniture).
- The minimum distance from the power supply point to the kitchen furniture (countertops, cabinets, shelves) is 5 cm.
- The minimum distance from the power supply point to the ventilation shaft opening is 20 cm.
- It is recommended to make the socket not close to the hood body, but to move away from it about 30 cm to the side. In this case, the heat will not reach the power point, and possible drops of water and fat from the stove will not reach.
- There must be grounding, current strength - from 15A.
- The total power of kitchen appliances should not exceed 4 kW. If the sum of the power of the kitchen equipment is already or exceeds 4 kW, a separate line must be installed for the hood to avoid overloading the electrical network when all devices are operating simultaneously.
- Access to the outlet should not be blocked by furniture or appliances, at least massive and heavy ones (placement inside a closet is allowed). Firstly, you need to see what condition the power point is in. Secondly, in case of problems with it or with the wiring, you will have to move furniture and appliances (and in the kitchen it is often impossible to move a separate piece of furniture).
It is also recommended to find out exactly what the cord length is for the selected model (if you have already chosen it). Usually it is about 80 cm (not a generally accepted option, but the most common).
The height of the outlet for the hood: which one should I use?
The recommended installation height is 180-200 centimeters from the floor, or 100-110 centimeters above the table (slab).
The optimal height from the stove (countertop) can be calculated using the following formula:
H ch + H b + 5
, Where:
- HVP: height from the hood to the stove;
- Hv: the height of the hood itself (body);
- 5 - half the height of the socket.
Where to make a socket for a “regular” hood (not built-in)?
Another important point: it is initially recommended to decide on the model (or at least the type of hood), and only then select where it will be connected to electricity.
The reason is that different types of devices have their own connection characteristics:
- Built-in (built-in). It is installed in a cabinet, and the socket is usually located there.
- Hanging (installation is carried out under the kitchen cabinet, or without it). If you install a hanging hood under a cabinet, then the power supply point can be made inside it.
- Island (ceiling). The most difficult option in terms of installation: attached to the ceiling, away from the wall. Electrical power in this case can be provided by direct connection to the wiring (more on this below). Or, as an option, the power supply point is placed under the ceiling.
- Corner, inclined, fireplace, T-shaped. Such devices are connected in the same way, into an outlet near the installation site.
Where and how to make a socket for a built-in hood?
It was already mentioned above that for a hood built into a cabinet, you need to install the socket there (in the cabinet). Therefore, initially you need to have at least a design for future furniture, and only then choose a place for an outlet.
You need to start working after the furniture has been installed. In this case, there are a couple of important rules of the PUE that must be followed:
- The socket must be installed on a fireproof base.
- “Hidden” wiring that will run inside the kitchen furniture must be laid in a corrugated steel casing for protection.
Do all hoods have a plug?
Most models are sold with a plug. However, some devices are sold without it - just a cord with wires at the ends. They are rarely on sale, but they are still found, so just in case, when purchasing, it is worth checking whether the model has a fork.
How to connect it in this case? The options are:
- Attach the plug to the wires and connect to the outlet in the usual way.
- Connect via Wago terminal blocks.
- Connect via terminal block.
Connecting a hood without an outlet to electricity (directly): is it worth doing this?
Do I need an outlet to connect the hood? Necessary, but not mandatory: if necessary, the device can be connected directly to the wiring, without a plug and socket - using terminal blocks.
This scheme is considered unsafe and is not recommended. In addition, this is also inconvenient: if you need to remove the hood, then disconnecting such a connection will be more difficult and longer.
How to choose and where to place a socket for a range hood in the kitchen: optimal height and best models
The ease of use of a room is largely determined by the thoughtfulness of the arrangement of furniture and household appliances. All devices operate from the mains, so it is important to connect them in a way that is least noticeable, most convenient and safe.
The location of the outlet for the hood in the kitchen must be considered at the stage of installing the electrical wiring. But you can do this at a later date.
Do you need an outlet for the kitchen hood?
A kitchen hood is a device that runs on electricity. The connection can be made in two ways.
- Directly to the wiring.
- Using a socket and a power cord with a plug.
The first option is unprofitable for several reasons.
- It is easiest to perform only at the stage of installing the electrical wiring in an apartment or private house.
- To twist the wires of the power cord of the hood with the electrical wires in a room with completed repairs, you will need to open the plastered grooves or remove the tiles.
- You will need to cut off the cord plug, after which you will lose the opportunity to repair the device under warranty.
- Maintenance of the hood will be complicated (replacing light bulbs, removing dust and dirt), since it involves turning off the power.
- If a malfunction occurs in the operation of the device, it will be difficult to check the integrity of the wires and the tightness of the twist.
- In order to be able to disconnect the hood from the power supply, you will need to install a separate circuit breaker in the panel. Consequently, change the wiring configuration.
In order to avoid most of the problems listed, you need to install an outlet for the hood in the kitchen. This is not as simple as it might seem at first glance.
Optimal location of the outlet for the kitchen hood
There are several options for installing an outlet under a kitchen hood.
- For built-in models, the optimal location is inside the wall cabinet in which the device is mounted.
- For hanging ones - above the top panel, not far from the air duct. Thus, the power cord will be out of sight.
- In the air duct housing.
This decision is quite understandable.
- The optimal installation height for the hood is 65 cm above electric stoves and 75 cm above gas stoves.
- On average, the height of the devices themselves is 20-30 cm.
- When adding the maximum values we get 105 cm.
- Leave 5 cm for ease of installation of the socket.
- We find the optimal location for it: 110 cm from the level of the tabletop.
Placement inside furniture for built-in appliances
The socket inside the furniture allows you to hide the connection wires, which corresponds to the modern way of arranging electrical points. The close proximity of wood and electrical wiring is fraught with fire hazards. Therefore, sockets inside furniture are installed on plates made of non-combustible materials. The wires are placed in a metal corrugated tube.
Rules for installing a power point
When installing sockets, they are guided by the PUE (electrical installation rules). There is a list of standards for kitchen hoods.
- The capacity of the electric point is at least 15A.
- The total power of connected devices should not exceed 4 kW.
- Height from the floor - at least 190 cm.
- The presence of grounding contacts with a current strength of at least 15A.
If the total power of the devices exceeds 4 kW, a separate wiring line must be installed to connect the exhaust system. In most cases, it is laid on top of finishing materials, disguised with decorative cable ducts made of plastic.
Which manufacturer and which model is better to choose?
The main criterion for choosing a socket for a kitchen hood is the degree of protection.
For rooms with periodically rising humidity levels, sockets with IP62 and higher are required. According to the classifier, the penetration of dust into such products is excluded and they are protected from strong jets of water.
It is recommended to buy sockets from reliable manufacturers specializing in the production of electrical products. On the positive side, they have proven themselves:
What to look for when choosing?
In addition to the manufacturer, several parameters are taken into account when choosing an outlet.
- Material of manufacture. The optimal solution is heat-resistant plastic. Budget models are made from low quality materials. This type of plastic quickly darkens and turns yellow and melts easily.
- Build quality. Backlash in the connections of the socket elements is unacceptable.
- It is advisable that the holes for the plug plugs be protected by special sliding curtains.
- The design of the product must correspond to the style of the interior.
5 best models
- Schneider Electric Etude PC16-044B IP44
Stylish, high quality product from a well-known brand. Product brand - "Etude". The socket is installed using a hidden installation method and is equipped with protective curtains. Thanks to its simple but elegant design, the product can become an effective addition to the interior. Body color: white.
- protection class - IP44;
- maximum voltage - 250 V;
- there is a ground contact.
Average price 136 rub.
- protection class - IP44;
- there is a grounding contact;
- weight - 0.02 kg.
Average price 398 rub.
- protection class - IP20;
- weight - 0.09 kg.
Average price 226 rub.
- protection class - IP20;
- screw connection of wires;
- protective curtains;
- holes at an angle of 45°;
- dimensions - 45x45 mm;
- safety blocking of the uninterruptible power supply line.
Average price 228 rub.
- protection class - IP20;
- screw connection of wires;
- protective curtains;
- holes at an angle of 45°;
- dimensions - 90x45 mm.
Average price 1210 rub.
Where to buy a socket for a kitchen hood?
In Moscow
- Online electrical store shop220.ru.
- Legrand online store.
- Online store "ETM".
In St. Petersburg
- Direct Electric online store.
- AnLan online store.
- Online store Rozetka34.ru.
The selection and installation of a socket for a kitchen hood must be carried out in accordance with the rules for the design of power supply points. This will ensure safe operation of the device.
Source
Optimal place
As mentioned above, there are several options for installing an outlet for a kitchen hood:
- for built-in modifications, the ideal location would be the inner box of the wall cabinet, into which the hood is built;
- for hanging-type models - above the top panel, near the air duct, then the power cord will be located out of sight;
- in the air duct casing.
An extremely important characteristic is the installation height of the socket under the hood. Professionals advise installation at a distance of 190 centimeters from the floor or 110 centimeters from the countertop. Such a decision is completely understandable. The ideal installation height for the hood is 65 centimeters above electric stoves or hobs and 75 centimeters above gas stoves or hobs. The approximate height of the devices themselves is 20-30 centimeters. We add up the maximum dimensions and get 105 centimeters. For comfortable installation of the socket, leave 5 centimeters. As a result, its optimal location will be 110 centimeters from the top of the tabletop.
Despite the fact that a distance to the outlet of the exhaust system of 190 centimeters from the floor or 110 centimeters from the countertop is suitable for the majority of modern hoods and in kitchens of almost any architectural design, it is nevertheless necessary to understand that this is just a universal height, it is not always may be the most suitable for your particular case. As a result, even at the electrical installation stage it is necessary to have a clear plan of your kitchen with the selected electrical equipment
Then you will have the opportunity to very accurately calculate the ideal place for the socket, while taking into account that, as a rule, the length of the power cord for a kitchen hood is no more than 80 cm in length
The method of placing the socket inside the furniture makes it possible to hide the electrical wiring, which corresponds to today's method of arranging electrical points. The close proximity of electrical wiring and wood threatens to create fire hazards.
The correct location of the outlet for the hood in the kitchen
Installing a power source next to a suspended hood is the most common method of supplying electricity. It is convenient to make such a connection at the design stage of constructing kitchen walls. The structural condition of the walls makes it possible to install the electrical wire using a hidden method. With this arrangement, a hidden type electrical appliance is chosen.
It is recommended to place the power source at a height of 20–40 cm from the working plane of the hood on the left or right side of the air duct. When choosing a side, ease of access to the electrical appliance is taken into account. Some craftsmen try to hide it behind the air duct so that the connection is not visible. But turning the hood on or off from the network with such an installation will be extremely inconvenient. Aesthetic perception fades into the background, especially in case of urgent need to switch off.
You can soften the visual perception of a power source located on the side of the hood
To do this, you need to pay due attention to its color and design when purchasing. This connection will be correct and safe
In the case when you have to deal with installing a socket on already finished walls, external laying of the electrical wire and the use of a surface-mounted electrical device are applicable. Hidden installation is more correct, but if we are talking about a tiled wall, then there are no other options.
When laid open, in accordance with safety requirements, the electrical wire is mounted in a special plastic corrugated braid. This will prevent accidental damage to the electrical cable.
It is possible to install using a combined method, i.e. hidden wiring and surface-mounted sockets or vice versa. Such a performance will not be pleasing to the eye, but will only be able to fulfill its intended purpose.
It is important to use an electrical wire with a cross-section of 2.5 sq. mm and a socket rated for 16 A. This will preserve the consumer connection network in case of overload or improper use
Most household hoods have an operating current of up to 10 A. But during voltage surges, the design of the electrical part must have a safety margin.
Installing a hood inside the top row of kitchen furniture will greatly simplify the method of connecting to the electrical network
With this design of ventilation equipment for the kitchen, it is important to supply voltage to the top row using a hidden or open method. To do this, they often use a pencil case located close to the top row of shelves.
Installation of electrical wiring inside the furniture will have to be done in a metal corrugation or a special fireproof plastic braid. The current source is installed in close proximity to the hood on the back or side wall of the cabinet.
In accordance with safety requirements, the surface-mounted socket must be installed on a fireproof base. As the latter, a dielectric plate is used that is larger in area than the base of the electrical appliance by 10–15 mm on each side.
Such a connection will be the best from an aesthetic point of view. The technical features of using such installation are less positive. Electrical wiring installed inside furniture made of wood or chipboard has a risk of fire. Strict adherence to the rules and regulations for laying household electrical networks will minimize this risk.
There are different methods for connecting ventilation equipment in domestic premises: with twists, through an automatic device or through a terminal block. Correct and safe in all respects is to connect the hood in the kitchen using a socket. Other methods have greater risks and less reliability.
Choosing a place for an outlet for a hood: rules and standards
When the outlet has already been selected and purchased, you need to choose where to place it.
The main rules for choosing a place for sockets for the hood:
- You need to decide exactly where and at what height the hood will hang (probably the most important rule). This is necessary so that when choosing a place for an outlet, you can comply with other rules and restrictions (distances to pieces of furniture).
- The minimum distance from the power supply point to the kitchen furniture (countertops, cabinets, shelves) is 5 cm.
- The minimum distance from the power supply point to the ventilation shaft opening is 20 cm.
- It is recommended to make the socket not close to the hood body, but to move away from it about 30 cm to the side. In this case, the heat will not reach the power point, and possible drops of water and fat from the stove will not reach.
- There must be grounding, current strength - from 15A.
- The total power of kitchen appliances should not exceed 4 kW. If the sum of the power of the kitchen equipment is already or exceeds 4 kW, a separate line must be installed for the hood to avoid overloading the electrical network when all devices are operating simultaneously.
- Access to the outlet should not be blocked by furniture or appliances, at least massive and heavy ones (placement inside a closet is allowed). Firstly, you need to see what condition the power point is in. Secondly, in case of problems with it or with the wiring, you will have to move furniture and appliances (and in the kitchen it is often impossible to move a separate piece of furniture).
The height of the outlet for the hood: which one should I use?
The optimal height from the stove (countertop) can be calculated using the following formula:
H vp
+ H v + 5
, where:
- Nvp: ;
- Hv: the height of the hood itself (body);
- 5 - half the height of the socket.
Where to make a socket for a “regular” hood (not built-in)?
The reason is that different types of devices have their own connection characteristics:
- Built-in (built-in). It is installed in a cabinet, and the socket is usually located there.
- Hanging (installation is carried out under the kitchen cabinet, or without it). If you install a hanging hood under a cabinet, then the power supply point can be made inside it.
- (ceiling). The most difficult option in terms of installation: attached to the ceiling, away from the wall. Electrical power in this case can be provided by direct connection to the wiring (more on this below). Or, as an option, the power supply point is placed under the ceiling.
- Corner, inclined, fireplace, T-shaped. Such devices are connected in the same way, into an outlet near the installation site.
Where and how to make a socket for a built-in hood?
It was already mentioned above that for a hood built into a cabinet, you need to install the socket there (in the cabinet). Therefore, initially you need to have at least a design for future furniture, and only then choose a place for an outlet.
You need to start working after the furniture has been installed. In this case, there are a couple of important rules of the PUE that must be followed:
- The socket must be installed on a fireproof base.
- “Hidden” wiring that will run inside the kitchen furniture must be laid in a corrugated steel casing for protection.
Do all hoods have a plug?
Most models are sold with a plug. However, some devices are sold without it - just a cord with wires at the ends. They are rarely on sale, but they are still found, so just in case, when purchasing, it is worth checking whether the model has a fork.
How to connect it in this case? The options are:
- Attach the plug to the wires and connect to the outlet in the usual way.
- Connect via Wago terminal blocks.
- Connect via terminal block.
Connecting a hood without an outlet to electricity (directly): is it worth doing this?
Do I need an outlet to connect the hood? Necessary, but not mandatory: if necessary, the device can be connected directly to the wiring, without a plug and socket - using terminal blocks.
This scheme is considered unsafe and is not recommended. In addition, this is also inconvenient: if you need to remove the hood, then disconnecting such a connection will be more difficult and longer.
By yourself or by a designer!
A large number of household appliances used in the kitchen require an increase in the number of electrical outlets. With the ideal location of kitchen outlets, for each household appliance used, you need to plan its own separate outlet. If this is not possible, then you can determine the required number of kitchen outlets based on the following rules.
Location and installation of sockets in the kitchen
Having an idea of the required minimum number of sockets, and what electrical installation products we need, we can proceed directly to planning and installation. Let's look at each of these points separately.
Planning the location of outlets
Before proceeding directly with installation, you should decide on the number and location of sockets. In addition, we must decide how many groups we need to power the room, and what electrical installation products will be powered from each of them.
- To do this, first of all, we need to decide on the number of sockets. We need to know exactly the number of household appliances that will be installed in the kitchen.
- Further, all electrical appliances should be divided into stationary and temporary. To stationary appliances we include a refrigerator, oven, dishwasher, washing machine, microwave, extractor hood and everything that during operation will be removed from the outlet only for the time of maintenance or repair.
- Temporary electrical appliances include a mixer, food processor, electric meat grinder and other appliances that will be connected to the network only during operation. For them, we will install sockets in the working or dining area as in the video.
- So, let's count the number of sockets. We need one socket for each stationary electrical appliance. For temporary electrical appliances, we make two or three sockets in the kitchen work area, and one or two in the dining area.
Distribution of sockets by groups
- Now, we need to distribute all the sockets into groups. To do this, we calculate the rated current of each outlet, soberly assess the likelihood of certain devices working together, and then combine them into groups. We will not go into the details of this process, because we have already described in detail the principle of forming electrical points in groups more than once.
- Now it's time to decide on the location of the outlets. To do this, we must know that sockets cannot be placed under sinks and water heating appliances. All other places are available for installing sockets.
The photo shows the location of the sockets
Based on this, we install sockets for appliances installed on the lower tier of the kitchen behind these appliances, at a height of 20-30 cm from the floor. Electrical appliances installed on the second tier, for example, a socket in the kitchen for a range hood, are mounted at a height of 20-30 cm from the ceiling. Sockets for temporary electrical receivers can be mounted inside furniture or on a wall at a height of 10-20 cm from the level of the tabletop. Sockets in the dining area are mounted in any place convenient for their use.
Installation of sockets
Let's say a few words about how to properly install sockets. At the same time, we will discuss the issue of not only connecting, but also arranging the electrical network of the kitchen as a whole.
Depending on the saturation of the room with electrical appliances, we may end up with one, two, and sometimes three power supply groups for electrical points. For each of them, it is advisable to mount its own junction box. This will reduce the likelihood of installation errors, power supply loops, and will also simplify subsequent maintenance and repairs.
Electric stove connection diagram
- According to building codes, it is recommended to install the distribution box above the general room lighting switch. If we have several distribution boxes in a room, where should we mount them?
- Let's say we have three junction boxes. We mount the first one, from which the lighting in the room is powered, as recommended, above the switch. We install the remaining two above a cluster of sockets that will be powered by it. If there is no such cluster, then it could be the sockets in the kitchen for the hob or oven - in general, the most powerful equipment.
Power supply diagram for each individual group
- In each distribution box we connect and lay wires to our sockets. The wire must be three-core to connect the phase, neutral and protective wires. To simplify installation and subsequent maintenance, the marking of wires should adhere to the PUE standards. The protective wire should be yellow-green, the neutral wire should be blue, and the phase wire should be of any color.
- We connect the wires from the distribution boxes to the outlet. The main thing here is not to make a mistake with connecting the protective wire, which should be attached to the grounding contacts of the socket. Wires to power contacts can be attached in any order.
Connection diagram for a socket from a two- and three-wire single-phase network
A little about the types of hoods
Modern hoods work in two ways:
- the air flow in them constantly circulates through filters (grease and carbon) and returns back to the kitchen - circulation hoods;
- the air above the stove is sucked into the air duct and discharged into the ventilation duct of the house - exhaust ventilation;
- New generation hoods combine both the first and second methods of air purification.
Connecting hoods of the second and third types is more labor-intensive, because installation of an air duct will be required.
Even more varieties of hoods can be distinguished by considering the method of their installation. In total there are about five of them, but from the point of view of connecting to the electrical network, fundamental differences arise between built-in and island (ceiling) hoods. The first ones are adjacent to the kitchen wall, or built into hanging cabinets, the second ones are attached to the ceiling above the hob, which is located in the center of the room.
Types of kitchen hoods
Modern manufacturers produce many different models of kitchen hoods. To navigate this diversity, you need to familiarize yourself with the classification given below.
Household models differ in the way they work and in the features of location and installation in the kitchen. The nuances of their installation and connection to the network depend on this.
Hoods may differ in operating principle:
- flow or exhaust. Polluted air is removed from the kitchen through a special air duct that connects the air purifier and the general house exhaust ventilation shaft;
- recirculation Heated air from the surface of the stove, containing contaminants, is forced through a filter system, where it is cleaned of impurities. Next he returns to the kitchen;
- mixed or combined. This system assumes that the device can operate in both modes described above. Most currently produced models support this operating scheme.
Based on the features of location and installation, 5 large groups can be distinguished among the devices under consideration:
- wall-mounted Attached to the wall above the kitchen stove. The variety of models allows you to choose the appropriate design option for any kitchen furniture set;
- hanging. They usually have a flat body. Hoods of this type are installed under a wall cabinet above the hob;
- built-in Mounted inside a hanging kitchen cabinet. The working panel of the hood replaces the bottom of the cabinet and is located above the surface of the stove, which allows the device to clean the exhaust air without any problems. From the outside, such air purifiers are practically invisible;
- corner. Indispensable in small spaces. Installed in the corner of the kitchen, saving usable space;
- island. These models are used in large rooms that are equipped with a kitchen island. Hence their name. The hood is suspended from the ceiling above the cooking area located in the middle of the kitchen.
Basic mistakes in the placement of sockets
The importance of the correct location and connection of kitchen outlets cannot be overestimated. Any kitchen, even the most original one, must first of all be safe.
It is not uncommon for owners to underestimate this requirement. This happens mainly due to inexperience, because they do not complete a full renovation of the premises every month.
Among the mistakes made when placing kitchen sockets, there are both frankly gross and insignificant. If minor defects only bring inconvenience and some discomfort during operation, then serious flaws can cause a lot of trouble.
Incorrectly installed wiring can cause a severe fire due to a short circuit
The worst thing is neglect of safety rules
This is when the wiring is laid incorrectly, the material of the walls and the required insulation option in a particular case are not taken into account. Such negligence is fraught with disastrous consequences - in the event of a short circuit, the entire house will be left in a matter of ashes in a matter of minutes
The second serious violation is when all electrical installations are powered from one power cable. This arrangement of sockets in the kitchen does not stand up to criticism, because the line simply will not be able to withstand the voltage.
The result is a completely non-functional room. You should always make sure that only one powerful or 2-3 low-power devices are turned on. This is unacceptable for the kitchen.
The third mistake is if a separate line was not allocated for the electric stove, coming from the panel. This powerful consumer of electrical current will work efficiently only if it is connected correctly.
Fourthly, all sockets hidden under the sink must have an appropriate degree of protection against moisture - at least IP44. Groups of electrical points located in the free access area of children must be equipped with protective curtains.
It is advisable to immediately move incorrectly located sockets to places more suitable for them (+)
Fifthly, for all appliances that work with water, for example, a dishwasher or washing machine, it is important to make a separate supply line. It must be equipped with a residual current device, and it is advisable to install sockets with grounding
In the event of a short circuit, these measures will help protect your home from harm by disconnecting the line.
Minor errors in the placement of kitchen outlets include the inconvenient location of some of their groups. It’s also bad when you forgot to provide a couple of spare points, for example, for a phone or laptop charger.
Sockets that are harmoniously matched to the overall style of the room will not irritate the owner
Another unpleasant drawback is when the color and shape of the body of the installed sockets stands out from the overall design of the room. This usually happens if the owners change the overall concept of the kitchen many times. Having purchased the necessary materials, they suddenly decide to change the color scheme or order other furniture, forgetting about the already installed sockets.
Making a wiring diagram
Are you tired of putting up with constantly hanging extension cords or the inconvenience of connecting household appliances? So it's time to plan a major renovation of your kitchen. And it’s best to start with drawing up a diagram, since moving or adding new cable channels in concrete walls is a very troublesome task. Of course, you can install all the wires on top of the walls, but such garlands are unlikely to decorate the room, and besides, it is unsafe.
So, what should this diagram contain:
- First of all, you need to decide what electrical appliances will be used. A standard set of almost any apartment: refrigerator, stove, microwave oven, electric kettle, extractor hood. If space allows, then add: dishwasher or washing machine, waste shredder, freezer, TV, cooler. And besides this, you may need to connect: a mixer, blender, multicooker. As you can see, the list is quite impressive, so it’s difficult to do without a competent plan for placing sockets.
- After this, display on paper the arrangement of furniture and household appliances in the kitchen. Consider the fact that sockets are needed not only where the kitchen unit is located, but also on the opposite wall (for a TV or portable device).
- Now we need to put the sockets themselves on the diagram. But here you will have to follow certain rules, because placing electrical installation products in random order is not allowed. And here we come to the main question - at what height is it better to place the sockets?
Conclusion
Of all the proposed options, each has its own advantages and disadvantages. You can choose for yourself which option is right for you. But based on experience, the outlet for the hood is the optimal ratio of price and convenience. Well, if you are so confused by its appearance under the ceiling, then by correctly placing the outlet you can almost always visually hide it.
Buying a kitchen hood is an excellent gift not only for any housewife, but also for everyone at home. The statistical majority of families eat in the kitchen every day. Often it is a favorite corner of households and staying guests, a place of intimate conversations and culinary feats. The kitchen room, due to its purpose, needs reliable ventilation. Connecting an exhaust hood in the kitchen perfectly solves the problem of cleaning the air from odors and fumes, but it should be remembered that the exhaust unit is, first of all, an electrical appliance that requires proper connection and maintenance.