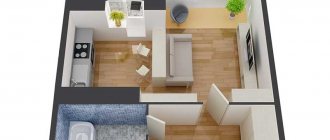
If your home is more than 15-20 years old, it is safe to say that your electrical wiring is outdated and does not meet modern safety requirements. In this regard, we propose to promptly replace the wiring in a one-room apartment using our own forces. Our specialists have extensive experience in providing electrical installation services. To calculate how much it will cost to change the wiring, we recommend calling a surveyor to the site. Call now!
Cost of replacing electrics in a 1-room apartment
For convenience, we have made an approximate calculation of the cost of replacing electrics in a 1-room apartment.
| Types of jobs | Price | Unit change | Quantity | Sum |
| Wall chipping | 300 rub. | p/m | 15 | 4500 rub. |
| Ceiling chipping | 300 rub. | p/m | 15 | 4500 rub. |
| Wire laying | 20 rub. | p/m | 30 | 600 rub. |
| Installation of internal sockets | 450 rub. | PC. | 12 | 5400 rub. |
| Installation of switches | 450 rub. | PC. | 5 | 2250 rub. |
| Installing a TV outlet | 450 rub. | PC. | 2 | 900 rub. |
| Installing an internet outlet | 450 rub. | PC. | 1 | 450 rub. |
| Installation of a box for 12 modules | 3000 rub. | PC. | 1 | 3000 rub. |
| Installation of a two-pole RCD | 300 rub. | PC. | 1 | 300 rub. |
| Making a hole in the wall to lead wires to the panel | 200 rub. | PC. | 1 | 200 rub. |
| Connection to the panel | 500 rub. | dot | 1 | 500 rub. |
| TOTAL | RUB 22,600 | |||
Request a call
As you can see, the cost is affected by:
- the number of proposed sockets and switches;
- type of sockets and switches;
- number of machines;
- method of laying the wire;
- apartment area;
- presence or absence of a wiring project, etc.
To understand the final price for replacing the wiring in a one-room apartment, we recommend calling our specialist to draw up an estimate. It will help you correctly calculate the load on the wiring depending on the number of electrical appliances that you plan to use in the apartment. Our master will also draw up a list of necessary materials for the work and help you purchase them.
Cost of certain types of electrical installation work
Wiring
Sockets
Electrical panels
Dismantling works
Preparatory stage
The most important part of this stage is planning. First of all, you should decide on the type of wiring. That is, choose what it will be, internal or external. The first option is more labor-intensive and practically cannot be reconfigured without major repairs (carried out before finishing work), but it looks more aesthetically pleasing. With the second option, everything is much simpler; it can be done without major repairs. Wiring can be reconfigured within certain limits, such as installing an additional line or relocating (adding) outlets.
Example of external wiring in a box
As practice shows, external wiring in apartments is not popular, for several reasons: firstly, the living space begins to resemble an office, and secondly, the box is an excellent dust collector. In addition, such wiring indirectly indicates permanent repairs, which reduces the cost of the apartment when selling. Be that as it may, this option has a right to exist and in some cases there is no alternative, but since the hidden type of wiring is mainly used, we will focus on it. https://www.youtube.com/watch?v=UGBLLe7oBy8
Wiring
| Type of work | Unit change | Price |
| Grooving brick walls for wires, 2x2 cm grooves | p/m | 250 rub. |
| Grooving concrete walls for wires, 2x2 cm grooves | p/m | 495 rub. |
| Grooving plaster walls for wire, 2x2 cm groove | p/m | 200 rub. |
| Grooving and laying of cables with turnkey groove sealing | p/m | 595 rub. |
| Cabling | ||
| – in the cable channel | p/m | 150 rub. |
| – in a tunnel using an open method | p/m | 50 rub. |
| - corrugated | p/m | 120 rub. |
| Sealing the grooves | p/m | 50 rub. |
| Open wiring installation (on brackets) | ||
| – on plaster walls | p/m | 100 rub. |
| - on a brick | p/m | 120 rub. |
| – on concrete | p/m | 150 rub. |
| Dismantling electrical wiring | p/m | 35 rub. |
| Electrical wiring diagnostics | from 1500 rub. | |
| Search for open circuits using devices for detecting hidden defects | from 2500 rub. | |
| Repairing broken electrical wiring | from 2000 rub. | |
Sockets
| Type of work | Unit change | Price |
| Installation of internal sockets, switches and junction boxes (with drilling) | PC. | 750 rub. |
| Installation of overhead sockets, switches and junction boxes | PC. | 450 rub. |
| Installing a socket on an electric stove | PC. | 600 rub. |
| Removing an old socket and switch | PC. | 90 rub. |
| Junction box installation | PC. | 450 rub. |
Electrical panels
| Type of work | Unit change | Price |
| Installation of an electrical panel for 36 modules | 2250 rub. | |
| Installation of a single-phase electric meter | 950 rub. | |
| Installation of a single-pole electric circuit breaker | 200 rub. | |
| Installation of an electric two-pole automatic machine | PC. | 500 rub. |
| Connecting the electrical cable to the main panel | dot | 500 rub. |
Wiring options
Depending on the wishes of the customer and the characteristics of the room, three methods of laying electrical wiring are used:
- Open . In this case, no gating is performed. The electrical wire is laid in special corrugated PVC pipes. These corrugations are usually hidden under the ceiling and covered with plasterboard or suspended ceiling. The wires are laid along the walls in a special cable channel; sockets and switches are external, i.e. protruding from the wall.
- Closed . In this case, gating of the surfaces of walls and ceilings is required. The wire is laid in grooves and covered with a layer of plaster. Sockets and switches are internal, they are installed in pre-prepared holes.
- Combined . Combines the two methods described above.
Repairing electrical wiring in an apartment step by step instructions
Do-it-yourself electrical wiring replacement
The wiring in the apartment is replaced with your own hands according to a pre-drawn diagram. In a one-room apartment in new buildings and in Khrushchev, experts recommend running a separate cable to the kitchen with a bathroom and to the living room.
This technology allows you to obtain a power reserve by distributing the total load over two circuits. In the event of a short circuit or open circuit, one line will remain in working condition.
Main reasons for cable replacement
There are several reasons why it is necessary to replace the wiring in a one-room apartment.
The main reason is that the wiring diagram and properties of the electrical cable in a new building are not designed for a large number of powerful electrical appliances. The aluminum wire overheats and the cable melts, which can lead to a fire.
Do-it-yourself replacement of electrical wiring in Khrushchev-era buildings is carried out due to the expiration of the cable's service life.
The optimal value of this parameter is 20 years. After this period, the insulation is destroyed, the wire sparks and shorts out. Lack of grounding is one of the incentives to update the electrical wiring in your apartment.
The electrical wiring should be replaced completely, up to the panel. At the same time, new sockets and switches are installed. Partial replacement of electrical wiring is allowed in the event of a wire break in a certain section of the circuit.
Preparatory work
Before changing the wiring in the apartment, you will need to carry out installation work using grooves (grooves in concrete). Wires are connected to sockets and switches under the plaster, in grooves or in the voids of the floors.
An apartment plan is drawn on paper, which indicates the locations of household appliances, sockets, switches and lighting fixtures. It is recommended to install sockets in places where powerful electrical appliances are installed.
For an electric stove, a separate socket with a power cable of more than 4 sq.m. is installed. The cross-section of the wire depends on the power of the stove. Sockets are mounted in the apartment wall, taking into account a distance from the floor of 80-100 cm.
Switches in the apartment are installed at the entrance to the room, maintaining a distance of 15 cm from the doorway. Installation work is carried out from the side of the vestibule so that the door opens and closes easily.
For each room of a one-room apartment, the total power of electrical appliances is calculated.
It is recommended to connect separate lines with machines to rooms with a large number of powerful devices. The direction of laying the electrical wire must be horizontal or vertical.
The system cannot be laid diagonally or at an angle other than 90 degrees.
There are three consumer groups:
A separate power cable is used for each group. The diagram indicates the type and cross-section of the cable. The cost of wiring electricity in an apartment depends on several factors:
- laying the cable yourself or with the help of specialists;
- choosing a wiring replacement method;
- housing area.
Purchasing material
To lay the cable to the lighting fixtures, use three-core copper wire VVG (power wire VVGng) with a cross-section of 1.5 sq.m. To calculate the length, you will need to measure all the marks made on the walls and ceiling, adding about 10-15 cm for junction boxes and switches.
Wiring in the apartment (for sockets) is done using a three-core VVGng cable.
Electrical installation work involves the use of automatic circuit breakers and RCDs (a mechanical switching device that is designed to switch on, conduct and switch off currents under normal operating conditions, including opening contacts when the differential current reaches a specified value under certain conditions).
This unit is presented in the form of a residual current device, which is used to protect against leakage currents. The circuit breaker is used for short circuit protection.
Experts recommend installing differential machines in a one-room apartment or studio, which perform the functions of two of these devices.
For sockets, you will need to buy a 30 mA Class A RCD and a 16-20 A circuit breaker. For lighting fixtures, purchase a 10 A circuit breaker. For the kitchen, you will need a 25 A circuit breaker and a 30 mA RCD.
The electrical panel can be metal or plastic. Its size is selected taking into account the number of machines and RCDs. For a one-room apartment, you can buy a panel with a reserve for 2 machines.
To connect wires and junction boxes, special connecting insulating elements - SZY - are used.
Stages of installing wiring in an apartment
The process of replacing electrical wiring begins with the installation of a new panel. If the studio apartment is located in a new building, then a special niche is provided for this unit, to which the cable is connected. You install automatic devices and RCDs in the niche.
If you are replacing electrical wiring in a Khrushchev-era building, then you select the installation location for the panel yourself. The structure is installed on dowels. A hole is made in the wall and a cable is pulled through. The power wire is connected to the switchboard.
The next stage involves protecting the input cable. The blue wire is connected to zero, the yellow wire to ground, and the white wire to the top contact on the machine. If an RCD is used, then the phase and zero are connected to the RCD, then go to the machine and the zero terminal.
Laying cables along the floor involves dismantling the old floor covering and installing a new finishing floor. To make grooves in concrete or brick walls, you will need a hammer drill. Places for installing distribution boxes and sockets are cut out with a special crown.
Cable laying in ceiling voids is carried out without violating the integrity of the walls and ceiling. The next step involves cutting the wire into pieces of appropriate length.
To easily replace the required area without disturbing the wall decoration, corrugation is used. To tighten the bundle of wires, use clamps.
Personal protective equipment is used to connect cables in junction boxes. To check the functionality of the system, you will need a tester (multimeter). It is presented in the form of a measuring tool that allows you to:
- identify damage to electrical appliances;
- check the battery charge;
- measure the operating voltage of electrical appliances.
The grooves are sealed with plaster. If the cable is laid under sheets of drywall, then it is recommended to hide it in corrugation. Clips are used to secure the wire to the walls. You can lay electrical wiring in special channels.
The plinth is attached to the floor. From it the box leads to switches and sockets. Then the wires are laid. If necessary, install external distribution boxes.
This technology is used in places where it is not possible to install hidden wiring, including office and commercial premises.
To replace electrical wiring in a one-room apartment in a new building, you will need the following tools:
- perforator;
- nozzles;
- Bulgarian;
- indicator screwdriver;
- building level;
- putty knife.
Electrical wiring in the apartment is replaced in several stages:
- Development of an apartment power supply diagram.
- Drawing up an electrical wiring plan.
- Electrical wiring.
- Installation of switches, automatic machines, RCDs.
- minimum channel length;
- the channels must run parallel to the floor, deviations at right angles are allowed;
- if it is planned to install 2 sockets on different sides in one wall, then to save money and time it is recommended to make a hole in the wall. The wire is routed through it.
The apartment is first de-energized. The distribution board is installed in the place where the machines will be located. The new cable is laid parallel to the old wiring. Sockets and switches are connected to the new cable.
The wiring in the apartment is done sequentially. Initially, connect the sockets and switches of the living room to the new cable, and then the rest of the rooms.
There are basic principles for laying channels that must be observed when carrying out this work:
Sockets and switches are installed after the putty, which is used to seal the grooves, has dried. If you do not have experience in connecting electrical wiring to the distribution board yourself, it is recommended to seek help from specialists.
Do-it-yourself electrical wiring in an apartment: step-by-step instructions
Many houses still have electrical wiring from Soviet times that has long failed to meet modern safety requirements. It was intended for only 4 kW, while now when designing it is necessary to calculate the wiring for 10 kW and above. New cables and wires can be installed, but the work is labor-intensive and complex. Installation of electrical wiring in a private house and apartment is done with your own hands only when a clear plan has been drawn up and there are step-by-step instructions.
DIY electrical wiring installation
Replacing wiring
If the electrical wiring in an apartment is made with your own hands from aluminum wire, its service life will be no more than 20 years. Do-it-yourself electrical wiring with new lines is only possible when the apartment is being renovated.
First of all, you need to think about the power and number of devices. The layout of the lighting system, sockets and junction boxes depends on many factors, in particular on how furniture, windows and doors are located in the apartment. An accurate wiring diagram must be created. The work stages should be as follows:
Electrical wiring project
The comfort and safety of using electrical appliances depends on a quality design.
Scheme development
Do-it-yourself electrical wiring installation can be done efficiently only when there is a power supply diagram for the apartment.
House power supply diagram
In the figure, the external wiring in the entrance panel is highlighted with a dotted line: grounding, main circuit breaker and RCD. Not a single power supply scheme for a house or apartment can do without an electricity consumption meter (E).
The phase and neutral wires are crossed out with two dashes. The protective conductor must be laid separately. Three-phase input is indicated by three dashes. Group machines are located in the panel. Separate lines with protection are made for the bathroom, electric stove and heater. You can choose the brand of RCD at your discretion.
In addition to the power supply diagram, electrical wiring is installed independently when there is an electrical diagram that is superimposed on the apartment plan and includes the following elements:
- switches;
- sockets;
- lamps;
- distribution boxes;
- apartment shield;
- terminals for connecting electrical equipment: forced ventilation systems, air conditioners, ovens, etc.;
- location of wiring laid through the premises.
The figure below shows a typical electrical wiring design.
Electrical scheme for a two-room apartment
The wiring diagram determines all repairs for the following reasons:
- any competent repair can and should be done with changing the wiring;
- subsequent work will not allow changing anything in the electrical part;
- high-quality repairs include effective lighting and convenient placement of sockets, switches and electrical appliances.
If electrical wiring is installed correctly, there will be no carriers, extension cords, or power adapters on the floor. When the repair is done correctly, there should be no mobile electricity transfer devices in the apartment. The exception is when connecting to power tool outlets.
If we consider the distribution of sockets in rooms, then the installation plan is mostly chosen very approximately and not always correctly. It is best to take them to different ends of the room. In this case, you need to draw up a plan in advance for the location of electrical equipment and furniture so that sockets and switches that require constant access are not blocked. If this does not happen, it means the wiring has been done correctly and the outlets are being used optimally. In this case, you will have to run new wires over expensive wall decoration.
You need at least two sockets for the TV, since it will require additional set-top boxes: digital or satellite, as well as video players.
At least three outlets must be installed for the computer and all the equipment necessary for it. Their height from the floor is now 30-40 cm. Thanks to this, the sockets are not visible from behind a table or sofa, which is aesthetically pleasing and practical. This means that the old openings will have to be walled up and new ones made, and a channel will need to be built to them.
Maximum energy consumption occurs in the kitchen. Separate cables must be laid for an electric oven, microwave oven and washing machine, since the power of each electrical appliance exceeds 1.5 kW.
An RCD is connected to each of these devices.
The work area requires a whole block of outlets, since the number of auxiliary electrical equipment is growing every year. For a small kitchen, two sockets will be enough, since many appliances will not fit there. It is convenient to place them above the tables so that they can be easily turned on. We also need to make sockets for electric ignition of gas burners and an additional exhaust fan.
The refrigerator only needs one outlet, to which you can easily connect. If any stationary electrical appliance is built into a cabinet, then it is convenient to use a separate machine located in the control panel. This will be a reliable guarantee that the connections will not short out if water enters.
The design transformation plan should not negatively affect the electrical safety of the premises. In an unexpected situation, designers will never be to blame. If the electrical wiring is done incorrectly, the person who had to install it is responsible for this.
Wire selection
Wires and cables are laid in walls (hidden wiring) or in boxes and pipes (open). Cable routing is allowed to be open, but they are more often placed behind partitions or in auxiliary rooms.
The most used cable for home electrical wiring is VVG or VVGng (less commonly, PUNP and NYM).
It is better to connect to the floor panel with an NYM cable, as it is more reliable in terms of fire safety. Despite its high cost, it is often used as a power cable when installing electrical wiring in a private house or apartment. It will not prevent them from replacing the cheap and fire-hazardous VVG input, for example, in a new building.
The VVGng cable does not propagate combustion due to the use of fire-resistant plastic compound. It is convenient to use for laying if it has a flat shape.
PUNP is the cheapest flat wire with 2-3 cores. It has insulation that loses its properties when heated. It is not recommended to include it in the home electrical solutions plan.
It is better to make the internal wiring of the shield using wires PV2, PV3 and PV4 with a diameter of 4 mm. To install the wiring, you will need plastic boxes, clamps, corrugated hoses and distribution boxes. It is advisable to purchase skirting boards with cable channels.
The entire load of the apartment or house falls on the input cable. Its cross-section is determined depending on the total power of all electricity consumers. Multiplying it by the utilization factor - 0.75, we find the power consumption. It is also necessary to take into account the reactive power consumed by the washing machine motor. To do this, its power is divided by the coefficient cos φ = 0.85. It should be taken into account that the water heater in the washing machine is an active and significantly predominant load. If fluorescent lamps are used, their reactive power is also taken into account (cos φ = 0.8).
When doing electrical wiring in a house with your own hands, you should take into account the reactive load, here there is much more of it than in an apartment: asynchronous motors of machines and pumps (cos φ = 0.85), welding transformer (cos φ = 0.5-0.7) , power tools.
Having established the total power in each circuit, using the table you can select a wire or cable of a suitable cross-section. At the same time, a reserve is made for possible additional connections in the future.
Table for selecting the cross-section of a copper conductor based on power consumption or current
Protective equipment is selected for the cable. If it can withstand a current of 25 A, then the RCD or circuit breaker is set to 16 A.
The power of the electricity consumption meter and the maximum consumption of electrical appliances must correspond to each other, otherwise the system will be de-energized. The characteristics of the meter indicate what energy consumption it is designed for.
Lighting selection
Illumination is measured in lux (lm/m2). The figure below shows indoor lighting standards.
Residential lighting standards
When installing electrical wiring in an apartment, it is necessary to include in the work plan the possibility of using additional lighting. In the bedroom or living room it is used to highlight interior details and zoning rooms. It has nothing to do with lighting standards, but sockets with easy access must be installed for it. In the kitchen, lighting is done in cabinets, as well as in the work and dining areas. There should be light in the bathroom where the washing machine is located or near the mirror. Switches and sockets are used with moisture protection.
Wiring
The plan for laying hidden wiring provides for its placement in grooves or under plaster. It is secured with plastic clamps every 0.4-0.5 m. For new distribution boxes, recesses are prepared and installed using alabaster. Old ones are also partially used if they are on the route. External wiring is placed in cable channels.
The laying is done strictly horizontally and vertically. Then there will be less chance of a self-tapping screw hitting the wire when drilling holes in the wall.
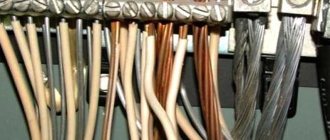
The ends of the wires inserted into the box are stripped and connected as required by the diagram. It is advisable to make connections using terminal blocks, soldering or crimping. Twisting is considered a temporary connection, but it can be further modified.
The entire electrical circuit and how the wiring will work in a private house or apartment depend on the distribution panel. It is placed near the front door. If the wall is made of plasterboard, choose a built-in version of the shield, and on reinforced concrete, install an external one. The location is made at a low height (about 1.5 m). The shield is fastened with dowel-nails or self-tapping screws. Placing the meter in the panel is not required, since it must be installed in the entrance, and in a private house - on an external power supply pole.
You can buy a shield in a store when you know how much equipment you need to put inside, while leaving some spare space. The standard panel contains DIN rail mounting points into which all electrical equipment can be easily inserted and fixed. The connecting wires inside are installed new and without twists. The phases and neutral wire differ in color. If it is the same, markings are made from colored tubes or using inscriptions. For input and output cables, a reserve length of at least 120 mm is left for possible repairs.
The connection of the input cable and the electricity consumption meter is carried out by electrical service specialists.
Installation of socket boxes, sockets and lamps
The center of the location of the first socket is marked on the wall, and then, if required, after 71 mm the middle of the next one is marked (standard center-to-center distance).
Installation of socket boxes and sockets
Making recesses for a socket box in a concrete wall is a labor-intensive process that requires a hammer drill with a special crown. Then grooves are made through them, and electrical wiring is laid. The best solution is to run separate wires to each outlet. A plug for the wires is cut out in the socket box and checked to see how it fits into the hole in the wall. Then the hole is primed, and a gypsum-based putty mixture is applied inside. Afterwards, the socket box, together with the wires inserted into it, is pressed strictly horizontally into the solution. The installation box should be flush with the wall surface. The grooves and gaps around the socket boxes are covered with plaster mortar only after they are completely fixed.
Sockets are installed with screws or self-tapping screws after the wall repairs and finishing are completed. In this case, the voltage in the supply wires is turned off. After installing the frames and panels of sockets, the supply of electricity is restored.
Plastic socket boxes can be used to install switches. Their installation is done in the same way.
Sockets in plasterboard construction are easy to install due to the fact that the material is well processed. Frame systems allow for hidden installation of communications with any number of wires.
Lighting fixtures are evenly distributed throughout the room. The classic solution is to hang a chandelier in the middle of the room. When installing it, you need to know that now it is necessary to connect a grounding wire to chandeliers and fluorescent lamps. When installing a stretch ceiling or a plasterboard ceiling, the chandelier is attached to the base through embedded elements. It seems that she is floating in the air.
Placing a chandelier on a suspended ceiling
Recently, spotlights that are placed in a suspended ceiling have become popular. Even before finishing it, it is necessary to determine the installation locations of the devices. It is rational to place the lamps at a distance of at least 1 m from each other, and 60 cm from the wall. However, they should not fall on the frame parts. The wiring is located between the base of the floor and the suspended ceiling.
Installation. Video
This video will tell you about installing electrical wiring in an apartment.
If you consistently go through all the stages from design to installation, then you can successfully do the electrical wiring in your apartment with your own hands. Such work should be included in the plan for the next repair and should be performed first. Step-by-step instructions are used for this. The convenience, reliability and durability of the electrical system depend on how correctly the circuit is drawn up, how the equipment was calculated, on the quality of the components and compliance with all norms and regulations.
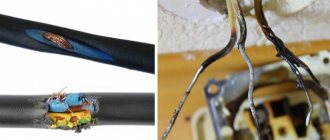
Replacement of old type electrical wiring with new one and its repair
After a while, any wiring fails. Of course, damaged communications cannot be used, so replacement of the electrical wiring is required. Unfortunately, not everyone clearly understands the responsibility of electrical installation work and begins independent reconstruction.
In this article we will consider all the recommendations and requirements regarding the procedure for dismantling the electrical system in an apartment.
Important! If problems arise in the old type electrical network, it is not recommended to partially dismantle it, since there is a danger of problems arising in this area again and again.
If your apartment is equipped with “Khrushchev-type” electrification (that is, it has aluminum wires), then complete dismantling and simultaneous replacement of electrical fittings is necessary.
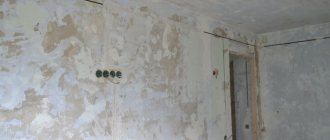
Preparing walls for electrical wiring replacement
Replacing electrical wiring in an apartment: step-by-step instructions
It is recommended to start any work process being prepared for it. It is ideal to study the features of electrical wiring, its type and installation methods and then divide your work into stages:
- the first stage involves the complete preparation of tools and all materials for both dismantling and laying new electrical wiring;
Attention! The ideal option is to use cables with copper conductors, neglecting unnecessary connections, except in junction boxes.
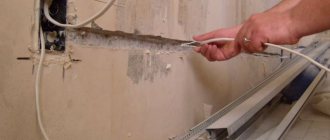
- The second stage consists of completely dismantling the old wires. You can find them using a special device or an indicator screwdriver. If this is not possible, you should understand when the wiring was done. At one time it was stretched between the walls and the ceiling, at another it was laid directly in the floor;
- Having done all the dusty work, a plan is created on which all communications are accurately indicated. He will be an excellent assistant in the future;
- now you can lay the cables in the same grooves, but if you are considering finishing the surfaces with plasterboard, then it is advisable to throw an electrician directly along the walls in a corrugated pipe and lay the grooves;
- if you chisel the walls, then do it in accordance with your plan. Consider every detail, including wires for powerful consumers and lighting. Divide the electrics into several groups, this will help connect them to protection devices;
- Then we place the cables in the prepared recesses in the walls. If necessary, secure it with special fasteners so that the wire does not dangle. In order not to use additional fittings, it is necessary to make the grooves equal to the size of the cable;
- install the distribution panel. You can find out about the details of its installation in our previous article. It should include circuit breakers, RCDs and the possibility of grounding, since grounding in apartment conditions is impractical;
- Now we connect all existing conductors in junction boxes and electrical panels, their functionality must be checked;
- At the final stage, it is planned to connect the panel to the general power supply.
Replacing old wiring with new one
Electrical wiring repair: tips and techniques
As you already understand, we are considering do-it-yourself wiring repairs in residential settings. Be sure to initially de-energize the entire home electrical network to prevent electric shock. If for some reason you cannot perform this operation, invite specialists.
If you still decide to repair it yourself, it is advisable to first find a broken conductor in the thickness of the wall; this cannot be done manually, so it is better to get a device for finding a damaged cable. You will learn how to use it by following this link.
Important! Be sure to consider all the details of repairing the wiring in the apartment in advance.
It is imperative that at the moment of suspicion of a short circuit, you should immediately open the electrical network using circuit breakers, so you cannot keep them under a lock that is difficult to open.
Frequently used devices most often malfunction, these are sockets and switches; let’s look at what to do in such situations.
Switch: we determine the malfunction and make repairs
To understand that your device is gradually starting to fail, special skills are not needed. Most often this is determined visually:
- the switch stops working, even if the lamp itself is operational;
- sparks appear in the device body;
- hissing and crackling sounds are heard under the keys of the device;
Based on such signals, it is recommended to urgently begin repairs to avoid a possible fire.
First, we turn off power to the entire room in which the problem is detected. Most often, after removing the housing from the switch, you will notice loose contacts between the wires and terminals - this is a common cause of sparking devices. Therefore, you just need to securely fix the conductor and everything will fall into place.
Connecting wiring to the electrical panel
Important! When repairing a backlit switch, you should be more careful and not mix up the conductors when connecting them.
How to repair an outlet: important details
The socket, like the previous device (switch), can break down just as often, but sometimes the malfunction causes a complete replacement of the consumer. To do this, we will go through the following list of actions:
- de-energize the room;
- check the absence of voltage in the socket with an indicator screwdriver;
- Now let's start removing the socket. It is also recommended to remove all its parts, including the “glass”;
- all conductors are stripped of insulation, a new socket with a housing is placed in the hole, and the conductors are connected in the same way. Then the socket housing is closed and voltage is supplied to the network.
Important! All wire connections in a powerful power source must be secure enough, but not overtightened.
It is better to test the performance of the device using an ordinary light bulb with wires in order to protect expensive electrical equipment from damage if carelessness was allowed during the repair process.
- Do-it-yourself electrical wiring in the apartment. We do repairs and replacement of electrical wiring ourselves. If your wiring is sparkling, this is a sure sign of its malfunction. And since there are issues with the wiring...
- Do-it-yourself suspended ceiling, step-by-step instructions Do-it-yourself suspended slatted ceiling: step-by-step instructions When finishing ceilings, consumers often choose slatted…
- Replacing electrical wiring in an apartment Electrical wiring installed in apartment buildings built in the mid-60s poses the greatest danger today. It's all about...
- Repair of intercom in an apartment Repair of intercoms. Tel.: +7 External inspection of the entrance door, calling panel, electromagnetic lock, door closer, protective…
Stages of work
- We will organize an introductory meeting, as a result of which you will receive an estimate of the work and a list of materials. Our task at this stage is to identify your needs in order to subsequently follow the intended goal. If you do not have a project for electrical installation of a one-room apartment, we can prepare for you a simple and visual plan for wiring and installing electrical points.
- After signing the contract, we begin the work and begin with dismantling the old wiring.
- Next, we carry out the wiring in the chosen method: open, closed or combined.
- We install electrical points in accordance with the previously developed plan.
- We bring all the wires into one internal panel, install automatic circuit breakers and RCDs.
Please note that today it is necessary to obtain approval from the management company for connecting the apartment to the common panel. In this regard, we ask you to coordinate this issue with your management company or HOA.
Making a plan
Having made a choice, we move on to drawing up a diagram. This must be done for the following reasons:
- the diagram will allow you to determine the amount of necessary equipment and calculate the approximate cable footage, taking into account the cost of the latter; for example, purchasing an extra 50 meters of copper wire will not only be expensive, but also offensive;
- the installation process will take a lot of time, and you can simply forget or not take into account some points, and after finishing work it will be impossible to make adjustments
- The planning process allows you to choose the most optimal option for cable routes and electrical points locations.
You need to start by drawing up an accurate plan with all the rooms; if you don’t want to practice with a tape measure, you can take the drawing from the technical passport of the apartment as a basis. Next, we make a photocopy of the drawing, or alternatively, scan or redraw it. Since we are making the scheme for ourselves, we don’t have to adhere to GOST requirements. Locations for electrical points are indicated approximately.
“Clean” apartment plan
We choose the optimal location for lighting fixtures and determine their quantity. Having decided, we indicate these places on the diagram. We do the same with switches. Next, we draw the lighting lines and distribution boxes on the diagram.
Plan with applied lighting diagram
It is undesirable to make one line for all lighting, since in case of an emergency you can be left in the dark. It is also not advisable to get too carried away with zoning, leading a separate route to each room. This increases cable consumption, requires more circuit breakers, that is, leads to an increase in the cost of the project.
In the plan presented above, two zones were made, one included two rooms and a corridor, the second a toilet, bathroom and kitchen. Ideally, lighting should be planned in such a way that if any of the lines fails, the electrical panel will always remain illuminated.
Now let's move on to the power part. We select places for electrical points (in this case, these are sockets) and draw routes, if necessary, add distribution boxes. All this should be done taking into account the future layout, so that there are no “frozen” (unclaimed) outlets, for example, covered by furniture. The opposite option, in which there will be a shortage of electrical outlets, is also undesirable (extension cords are not the best decoration for the room).
Plan with lighting and main power section
A few clarifications need to be made here. In the diagram presented in Figure 4, four separate lines are used for sockets. This was done so that when the protection on one of the lines is triggered, only one room remains de-energized. The actual number of zones can be halved by combining rooms and a corridor into one circuit. As for the kitchen, it is recommended to make a separate line for it.
Now all that remains is to draw on the plan individual routes for the stove and boiler.
The final version of the wiring diagram in the apartment