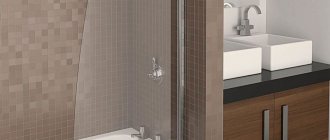
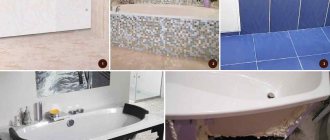
The plinth is an important finishing element and performs two functions at once - practical and aesthetic. Masking the joints along the perimeter of the ceiling and floor, it simultaneously prevents the penetration of dust, moisture, and small debris. A correctly selected baseboard gives the interior a complete look and helps to highlight finishing materials or design features. Thanks to the rich assortment, choosing a baseboard for a bathroom will not be difficult; the main thing is to take into account the design style and color scheme.
Bathroom plinth
Types of floor skirting boards for the bathroom
There are many different finishing materials that can be used in decorating a bathroom. Just like the threshold in the bathroom, the baseboard needs to be chosen so that it matches the overall design of the room.
Depending on the type of material, the baseboard for the bathroom floor can be:
- ceramic – beautiful and functional;
- plastic – easy to install, flexible and versatile (about
Main types of bathroom borders
Today's building materials market amazes with the richness of the choice of skirting boards; they differ not only in colors, sizes and textures, but also in the material from which they are made. It is worth noting that the cost of the product also depends on this. So, according to the material, skirting boards are divided into:
- Marble;
- Metal;
- Plastic;
- Ceramic;
- Wooden or MDF.
Attention! You should not choose wooden baseboards for your bathroom. It will not last long because it does not interact well with moisture. This is expensive and not practical.
Ceramic baseboard
If the decoration in the bathroom is made of ceramic tiles, then it would be logical to use a baseboard made of the same material. Ceramic plinth has the following characteristics:
- wear resistance;
- moisture resistance;
- does not change its shape;
- the color does not fade over time;
- easy to care for;
- has chemical resistance;
- resistance to sudden temperature changes;
- durable unless dropped or hit with something very heavy.
Manufacturers have not previously produced ceramic skirting boards. Therefore, instead, tiles cut to the required sizes were used, and very often its color differed from the color of the finish, but was very close to it.
Today, ceramic skirting boards are produced in large quantities. It is produced both separately and in a collection with tiles. Skirting boards can be of various sizes, shades and shapes, and are also produced in the form of corners. Basically, the dimensions of the floor plinth are more or less standard.
As a rule, the baseboard is also purchased immediately along with the tiles. You should choose baseboards and tiles that match each other, and everything should be in harmony with the overall design of the room. The amount of material should be taken 5-10% more than required, and you must not forget to buy corners.
Ceramic plinths are laid, like tiles, using a special tile adhesive. This type of skirting board is more difficult to install than a plastic one, since it does not have plasticity. Before the glue has set, you should very carefully adjust all the elements.
This plinth, unfortunately, can not be found in all localities. Therefore, they come out of the situation depending on the current situation. There are specialists who construct the floor in such a way that there are no gaps between the wall and the floor, and accordingly, there is no need for a plinth.
How to install a skirting board yourself
Ceiling and floor plinths have certain differences in installation, so the installation of each of them must be considered separately. But the number of elements is calculated using the same formula. To find out how many ceiling moldings you will need, you need to measure the perimeter of the bathroom, divide it by the length of the molding and round up. For example, the width of the room is 2.5 m, the length is 3 m. The perimeter is 11 m, and the length of the ceiling plinth is usually 2 m. When dividing, we get 5.5 and round to get a whole number. That is, we will need 6 slats, although it is better to take one more so that there is a reserve for trimming.
Types of ceiling plinths, sizes
The number of floor skirting boards is calculated in the same way, and the difference is only in the length of the elements. For example, plastic ones are usually produced with a length of 2.5 m, for ceramic ones it is from 30 to 90 cm. The more niches and protrusions in the room, the greater the material consumption for trimming. Installation should begin after complete completion of finishing work.
Attaching the ceiling plinth
To work you will need:
- ceiling baguettes;
- acrylic sealant;
- assembly adhesive;
- marker and tape measure;
- mounting gun;
- fine-toothed hacksaw, miter box.
It is worth preparing in advance everything necessary for installing the baseboard
Step 1. Take the first baguette and try it on to the line where the ceiling and wall meet. Pressing carefully, mark the cut points along the edges with a pencil. You don’t have to apply the baguette itself, but measure the distance with a tape measure; the main thing is to take the measurements as accurately as possible so that you don’t have to separately mask the gaps between the baguettes.
Step 2. Place the baguette in the miter box and cut the edge at an angle exactly along the intended line. You need to cut at an angle of 45 degrees, and the side of the plinth that will be adjacent to the ceiling should be at the bottom in the miter box. The left parts are inserted from the left side into the tool and cut from right to left, the right parts vice versa. To join the outer corners, cuts for the left parts are made from left to right, while the right parts are cut from right to left. This may seem a little confusing to a beginner, but it’s not difficult to figure out the process. Experienced craftsmen use miter saws for cutting, allowing them to accurately and quickly cut the material at the desired angle.
Trimming the ends of the plinth
Step 3. Place the prepared plinth face down on a flat surface and carefully apply mounting adhesive from a gun. The glue is applied in a thin continuous strip along the side walls of the baguette, almost along the very edge. There is no need to make a thick layer, since after pressing the baseboard, the excess will be squeezed out.
Advice. For better adhesion of materials, you should thoroughly wipe the baseboard itself and those areas where it will be glued from dust. Even if you have done a thorough cleaning after finishing, dust particles still have time to settle on the surface.
Wipe off the dust
Apply glue
Step 4. Very carefully, trying not to touch or stain the walls, apply the plinth to the joint, level it and press it simultaneously against the wall and ceiling. The axial bend of the plinth must be exactly at the junction. Press the baguette and hold it for a few seconds so that the edges are tightly connected to the work surface. Excess glue should be removed immediately with a damp, clean sponge.
Gluing process
Step 5. To completely prevent the penetration of moisture, sealant is applied from a gun along the joint line of the baguette. This must be done carefully, with a thin continuous strip, first between the baguette and the ceiling, then between the baguette and the wall.
Applying sealant
Applying sealant along the bottom edge
Step 6. Using a small rubber spatula or just your finger, smooth the sealant along the entire length, and then wipe off the excess with a slightly damp sponge. Do not rub too hard, otherwise the sealant will have to be applied again.
Leveling the sealant
Excess should be wiped off with a sponge.
Advice. Against the background of colored walls or ceilings, the white sealant is clearly visible, and if the seam is made unevenly, all defects will also be noticeable. To make a perfectly even seam, before applying the sealant, you need to stick masking tape along the baseboard, leaving a gap of several millimeters.
Step 7. Take the next baguette, measure the required length, make corner cuts for joining. Be sure to apply it to the ceiling to make sure that the corners match exactly. After this, glue is applied and the steps described above are repeated. A little sealant is also applied to the joint line between the baseboards, which makes the seam invisible.
Gluing the next skirting board
Filling the joint with sealant
Installation of floor plinths
For installation you will need:
- floor plinth with plugs, corners and connecting elements;
- self-tapping screws with dowels 6x40 mm;
- tape measure and pencil;
- fine-toothed hacksaw;
- sharp mounting knife;
- drill and screwdriver.
Skirting board with cable channel
Corners for skirting boards
Step 1. Work starts from the corner. If the wall is shorter than the baseboard, apply plastic corners to it on both sides and measure the distance between them. It should be noted that the plinth itself fits 5-10 mm into the grooves of the corner or connecting elements, which means that you need to add 10 to 20 mm to the measurements.
We measure the length of the plinth
Step 2. Measure the required distance on the plinth and mark the cut line with a pencil.
Making marks with a pencil
Having laid the part on a flat surface, saw off the excess with a hacksaw, and then process the cut with sandpaper or a file to remove burrs.
Sawing off the baseboard
Processing the cut
Step 3. Having removed the decorative cover from the cable channel, holes with a diameter of 6-8 mm are drilled in the plinth in increments of 50-60 cm. The outermost holes should be located no more than 10 cm from the ends. At least two holes are made on short sections of the plinth, even if the distance between them is 10-15 cm.
Drilling holes
Drilling holes in a short distance
Step 4. The edges of the plinth are inserted into the grooves of the corner elements and applied to the joint between the floor and the wall. Carefully level it, press it to the surface and drill holes in the wall for fasteners through the holes in the baseboard.
We attach the baseboard to the wall
Advice. Since the walls in the bathroom are most often tiled, you first need to attach the baseboard and mark the drilling locations through the holes with a pencil. Then the part is removed, the glaze is scratched on the tile at the designated points with something sharp, and the lining is drilled with a spear-shaped drill. Next, change it to a drill for concrete and go deeper into the wall by 40-50 mm, turning on the hammer drill mode. This will prevent chips and cracks from appearing on the tiles.
Drilling holes in the wall
Step 5. Attaching the baseboard again, insert dowels into the holes and screw in self-tapping screws. You can also hammer it in, but this method will significantly complicate dismantling during subsequent repairs. In order not to damage the plastic with a hammer blow, the self-tapping screw is not driven all the way, but only flush with the baseboard body, after which they take a hammer and, with its help, deepen the fasteners into the cable channel.
Hammering a dowel with a self-tapping screw with a hammer
Using a finisher
Step 6. When joining two elements on a straight section of the wall, everything is done exactly the same, only connectors are used instead of corner parts. Having secured the plinth along its entire length, take the lid, bend it slightly and insert it first with one end into the groove of the corner, then with the other, and snap it into place along the entire length. On short sections it is more difficult to bend the lid, so it is cut 7-10 mm shorter than the baseboard, inserted into a corner on one side, moved a little to close the gap and snapped into place. Finally, plastic plugs are placed at the ends of the plinth.
Insert and snap the lid
Short element with lid
When the short element is fixed with dowels, the cover is slightly moved towards the corner or plug
Fixed floor skirting
If you need to lay a wire in the bathroom, drill a neat hole of the appropriate diameter in the plug and pull the cable through the channel in the baseboard. This is done after fixing the baseboard to the wall, but before installing the cover. The wire is straightened and laid so that it does not interfere with snapping the lid. Study the cast marble bathtub using the link.
Wiring in the baseboard: how to do it yourself
Plastic skirting board
A plastic baseboard on the bathroom floor can be used for almost all types of interior decoration. This type of plinth is inexpensive and comes in a large number of colors.
It has the following characteristics:
- moisture resistant;
- not exposed to fungus and mold;
- thanks to the existing rubber edges, it fits tightly to the surface;
- the surface is smooth and even, does not require painting, and a large selection of colors allows you to choose a baseboard that will look harmonious in the overall interior of the bathroom. Tips on how to choose a baseboard color will help you figure it out;
- durable enough;
- if it is not glued, then it is possible to dismantle it and install it again;
- easy to install;
- has space for cables and necessary accessories;
- easy to care for, detergents will not damage it.
The plastic plinth is fixed to the tile using “liquid nails”. If there are small cracks, they are sealed with silicone sealant. Most specialists use tile adhesive when installing skirting boards.
How should I glue it?
With the help of certain tips, you can glue the baseboard to the floor in the shower room with your own hands. To do this you will need to prepare some tools:
- miter box;
- hacksaw;
- scissors;
- a rag;
- sealant;
- glue or liquid nails.
Tools for installing skirting boards
Metal baseboard
A metal baseboard for a bathroom floor has the following characteristics:
- strength, this indicator is much higher than that of other types of skirting boards;
- duration of service life;
- immunity to temperature changes;
- moisture resistance;
- easy to maintain as it does not react to detergents.
In addition, various wires can be laid under the baseboard. The metal version of the plinth most often used is the one made of aluminum. Its cost is high, so it is rarely used in apartment interiors. However, such a plinth looks luxurious, beautiful and unusual, and is a unique part of the decor.
Features of materials
So what material should we choose? Now more details about each:
- Plastic border, of all those proposed above, is the cheapest. But that doesn't make him the worst. On the contrary, it is very easy to install, easy to clean, and resistant to moisture and mold. Another significant advantage is that stores offer a huge selection of colors and textures of this type of skirting board. Therefore, it is easy to choose for any design.
Variety of plastic borders using the example of popular market offers
- Ceramic plinth looks expensive and very harmonious in combination with tiles, which justifies its higher cost. Its advantages include a long service life (it will not lose its original appearance for a long time), it is easy to clean, as it is resistant to any household chemicals. Among the disadvantages, it should be noted that ceramic plinth is a little more difficult to install, and it is also more fragile, so you need to be more delicate with it.
Advice! If you have stopped and chosen a border made of ceramics, then it is best to select the color scheme directly in the store to match the color of the floor tiles. This way you definitely won’t go wrong, and your bathroom design will look complete.
- Skirting boards made of metal are, as a rule, chosen very rarely. It does not suit all bathroom decor styles. This plinth will look best if the bathroom is made in high-tech or retro style. When choosing such a product, you should pay attention to what kind of metal it is made of. It must be resistant to corrosion.
The main advantages of metal plinths:
- Long service life;
- High strength of the material;
- Not susceptible to shocks, easy to use.
The most expensive, but the most elegant are the borders that are made of marble. They will become a real decoration of the bathroom, and not just an addition to it.
Stone border: an expensive but effective solution
Their high cost is justified by their long service life.
Attention! You can install ceramic and plastic borders yourself, but for high-quality installation of marble and metal products it is better to invite specialists.
Self-adhesive skirting board
This bathroom floor plinth is a polyurethane tape that has the following features:
- moisture resistance;
- rot resistance;
- does not change due to temperature changes;
- very easy to install;
- long period of operation;
- easy to care for;
- wide range of colors, produced in various widths.
Water may cause limescale to appear on the baseboard. It is very easily removed using cleaning products that do not contain abrasive substances so that scratches do not form.
This type of plinth is installed as follows: the protective layer is removed from the adhesive surface, then gradually unwinding the roll, the tape is glued to the required place. Self-adhesive skirting boards install faster than other types of skirting boards.
Primary requirements
Floor skirting boards are installed in the bathroom to solve two main purposes. Firstly, they give the renovation a finished look by covering the gaps between the floor and wall coverings. Secondly, their presence provides additional waterproofing, since water will get into open cracks. Basic requirements for borders:
- the material should not absorb moisture and be destroyed under its influence;
- products must be durable;
- the baseboard material should not contribute to the spread and growth of mold fungi;
- the border should be compatible in design with other finishing materials.
Choosing the color and width of the plinth
The plinth is selected depending on the color scheme of the floor covering. If you choose it in the same color as the floor, it will look like a single whole. To emphasize the line between the floor and the wall, you need to choose a contrasting color or it should differ in color by several tones. Nowadays, more and more often, the color of the plinth is chosen to match the tone of the walls, rather than the floor.
Even a plain white baseboard will look like a small accent in the design of the room if the overall color background is chosen correctly. You can experiment, look at several options and choose the best one.
The following factors influence the choice of plinth height:
- room size;
- bathroom geometry;
- ceiling height;
- color scheme for finishing the floor, walls and ceiling. If the bathroom is large, then the height of the plinth should be appropriate to the size of the room, that is, higher compared to the plinth in a small bathroom with low ceilings.
You should adhere to proportions and choose the right combination of colors, then the bathroom interior will look elegant, and the baseboard will give it a complete look.
Why did the gap form?
The reasons for its appearance are mainly related to construction defects and mistakes made during landscaping:
- the walls are not built at right angles and have an uneven surface;
- the bathtub is not correctly selected in size and shape;
- the frame and base are not installed correctly (not tightly fitted to the wall, distortions along the horizontal and vertical planes).
How to fix the problem?
There are many ways to seal the gap, or joint, between the bathtub and the wall using various building materials, types of glue and sealants. Let's look at the simplest and most effective of them.
Features and types of corners
Attaching the outer corners can be done with liquid nails or silicone glue. In this case, we trim the joints or use ready-made corners.
the corners with an internal direction on the side of the bathtub, and place the other end under the tile.
two-part corners with self-tapping screws or silicone. The plinth snaps into place at the top.
Moldings are used to hide defects. Large ones are mounted only in large rooms. For small bathtubs, purchase wide borders. And if you have low ceilings, then vertical elements will look good.
Skirting boards for external cladding do not allow water to pass under the bathroom and add aesthetic notes.
Types of ceiling fillets for the bathroom
Ceiling plinth is no less in demand than floor plinth, as it also performs protective and decorative functions. However, do not forget that constant contact with water and rising steam can have a negative effect if the material is not sufficiently resistant to such effects. It is for this reason that it is not recommended to use wooden borders, which can become deformed under the influence of moisture, because a plastic plinth for the ceiling copes with the task much better.
One of the most popular ways to solve this problem is to install foam baseboards. This option is somewhat cheaper than a plastic baseboard for the bathroom and at the same time you can easily attach it yourself, and it looks quite satisfactory. The only thing that needs to be taken into account is that this material is very fragile and requires careful handling during transportation and installation.
A more expensive, but significantly superior option is polyurethane fillets. Such skirting boards have increased plasticity, due to which they allow you to design any uneven surfaces, as well as protrusions. Like foam, this material is completely resistant to water and steam, and special glue is used to fix it.
Wide polyurethane ceiling plinth for bathroom
Another option is to install PVC fillets. This plinth will go well with panels made of the same material. And the color scheme is usually selected to match the color of the ceiling covering, although such panels are not overly diverse.
Plastic ceiling plinth is a win-win option in the design of any interior, since the color options for such fillets are not limited in any way and choosing an option that will ideally match the color of the bathroom walls is not at all difficult.
Calculation of ceiling plinth for its installation
It is not difficult to calculate the required amount of plinth - you just need to measure the perimeter of the bathroom. For example, if a room measures 5x4 m, then its perimeter will be 18 meters. If we take into account that the length of the fillet is two meters, then by dividing the perimeter by the length of one product, we find that 9 fillets are required for this room.
If a fractional number is obtained, then it is rounded to the nearest whole number, since the plinth is sold by piece, and not by linear meters. In any case, experts advise buying one more ceiling plinth, in case of unexpected errors when cutting. In total, it turns out that we need to buy 10 fillets.
It is better to draw up a scale drawing of the ceiling in the bathroom in advance and design the location of the skirting boards in order to minimize the number of joints and at the same time achieve a symmetrical arrangement of the ceiling fillets. A checkered piece of paper is perfect for a drawing; then four squares can be taken as a meter. On the drawing, it is necessary to draw up a diagram of the location of the fillets in the most optimal way and thereby clarify the number of required skirting boards.
