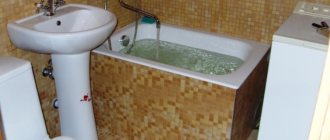
The old bathtub at the dacha has long ceased to be the only place for maintaining personal hygiene, and a normal modern bathroom at the dacha is becoming more and more common. We want to consider the main ways of organizing the interior and arranging a country bathroom.
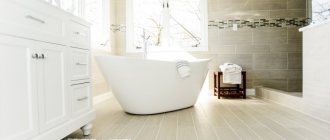
At the dacha you can equip a full bathroom.
Preparatory stage
A bathroom in a country house can be installed in any room of a suitable size. If necessary, two or three plumbing units can be made in a wooden house.
Preliminary diagrams will help you choose the right room size. It is also advisable to make a model of the future bathroom on an appropriate scale. This will help to properly organize the internal space and accommodate the necessary equipment, appliances, and furniture.
To carry out construction and repair work, you will need the following tools and equipment:
- construction tape;
- hacksaw;
- plumb and level;
- Bulgarian;
- electric drill;
- construction mixer;
- container for mixing the solution;
- brushes;
- spatulas;
- gas-burner;
- technical knife;
- hard brush;
- stapler
It is advisable to choose what to decorate a bathroom in a wooden house during the preparation period. After all, facing and protective materials will take up part of the space. This must be taken into account when drawing up a bathroom layout. According to the calculations made, it is necessary to purchase finishing materials, waterproofing and prepare all the required tools.
Country pond from an old bathtub
Small reservoirs and ponds always harmonize perfectly with the landscape design of a dacha area. Building a small pond yourself is not difficult if you have an old bathtub. Such a pond will look most natural if the bathtub is buried almost to the very edges in the ground. In the place where it is planned to organize a pond, it is necessary to make markings based on the size of the bathtub and dig a hole corresponding to its parameters. Next, plug the side and bottom drain holes with a wooden plug wrapped in cloth. It is better to paint the inside of the bath black so that the bottom of the bath does not shine with an unnatural whiteness. However, if you do not plan to periodically drain the water from the pond and clean the surface of the bathtub, then after a certain amount of time the bathtub itself will take on a natural appearance due to adhering dirt, plant debris and insect waste products. Here are other ways to make a pond in your dacha with your own hands.
Article on the topic: Video tutorials for cross stitching with a parking lot: methods and master classes, cross stitch technique for beginners, from left to right
You can lay stones around the pond and plant plants such as loosestrife, bells, iris, ferns, and bergenia. You can also decorate the pond with lanterns and various figures of animals and birds.
Principles of waterproofing a bathroom
Waterproofing a bathroom in a wooden house is carried out using a special technology. The choice of protective materials must be carried out especially carefully. To protect wooden structures from moisture in the bathroom, special materials are used, for example:
- special film;
- glass wool;
- glassine;
- roofing felt;
- roofing felt;
- isoelast;
- isoplast;
- mostoplast.
Moisture-resistant material must be laid on the floor in two layers. The final thickness of the coating must be at least 18 cm. The floor insulation is carried out with expanded clay, on top of which a mesh or frame is mounted. The floor screed is made from a sand-cement mixture in a ratio of 3 to 1 and water. After the solution has hardened, the surface can be finished.
The walls in the bathroom must be treated with special compounds intended for rooms with high levels of moisture and temperature changes. To prevent the appearance of fungus, a protective mixture must be applied to all wooden surfaces and finishing elements.
Preparing a bath to replace enamel
So, how can you make a new one out of an old bathtub? First of all, a special powder is applied to the surface. After this, the cleaning itself begins to remove old enamel, scratches and splinters. This procedure occurs without washing off the powder.
For cleaning, use waterproof sandpaper or an abrasive stone. This process must be carried out with special care, given that the entire restoration result depends on it.
After removing the old coating and defects, you need to wash off the resulting slurry and fill the bathtub with hot water for a while. Then it goes down, and the product is wiped dry and degreased.
In case of deep chips, they need to be restored. For such purposes, epoxy compositions or a mixture of Super Cement glue and white nitro enamel are used.
At the end of the first stage of work, the surface should be smooth, dry and matte.
Working with moisture-proof materials
For waterproofing wooden bathrooms, the following are usually used:
- Painting mastics and/or emulsions. Painting is applied in 2-3 layers as the surface dries.
- Film and/or roll materials made of polymer or bitumen. They are glued to special compounds.
If everything is clear with painting materials, then the second type has its own secrets.
Film and roll waterproofing can be self-adhesive or weld-on. In the first case, it is necessary to remove the protective film. In the second, the use of a gas burner is required to heat the adhesive composition applied to the material during the production process.
Films and roll products are placed on a flat surface, always overlapping and with careful processing of the seams.
For corners and other hard-to-reach areas, the best solution is to use waterproofing paints. The surface under the sealant must be primed with solutions that penetrate to great depths. After drying, the paint is treated with moisture protection.
Film waterproofing is secured with a stapler. The membrane based on polymers and bitumen is a self-adhesive material. After 24 hours, when the mastic or emulsion has dried, you can lay the film or roll material. The canvases are cut taking into account that the overlap when laying should be at least 10-15 cm.
Step-by-step video instructions for waterproofing a bathroom:
When waterproofing, it is necessary to pay special attention to the area of high humidity. This includes the floor and walls around the bathtub, washbasin, bidet at a distance of at least 0.5 m and in the shower stall. These areas must be heavily waterproofed to protect the wooden base from moisture.
Arrangement of the floor in a wooden bathroom
The floor in the bathroom requires special attention when arranging it. Basic rules that require strict adherence in this case:
- the floor should be at least 2 cm lower than in other rooms of the house;
- beams are laid in smaller increments to increase the cross-sectional area.
The ceilings must easily withstand the weight of a filled bathtub, furniture and other equipment located in the bathroom. Therefore, their thickness must be increased by about 25-30%.
To create the required level difference in height, the beams in the bathroom need to be lowered by about 30 cm. After all, in the bathroom it is necessary to make a concrete screed, lay waterproofing, and a finishing coating. In this case, the floor in the bathroom should be slightly lower than in other rooms of the house. This will protect against water spillage in the event of an accident.
Beams and joists that form the basis of the subfloor must be impregnated with moisture-proof compounds. The foundation is first covered with special plaster or mastic.
The floor pie is made up of insulation, a reinforcing frame or a special mesh. You can use the "warm floor" system. During the arrangement of the rough foundation, it is necessary to lay all the necessary pipes and communications and protect them from moisture, damage, etc.
After the surfaces have completely dried, the rough floor covering can be laid. The finishing floor is placed on top of it.
You can cover the bathroom floor with the following materials:
- tiles - ceramic or tiled;
- linoleum;
- mosaic;
- porcelain stoneware;
- adhesive plug with varnish coating;
- moisture-resistant laminate or wooden board.
Additional treatment of the finishing coating with an antiseptic and waterproofing agent will give it increased strength and protect it from the spread of harmful microorganisms.
Photo example of a bathroom with tile flooring:
When laying the floor, you need to provide a drain for the drainage. This is done by laying the cake at an angle of 1-2° towards one of the corners. It is necessary to equip a drain hole in it to remove water masses that fall on the floor.
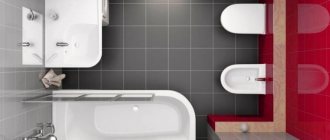
Features of the bathroom
In principle, you can organize a bathroom in any room, but you will have to do some additional work with it: open up the floors, increase the thickness of the ceiling by a quarter, reduce the distance between the beams, on which the floor boards will then be installed. Such changes are a forced measure. Any plumbing equipment itself weighs more than furniture. And when the bathroom is filled with water, the dynamic load on the floors increases, which very quickly provokes the destruction of the material.
In addition, the floor in the bathroom must be lowered by 20 cm. This difference is necessary for waterproofing work and additional insulation.
Reinforcing floor joists in the bathroom Source nehomesdeaf.org
Rules for proper waterproofing
Wood has a porous structure that is constantly in motion. At a high threshold of humidity, it actively absorbs it, and at high temperatures releases it to the air. In such conditions, the tree quickly begins to rot and become covered with fungi or mold. Proper moisture protection and good ventilation help prevent such phenomena. Without these two components, the final decoration of the bathroom in the countryside will not last long.
For waterproofing, experts recommend using pasted or rolled materials. There are films and membranes on sale that are glued to the concrete base using hot mastic. The presence of such seams is a disadvantage of the described choice. Over time, they can become unsoldered. Moisture penetrates inside, and the defect intensifies even more, which violates the waterproofing of the wooden room. A similar problem is solved by growing the sheets overlapping and then filling them with hot bitumen. If, before pouring, laid out rolls of waterproofing are covered with reinforced glass wool, after the composition hardens, a seamless fabric is formed that meets all the requirements of modern waterproofing.
Roll waterproofing of floors in a wooden house Source multinga.com.br
It is easier to work with coating materials (bitumen-based mastics or polymer-based emulsions). They are simply applied with a brush or roller to the surface. After hardening, a durable waterproof layer is formed. Waterproofing is created using layer-by-layer application; between each coating, the time interval specified by the manufacturer on the packaging is maintained. The number of recommended layers may also be indicated there.
If the design of a bathroom in the country involves the use of wooden finishing, all elements are pre-treated with impregnating waterproofing materials. They contain water-repellent cement, crushed sand and special chemicals. The surface of the wood, impregnated with this composition, becomes completely waterproof.
Different options for waterproofing floors in a wooden house Source pol-exp.com
See also: Catalog of companies that specialize in finishing materials.
Typically, waterproofing a bathroom floor is done according to the following scheme:
- First, the foundation is waterproofed , it is coated with mastic or plastered with solutions prepared from mixtures with polymer additives.
- Then the logs are treated .
- A subfloor is mounted on top of them , which is then, in turn, covered with rolled waterproofing materials. The easiest way to install is self-adhesive bitumen-polymer films. They attach well to wooden horizontal and vertical coverings.
- remove dust from them using a vacuum cleaner , then apply a bitumen emulsion primer with a roller or brush.
- When it is completely dry (check this with a cotton pad - if after applying it to the treated surface it remains clean, then you can proceed to the next stage).
Rolled waterproofing for wooden floors Source homeandhoby.blogspot.com
- The rolled membrane is spread on the floor , a piece of the required length is measured, cut with a knife, then rolled on both sides with the protective film facing up.
- It is cut exactly in the middle and carefully removed . In parallel with this, you need to glue the roll to the base.
- remove air bubbles with a brush . To do this efficiently, you will have to brush over the same place several times.
- The second sheet is glued in the same way . It is laid with an overlap (10 cm). The contact area of the two rolls is additionally treated with bitumen mastic.
- The seam is carefully ironed with a heavy roller .
- Walls are waterproofed in the same way . The rolls applied to them should slide to the floor by 10 cm. The allowance is additionally coated with a primer. Any tile material can be immediately laid on such a base.
In wooden houses, the construction of a concrete screed is not recommended: it increases the load on the floors and becomes the bridge through which heat from heating then leaks out into the street in winter.
Technology of application of coating waterproofing
When there is a need to additionally insulate the walls of the bathroom, a frame is constructed from metal profiles, sheets of mineral wool are placed in them, and they are covered with moisture-resistant plasterboard on top. The floor is insulated using expanded clay, it is filled with moisture, covered with plastic film, and polymer particle boards are laid on top. Afterwards, all surfaces are treated with coating waterproofing.
Performing waterproofing with coating mastics Source hochu-stroitsya.ru
Wooden walls in the bathroom
Nowadays, bathrooms often use wood to finish the walls. The main thing in this case is to choose the right breed. Moisture-repellent wood is:
- yew;
- larch;
- pine;
- spruce;
- fir.
A room with such decoration will always be warm, cozy and comfortable. Walls made of the specified types of wood do not need to be treated with waterproofing, especially if the bathroom will not be used as a Russian bath.
The walls can be sheathed with sheets of plasterboard or wooden slats. It is necessary to lay a waterproofing material under these finishing materials. Film materials can be glued, fused or stapled to the surface. When equipping a shower stall, it is better to line the walls with tiles or porcelain tiles, because the humidity level here will be increased.
Installation of a shower cabin with a water heater in the country house.
Most people like to spend the summer at the dacha: swimming, sunbathing, planting something in the garden. As they say, there’s a lot to do. But then evening comes, and problems begin - you want to wash off the day’s dust and soil from your hands and feet and just enjoy the warm water. In such a situation, everyone gets out as best they can - someone heats the water with huge pots, someone uses water pre-heated in the sun, and someone (especially hardened) is happy with cold water. But this state of affairs is not suitable if there are a lot of people or several children at the dacha. Then the ideal option would be to install a shower cabin with a water heater at the dacha.
You can buy a shower cabin with all the necessary appliances, or you can do it yourself. So, you need to start from the cabin itself. If the dacha is used only in warm weather, then a light cabin can be built, and the material for construction is not particularly important: iron, iron structures covered with tarpaulin. And those who have metal tiles left over from their roofing use that too. The main thing to consider is that instead of a roof, you need to install a water tank through which water will be supplied. And in order to prevent water from being wasted, the outlet pipe must be closed with a shut-off valve.
The most difficult thing is to build a heat exchanger. It is necessary to make a coil from a steel pipe - twist the pipe into a spiral of three turns. It turns out something similar to a compressed spring. The coil needs to be inserted into the casing and the whole thing is welded together. This structure is connected to the main water supply using couplings. There is no need to weld it tightly - on the contrary, in winter it is better to remove the structure so that the pipes do not burst from severe frost. But if you don’t want to bother with the manufacture of such a complex system, you can take a radiator from a gas water heater, which can also play the role of a heat exchanger.
Instead of a heater, you can use an ordinary blowtorch. For it, you need to specially build a shelf so that the combustion chamber enters the heat exchanger coil. The blowtorch would need to be adjusted to get the water at the right temperature. As a result, preparation for evening water procedures will now take literally a few minutes, since not the entire tank will heat up, but only those jets that will directly flow while taking a shower.
However, if the dacha is used from late spring until the first cold weather, then taking such a shower will not be very convenient. Then it’s worth doing more thorough construction - building something like a small bathhouse, but instead of a stove, install an electric water heater there. For such a shower stall, you need to dig a foundation and choose a good material for the walls - you can use a log house, like for a bathhouse. Flexible tiles will go on the roof, but in this case it is necessary to make a recess in advance for the barrel in which water will accumulate.
Such a major shower will have to have electricity installed in order to connect a heater and be able to wash in the light. Electrical work should be trusted only to professionals who will give advice and help avoid dangers: overloads, short circuits, uninsulated wires. In such a cabin, however, you can take a shower even in summer or late autumn.
A shower at the dacha is needed by everyone who does not have the opportunity to build a bathhouse, or constantly travel to the city just to wash themselves. After a hard day of work in the garden, when even washing your hands with cold water is a problem, a warm or hot shower will save you. After swimming in a river or walking through the forest, many people have only one desire - to stand under the warm streams. And if you need to take a child, or even more than one, to the dacha, then a shower with hot water is all the more not a luxury, but an urgent necessity. With a shower, you won’t have to warm up a basin of water for three hours to wash pranksters’ feet before bed or bathe them after yet another exploration of a dirty puddle.
Wooden bathroom ceiling
It is optimal to make the ceiling in the bathroom suspended from a special water-repellent film. You can use PVC panels with a glossy finish or moisture-resistant plasterboard.
The ceiling made of plasterboard or gypsum fiber is laid using a frame made of metal profiles. They must be coated with a special compound to prevent corrosion and rust. For the finishing coating of such a ceiling, you can use glass wallpaper.
The wooden base of the ceiling must be treated with an antiseptic and a special primer. Once it has dried, the finishing coat can be applied.
What can be done from an old bathtub - photo
The best posts
- Design of a living room combined with a kitchen: ideas for zoning (37 photos)
- Green carpet in the interior: a walk on green grass in your own living room (37 photos)
- Rules for combining wallpaper in the interior of a house (37 photos)
- Coffee table in the interior: creating comfort in the living room (37 photos)
- Bright carpet in the interior: how to easily and simply bring color to your apartment (37 photos)
- Garden of indoor plants in an apartment: closer to nature at home (37 photos)
- Updating an old wall with your own hands: tips + step-by-step masterclass (37 photos)
- Space above the bed in the bedroom: decor and design ideas (37 photos)
Arrangement of ventilation and lighting
To prevent the finish from deteriorating under the influence of abundant moisture, good air circulation must be ensured in the room. Ventilation in the bathroom must be forced, supply and exhaust type. To equip it, corrugated pipes are laid along the ceiling for air outlet and air supply.
Fans are installed in holes at the level of the decorative ceiling. To give them an attractive appearance, special decorative grilles are used.
The ventilation device must be selected according to the total volume of the room and taking into account the intensity of its use. Especially if it is not possible to install at least a small window in the bathroom.
For lighting rooms with high levels of moisture, low-voltage halogen lamps (approximately 12-15 V) are better suited. In a small room, a single light source will be sufficient. For a large bathroom, you can use several lamps. This will ensure good illumination of all necessary points: mirrors, dressing table, cabinet for small accessories, etc.
Alternative outdoor service
By itself, a cast-iron bathtub somewhere in the garden or on the lawn looks ridiculous, and you will have to show a little imagination to fit it into the surrounding landscape. The main advantages of this dimensional plumbing attribute are its strength and solid weight, which allows you not to worry about its stability. The creative thought of our contemporaries has developed several ways to use a cast-iron bathtub for other purposes.
Tank bath
The first thought that comes to the mind of a thrifty owner regarding the fate of the bathtub is to use it as a container for storing water. In most areas there is no excess water, whether there is an extensive vegetable garden or several carefully tended beds. For many garden plants, cold water from a tap or well is destructive, so a bath located in the sun will be a very useful device.
Fun solution Source kvartira-flat.ru
An old bathtub can hardly be called a decoration for a site, so a similar container for technical needs can be slightly dressed up. You can go two ways: firstly, the easiest way is to make it less noticeable and disguise it by painting it green. Secondly, you can do the opposite and make it a bright detail; For this you can use bright colors or non-standard design.
On our website you can find contacts of construction companies that offer the service of developing and carrying out landscape work of any complexity. You can communicate directly with representatives by visiting the “Low-Rise Country” exhibition of houses.
Bath-bed
The retirement bath will bring a lot of benefits as a slightly extravagant, but fully functional bed, which has the added advantage of being able to be moved to another location if necessary. Any plants can be grown in a large container; capricious cucumbers and zucchini feel especially comfortable in it. In order for garden crops to please you with a good harvest, you must take the following measures:
- Preparing the container
. It is advisable to paint the walls a dark color, and drill a couple of additional holes at the bottom to drain excess moisture (or at least do not cover the drain). Place a drainage layer at the bottom of the container; Crushed stone, pebbles or expanded clay are suitable.
Strawberry harvest guaranteed Source rmnt.mirtesen.ru
- Land preparation
. Compost (leaves, straw, tops) is laid out on the drainage, and a layer of fertile soil is placed on top; the finished bed is watered with a fertilizer solution.
- Getting an early harvest
. Cucumbers are planted with seeds in a bathtub; They must be protected until stable warm weather sets in. The covering material (lutrasil) will turn the bathtub into a mini-greenhouse, and your cucumbers will thank you for such care.
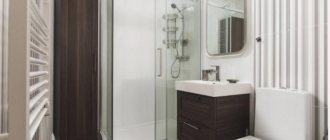
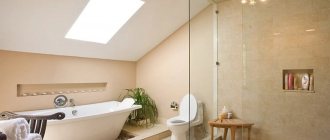
Furniture and plumbing for the bathroom
Equipment can be purchased after finishing work is completed. However, its dimensions must be taken into account at the preparatory stage, as well as the full set of necessary devices. Often they combine a bath with a shower or toilet.
The bathroom can accommodate:
- bath or jacuzzi;
- shower cabin;
- bidet;
- toilet;
- sink;
- dressing table;
- storage system for hygiene items and linen.
Bathroom furniture can be made with your own hands. This will allow you to easily select a set for a specific room.
It is better to place the washing machine in the utility room or kitchen. The bathroom should have enough free space after its final arrangement. Otherwise, it will be uncomfortable to be in this room.
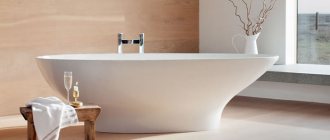
Bath - the main object of the room can be made of various materials:
- wood;
- cast iron;
- acrylic
A wooden bathtub has a high cost. After all, only expensive types of wood are suitable for its creation:
- wenge;
- larch;
- red cedar
These breeds are resistant to moisture. A bathtub made of such material will last a long time and will look very extravagant. Especially if you choose the right furniture and other furnishings.
A familiar cast-iron bathtub coated with reliable enamel is a good option. However, the significant specific gravity of this tank, especially when filled, should be taken into account. It is better to install a cast-iron bathtub only on the first floor of the house, provided that the foundation and all ceilings can withstand such weight.
The best option is an acrylic bathtub. It weighs very little. The price of such a plumbing fixture is low. The design possibilities are very diverse. Acrylic bathtubs are available in various shapes, sizes, and colors. This allows you to choose this item to your liking.
DIY oven
The idea that used cast iron bowls are ideal for making stoves and braziers quickly spread among craftsmen. The reasons are due to the combined properties of the material:
- quick heating of cast iron and long-term heat retention, unlike steel;
- durable enamel coating, sintered during application, at a temperature of 800°C;
- high wear resistance of the alloy even with temperature changes.
It is these properties that cast iron cookware, beloved by many cooks, is known for. Meat, pies, vegetables in pots cooked in such a Russian oven will always be evenly steamed, baked and will remain hot for a long time. And using its somewhat modernized design for a bathhouse will help save several tens of thousands of rubles.
Instructions
Below are step-by-step manufacturing instructions:
STEP 1. First you need to saw your cast iron hot tub in half using a grinder. To do this, mark the bathtub using a construction marker or pencil. It is desirable that the cut occurs on the non-enamelled side. It is also necessary to organize a support, for example, made of brick, under the halves of the bowl. This will protect you from biting the disc.
Cutting cast iron is a rather long and labor-intensive task, so work must be stopped periodically and the tool allowed to cool. The blade should be moved slowly and smoothly along the cutting line.
If you are just about to dismantle your old bathtub, be sure to pay attention to a special article that describes
all the nuances of dismantling a cast iron bathtub .
STEP 2. Next, you need to prepare a pedestal for installation where the brazier will be located. You can weld a metal frame, but the easiest way is to make a substrate, for example, from cinder blocks. Place half of the hot tub (the one without the drain) on top of them.
STEP 3. The next step is to cut out a sheet of metal that will cover our firebox. Its thickness should be 8-10 mm. If the material is thinner, it may burn out over time . Then a chimney is welded to it - a pipe with a diameter of 100-120 mm. A hole of the appropriate size is pre-cut under it. This can be done using a grinder.
The edges of the bowl are coated with a special heat-resistant sealant, and a structure assembled from metal and pipe is placed on them and pressed tightly.
STEP 4. Now you need to cut a hole for the chimney in the second half of the bowl. First you need to mark the location for the hole, carefully measuring everything. Next, you can drill several holes around the perimeter of the circle, and then carefully go along it with a grinder. The circle should be knocked out with a hammer and chisel.
All that remains is to carefully coat the edges of the metal sheet with heat-resistant sealant and place the second half of the bowl on it.
It is advisable to weld the chimney to the upper half of the bath. To do this, be sure to use special electrodes for cast iron.
STEP 5. Next you need to tighten the two halves using bolts or studs. Drill through holes along the side of the font in increments of 200 mm. Insert the fasteners into them and carefully tighten all the elements.
STEP 6. Now you need to separate the ash pit and the brazier using a grate on which the firewood will be placed. You can take a ready-made one, or you can weld it from pieces of reinforcement or square timber. It is important to observe the condition that the distance from the grate to the bottom point of the bowl is 150-200 mm.
STEP 7. In the next steps, a front panel is made from a sheet of metal, in which all the doors are provided in advance: for the firebox and for the oven itself. The doors are hinged and the entire panel is welded to the structure assembled above.
Then the lower part of the bowl is lined with brick.
STEP 8. For better thermal insulation, the wind part is covered with a layer of mineral wool and coated with clay or a special heat-resistant mixture.
STEP 9. It is better to coat all metal elements with heat-resistant paint. The oven is ready.
Wooden structure finishing options
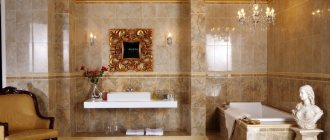
Currently, finishing a bathroom in a wooden house can be made of various materials. It’s easy to choose the style and main design line yourself. Bathtub, sink and other equipment must be selected in accordance with the basic decoration of the room. The final composition should combine a single style and harmony.
The finishing can be done in one of the interesting and unusual styles that are most popular at the moment, or vice versa, in a classic design. It could be:
- minimalism;
- Provence;
- eco-style;
- country.
Only low-quality accessories and furnishings are incompatible; all other details can be interestingly combined in a wooden interior.
Consultants at santehnikportal.ru advise planning your budget and arranging the bathroom itself in advance.
Thus, a bathroom in a wooden house requires a special approach in the arrangement process. First of all, it is necessary to perform high-quality waterproofing of the floor and walls, as well as protect the ceilings from moisture. A good ventilation system is equally important. During finishing work, you need to be guided by your own taste, material capabilities and the size of the room reserved for hygiene procedures.
What materials can be used to finish the floor?
After the rough work is completed, you can begin laying the topcoat. You can use for the designated purposes only those materials that boast high moisture resistance and the ability to withstand high temperature changes. In addition, the finishing coating must comply with sanitary standards. These parameters best correspond to:
- ceramic tile;
- artificial granite;
- linoleum;
- mosaic.
Mosaic decoration for a bathroom in the country Source nastanova.com
If the design of a bathroom in the country involves the use of wood, experts advise using moisture-resistant tree species. The wood must first be treated with antiseptic compounds. They will prevent infection by fungus and mold.
Wall decoration
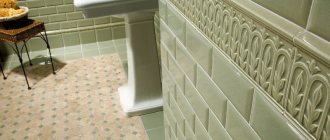
You can use different materials to decorate the walls. Traditionally, preference is given to ceramic tiles. It helps to form a surface on which dirt and dust do not accumulate, water does not stay on it for a long time, it rolls down, so the walls dry quickly after bathing. The surface of the ceramics does not absorb odors and can be washed using household chemicals. Ease of care is the main advantage of the described choice. An additional bonus is long service life. The finish can retain its original appearance for decades. And this helps you save on bathroom renovations.
Tiles and wood in the decoration of the walls of a bathroom in the country Source pano-mosaic.ru