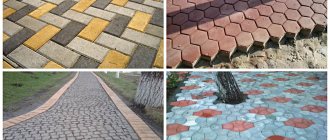
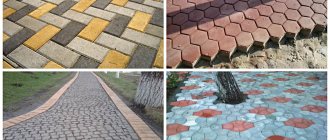
Owners of country houses and summer cottages often use paving slabs to cover paths and driveways. There are different requirements for such coating depending on the place of its use. The same can be said about the installation method. If the production of paving slabs will be carried out at home, then special attention must be paid to the manufacturing technology and preparation of the solution, since the performance characteristics of the material and its durability depend on this.
Advantages of self-production
Making paving slabs yourself has the following advantages:
- significant savings on landscaping the local area;
- confidence in the quality of the product;
- as a result, you will receive a unique and beautiful product;
- the ability to choose the appropriate color and design to match the overall style of the site;
- long service life.
In addition, the process of producing paving slabs at home is quite exciting. It will help reveal your hidden talents and give you a reason to be proud of the result.
Manufacturing of paving slabs
By following the process technology and adhering to the requirements that determine the composition and proportions when mixing mortar for paving slabs, you can achieve acceptable results even at home. And adding various pigment dyes to the concrete mixture will help get rid of the “grayness” and make sidewalks brighter.
Which is better: vibro-cast or vibro-pressed tiles?
The production technology of paving slabs involves the production of two types of coating:
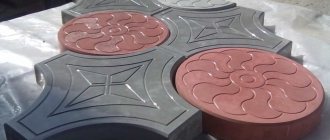
- Vibrocast tiles are more often used in private construction. Externally, it is smooth and more beautiful due to its rich color and heterogeneous structure. The manufacturing technology is quite simple: the solution is poured into the molds, then they are placed on a vibrating platform. During vibration, air bubbles are removed, and the mixture evenly fills the mold. After drying, the products are removed from the molds and further dried.
- Tiles produced by vibration pressing are stronger and more durable. It is suitable for places with heavy traffic. The manufacturing process of this product requires the use of special technological equipment. Externally, the product has a homogeneous structure and a rough surface.
Pressed products have a limited choice of shapes and colors, but they are more durable, strong, and moisture resistant. Due to the absence of pores, such elements do not crumble and are resistant to abrasion. But you won’t be able to make them at home, since tiles can only be pressed using a special machine.
The method of producing a vibro-cast coating is simpler and is suitable for doing it yourself. But you can cast any shape and choose the appropriate color. These tiles are suitable for paving outdoor garden paths, but not for places with heavy traffic and loads (for example, near a garage).
Paving slab production technology
What are paving slabs made of?
The concrete mixture for tiles includes the following components
- water;
- cement;
- sifted sand;
- plasticizer;
- concrete dye;
- special additives and other components.
The cement from which the tiles are made has special requirements. It should not contain large amounts of mineral additives and air bubbles. But the composition of the mixture is not constant, it can be adjusted and depends on the technology that the manufacturer is focusing on.
How are paving slabs made in production? Today there are two most common methods:
- vibration pressing;
- vibration casting.
Another highly productive method for producing paving stones is hyperpressing. It is quite effective, but is used infrequently. This technique requires sophisticated equipment and special knowledge. Therefore, manufacturers are increasingly giving preference to vibrocompression and vibrocasting.
How are paving slabs made using vibration pressing?
The technology for the production of paving slabs using the vibrocompression method requires the presence of
- molds (matrices);
- beds;
- punch.
The process goes as follows.
First you need to make a solution. The composition, as a rule, is chosen “classic”: cement base (best of a light shade), sand, plasticizer. To give the desired shade, coloring additives are used. Seals are also used to increase the strength of the finished product.
After the solution is prepared, it must be placed in the matrix and placed on the bed. Next, they begin to compact the mixture by pressing on it with a punch. The punch will enter the mold, and the bed will continuously vibrate. The process will continue until the concrete mixture is completely compacted, after which the punch will rise, and the molded paving slabs will remain on the frame.
This method is highly productive and allows you to automate all processes.
Features of the production of paving stones using the vibrating method
The technology for the production of paving slabs using the vibration casting method requires the presence of
- plastic form;
- vibrating table
The plastic mold is filled with a fine-grained concrete mixture and placed on a vibrating table, which continuously vibrates and thus gradually compacts the solution. Cement laitance that appears on the surface of the concrete indicates that the process of compacting the mixture has been successfully completed. The plastic form is removed from the table and left in a room with high humidity. Here the tiles are left for 8-72 hours so that they gain strength. To do this, heaters-evaporators are turned on. They maintain a constant ambient temperature of +20-25C. Full strength gains occur in about a month.
Necessary materials
To make paving slabs at home you will need the following materials:
- The main component in the solution is cement. The quality of the product depends on its characteristics. For the solution, take cement grade M 400-500. High grade cement will give the product strength and increase its moisture resistance and frost resistance.
Advice! Buy only fresh cement, since during long-term storage it loses some of its qualities. To check the freshness of the cement, squeeze a handful of powder in your hand. If you get a lump, do not use this composition. Fresh cement flows through your fingers without forming a lump.
- Filler must be added to the cement mixture. It can be large or small:
- fine crushed stone, grain sieving, pebbles or slag are used as coarse filler (the filler must be cleaned);
- sand with a grain fraction of up to 0.6 mm acts as a fine filler (use sand without clay and impurities).
- The water in the solution should be clean and at room temperature.
- Another component is a plasticizer. It comes in the form of a ready-made mixture and in powder. Plasticizers increase the elasticity of the solution, reduce the consumption of water and cement, increase the density of concrete and facilitate the mixing process. The best additive is called Superplasticizer S-3, but you can also use Polyplast SP-1, PLASTIMIX F, Westplast or Master Silk. Plasticizers in the mixture provide high moisture resistance and frost resistance of the product, as well as its wear resistance.
- Dye or coloring pigment allows you to get the tile of the desired color. Choose lightfast dyes. Since pigments cost a lot, it is beneficial to add dye only to the top layer of the tile, and make the bottom layer from ordinary gray concrete.
- Fiber fiber is a reinforcing additive to increase the strength of the product. Polypropylene fiber with a fiber length of up to 2 cm and a diameter of up to 50 microns is used as a reinforcing fiber.
Important! The length of the reinforcing fiber should not be greater than the diameter of the coarse aggregate.
- Matrix lubricant is needed to make tile removal easier. There are special lubricants on sale (Emulsol or Lirossin), but substitutes are often used instead:
- vegetable oil;
- used motor oil;
- soap solution.
Paving slab production technology
Pigment or dye is a rather expensive component, and in addition, increasing its content in concrete worsens the quality of this concrete, therefore it is desirable to reduce the proportion of pigment with sufficient saturation.
The prepared pigment is stored for quite a long time, since it has a completely stable formula. Immediately before adding to the concrete, the dye is mixed.
Vibroforming of the product:
Vibroforming of products is carried out in molds on a vibrating table; they are laid out as closely as possible relative to each other. The time that the mold is on the vibrating table is from 1.5 to 2 minutes until a white liquid (the so-called “milk”) forms on the surface.
The first step is to spread out the colored concrete, covering as much as possible the bottom of the mold with a layer of 1-2 cm. Then for 5 - 10 seconds. The vibrator is turned on so that the concrete lays in an even layer. The vibration intensity and amplitude of the vibrating table must be moderate so that the concrete can be compacted under its own weight. The next step is to add concrete without pigment as much as needed to the edges of the selected shape, but no less. For 5-10 sec. The vibrator is turned on again, and then the excess concrete is cut off with a metal corner. After filling the mold and when the vibration is finished, the solution in the molds is thoroughly rubbed. If there is not enough concrete, then you need to add a solution and rub it again, but without vibration. The resulting smoothed forms are placed in layers on pallets, each layer is laid with sheets of plastic. The total number of layers should be no more than 10.
Before knocking out, the mold must be heated in a water bath to 60-70 degrees, keeping each mold in the bath for no longer than 2 minutes. The heated mold is moved to a vibrating table. It should be noted that unmolding without heating reduces the service life of the mold by about 30%, which can lead to defective finished products, especially thin ones.
Product hardening:
Drying or hardening of the finished product occurs within two days under natural conditions. Pallets with forms are allowed to be moved no earlier than two days after the end of pouring. After unmolding, the tiles are laid out on Euro pallets with their faces facing each other, tied with packing tape. To maintain the proper appearance of the tiles and further harden the concrete, it is necessary to cover the pallets with polyethylene stretch film or shrink film.
In summer, products are released when they reach 70% of the intended strength, which is approximately equal to a week of concrete hardening, starting from the moment of its production. In winter, tempering is carried out at 100% of the strength, which is approximately equal to 28 days.
You can buy paving slabs in Yekaterinburg produced using the vibration casting method at
Equipment and tools
You will need the following equipment for the production of paving slabs:
- A concrete mixer is needed only for large volumes of work, otherwise you can get by with a shovel or trowel.
- Vibrating table for compacting the mixture into a mold and removing air bubbles. Instead, tapping or shaking the mold is used.
Advice! It is easy to make a simple vibration table from a regular washing machine operating in spin mode.
- Drying racks. At this point, the product is dried in molds for three days and another week after removal from the matrix.
- Forms are purchased online. They come in several types:
- silicone blanks are suitable for products of complex configuration with a structured surface (the disadvantage of silicone is that it swells under the pressure of concrete; the matrix can withstand up to 50 cycles);
- plastic products are suitable for a simple pattern (they are strong, flexible and durable, withstand 800 cycles);
- polyurethane ones are more expensive than silicone, but they hold their shape better (withstand up to 100 cycles).
Preparation of the solution
Making paving slabs with your own hands begins with preparing the solution. The proportion of ingredients is as follows:
Machines for the production of paving slabs
- sand - 56 percent;
- fine crushed stone or gravel sifting – 23%;
- cement – 21%;
- coloring pigment - 7 percent of the volume of concrete;
- water – no more than 5.5% of the amount of concrete;
- plasticizer – 0.7% of concrete;
- fiber fiber - for each cubic meter of concrete approximately 0.05% of its total volume.
From one cubic meter of solution, 16.5 m² of tiles are obtained, provided that their thickness is 6 cm. To obtain a high-quality solution, the ingredients are mixed in the following sequence:
- First, mix some water and plasticizer. The mixture is poured into a concrete mixer. For mixing, use only warm water, since cold liquid does not dissolve additives. It is important to ensure that the plasticizer is completely dissolved.
- The dye is diluted with hot water (take 3 parts water for 1 part pigment). Make sure that the solution is free of lumps.
- After this, crushed stone and sand are added.
- Now it’s time to put cement into the concrete mixer. While adding it, water is periodically added for better mixing.
- At the end of the kneading, pour out the bulk of the water.
Important! The finished mixture holds well on the trowel without spreading, and when placed in a mold it easily fills it.
Self-produced paving slabs
You can make concrete tiles with your own hands only using the vibration casting method. In this case, there will be no need for expensive equipment, additional production space, and you don’t need a lot of household products.
But you still have to think about the premises. A spacious shed or an empty garage would be a suitable option. The main thing is that they have electrical wiring connected to them, good lighting and heating in winter.
A prerequisite is a dry microclimate inside the building so that cement and plasticizers can be stored in the required conditions.
One more point worth paying attention to. For sand, granite screenings and slag, a separate place should be allocated in the area adjacent to the premises. It is recommended to build a temporary canopy over it.
Materials and equipment
The concrete mixture for making tiles includes:
- cement;
- dye (if necessary);
- filler in the form of sand or granots;
- required plasticizer;
- water;
- fiber fiber.
You should purchase and prepare:
- small volume concrete mixer;
- vibration table (you can make it yourself);
- molds – rubber or plastic;
- mold lubricant;
- the racks are strong and reliable.
You need to stock up:
- trowel;
- shovel;
- a durable 10-12 liter bucket.
And don’t forget about rubber gloves, which will prevent the cement from “corroding” the skin of your hands.
Preparation for the process
First of all, you should lubricate the molds, cleaned from preliminary mixing, with the purchased lubricant. It is also possible to independently produce a suspension in the proportion of 3 parts water and 1 part machine oil (used).
The next stage of work is the preparation of a liquid mixture of plasticizer and dye. It is not allowed to throw them into a dry cement-sand mixture, so the components should be diluted with warm water (take 200 g of plasticizer and 60 g of dye per 1 liter). This volume is enough for 40 liters of concrete mixture.
Preparing the mixture
Components are poured into a concrete mixer at the rate of 1 part cement to 2 parts filler (usually a bucket is taken as one part). The ingredients are first mixed dry, and then fiber (2 large handfuls) and water are added to them, mixed in a ratio of 1 to 4 with the previously prepared solution of plasticizer with pigment.
After thorough mixing, the mixture is laid out in molds and a vibrating table is turned on to compact the mass. The further vibration casting process is described above.
02/02/2015 at 12:02
Recommendations for organizing the production of paving slabs and other concrete products using the vibration casting method
Equipment:
1. Forming vibrating table.
2. Forced action paddle concrete mixer.
3. Deforming vibrating table.
