It is impossible to imagine the interior of a bathroom or kitchen without a sink. Installation of this product is quite simple and can be done independently, without the involvement of professionals. However, there are several nuances that must be taken into account when installing this type of plumbing yourself. In this article we will talk in detail about the features of installing sinks of different types.
Preparing to connect the sink
Determining the installation height of a plumbing fixture (for more details: “Installation height of a sink - at what height to install it correctly”). The sink, not equipped with additional accessories, is located at a height of 850 millimeters. At this level, draw a horizontal line - it will be the guideline for installing the washbasin. The top surface of the plumbing fixture must correspond to it.
If there is a support leg or when the sink is installed in a cabinet, there is no need to determine the height of the plumbing fixtures. This parameter depends on the size of the leg or cabinet.
Marking mounting locations on the wall.
Before installing the fastening system, it is necessary to make appropriate markings on the wall. The sink bowl has mounting holes for connecting the sink to the sewer. The plumbing fixture is applied to the wall, as in the photo, its upper edge is aligned with the drawn line and the places where the holes for fasteners will be located are marked. This work is easiest to do with two people. One person should hold the washbasin near the marked line, and the second at this time can mark the places for fasteners from below. If there is a leg or a supporting cabinet, installation work is simplified - the plumbing fixtures are placed on a support and the mounting points are marked on the wall.
Sewage pipe diameters
The difference in pipe diameters is due to the characteristics of plumbing fixtures. So, for example, in a toilet bowl, a large amount of water with particles of different fractions is formed in one flush. In this case, you need to use a pipe with a diameter of 100 mm. As for the bathroom, a significant amount of water also accumulates in this plumbing fixture, but the diameter of the sewer pipe is required to be smaller. What is the reason? In this case, you need to remember the rule: the permeability of a sewer pipe is always equal to the narrowest point in its design. Thus, we should pay attention to the size of the drain hole and everything will become clear.
In the specialized literature there are examples and methods for calculating the diameter of a sewer pipe. The calculation can be too complicated, because you need to take into account the angle of connection with the riser and a large number of other factors. In addition, using SNiPs, you can clear the maximum permeability at a certain diameter. To put it simply, the diameter of the sewer pipe should be:
To install a sewer system in a house or apartment, it is enough to use a pipe with a diameter of 100 mm for the toilet.
Example:
With standard wiring in an apartment, a riser with a diameter of 100 mm passes through the toilet, a tee with a socket of 100 mm for the toilet comes out of it, and an outlet with a diameter of 50 mm for the remaining plumbing points. For example, a washing machine, washbasin, bath or shower, kitchen sink, and dishwasher.
For a washbasin, bidet or urinal, as well as a kitchen sink, it is enough to use a 50 mm pipe;
Due to the gradual contamination of the main line, a 100 mm pipe is used for houses of no more than five floors. In the case of multi-storey structures, the pipe must have a diameter of at least 150 mm;
We select some sections located in a horizontal position, connecting several risers and leading to the well, with a diameter of 200 mm;
Unlike cast iron, deposits do not form on the surface of plastic pipes, so you can use pipes with a diameter one step smaller.
The variety of sewer pipes is not limited to the above values. There are pipes on the market with diameters of 75, 90, 110, 160 and 300 mm. It is worth noting that it will be very difficult to select cuffs and fittings for such pipes, and it is best to avoid using them. Of course, there are exceptions where these pipes will be the only way out when organizing a sewer system.
Installation of sink mounts
Perform this work in the following sequence:
- holes are drilled in the wall according to the markings;
- dowels are driven into them;
- then special mounting pins are screwed in.
Instructions explaining how to connect a sink in a bathroom or kitchen involve the use of dowels, nuts, mounting pins and plastic inserts that are included with the plumbing fixture.
When screwing in the studs, you should pay attention to the depth of their installation, since it should allow you to hang the washbasin bowl and screw the fastening nut. This means that the part of the stud protruding from the wall should be of a length that is slightly longer than the thickness of the sink and has an extra centimeter and a half for tightening the nut.
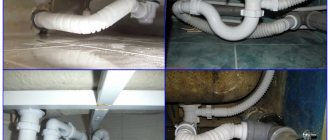
Errors made during the installation process that can cause pipes to become clogged
- Pipes from sinks, sinks and other plumbing fixtures must be mounted on a connection at a right angle of 90 degrees. If two devices are installed and the drains are drained towards each other, a blockage may occur in the tee of the pipe, which goes directly into the drain pipe. In this case, it makes no sense to clean the pipes from the side of the sink or washbasin using a spiral or hydrodynamically using a hose. If it concerns two sinks connected next to each other, then it is clear that from one sink the hose will pass to the second sink, but it will not be able to turn in the direction of the main drain pipe. One way or another, it will be quite difficult to clean the sewer.
- Another important mistake is that the drain pipe coming from the washbasin or sink is too high in the bathroom. As a result, the process of draining wastewater into the sewer pipe becomes difficult. Many people decide to move pipes and plumbing fixtures, which include bathtubs, sinks and sinks, to another location that is not provided for in the project. If pipes are changed, the main problem may be that the outlet to the device will be rigidly tied to the outlet of the pipe in the riser, and the situation is very difficult to change. When connecting sinks and sinks, everything should be fine, since there is a certain height reserve, taking into account the fact that plumbing fixtures are suspended at a height of approximately 90 cm. But despite this, many inexperienced installers may not take into account or think through such a detail. It is easier to make a mistake with the height when connecting a bathtub and shower. Often the drain is located above the floor surface. It is quite difficult to lift a heavy bathtub yourself, so a simple solution is to install the drain pipe above the siphon outlet. Thus, the pipe is often laid without the required slope, which can also cause clogging of the sewer.
- You can often encounter a problem in which pipes that are supposed to be attached to the wall from the outside are not fixed correctly. Products may sag, and counterslopes and other practically irreparable cases often form. Of course, this does not in any way affect the proper functioning of the sewer system, but this feature can cause blockages, which will require frequent cleaning of the pipes.
Connecting the washbasin to the water supply
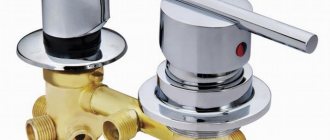
Mixer installation
. When connecting a sink to a sewer in a bathroom or kitchen, you can install the faucet after attaching the plumbing fixture to the wall, but experts recommend doing this work before attaching the washbasin. The fact is that all connections to it and the fastening process are made from below (read: “How to choose a faucet for the kitchen - types, features, principle of operation, selection rules”).
Mixer installation work is carried out in the following sequence:
- depending on the type of mixer, one or two pins are screwed in;
- Before installing the faucet in the kitchen, install the hoses supplying hot and cold water and tighten them using an open-end wrench. Tightening is carried out with moderate force and very carefully, taking into account that after installing the mixer on the sink, they will no longer be able to be tightened;
- according to the washbasin connection diagram, you need to route water supply hoses through the holes in the sink;
- On the back side of the studs, sealing rubber bands, a pressure washer and fastening nuts are put on, which are tightened with a wrench.
You should pay attention to how correctly the mixer spout is positioned - the product is installed at a right angle relative to the mounting wall or the side of the sink adjacent to it.
Required slopes and diameters of drainage pipes
| Device | Slope | Distance between central drain and siphon without ventilation, cm | Diameter of pipes for drainage systems, mm |
| Bath | 1:30 | 100-130 | 40 |
| Shower | 1:48 | 150-170 | 40 |
| Toilet | 1:20 | up to 600 | 100 |
| Sink | 1:12 | 0-80 | 40 |
| Bidet | 1:20 | 70-100 | 30-40 |
| Washing | 1:36 | 130-150 | 30-40 |
| Bath, sink, shower (combined drain) | 1:48 | 170-230 | 50 |
| Central riser | 100 | ||
| Branches from this riser | 65-75 |
To connect a wide pipe from the toilet to the main branch, the installation of adapters with a rotation angle of 45° is required. If you need to make a turn on the way to the connection, the angle of rotation should also be 45° so that the system does not clog.
In hard-to-reach places, it is convenient to connect the toilet to the sewer through a corrugated cuff. It bends at any angle and extends in length.
First, short structures are assembled, then they are mounted into one common highway. Inside an apartment or house, sewer pipes are installed without welding, inserting them into one another without distortions and until they stop. To ensure a reliable connection, a sealant is used. It is applied to the joints, and only after that the pipes are installed.
When the installation is completed, the drain is checked by opening all the taps. If you correctly calculate the scheme and make hermetically sealed connections, the new sewer system will last for decades.
To connect the sink to the sewer, it is not necessary to seek help from specialists, since the work can be done with your own hands, following simple instructions and recommendations. The help of a plumber may be required in situations where there is practically no experience in carrying out similar work.
As a rule, the connection of plumbing fixtures should be made at the last stage of repair. The rules for installing sinks in the bathroom or sinks in the kitchen are no different, so let’s pay attention to the general points.
Connecting the sink to the sewer
Mounting the washbasin on the wall
The sink is secured after completing the connection to the water supply:
- the sink with the mounted mixer is placed on mounting studs that are screwed into the wall;
- insert plastic inserts into place;
- Finally, tighten the nuts.
As for washbasins that have a support, their connection begins with installation on a pedestal or bedside table.
Connecting hoses to the water supply system
. A gasket is placed between the tap and the sealing nut. The nut does not need to be tightened too much, since the rubber gasket usually seals well. It can be tightened after the test (after turning on the water supply). If a leak occurs at the connection, the nut will need to be further tightened.
Types of siphons
A siphon is an element that is responsible for draining water and ensuring that unpleasant odors and harmful bacteria do not penetrate from the sewer into the room. There are currently four main design options available for sale:
| Bottle | One of the most popular options, characterized by a solid design and a fairly simple device. The advantages of such solutions include reliability, durability, and a simple cleaning process: just remove the flask and remove all accumulated contaminants. It is possible to say that this is the optimal solution in terms of price-quality ratio |
| Corrugated | The simplest of the options being considered is that the design is a corrugated pipe that is bent to create a water seal in a certain place; this unit is fixed with a simple plastic clamp. The main advantage is simplicity and only two connections - on the sink and at the entrance to the sewer; disadvantages - not very resistant to warm water and prone to clogging |
| Pipe | This design is a curved iron pipe. A water seal is formed at the bend, which prevents the penetration of smell from the sewer; its biggest advantage is the ability to clean it by removing the elbow, and its biggest disadvantage is the small amount of water seal, therefore, if you do not use the sink for a long time, the water will evaporate, and an unpleasant odor will enter the room |
| Dry | A very interesting solution, imagining a case with a polymer membrane inside, which, when wet, freely allows water to pass through, and in the absence of liquid, the rubber tube sticks together, preventing the penetration of odors and bacteria |
Advice! If you are draining a country house or any other building that is not heated in winter, then it is best to install dry siphons, since they do not contain water, and, therefore, they will not freeze in winter, and the system will remain operational.
A few important notes
Before you start connecting the sink, you need to take into account some of the nuances of the work:
- to connect the kitchen sink to the sewer, you do not need to tightly tighten all the connections, since in this case the rubber sealing gaskets can be damaged;
- in the case when, when checking the quality of connections between the pipe and the cuff, there is a leak, then it is necessary to remove the cuff and thoroughly dry the surfaces that are to be reconnected. Then the dry cuff is lubricated with sealant and the connection is made again;
- To connect a double kitchen sink, you should purchase a special siphon that has an outlet to two pipes.
Every home craftsman, subject to the installation rules, can connect a sink or kitchen sink with his own hands.
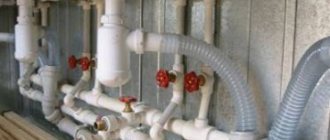
Subtleties of sewer installation
When starting the installation of a sewer pipe, you need to be able to not only choose the correct diameter, but also take into account some nuances that allow you to create a high-quality and working system. So, in order for the sewer system to fulfill its duties, the following must be taken into account:
A sewer pipe located horizontally should not have a diameter larger than the riser into which water flows from it;
Horizontal connections are made using oblique tees. A right angle can only be used when connecting to a riser;
In places where the sewer route turns, inspection windows must be installed;
The sewer riser must be left open at the top so that air can flow freely into the system;
The slope of a horizontal pipe should be from 1 to 2 cm per meter;
If the slope is too large, then the water will create noise when draining, and the pipes will quickly become dirty, but if the slope is less than normal, then the water will not drain well;
The formation of counter-slopes must not be allowed. The sewerage system is installed so that the pipes are directed towards the water flow.
If you use the above tips, you will be able to correctly choose the diameter of the pipe for sewer installation and in the future you will be able to use the system without problems.
1. 2. 3. 4. 5. 6.
Since you can connect the washbasin to the sewer yourself, there is no need to involve specialists in this work. But if you lack the skills to install plumbing and are unsure of your abilities, you can use the services of professionals. The sink should be installed at the end of the renovation. The technology for installing a kitchen sink and washbasin in a bathroom is similar.
Installation process
If you do the work yourself, then it is easier to split the whole process into two stages, since each of them is carried out separately. This makes it easier to understand the connection - the instructions on how to assemble a sink in the kitchen prescribe a certain sequence of actions.
Mixer connection
The work depends on the type of installation of the system - a wall-mounted kitchen sink may be equipped with a wall structure, and this requires preliminary connection of communications specifically to the connection point.
For standard options, work is carried out as follows:
- First of all, the product is unpacked, much more often the mixer is delivered assembled, but from time to time you may find it useful to attach the valves using the screws included in the set. In addition, you need to check the presence of all the seals that should be included in the kit.
- Then the system is attached to the sink, and there should be a sealing element both above and below that will prevent water from leaking during operation . Fastening can be done in several ways - either with a large nut, or using one or two threaded rods - the instructions in the kit will help you understand the work - everything is very simple and clear.
- The next stage is attaching the flexible liner; its length should be sufficient to allow it to be placed not by stretching, but with a small margin . Rubber washers must be placed under the union nuts, and the thread itself is additionally sealed with Unipak. If there is not enough space under the sink, then you should first connect the connection to the mixer
Note! It is not recommended to use fum tape for sealing in these places, since it does not tolerate the constant action of warm water well.
- Lastly, the system is connected to the water supply, after which its tightness is checked.
Drain system
There will also be various options - a wall-hung kitchen sink requires the installation of a hidden siphon, much more often it is simply hidden in a niche in the wall.
Standard options plan as follows:
- First of all, the outlet for the kitchen sink is attached to the structure; it must be sealed on both sides with rubber rings for tightness.
- Then he plans a water seal and connects it to the drain using a union nut, which must also be sealed with a ring.
- Lastly, the structure is connected to the sewer system and checked for leaks.
It goes without saying that when it comes to such a group of equipment as kitchen plumbing, the sink is the most integral part of the system, which should be given special attention.