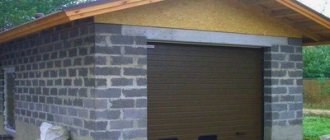
Owners of personal plots strive to equip a recreation area with a barbecue complex. Construction is expensive, so craftsmen equip the place with their own hands using the material left over after repair and construction work. A barbecue made from blocks is the best way to save money.
The barbecue area, equipped on the site, includes a grill, a woodshed and tables
Projects and drawings of barbecues and barbecues made from blocks
Construction of a place for a family vacation begins with choosing a site. The location of the barbecue area should be convenient so that:
- you could bring food from home;
- there was a covered canopy to provide shelter during a sudden rain;
- there was a distance from neighbors so that noisy company would not interfere with rest.
A sketch of the recreation area is drawn on paper, and then measurements are taken and a detailed drawing is made.
A barbecue is built from blocks according to a photo or video instruction. A mini utility unit installed in the recreation area will help you conveniently store firewood, skewers and kitchen utensils for outdoor cooking.
The base is calculated based on the desired dimensions of the firebox
The fireplace exceeds the perimeter of the base by 15-20 cm. Based on the needs and size of the area, determine the perimeter of the barbecue area.
The grill is combined with a grill, cauldron, barbecue and smokehouse
When planning, the distance from the house, neighboring plots and water supply is taken into account. If desired, water and drainage are connected to the grill area and a sink is installed.
A multifunctional barbecue complex allows you to cook right on the street in a noisy company of friends and family
Small plots limit the size of the recreation area, so summer residents build a small complex of barbecue, woodshed and table with their own hands. Small structures do not require a chimney.
The multifunctional barbecue complex is complemented with a chimney, decorated with arches and columns
Benefits of a barbecue oven
The barbecue is installed permanently. It does not need to be moved from one place to another every time.
This is much safer than a homemade grill or something vaguely reminiscent of it.
Occupying a fairly small part of the site's territory, the stove can bring a little chic and gloss to the life of this site. Especially if you didn’t skimp on finishing materials and carefully thought through the design of the stove itself.
No barbecue can replace the taste of meat that it acquires when cooked in the oven.
During cooking in such ovens, smoke does not enter the seating area and does not interfere with guests’ enjoyment of nature; moreover, you can safely fry meat even in the rain.
And finally, you can make such a chic thing for your site yourself. Making a barbecue oven with your own hands will definitely delight your guests; they will come to you much more often to sit in a pleasant environment near the oven.
Return to contents
What can you build a grill from?
A stationary barbecue made from blocks in the countryside, made by yourself, is distinguished by its reliable design, strength and durability. Often it is equipped from materials left over from the construction of the house. Concrete blocks are no exception.
The advantages of the material are as follows:
- high strength;
- weather resistance;
- durability;
- frost resistance;
- quick and easy installation;
- low consumption of cement-sand mortar;
- efficiency.
Attention!
Concrete is a flammable material, so the firebox is made of fireclay bricks or a metal structure. Purchased models of barbecues are not much different, so owners of personal plots try to build an individual structure. Combined structures include not only blocks, but also brick or metal. Modern manufacturers offer a large selection of building blocks:
- Foam blocks are made from foaming agent, cement, sand, water and hardener.
Fine-grained foam block material does not hold nails and screws - Aerated blocks are made from cement, sand, gypsum, metallurgical slag, lime and water.
Aerated blocks do not shrink, but their disadvantages include high moisture absorption - Cinder block contains ash, slag or shell rock.
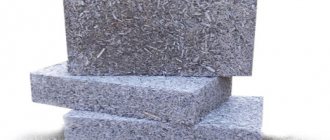
Cinder block is hygroscopic, therefore it is prone to the formation of mold and fungi
Is it possible to assemble a barbecue from expanded clay concrete blocks?
Recently, the construction of barbecues from aerated concrete blocks has become widespread. However, expanded clay concrete is made from foamed and fired clay. The material is light, strong and durable. Experts highlight some advantages of expanded clay concrete:
- resistant to atmospheric influences and sudden temperature changes, frost-resistant;
- hygroscopic;
- environmentally friendly, because it is made from natural materials, without the addition of household chemicals;
- ease of installation: laying one block is comparable to laying seven bricks;
- economical in cost;
- does not support combustion, which means it can be used to build a barbecue;
- resistant to the formation of fungus and mold.
Advantages and types of blocks
Blocks have been successfully competing with bricks for a long time. Their most noticeable difference is their large size. Strength indicators do not differ significantly from the characteristics of bricks. By laying out the foundation of the gazebo, pedestal, outer walls and functional niches of the barbecue in blocks, you can significantly reduce the consumption of bricks. The use of blocks reduces the cost of construction and significantly speeds up the process. They have other advantages:
- relatively light weight, which makes it possible to simplify, reduce the foundation, facilitate loading and unloading operations, and the masonry process.
- the ability to easily change their linear parameters (by cutting) and make holes.
- high strength, durability.
- low thermal conductivity (due to the cellular structure).
- resistance to frost.
- ribbed structure of spoons, reducing solution consumption.
- corrugated surface suitable for plastering and fastening finishing materials.
The range of blocks on the market is quite wide.
Foam block
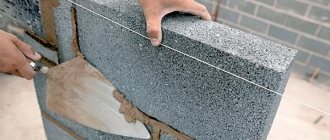
Concrete blocks made from a mixture of cement, sand and water acquire a fine-cell structure due to the introduction of a foaming agent (synthetic or protein) and additives that accelerate hardening into the mixture. They are produced in two ways (under pressure and without pressure), and have several varieties according to strength grades. For laying the barbecue frame, a material of structural and thermal insulation type (grades D500 to D900) is suitable.
It also has disadvantages:
- shrinkage caused by a significant amount of water in the mixture (3 mm per meter of height), which is not so important when building a barbecue.
- much greater than that of brick, the ability to absorb moisture (requires finishing with plaster, painting or treating the outer surface with a special emulsion to protect concrete - a water repellent.
- fragility of edges susceptible to chipping during rough handling.
- Does not hold nails or regular self-tapping screws.
The bright white color of the blocks is a sign of a violation of the production technology. Normal is a light gray shade, perfectly uniform.
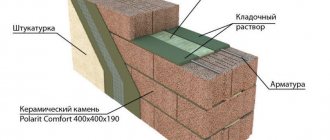
Laying foam concrete over traditional mortar is also allowed, but craftsmen recommend using a special cement-based adhesive, which allows you to obtain thin, almost invisible, but very strong seams.
Gas block
The base of the mixture is the same: cement, sand and water. It is enriched with gypsum, lime, and metallurgical slag. Gas-forming agent is aluminum dust in the form of a paste or suspension that actively releases hydrogen when interacting with a highly alkaline cement mortar. The gas trying to find a way out swells the mixture, increasing its volume.
This material is almost not subject to shrinkage, but is even less resistant to moisture than foam concrete. Its through channels are quickly saturated with water. High-quality surface finishing is required for most of its types. But it firmly holds nails and other fasteners, which is important for lovers of hanging decorations.
cinder block
The concrete mixture for this block has a large amount of filler: slag, ash, shell rock, tyrsa. This is the least environmentally friendly material. The blocks are produced monolithic or hollow. Monolithic products are heavy, but are excellent for arranging a foundation. Cinder blocks quickly conduct heat, so do not expect significant heating of the surrounding space from such a design. It is very hygroscopic, fungus and mold grow in the pores.
What to choose
For non-residential buildings, which includes an outdoor barbecue, the cheapest of the blocks - a cinder block - is also suitable. If special requirements for the design are presented (in terms of visual appeal, environmental safety), it is advisable to use a more expensive material.
Where is it better to build a barbecue area and grill?
Before arranging a place to relax, experts advise studying the recommendations for constructing a barbecue area from blocks with your own hands. When planning, take into account the location:
- to the fence from 1 m;
- to bushes or trees from 3 m;
- 3-5 m to a residential building.
A path is laid to the barbecue complex from the house, utility block and other buildings
Foundation organization
Tools and materials for the foundation:
Diagram of a barbecue made of foam blocks.
- reinforcing mesh or reinforcing bars;
- gravel for a pillow under the foundation;
- cement and sand for mortar;
- formwork materials - you can use wooden boards and bars fastened with nails;
- shovel and any device for compacting soil and gravel;
- mixer and solution container;
- building level.
The first step is to mark the perimeter of the oven on the surface in the selected location based on the existing dimensions. Be sure to measure the diagonals, they must be equal, otherwise you will end up with a slanted foundation and a barbecue built with your own hands will turn out similar. Then, in the marked dimensions, it is necessary to excavate the soil by 30-40 cm, the depth depends on the dimensions of the furnace. Compact the bottom and fill with a 15-20 cm layer of gravel, which should also be compacted.
Build a sealed formwork from boards around the hole, which can be secured with bars and nails. The horizontality of the top of the boards and the perpendicularity of the corners of the formwork for an aerated concrete barbecue are set using a building level. The height is set based on the surface characteristics of the site.
Pour a solution about 5 cm thick into the formwork cavity and place a reinforcing mesh or other selected reinforcement. Then repeat the procedure 1-2 more times depending on the height of the formwork. The solution is mixed in a container with your own hands or in a concrete mixer. Taking 2 parts of a cent and 3 sand, you can add 4 parts of gravel, this will only strengthen the solution.
Having filled the space in the formwork with a solution, you should level the resulting surface by running a lath, leaning on the edges of the formwork. To expel any air bubbles formed in the solution, you can lightly tap the formwork boards with a hammer. After pouring the foundation for a DIY barbecue, you should leave it to harden for at least three days.
What tools and materials will be needed
After planning the site and creating a project, they begin to prepare the necessary tools and materials. To build a barbecue from blocks and bricks with your own hands you will need:
- blocks;
- fire brick;
- cement, sand, clay, lime for mortar;
- boards or plywood for arranging formwork;
- fittings made of metal or fiber optics;
- grate, door and other oven accessories;
- shovel;
- level;
- screwdriver and screws;
- decorative material.
Creation from foam blocks
A brazier made of foam blocks can be of simple or complex design. A complex design means a multifunctional outdoor oven, which is complemented by a hob and a smokehouse. Today we will look at the option of building a simple outdoor oven from concrete blocks.
So, at the preparatory stage it is recommended to make a design for the future structure. You can draw a drawing of a simple barbecue manually or take advantage of special computer programs (Compass-3D, AutoCAD, CorelDRAW, etc.). A graphical representation allows you to see and evaluate the scale of the work, as well as avoid common mistakes during construction.
Materials and tools
It is equally important to prepare and purchase in advance all the materials, tools and construction equipment necessary for the work:
- foam blocks;
- fireproof red brick;
- decorative plaster, artificial or natural stone, facing brick or any other material for decorating facades;
- fireproof mortar and oven grout;
- high quality cement, sand and water for mixing the solution;
- container for concrete mortar, trowel;
- boards 30 cm thick for formwork and wooden beams measuring 10x10 cm;
- reinforcing mesh or metal rods;
- measuring and marking instruments;
- bayonet and shovel shovels;
- hammer, nails and various fasteners;
- roasting rack and other kitchen utensils;
- decorative elements;
- protective gloves and overalls.
Concrete base
The construction of an outdoor stationary barbecue requires a serious and meaningful choice of location. The best option is a garden area that is protected from wind and drafts and is located near the house or summer kitchen.
Now let's move on directly to the construction of the concrete base of the future barbecue:
- Clear the surface of vegetation and various debris. Remove the top layer of soil and level the area. At the same time, do not forget to check the evenness of the horizontal line.
- Using reinforcing mesh or metal rods, pour the concrete foundation. The base area should be 80x60x15 cm.
- After the foundation has hardened, we move on to laying foam blocks. Each side must be leveled and adjusted vertically and horizontally. To do this you will need a building level.
- After the second tier, you need to make wooden formwork for pouring concrete mortar with fine crushed stone. A metal corner is placed at the base of the lintel, which helps to avoid cracking of the concrete when heated.
Grilles and fastenings
It will take at least 10–14 days for the concrete solution to harden. If the weather is cloudy and damp, it is better to wait a little while removing the wooden formwork. Once the concrete has hardened well, you can remove the wooden boards and slats.
At this stage, the fastenings for the spit and grill are installed. As a grate, ready-made cast iron grates from an old wood-burning stove or a grate made of a metal frame and crossbars can be used. The frying grate is installed on the ledges of the stones and filled with concrete mortar.
Don't forget about the grille
The surface for coals must be lined with refractory bricks, which prevents the outdoor stove from heating up and catching fire. It is recommended to close the firebox window where logs and coal will burn with a door made of tempered glass or metal.
Facing and decor
At the final stage of construction, the cladding and decoration of the homemade barbecue takes place. To increase the strength of the structure and prevent the appearance of fungus inside, concrete blocks must be plastered with high-quality cement mortar. After the solution has dried, you can move on to the exterior decor. Red facade or glazed brick, fire-resistant tiles, artificial or natural stone are used as facing materials. Decorative plaster is performed on a mesh fixed on top of the wall.
Homemade barbecues made of concrete stone are often decorated with forged elements and decorative patterns. The design option for an outdoor stationary barbecue depends on the imagination and creative abilities of the master.
We have all thought more than once about how best to spend our free time, so that we can gather all the people close to you at one big table, so that both soul and body can rest. One of these types of recreation is nature, cottage and barbecue. After all, you can watch the dances of the flames endlessly, and not only watch, but also satiate your stomach.
In addition, in ancient times, a home with a lit fire was considered a symbol of well-being.
How to make a prefabricated grill from concrete blocks
The construction of a barbecue oven from blocks with your own hands begins with clearing the site. Debris and grass are removed and the turf is removed.
Step-by-step instructions for carrying out the work:
- Markings are made on the cleaned, prepared area. Pegs are installed around the perimeter and string is pulled. According to the markings, remove the top layer of soil, deepening it by 20 cm.
Gravel and sand 5-10 cm high are added to the bottom - Formwork is installed around the perimeter. At the corners and in the center of the sides, stakes are driven in from the outside and the structure is secured using self-tapping screws with a screwdriver. A mesh of reinforcement is laid at the bottom. Filled with concrete.
Concrete mortar is made in the proportions of one part cement to 3-4 parts sand - According to the drawings, the first row of blocks is laid out. Cement-sand mortar is made in a ratio of 1:3.
To ensure that the next tier is securely fixed, a piece of reinforcement is inserted into some cells of the block - After laying the second row, they begin to arrange the formwork. Crushed stone is added to the solution of cement and sand. This will make the structure more dense. The concrete is left to mature for 10-14 days, watered daily.
A metal corner is placed at the base to prevent concrete from splitting when the firebox heats up. - After the concrete has hardened, the formwork is dismantled. Install the grate.
Pieces of metal reinforcement are welded to the corner or a ready-made grate is installed - The firebox is made of refractory bricks. For coupling, prepare a clay-sand mixture or buy ready-made concrete for braziers. A metal corner is used to make an edging around the brick firebox.
The solution is prepared from clay, sand and lime in a ratio of 1:3:0.25 - To make a DIY block grill look attractive, it is decorated with plaster. The structure is painted in a suitable color.
In addition to plaster, stone or porcelain tiles are used for decoration.
Choosing a location for a future furnace and preparing for construction
If you have already decided that you can handle building a barbecue with your own hands, then it’s time to start choosing a place for the foundation for the stove. At this stage, you also need to think about how it should look, whether it will have a pipe or not, and what functional characteristics it should have. The best option to build a miracle barbecue oven with your own hands is to place it in a recreation area. Only at this stage is it important to think over the style of the future stove so that it does not violate the unity of the entire structure. It is very convenient when the barbecue has its own separate roof. It can be made from slate or tiles. You can build a barbecue from red brick, gas silicate blocks, or natural stone. We will look at building such a stove with our own hands from foam blocks.
Construction of a barbecue requires a foundation. If this is supposed to be done in a recreation area, then there is usually already a foundation there. You just need to take into account that it has reinforcement at the base and is at least 15 cm thick. If there is no foundation, then it must be done as follows: dig a trench, make a crushed stone cushion, fill it with water and compact it well. Place reinforcement on the pillow. Make wooden formwork about 15 cm high and pour concrete. Then you will have to wait 2 days until the foundation hardens. You can start building the oven.
When preparing the foundation, consider the following points:
- It is prohibited to place a barbecue made of blocks under a tree, next to outbuildings and fences (to ensure fire safety);
- In relation to the house, it is better to place the barbecue on the leeward side, which will prevent smoke from entering the house;
- it is advisable to supply electricity and water to the selected location;
- Don’t forget about paths made of stone and concrete. Because barbecues and stoves always bring together a lot of people, and the lawn will quickly be trampled.
To do this you will need the following materials:
- 15 gas silicate blocks;
- 150-160 pieces of oven bricks;
- 7-8 10-liter buckets of red clay;
- bag of cement;
- sifted and washed medium-grain river sand;
- decorative stones for finishing;
- crushed stone for the foundation cushion;
- formwork (wooden boards).
Prepare the following tools:
- Master OK;
- shovel;
- 2 10-liter buckets;
- bushhammer;
- 2 barrels of 100 liters each for soaking clay;
- container for mixing the solution and mixer;
- level;
- sieve (to strain the clay solution).
Return to contents
How to make a barbecue complex from aerated concrete
Do-it-yourself construction of a barbecue from a gas silicate block is gaining increasing popularity. The material allows you to construct structures of various shapes and is easy to saw without chipping. The construction of a barbecue complex with your own hands is carried out in several stages.
Preparing the rough foundation
Markings are made in the prepared area according to the drawings. The top layer of earth is removed along the perimeter to a depth of 20 cm. Lay aerated concrete blocks. Check the level. Gas blocks are fixed using a cement-sand mixture made in a ratio of 1:4.
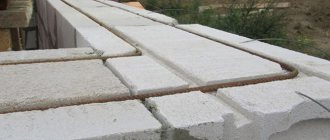
Vertical seams are secured using thin-layer adhesive
Laying a finished base of aerated concrete
Gas blocks are laid on top of the rough layer using thin-seam glue. Blocks 15 cm thick are used for the base.
The evenness of the masonry on the horizontal surface of the blocks is checked using a building level
Laying gas blocks
Following the drawing, they lay out the woodshed, firebox and chimney. In order for the gas blocks to be reliably connected into a single structure, a number of rules are followed when laying the blocks:
- the width of the trowel is equal to the width of the gas block;
- Before applying the glue, the surface of the gas block is cleaned with a spatula and a brush;
- glue is applied to each joint;
Attention! If the glue sticks out during laying, do not lubricate it, but wait until it dries completely, then cut it off with a knife.
Construction of a firewood shed
Three rows of gas blocks are laid sequentially on the prepared base, following the drawing. Blocks 10 cm thick are used for the back wall, and 15 cm thick for the partitions.
Each block is checked with a level so that there is no distortion of the structure in the future.
Installation of barbecue firebox
To construct the firebox, a horizontal base is created from gas blocks 10 cm thick. Blocks 15 cm wide continue to be laid vertically on top of the base. The back wall is laid out from blocks 10 cm thick.
The last row is processed with a sanding board to obtain a completely smooth surface.
So that in the barbecue you can burn not only charcoal, but also firewood, the firebox is reinforced with heat-resistant brick from the inside. Install the grill grate.
Fireclay bricks are laid on a heat-resistant clay-based concrete mixture
Facing and assembling the barbecue
A metal corner is installed on the firebox. A stainless steel exhaust hood is attached to it. To make the structure have an attractive appearance, it is decorated with facing materials.
The structure is decorated using facing bricks, wild stone or decorative plaster
Finishing base of the barbecue
We use aerated concrete blocks of various widths - 150, 100 and 50 mm, so that the structure is durable and at the same time does not seem overly massive. We lay the blocks on glue for thin joint masonry, which allows us to achieve minimal seams (1-2 mm) between the blocks. You should not use foam glue for these purposes: it is not designed for high temperatures.
First of all, we build a finishing base for the grill. We make it from blocks 150 mm thick, laid horizontally.
If there are differences of 5 mm or more on the surface of the foundation, then we attach the blocks to the foundation with a regular cement-sand mixture, due to which we level the structure. And we connect the blocks together with glue for thin-seam masonry. We check the evenness of the base with a bubble level, leveling it with a mallet if necessary.
Before applying the glue, “clean” the blocks with a flat spatula and brush off the dust with a brush. Thus, we remove dust from the surface for better adhesion to the solution.
It is advisable to apply the glue with a special YTONG toothed trowel. The width of the trowel should match the width of the block. Unlike a conventional toothed (and even more so, flat) trowel, a trowel is capable of guaranteeing a truly thin adhesive layer that is the same size throughout the entire masonry. When working with a notched trowel, the thickness of the seam depends on how the master holds the tool relative to the surface. And, as a rule, a spatula does not allow you to achieve the same seam throughout the entire masonry.
If necessary, we cut the blocks with a hand saw with a blade having carbide teeth. To speed up the work, you can use a reciprocating saw with a blade for aerated concrete or other electric saws.
You can view the full list of professional tools for working with YTONG aerated concrete here.
Installation of a barbecue made of foam blocks - the second stage
Now let’s see in practice that laying foam blocks with your own hands is not such a difficult process:
- First, you need to prepare a pit for the foundation, better dig a recess for a monolithic slab.
For a barbecue (pictured) it is better to prepare a solid foundation
- Afterwards, prepare cement mortar for the base. To do this, we use cement, sand, crushed stone and water - mix it all in a concrete mixer.
- Pour the solution into the recess, immerse several iron rods in it and leave until it sets completely.
For your information! Formwork in this case does not play a role; if you want, it can be done, but it is not necessary. After all, our foundation is shallow and should be level with the surface of the earth.
- When the surface hardens (5-7 days in the warm season), you can draw the outline of the future barbecue.
- The next step is preparing an adhesive solution for foam blocks. It is much better than a cement mixture, because the seams are thinner and more invisible.
To prepare the glue you will need a drill with a mixer attachment.
- Now the laying of foam blocks with your own hands begins - the first row is laid out on the already applied mortar. Use a notched spatula; it does not spread the mixture all over the sides, but distributes it evenly on the surface.
- Using a mallet and a building level, you need to level the base. Give time to harden.
- The second row is laid out with a slight overlap so that the vertical seams do not touch.
Note! If we had built the structure from brick, then at this stage some difficulties might arise with processing the material. In our case, foam concrete is also unique in that it is easy to saw and process as needed.
- Cinder block fence: photo examples
It is enough to use a regular hacksaw for wood
- Before laying the 3rd - 4th horizontal row, it is necessary to prepare fastening elements for the base on which the coals will be located. To do this, it is enough to make several holes in the blocks located opposite each other and insert reinforcing bars into them. The distance between the rods should not exceed 3-4 cm.
- After which, you can lay out another row of foam concrete.
- For a grid with meat, you will need slightly different instructions: several parallel grooves should be made in the already installed blocks, about 1-2 cm deep. The grid will be inserted into them at the required height.
The grooves must be strictly perpendicular and at the same height
If you want to make a double barbecue, then it is better to build partitions from foam blocks with your own hands that are denser, since the braziers will be located on both sides.
In this case, you will need a more durable product that can withstand increased exposure to fire.
- The narrowing of the chimney begins half a meter from the grate with meat, so after laying a couple of rows of foam concrete over the roasting pan, begin trimming.
- To begin, lay one horizontal beam (metal angle) to connect the walls of the barbecue. We have a foam block on the back wall.
- Now, having cut the block at an angle, secure it with glue so that it looks like a gable roof of a house.
- Either cut a small square in the center or cut one block in half, removing 1/3 of it.
- Of course, you will need an “umbrella” over the chimney - it can be made of metal so as not to spend money on other building materials.
All that remains is to decorate the foam block grill and you can use it.
BBQ finishing made of foam concrete
Since the structure is intended for high temperatures, decorative elements must also be fire resistant.
To protect your barbecue and avoid unnecessary investments, it is better to immediately pay attention to the decorative stone.
Important! The cement mortar on which it is fixed is not afraid of high temperatures, so it does not delaminate and will not crumble with the tiles.
- The first step is to prime the surface of the newly erected structure.
- When the material has dried, you can apply the adhesive mixture with generous strokes, spreading it well over the surface.
- It is better to start gluing from the bottom rows so that the stone does not slide down under its own weight.
- When laying out the foam block row by row, try to leave small voids between the products, since temperature changes will affect the material, it will contract and expand.
3-5 mm is enough so that the material does not become deformed when expanding
You can also use facing bricks, but the price of decorative stone per square meter is more acceptable.
How to do it yourself?
To independently build a simple barbecue oven, you will need the following materials:
- about a hundred bricks;
- Metal sheet;
- lattice.
Do-it-yourself installation of the structure and cladding occur in a certain sequence.
- The first row is laid out on a flat, stable surface with a perimeter of 1x1 meter. The shape of the future barbecue can be square, round or polygonal. The choice is limited by the desire of the designer;
- in the first row, bricks are placed at a distance of about 5 centimeters from each other;
- the remaining rows of bricks are laid out in a checkerboard pattern using the same technology;
- the number of rows is calculated from the desired height of the roasting pan;
- a sheet of metal is placed on the resulting base, on which the coal will lie. Another 2-3 rows of bricks are laid on top of it according to the same principle;
- then the gratings and two finishing rows of bricks are installed.
This structure is assembled without the use of mortar , which ensures ease of assembly. It does not require special construction skills and takes a minimum of time.
The construction of a more substantial structure requires laying a foundation, the size of which depends on the dimensions of the future barbecue plus 30 centimeters around the perimeter. They are calculated based on the size of the firebox and the presence of additional structures. Building a barbecue yourself is not at all difficult if you follow the recommendations of experts.
BBQ grills made of cinder blocks and bricks
When building a garden stationary barbecue or barbecue, you can use various materials. But in any case, if the future structure is quite massive, then the construction of a foundation for a garden hearth cannot be avoided.
The foundation for the stove is made according to the size of the fireplace. The process itself. Excavation of soil, installation of formwork made of boards along the edges of the pit to prevent the spreading and absorption of concrete into the ground and, accordingly, pouring a concrete base with a thickness of 80 to 100 mm.
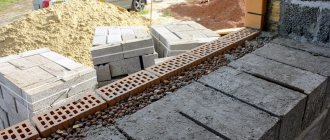
The basis of the future barbecue grill is made of cinder concrete blocks. For construction, we need twenty-one blocks, from which two niches are formed, forming the letter W. In these niches, firewood or coal necessary for cooking will subsequently be stored. The masonry process itself is simple due to the large size of the blocks.
The basis of the future barbecue grill
The height of the masonry is limited to three rows. We will obtain the halves of the block needed during construction by sawing a whole brick into two parts using a grinder. We check each laid row with a level and plumb line. 2. We make two shields according to the size of the niches, from below each of these shields, we place supports in the corners, ensuring that the shield is flush with the block masonry.
We install formwork using four boards around the perimeter of the barbecue grill. We nail these boards together. To prevent the formwork from “moving out”, we attach it additionally to the vertically installed racks. The top of the formwork should rise above the masonry by 5 cm.
Reinforcement of the cast slab
We reinforce the base with several reinforcement bars. Now everything is ready to pour the slab..
The next operation is filling the formwork with concrete mixture. The mixture consists of sand, water, cement and gravel. Recommended ratios of components per 1 m3 of concrete. 200 liters of water, 800 kg of sand, 1100 kg of gravel and 350 kg of cement.
When the formwork is filled with concrete, take a straight board slightly longer than the width of the barbecue and, placing it end-to-end on the formwork, begin to slowly pull the board along the entire length of the masonry, thereby leveling the fill and removing excess concrete. By repeating this operation several times, we will obtain a perfectly flat surface.
Pages 1 - 2 - 3
We are building a country house 2019
Source: https://domgorod.com/mangaly-barbekyu-iz-shlakoblokov-i-kirp/
Alternative materials for your barbecue
Recently, more and more people prefer barbecues made of aerated concrete. This is due to the fact that it is made of porous concrete and has a look and performance properties similar to brick . Due to its compact size and light weight, this material is ideal for constructing a tall roaster on a light foundation. In addition, thanks to the wide range of colors, you can choose the shade that will best suit the landscape and decorate the site.
A private house or cottage is a place where many people gather for friendly gatherings. At such moments, it is especially convenient to cook food on an open-air grill.
A barbecue made from blocks is ideal for this, as it is easy to use and can be quite large in size.
For the construction of such a structure, you can choose a beautiful building material, thanks to which it will perform both practical and decorative functions.
Aerated concrete grill - is it real?
Good day. I had the idea to build a barbecue out of aerated concrete on the site. Quite a lot of blocks remained after the construction of the house. There are not enough of them for a serious building like a utility block, but it would be a shame to throw them away. Tell me, please, is this possible? Will this stove fall apart after several uses?
If possible, what is the best way to do this, what kind of masonry mortar to use? We don’t need a complex structure with a chimney, stove and other bells and whistles – just a convenient place to fry meat or fish over coals.
Concrete grill is a fairly common design. Moreover, it is made both from blocks and by pouring liquid mortar with reinforcement into the formwork. But you are interested in building from blocks, so we will tell you about this method.
How to care for your grill?
Clean the grill grates with a steel brush to prevent ash and food debris from accumulating there. Spray the cooled grill grate with sunflower oil to prevent rust from forming on it. Remove ashes after each use of the grill to avoid the accumulation of foreign odors for the next cooking.
Whether you make a barbecue yourself or buy a ready-made one, it will bring you many pleasant moments when, with a barbecue in your hand, admiring the open fire in a pleasant company, you will get the much-needed respite from the busy daily rhythm.
We are accustomed to brick and iron barbecues, although you can make a barbecue roaster from other materials. Let's look at how to make a barbecue out of blocks. Foam blocks and cinder blocks are often left over after construction and I would like to make something useful out of these leftovers.
It’s not just the presence of leftover material that pushes people to make a barbecue with their own hands. Purchased or standard models are a compromise, probably convenient for many. But an individual project will take into account all the features you need and you will not need to pay for unnecessary elements. The appearance is also original.
Block advantage
The quality of modern blocks is such that after finishing it is difficult to find differences with brickwork. What are the advantages of this material for barbecue:
- The lightweight design does not require a heavy foundation;
- The blocks are easy to process;
- Some options have a ribbed surface, which saves masonry mixture;
- There are no restrictions on any type of finish;
- Low thermal conductivity;
- High frost resistance;
- Sufficient strength;
- Where there are no thermal loads, increased service life compared to brick.
Several types are available:
- Foam blocks;
- Cinder blocks;
- Gas blocks.
Foam blocks
These blocks are made from a mixture of sand, cement, water and a synthetic foaming agent. After hardening, a fine-cell structure is obtained. The blocks are available in different brands, but only D500 to D900 are suitable for our barbecue.
In addition to the advantages, there are also disadvantages:
- Significant shrinkage;
- High hygroscopicity;
- Brittleness upon impact, this especially applies to edges;
- For fastenings you will have to use embedded parts (the material does not hold nails or screws).
Gas blocks
They are made mainly from cement, but they are also made from gypsum or lime. Aluminum powder is used for gas generation. Aerated blocks are not subject to shrinkage and hold fasteners well. Through voids will require more mortar.
cinder block
The cinder block masonry can be left unfinished, which will give the barbecue a special look. Such blocks are made from a cement mixture with a large proportion of filler:
- Ash;
- Tyrsa;
- Slag;
- Shell rock.
There are options with or without voids. This material is durable.
What to choose
An outdoor barbecue is not a particularly responsible building. In the sense that it does not need to withstand the load. And to create it, it is rational to take the cheapest material. Cinder blocks are just right here. But taking into account environmental safety, durability and attractiveness, we recommend gas block or foam block.
