What is a plane for aerated concrete
Cellular concrete, which includes aerated concrete blocks, is a low-density material and can be easily processed. For example, they saw it using metal hacksaws and make grooves with a hand tool, actually scraping out the recesses. A similar situation is observed with grinding.
- A plane or grater for aerated concrete is a device consisting of a holder (handle), a base (board 15*50 cm) and a working part, which can be metal teeth of various formats.
- The essence of the tool is extremely simple - it is pressed with the working part on aerated concrete, grinding it. Constantly alternating forward-reciprocating movements ensure efficient grinding of blocks.
- The effectiveness of aerated concrete plane depends on the total area of the working surface and the size of its tenons.
- A plane in construction comes in handy in several cases - for example, after unsuccessful sawing of material, to eliminate surface waviness or to fit blocks of different sizes.
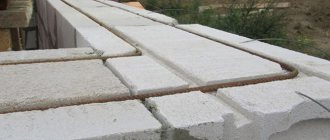
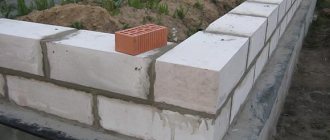
All this allows you to significantly reduce the thickness of the masonry mortar or glue, which means the house will be much warmer and the strength of the walls will increase. Saving on glue will also be a pleasant bonus for the construction budget.
Scope of application of the device
Professionals are familiar with this tool not only as a plane for aerated concrete. Its other names are also known: scraper, grater. With the help of such a tool, all errors that gas silicate blocks have are smoothed out and leveled out. After all, cutting them, as is done with wood, will not work, since they have a porous structure. Attempts to remove a thin layer will lead to the appearance of new grooves and nicks, which will increase the amount of work.
You should not use a jointer, semi-jointer or carpenter's plane for these purposes. They are designed for wood density, which differs from the characteristics of aerated concrete. Therefore, you should only use a tool specifically designed for this purpose.
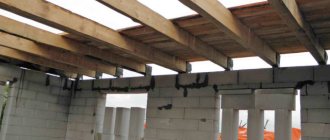
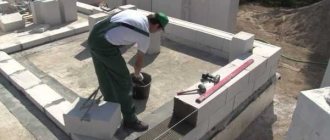
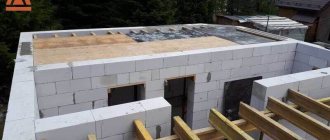
Using a plane for aerated concrete blocks, errors are effectively removed and the surface is leveled. During construction, each row has to be processed to ensure high-quality pairing of construction elements. You can start using the tool after laying the first row.
Dull teeth can be sharpened with a file as necessary - this will ensure a good level of processing.
Important! To be fair, I note that the leading manufacturers of aerated concrete have learned to make ideal blocks. Therefore, leveling the surface when laying the next row may not be necessary. But the plane will still come in handy when making additional blocks. This is when you need to lay a cut block into a wall according to certain dimensions. By the way, here is an article about choosing a hacksaw for gas silicate blocks.
Don't miss: Polishing stainless steel - methods and their differences + video
The surface along the cut line will help to polish the trowel. As already written above, for gas silicate a tight fit is important so that “cold bridges” do not appear through which heat will escape.
Characteristics of planes
Depending on the type of working surface of the plane, its technical capabilities will differ, as mentioned above. But other parameters also determine performance and ease of use:
- Dimensions of the sole - the larger the working surface, the less effort and time you need to spend on grinding the blocks. The longer the sole, the more accurate the transition between adjacent blocks.
- Shape and thickness of the handle – when choosing or making a plane, you need to focus on the comfort of the grip. Give preference to a long, voluminous handle so that you can hold it with both hands if necessary.
The standard size of a plane for aerated concrete is 15-20 by 55-60 cm.
Types of scrapers
Like most modern devices, scrapers are, depending on the type of drive, electrical and mechanical.
Electric planer
High performance tool. However, on local construction sites, such as when constructing an individual house, a high-power plane is not needed: the mason will have to spend most of his time on servicing the tool, and not on performing basic operations.
Planers with an electric motor are required on large objects - where the length of the planes to be leveled exceeds tens of meters. Here, 5–10 m of wall are laid out in one go. To sand the top edge of a newly laid row, simpler and less expensive tools are needed. The best choice, according to professionals, is manual scrapers.
Manual or mechanical
Depending on the type of working surface, there are two types of planes:
- knife - with cutting elements consisting of several knives attached obliquely;
- scraper - with a fine-toothed working surface, similar to a kitchen grater.
Knife planes resemble carpenter's jointers in their purpose. These tools use rough stone processing: they are used to remove thick layers of aerated concrete - more than 2 mm in one pass.
Scrapers or graters are tools for fine grinding. They are especially convenient when you need to remove small irregularities and roughness. Their productivity is 1–2 mm of aerated concrete per working movement.
How to make a plane with your own hands
Due to the simplicity of the design of the plane, you can make it yourself - despite the fact that you will have to pay from 1000 to 1500 rubles for it in the store. For a homemade instrument, the cost is unlikely to exceed 250-300 rubles. Some parts can be found for free, or you will already have them in stock.
Tools and materials that will be required for work
The main task of the master is to make a comfortable and durable base on which the working part of the tool will be installed. For all this you will need:
- A piece of board measuring 150*600*15(20) mm - the sole of the plane will be made from it.
- A piece of board 100*500(600)*25 mm - a very durable and comfortable handle will be cut from this piece. Alternatively, you can use a regular block, but such a handle will not be so comfortable to hold on to.
- Self-tapping screws for attaching the handle - galvanized fasteners 55 mm long will do.
- Self-tapping screws for fastening the working blade - they should not go through the sole, so short ones of 16-19 mm are suitable.
From the tool you will need:
- An electric jigsaw, with which you can set the correct and convenient shape for the plane handle.
- A manual router for rounding the edges of the handle, which will increase the comfort of the grip. Not everyone has such a tool, so as an alternative, you can smooth off the sharp edges with a knife or a wood plane, and then treat them with a rounding sander.
- Screwdriver for drilling boards and installing screws.
- Sandpaper for sanding boards. Treatment will increase the safety of the product.
- To protect wood from moisture and ultraviolet radiation, you can use various impregnations, for example, wood oil or varnish - the latter will chip over time.
How to assemble the base correctly
Now let's take a closer look at how to properly assemble the tool so that it lasts a long time, is durable and comfortable.
- First you need to prepare lumber, the edges of which are trimmed to increase geometric accuracy.
- The long edge of the board from which the handle will be made must be cut exactly along the line. This is not very easy to do with a jigsaw, so use a circular saw or trim it with an electric plane. This is necessary in order to minimize the gap between the handle and the base.
- The board for the sole is planed and sanded on all sides for the same purposes.
- Now you need to accurately draw its shape on both sides of the workpiece under the handle - use a slate pencil for marking. You should end up with something similar to what is shown in the following photo.
- Using an electric jigsaw, a handle of the desired shape is cut from the workpiece. If you want to make a shaped hole in the board, first use a drill and then insert a jigsaw file into the hole. Check the accuracy of the cut using the markings on both sides and make adjustments if necessary.
- Next, using a router, you need to round all the edges on the handle and sole. This will make the instrument safer, more beautiful and much more convenient to use.
- Then you need to sand the wooden blanks to a perfectly smooth state with sandpaper.
- All that remains is to connect the parts correctly. To do this, it is necessary to make preliminary markings. Based on the shape of the handle, determine the points for the optimal location of the screws - usually 4 pieces are enough. Mark these points on the sole and make through holes with a diameter of 2.3-3 mm.
- The same holes must be made on the handle, but only blind ones so that the part does not crack when screwing in the fasteners. On the underside of the sole you need to make a small recess with a diameter of 6 mm so that the screws can be screwed into a countersunk position.
- The handle is pressed against the sole with clamps or the hands of an assistant, after which the screws are carefully screwed in until they stop. At this point, the manufacture of the base can be considered complete. All that remains is to open the wood with oil and let it dry thoroughly.
Installation of the working part
As we remember, the working part comes in several types, any of which will not be difficult to install.
- The easiest way is to attach sandpaper, which can be placed on the glue, by additionally bending its edges to the ends of the sole and additionally screwing it here with self-tapping screws.
- Nail plates are just as easy to install; they are arranged in a row and screwed onto self-tapping screws. For this purpose, there are even prepared holes in the plate itself.
Markings and drawings
The most difficult thing to make is a plane, for which you will need several wood files 60 cm long and wood glue for better fixation. The following picture shows the simplest drawing of such a tool.
Depending on the length of the base of the future plane, it is necessary to place 6 or 8 rows of blades with teeth on it. Moreover, note that half of them have one angle of inclination, and the second - the opposite. This is done to increase processing efficiency and to ensure that the tool does not move to the side during movement.
Vitaly Kudryashov
Work begins with marking - you need to divide the base into two identical parts, which in turn are divided at equal intervals into small segments. The angle of inclination of the canvases can vary from 40 to 45 degrees - it is better to set it after dividing the purchased canvases into equal parts in order to avoid additional metal trimming.
Ask a Question
The easiest way to mark is using a carpenter's square.
The process of installing canvases
Having received the marking lines, it is necessary to saw through the wood in these places to immerse the metal sheet into it. A thick, replaceable wood saw blade for a hacksaw with a tooth height of 4-5 mm will suit you.
- In order for the metal to be held more firmly in the wood, it is necessary to make the cuts thinner, so it is better to use a metal blade to solve this problem. The wooden base must be securely fixed in a vice, and then cuts of the same depth must be made, so you must first mark the cut boundary on both sides, and not trust your eye.
- Metal sheets are divided into parts. To do this, they are clamped with a vice and broken off with pliers. The resulting sharp edges must be processed with a file.
- If the canvases are coated with a layer of oil from the factory to protect against corrosion, then first degrease their surface with white spirit or kerosene.
- Wood glue is pumped into the resulting cuts. The easiest way to do this is with a disposable syringe.
- Next, pieces of canvas are driven into the base. To avoid bending the teeth, use a wooden spacer.
After drying, it will be very difficult to remove the blade from the tool, so check in advance that the teeth of adjacent blades are directed in different directions.
Planer design
Branded planes can be made from wood and plastic, or entirely from metal.
An aerated concrete planer is needed to level a number of blocks when laying walls from them. Their task is exactly as much material as is required to ensure the horizontal surface of the row. If too large a layer is removed, then such a block will have to be thrown away, since it will be very difficult to correct the situation. In this regard, the main requirement is put forward to the cutting elements of the plane. The height of these elements is set based on work practice, so consultation with a specialist is recommended.
If you look at any branded plane, you will notice that in appearance it is a combination of a construction grater (scraper) and a kitchen shredder. In other words, it is a platform (body) with a handle, at the bottom of which sharp blades are fixed in rows, and the rows are located in two different directions. On one side there are 5-6 rows of parallel knives directed at an angle to the edge of the body, and on the other side there are the same rows, but directed in opposite directions. The blades themselves are fixed vertically in the body.
This design of the device allows you to scrape material from the surface of the block, while grinding it. The body material in branded planes is usually durable plastic. Tools are more simply made of wood. As practice shows, the material of the case does not matter if it is strong enough. The design of the handle matters only for ease of use, i.e. it should be well grasped by the human hand.
How to properly level aerated concrete + recommendations for use
Using such a tool is not very difficult - push forward/backward until you get a flat surface, but we have prepared some interesting tips for the reader:
- After laying the row, measure the overall surface plane using the rule, capturing at least 3-4 blocks in a row. The total difference should not exceed 1 mm. If the unevenness is greater, be sure to level the masonry.
- Sanding should be done in one direction for greater control over the process. The grater must be pressed with some force, while pushing forward.
- When sanding, wear eye and respiratory protection as a lot of dust gets thrown into the air.
- If you overdid it during sanding and removed the excess, you don’t need to remove the thickness of the entire row - it’s easier to make a small damper from glue, no more than 3 mm thick.
The best tool manufacturers
At first glance, a plane for aerated concrete is extremely simple, and without the hassle of choosing, you can buy the first tool you come across. This is partly true, but we will still note manufacturers who traditionally produce good quality instruments at reasonable prices.
- Zubr is a Chinese company cleverly masquerading as a domestic manufacturer. However, this does not in any way detract from the quality of their products.
- Stayer has also established itself as a company that produces good tools in the budget segment.
- Matrix - these tools are a little more expensive, but when you buy them, you gain reliability and convenience.