Choosing a soldering iron for radio amateurs is a very important point, since it is a key device for every radio amateur. However, all soldering irons or soldering stations have differences and are selected by radio amateurs individually, depending on the type of intended work and personal preferences. We also recommend reading the article about soldering basics.
For you, we have made a selection of suitable soldering irons, stations and accessories from Aliexpress.
How to choose a soldering iron for soldering microcircuits
Before choosing a soldering iron, let's figure out what they are.
Soldering irons come in gas and electric types.
Gas ones are more often used for soldering during installation work, for example, soldering in distribution boxes. They are convenient because they can work autonomously, but during operation they emit harmful substances and working with them for a long time is harmful to the health of both you and others. But for soldering microcircuits or other radio components, it would not be wise to choose such a soldering iron. It is extremely difficult to solder any board with it.
Electric ones, in turn, are the most common. Depending on the type of heater they are divided into:
- Spiral (nichrome)
- Ceramic
- Pulse
- Induction
Spiral is the most common of all electric heaters. The spiral heater provides reliable and durable operation at an inexpensive price, but has one drawback - a long heating time.
Ceramic is more expensive and quite fragile, however, it needs less time to heat up.
Pulse, with its rather high price, will be the best option. It heats up quickly and will not become unusable from a small impact.
If you are going to take up soldering seriously, and the range of proposed work will increase, pay attention to soldering stations. Induction heats up due to the inductor coil. This soldering iron does not need a thermostat, but you will have to select the desired temperature by searching through the set of tips.
Tools
When working on soldering circuits and wires, just having a soldering iron is not enough. For this type of installation, additional materials, tools and equipment will be required:
- Stand for the soldering iron itself. The temperature of the tip, even after completion of work, can be up to 300 degrees for some time. To protect surrounding people and objects from burns, there must be a stand. If you don’t want to spend money on it, you can easily make it yourself.
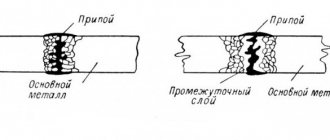
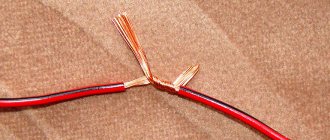
- Solder. It is an alloy of tin and lead, which is needed for contact with the surface.
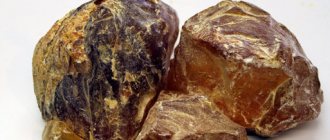
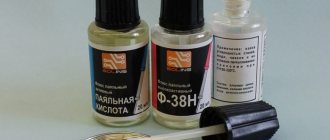
- Rosin. Essentially, it is a solid resin that is used to remove oxide films and grease layers from surfaces.
You might be interested in Checking a diode bridge with a multimeter
Important: you should not breathe vapors or smoke from solder and rosin, as this has a negative effect on the human body.
- Tweezers. Used for working with small radio components. It is best to take a tool whose ends are pointed.
- Side cutters. Mainly useful for working with wire and for stripping wires.
- File. It is used to file off the soldering iron tip if necessary.
- Screwdrivers. It’s better to buy a whole set with different attachments at once.
Selecting the power of the soldering iron
There are soldering irons of different capacities:
- Low-power (from 3 to 10 W.)
- Medium power (20-40 W)
- High power (60-100 W)
- Industrial (more than 100 W)
Depending on the power, the purpose of the soldering iron changes. Soldering irons with a power of more than 100 W are used for soldering large metal products such as radiators, pots, and pipes. Soldering irons with a power of 60-100 W are designed for soldering really thick wires.
Optimal for home - from 20 to 40 W.
Soldering irons up to 10 W are designed mainly for soldering simple microcircuits, SMD elements and other miniature radio components.
So, answering the question of how to choose a soldering iron for soldering radio components and microcircuits, a good option would be to choose a low-power soldering iron to avoid overheating of miniature radio components and SMD elements. However, if you are an experienced radio installer, the best option would be a 20-40 W pulse soldering iron, which in skillful hands can be used for quick work with miniature radio components and other work around the house.
Popular vote
Which soldering iron do you recommend or is your priority?
Pace PS90
15.56 % ( 7 )
Work's W30740 40 W (31040)
11.11 % ( 5 )
Rexant 220V 25W 12-0121-1
17.78 % ( 8 )
Bison Expert 60W 55402-60-z01
6.67 % ( 3 )
Topex 200 W 44E031
4.44 % ( 2 )
Mega 60074 40 W
0.00 % ( 0 )
Bison Professional 40W 55413-40
8.89 % ( 4 )
Union PS2005-40
6.67 % ( 3 )
Mastertool 44-0006
2.22 % ( 1 )
Minidso TS100
15.56 % ( 7 )
Megeon 00100
11.11 % ( 5 )
Soldering iron for microcircuits: how to choose a tip?
Of course, an important factor when choosing any soldering iron is the tip. However, the choice of sting is purely an individual preference. Choose depending on which tip you are comfortable working with; there are only a few recommendations for choosing. It is not recommended to use a tip larger than 3 mm. It is advisable to use a copper tip, as it is easy to clean and process. The copper tip with a layer of aluminum is not processed, but is slightly subject to burning. There are both regular and heat-resistant stings. Heat-resistant ones can more easily withstand long-term work and exposure to high temperatures. If you are a beginner, then a straight sting is the best option. Moreover, an advantage to the soldering iron will be a set of tips of different shapes, the ability to replace the tip and adjust its length.
A good soldering iron for microcircuits should have a flexible power cord and double insulation. Also pay attention to the handle. It must be well protected from possible overheating, therefore, unlike ebonite and plastic, wooden handles are recommended. They are less susceptible to heating, unlike plastic ones, and lighter than ebonite ones, that is, they are more suitable for long-term work. Also an important indicator will be the function of constant temperature support and a thermostat, so as not to burn out the components when soldering. Soldering iron equipment will make the work and maintenance of the soldering iron easier: a soldering iron stand, a sponge for cleaning the tip.
User manual
There are often nuances in work that need to be corrected. The main points will be discussed below.
Soldering chips
When operating microcircuits and chips, it is necessary, first of all, to exclude the possibility of overheating of the chip. To do this, you need to touch each of its contacts for no more than three seconds. After this, the contact must be cooled and only then can the soldering process be carried out again.
Before soldering, the chip contacts are prepared and processed by applying a thin layer of solder to them, which will improve contact with the surface. Flux is applied to the legs of the element and a tip with solder is passed over them. If the procedure is carried out correctly, the contact will be shiny and smooth, without various accumulations of solder.
Various types of microcircuits
Pin chips
If the chip has leads in the form of pins, then the process of soldering it into the board occurs as follows:
- The microcircuit is installed in special holes in the surface of the board.
- On the opposite (back) side, flux is applied to the pin contacts.
- Each pin is soldered on the same reverse side.
- Remains of flux are removed.
Pin chip
Soic chips
Chips of this type are soldered slightly differently. This method is most often called "solder wave". Its essence is that molten solder in a liquid state fills the space between the metallized part of the board and the contacts of the part. This creates a drop that is capable of conducting electrical impulses.
The solder wave method is performed in the following few steps:
- Tin and moisten with flux all surfaces that will provide contact.
- Place the microcircuit on the surface of the board so that all the legs are aligned with the metallized tracks.
- To begin with, you need to solder only one corner contact.
- Next, the second contact is soldered, located diagonally in relation to the first. In this case, you need to make sure that all other contacts remain on their metal tracks.
- Next, flux is applied to all soldered and free ends of the microcircuit.
- Next, using the tip, the solder is evenly distributed over the contacts.
- If solder bridges form between the contacts, you must remove them, as the jumpers will interfere with the operation of the components. Removal occurs using a special metal braid. To do this, place it on top of the jumper and pass it with the tip of a soldering iron. In this case, the solder is absorbed into the braid.
Important! When performing soldering using the “wave solder” method, there must be a sufficient amount of flux at the places where soldering is carried out directly to ensure wetting of the surfaces.
You might be interested in this: Purpose, design and operating principle of ATS
Soic chips
Dismantling microcircuits
Planar chips are desoldered from the board using the following algorithm:
- Using acetone and ethyl alcohol, remove the varnish from the contacts completely.
- Flux is poured onto all contacts that will be soldered.
- Close all contacts using solder, accelerating it with a heated tip. The applied solder must remain liquid.
- Then you need to run the sting over all contacts, melting all the solder.
- Remove the chip.
conclusions
If you have not decided which soldering iron to buy for soldering microcircuits, to summarize, we will emphasize the main recommendations and requirements so that you understand which soldering iron is better for soldering microcircuits and other components when looking at stands and shop windows for radio amateurs.
For inexperienced radio amateurs, it is advisable to use low-power soldering irons from 3 to 10 W. It is possible to use soldering irons with average power of 20-40 W to work with microcircuits and radio components, but there is a high probability of damaging the component during installation or dismantling. The wire must be flexible, long and double insulated. The tip is selected individually depending on preferences and type of work. It is advisable to buy a soldering iron with a wooden handle. The type of soldering iron heater depends on the funds allocated for the purchase and the type of intended work. It is desirable that the purchased soldering iron has a function of constant temperature control, a temperature regulator, a set of tips, an adjustment of the length of the tip, the ability to replace the tip and an addition, such as a stand for the soldering iron, a storage case, a cleaning sponge, etc.
You can buy a soldering iron on the well-known site - Aliexpress; we have made a selection of popular models in a separate article.
TOP 12 best soldering irons
| Photo | Name | Rating | Price | |||
| TOP 9 best models of soldering irons for home | ||||||
| #1 | Pace PS90 | ⭐ 99 / 100 7 — votes | Find out the price | |||
| #2 | Work's W30740 40 W (31040) | ⭐ 98 / 100 5 — votes | Find out the price | |||
| #3 | Rexant 220V 25W 12-0121-1 | ⭐ 97 / 100 8 — votes | Find out the price | |||
| #4 | Bison Expert 60W 55402-60-z01 | ⭐ 96 / 100 3 — votes | Find out the price | |||
| #5 | Topex 200 W 44E031 | ⭐ 95 / 100 2 — votes | Find out the price | |||
| #6 | Mega 60074 40 W | ⭐ 94 / 100 | Find out the price | |||
| #7 | Bison Professional 40W 55413-40 | ⭐ 93 / 100 4 — votes | Find out the price | |||
| #8 | Union PS2005-40 | ⭐ 92 / 100 3 — votes | Find out the price | |||
| #9 | Mastertool 44-0006 | ⭐ 91 / 100 1 — vote | Find out the price | |||
| TOP 3 best portable soldering irons | ||||||
| #1 | Minidso TS100 | ⭐ 99 / 100 7 — votes | Find out the price | |||
| #2 | Megeon 00100 | ⭐ 98 / 100 5 — votes | Find out the price | |||
| #3 | Stayer Professional 55409 | ⭐ 97 / 100 | Find out the price | |||
Which soldering iron do you recommend or is your priority?
Take the survey
The process of desoldering the microcircuit
This can be done either using a hair dryer, which will be faster, but risks uniform overheating, or using a soldering iron and micro-soldering technology. This method is longer and more labor-intensive, but the result and its reliability will be higher.
How to desolder a microcircuit from a board with a soldering iron
To do this, you will need to heat a thin tip to the melting temperature of the solder and tin it. You can use special solder for soldering microcircuits; it has a slightly lower melting point. Be sure to use flux. If the microcircuit has pins on the other side of the board, that is, a through fit, in order to desolder it, you should evenly heat the pins of the chip on one side, moving the tip of the tip with a drop of solder on it along the legs. Prying it up with tweezers, release the legs and begin a similar process on the other side.
Then you should clean the mounting holes to install the part. This is done either by suction or braiding. There is also an option with a ground fine medical needle. To do this, heat the hole under the leg on the board with a soldering iron, and press on the other side with the tip of the needle. The method is quite unsafe and should only be used with special experience. If you damage the very small sleeves located in the holes, you may simply not solder the leg of the microcircuit. After cleaning, the microcircuit is installed in its place, observing the position of the key and securing the legs with solder.
If the chip is planar-mounted (that is, does not have through pins), desoldering occurs differently. We warm up the legs and, using tweezers, carefully try to separate them from the pads, first on one side and then on the other. This process can be greatly facilitated by the addition of the Wood and Rose alloys mentioned above. If the part has legs on four sides, it is better not to use a soldering iron to solder it.
Soldering with a hairdryer
Excellent for planar parts, centipede chips and SMD capacitors. Such hair dryers are usually included in a set called a soldering station, which is a universal and multifunctional device.
To desolder, apply flux evenly, set the temperature to about 450 degrees (a little lower is possible, but then the process will take longer) and a low flow rate. On the board, all plastic parts and capacitors that are prone to explosions when overheated should be insulated with foil. Bring a hairdryer and start heating the legs in a circle. You can also blow into the center of the part, but this increases the risk of irreversibly damaging it.
Read also: Connecting a 380V to 220V electric motor via a capacitor
When it becomes noticeable that the flux has almost evaporated and the microcircuit is “floating,” pick it up with tweezers. It is necessary to avoid moving the microcircuit to the side as much as possible, since it can move small SMD components from the harness, and returning them to their places is not an easy process, they can stick together and become an edge.
After removing the microcircuit, you need to align the pads with a soldering iron tip, prepare a replacement and align it as accurately as possible on the board, observing the key. This can be either a microcircuit drawn on the board in miniature, shown in the correct position, or a simple white arrow in one of its corners. On the part itself, the key is drawn as a groove on one of the sides or a dot in the corner.
Having exposed and lubricated everything with flux again, we begin to heat it up. Again, the microcircuit should move a little in the liquid flux, it should be corrected and wait for diffusion, when the solder from the board and its legs mixes. After this, you can remove the hairdryer, let the board cool, remove all the protective foil and wipe with alcohol for an aesthetic appearance.
Soldering tools
To carry out work on replacing microcircuits, you need to stock up on tools and consumables. They will help to perform the job efficiently, prevent possible damage to the part being soldered, the tracks on the board in the place where the microcircuit was soldered, and ensure a secure fit.
In most cases, the tools used are:
- A hot-air hair dryer that allows you to contactlessly and simultaneously heat the solder on all legs of the part using air heated to high temperatures.
- Soldering iron with a thin tip. Used for carrying out intermediate work, cleaning areas from excess solder, leveling them and pre-tacking the microcircuit in several places for more accurate positioning.
Read also: How to insert a drill into a Bosch hammer drill
Soldering stations with infrared heating are not suitable for such work, since their power and heating area are excessive. They are better used in more complex work.
To ensure the best soldering quality and long-term operation of microcircuits and parts, the following aids are used:
- A flux that allows the solder to melt faster and the varnished surface of the board to avoid thermal damage.
- Solder, as well as various low-melting compounds that make it easier to tear off and desolder the part from the surface.
- Braid is a flat “pigtail” of thin copper wire that has the ability to remove solder from places where there is excess or is not required at all.
- Solder suction, designed for cases where the previous solution did not help get rid of excess drops.
- A microscope that allows you to visually assess the quality of soldering, see stuck legs on very small parts and examine damage to tracks and printed circuit boards that are not visible to the naked eye.
- Tweezers for removing and positioning installed microcircuits.
- Industrial alcohol for removing flux and soldering products from the board.
Soldering irons for soldering microcircuits
Mostly devices with a thin or replaceable tip with a power of about ten watts are used. Soldering irons of higher power can be used in such work only if sufficient experience has been acquired and all work is carried out at the required speed. If overheated, the microcircuit can be damaged beyond repair.
Another problem with high-power soldering irons is frequent damage to the tracks. This should be avoided and soldered with great care, since their restoration is a very labor-intensive and long process. To remove excess solder, you can use thicker tips - up to 5 millimeters.
The electrical voltage from which the soldering iron operates is also very important. It happens that from a standard 220 volt outlet, microcircuits designed for a lower operating voltage fail partially or completely. Motherboard clockers, for example, do not work with voltages higher than 3-5 volts, and therefore a soldering iron operating from an outlet can cause their death.
In order to avoid such situations, many tools are equipped with power supplies with voltage transformers inside and operate in the range of 12-36 volts without harming the elements they touch.
Temperature regulation is also an important indicator. It is worth giving preference to soldering irons with this function, since different solder melts under different conditions, and the master must have a flexible tool to avoid buying several.
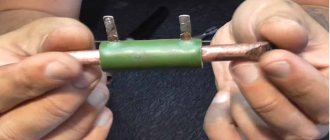
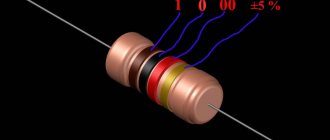
If you don’t want to buy, you can make a soldering iron for microcircuits with your own hands. To do this, you will need a resistor, two pieces of copper wire of different diameters (0.8 and 1 millimeter), textolite and a ballpoint pen. This product is not comparable to store-bought counterparts, but it is quite suitable for simple tasks.
Industrial hair dryers
They differ in the strength of the air flow, the maximum heating temperature and the thickness of the tube. As a rule, most hair dryers are equipped with several removable nozzles that allow you to change the diameter of the nozzle according to the task. This is most influenced by the size of the soldered part.
The adjustable strength of the air flow and its temperature help to avoid overheating of surrounding components and blowing away small SMD capacitors, which are very often found in the wiring of replaced microcircuits. Too high a temperature can lead to swelling of the surface of the board and such unpleasant consequences as, for example, explosions of electrolytic capacitors located nearby.
Consumables
It is better to use liquid or paste gumboil. It must be applied to the soldering area either with a thin brush, or, having previously tucked it inside, using a syringe. The most common fluxes:
- Rosin.
- LTI.
- Flux for soldering BGA chips (M-223).
Solder can be lead or lead-free . The first one melts much easier and has fewer harmful metals in its composition, while the second one is more suitable not for working with microcircuits, but for soldering chips and complex components. Low-melting compounds such as Rose and Wood alloys help desoldering the chip more easily, lowering the overall soldering temperature by mixing with the solder on the board.
Copper braiding and suction are used when drops of solder get on the board, in places where they should not be, or when cleaning and aligning pads for installing a part. They help eliminate deficiencies and ensure normal operation of the device.
Popular types of soldering irons
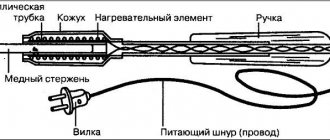
Electric soldering irons with nichrome heater
The principle of operation is to heat the surface of the tip when the tool is connected to the power supply. The heating tool is presented in the form of a spiral. It is made of thin wire. Also, modern models of soldering irons may include a nichrome element that is built into the insulator.
Advantages and disadvantages
- reasonable price on the market;
- availability of choice;
- good resistance to damage.
- does not cope well with heavy loads, the spiral may burn out if the tool is used every day;
- long warm-up.
Electric soldering irons with ceramic heater
The heating element is a ceramic rod, which heats up when voltage is applied to the contacts.
Advantages and disadvantages
- fast heating;
- duration of use subject to the manufacturer's recommendations;
- ability to adjust temperature and power level.
- there are often fakes on the market;
- fragility of the heating element;
- there is no possibility of using replaceable tips;
- expensive cost.
Pulse soldering irons
Convenient to use - the tip heats up after pressing the button. Warming up is as fast as possible - just a couple of seconds. In domestic models, the tip is represented by a copper wire. It is an integral part of the electrical circuit, which includes a high-frequency transformer that reduces the mains voltage to operating voltage, as well as a frequency converter that is responsible for increasing the voltage frequency to 18-40 KHz.
Advantages and disadvantages
- fast heating;
- soldering of elements of different sizes;
- high level of efficiency.
- for long-term work, it is better to choose a different type of soldering iron, since pulsed ones cannot withstand a continuous cycle of use in constant mode.
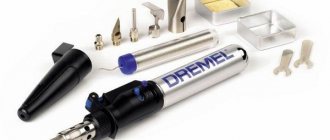
Gas soldering irons
A good stand-alone type soldering iron, where the heat source is the flame from the combustion of gas filled in a can. If you remove the nozzle, the owner will receive a regular gas burner.
Advantages and disadvantages
- use without being connected to a network.
- No.
Cordless (cordless) soldering irons
They are distinguished by low power - 15 W. Battery operated. Mainly used for small electronic components.
Advantages and disadvantages
- fast heating;
- portability;
- no connection to the power grid;
- a light weight.
- low power.
Hot air soldering irons
Heating is carried out by a stream of hot air, which is directed at the soldering zone and exits the tool nozzle.
Advantages and disadvantages
- contactless use.
- the flow can blow away small parts, and neighboring elements may also be damaged.
Portable USB soldering irons
The tool runs on USB power, for example, from a standard cigarette lighter. Can be used for soldering small parts.
Advantages and disadvantages
- compactness;
- mobility;
- fast heating.
- low power.
Hammer soldering irons
Hammer soldering irons are equipped with handles with a thick tip. Used for soldering large parts.
Advantages and disadvantages
- low price;
- power 100-150 W.
- small functionality;
- lack of heating temperature control.