An electric drill is an irreplaceable thing that almost every man has. People who regularly use this tool periodically encounter it breaking down. If it is not possible to take the device to a workshop, you will have to do the repairs yourself. In this case, you need to familiarize yourself with what the electric drill circuit looks like and understand the repair tips.
An electric drill is a device that is found in almost every home.
Possible tool malfunctions
First, you need to familiarize yourself with the main types of electric drill faults. They can be:
- Electric. Most often, breakdowns are related to electronics. There are times when the tool begins to spark due to overload. Some Bosch PSB models stop functioning due to the brushes grinding down.
- Mechanical. Sometimes bearings or gear mechanisms fail. In such situations, only complete replacement of broken parts will help.
Additional Information! The main signs of mechanical malfunctions include humming and a decrease in rotation speed.
Algorithm for finding and eliminating electrical failures
When searching for a breakdown, it is recommended to follow a certain algorithm that will help you quickly find the fault:
- If the device does not turn on completely, you need to open the case and check the cable connections. Perhaps one of them has become detached from the electrical circuit and therefore the device does not turn on.
- If everything is fine with the wires, you need to check the switch toggle switch. In some devices from Bosch and Makita, traces of oxidation appear over time and the device stops working.
- When inspecting the device, special attention should be paid to the brushes. They must press securely against the rotor.
Important! During inspection of the electric drill, do not connect it to the electrical network. Especially if the wire contacts are being checked.
Possible tool malfunctions - we carry out repairs ourselves
If your tool begins to work worse, or even stops performing its direct duties, it’s time to diagnose the problems and try to deal with them. First, we check the wire for damage and the voltage in the outlet, for which you can plug in any other device - a TV or a kettle.
If you are inspecting battery-powered devices, they should be checked using a tester - in this case, the voltage indicated on the case should have a similar value to the battery voltage.
If the voltage is less, you will have to replace the batteries with new ones. If the battery is working normally, the power supply is normal, look for hardware problems. The most common breakdowns are:
- Problems with engine operation;
- Brush wear;
- Problems with the button operation.
Knowing how the electric drill button is connected, you can quickly solve the problem. In addition, a problem with the operation of the drill can also arise due to the dustiness of the tool, because the drill “takes” wood, brick, and other materials. This means that you should take care to clean the device after each use - this is the only way to reduce the risk of malfunctions due to contamination of the tool. That is why, after you have carried out renovations in your apartment, immediately clean the drill.
Necessary tool
An ohmmeter is an indispensable thing for determining the causes of malfunctions.
Before you begin repairing an impact drill, you need to familiarize yourself with the list of tools that may be needed:
- pliers;
- ohmmeter;
- grinding sandpaper;
- vice;
- straight and Phillips screwdriver;
- spanners.
A vise may also be useful for securing some parts.
Types of drill button connection diagrams
There are two types of electric drill connection diagram. It is necessary to familiarize yourself with the features of each of them.
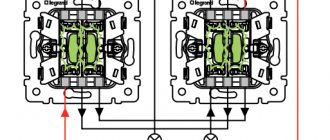
Wiring diagram for a shovel drill switch
The switch circuit will help you correctly connect the button to the tool.
As a rule, such a circuit is used by craftsmen when repairing a broken tool. With its help, you can check all the functional features of the switch. It also allows you to carry out repairs after determining the cause of the breakdown.
Most manufacturers supply a circuit diagram for connecting the switch along with the instructions for the product. However, there are times when it is not there. In such situations, people have to search on the Internet on their own. To find it, you will have to find out the exact model of the device in advance.
Circuit with reverse and speed controller
The connection diagram for a switch with reverse is used to connect a reverse button.
Some models from manufacturers such as Sparky or Interskol are equipped with switches with a built-in speed controller and reverse. It is quite difficult to understand such structures and therefore it is not always possible to determine the exact cause of their breakdown.
If such a button fails, it is recommended to simply buy a new one and connect it by referring to the diagram.
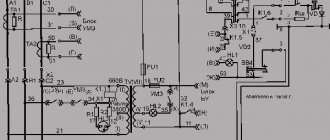
Electrical Drill Connection Diagram
Changing brushes
. A common type of breakdown is wear of the motor brushes, which are replaced independently by yourself. From time to time, there is an option to change the brushes without disassembling the drill body. For some models, it is enough to unscrew the plugs from the installation windows and install new brushes. For other models, changing requires disassembling the housing; in such circumstances, you need to carefully remove the brush holders and remove the worn brushes there.
Do not wait until the brushes wear down to small size. This is fraught with the fact that the gap between the brush and the collector plates increases. As a result, excessive sparking occurs, the collector plates become very hot and, of course, “retreat” from the base of the collector, which will lead to the need to change the armature.
You can determine the need to change the brushes by excessive sparking, which can be seen in the ventilation slots of the housing. The second method of determination is the random “jerking” of the drill during operation.
Power cord
. The cord is checked with an ohmmeter, one probe is connected to the contact of the power plug, the other to the core of the cord. Lack of resistance indicates a break. In this case, repairing a drill comes down to replacing the power cord.
Electric motor diagnostics
. In second place, in terms of the number of drill breakdowns, there is an option to put the malfunction of motor parts and, in most cases, the armature. Breakage of the armature or stator occurs for two reasons. incorrect operation and poor wiring. The world-renowned Russian automotive industry uses expensive coil wire with double insulation with heat-resistant varnish, which significantly increases the reliability of the engines. Accordingly, in cheap models the quality of insulation of the winding wire is not sufficiently developed. Incorrect operation boils down to frequent overloading of the drill or prolonged operation without breaks to cool the motor. Repairing a drill in makeshift conditions by rewinding the armature or stator, in this case, is not feasible without special devices. Only one hundred percent change of element (only experienced repairmen will rewind the armature to another stator at home).
Content
