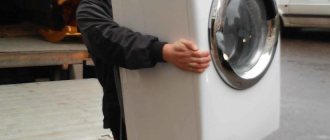
Household appliances make life much easier. For example, almost every family has a washing machine. She has ceased to be an inaccessible item, and has now become an indispensable assistant to any housewife. Any equipment fails sooner or later, and a washing machine is no exception. No matter how expensive and high-quality a model is, it is not immune to malfunctions.
When the washing machine breaks down, the question immediately arises: what to do? If the warranty period for the machine has not yet expired, then it is better to contact a specialist to solve the problem. If the warranty has expired, then to save money you can fix the problem yourself. Repairing a washing machine with your own hands is not difficult, you just need to have an idea of how the washing device works, as well as the algorithm for its operation. Most breakdowns can be fixed on your own, without the help of equipment repair workshop workers, you just need to study this issue a little.
Design and principle of operation of an automatic washing machine
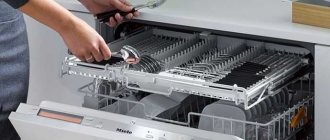
Regardless of the manufacturer, all machines have a similar structure and operating principle. They differ only in the volume and type of loading. All machines have a control unit. It includes panel and board. The control panel contains buttons and levers with which the operating mode is set. The board recognizes these modes and sends signals further. With the help of these signals, water is drawn in, drained, heated, and the drum is also set in motion.
Each process is monitored by a variety of sensors. They send information to a microprocessor located on the board. The machines contain sensors such as:
- sensor responsible for water level. Monitors the volume of water in the device. Gives a signal to turn on/off the water supply;
- sensor responsible for heating water. Gives a signal to turn on/off water heating;
- tachometer Responsible for the speed at which the drum rotates;
- time relay. Responsible for the amount of time spent on different stages of washing.
The main sign of a control board malfunction is a failure in the programs. Basically, the board is not repaired, but replaced, after which the machine works properly again. The board is attached to each actuator: drum, pump, electric motor, valve that shuts off the water pressure, etc. The main actuators include the following:
- loading hatch door lock. If the door is not closed tightly, the machine will not start the wash. It is necessary to press a little on the door so that the contacts close, after which the washing starts;
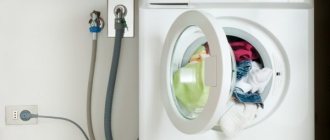
- water supply valve. The washing device is connected to the central water supply using a hose. There is a valve in it, it starts and turns off the supply of water to the device. If the machine does not start drawing water or does not stop drawing water, then the valve is broken. It should be cleaned of dirt or replaced;
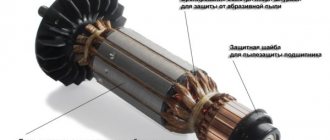
- electric motor Thanks to the motor, the drum moves during washing. There are models of machines where the movement of the drum is transmitted to a pulley through a belt, and there are devices with direct drive. When the drum stops rotating, the belt is replaced. If the drum stops rotating on a device with a direct motor, then the fault will be in the electric motor;
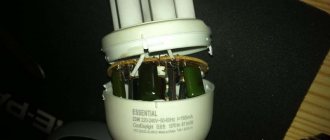
- TEN (tubular heating element). Thanks to this part, the water can be heated. If the water stops heating, then the heating element is faulty. If it is working properly, then look at the condition of the temperature sensors;
- water pump. It is a pump that pumps out waste water after the end of the washing cycle.
The main part of the body is allocated for the tank in the washing device. It contains a drum, a heating element and several sensors. The tank includes two parts that are connected to each other. Water is collected and pumped out through special tubes that are connected to the walls of the tank. The top of the tank is attached to the body of the machine using springs, and the bottom using shock absorbers. This fastening helps reduce the level of vibration that occurs during washing.
There are models with collapsible and non-removable tanks. The first option is more expensive, but they are easier to repair with your own hands. If any part located inside the tank breaks, it can be easily replaced. To do this, you just need to disassemble the tank of the machine. In another case, you will have to replace the faulty part along with the tank.
All washing devices, regardless of manufacturer, operate according to the same scheme. The washing process consists of the following steps:
- You need to turn on the washing machine, place the laundry inside, and select a washing program. After this, a mechanism will work, which will lock the door and start the wash.
- Water begins to flow through the hose through the valve, the valve will adjust the amount of water and stop drawing it.
- Once the required amount of water has been collected, the valve will close.
- Then the heating element will start, it will heat the water to the required level. The sensor is also responsible for heating the water, but if it is missing, the timer will work.
- Together with the heating element, the electric motor also starts working. It starts the drum, which rotates smoothly from side to side at regular intervals. This helps wet the laundry.
- After heating the water, the heating element will turn off and a full wash will start. The drum will begin to rotate smoothly from side to side at regular intervals. This process prevents the laundry from bunching up.
- At the end of the wash cycle, the used water will be drained away. New water will begin to rinse the laundry.
- After this, the drum will begin to rotate slowly. You can select different modes, the number of starts of the rinsing process will depend on this.
- After the last rinse, the pump comes into play again and pumps water out of the drum.
- Then the drum will begin to rotate at high speeds. This will start the spinning process. All this time the pump will continue to operate.
After this, the machine turns off, and the washing cycle can be considered complete. There is nothing incomprehensible about the design and operation of washing machines. You should know all this in order to understand at what stage of washing the problem occurred and which part is responsible for this stage of washing. Knowing all this, you can easily replace the faulty part. Since all washing devices are similar, the problems leading to breakdowns will be the same in them.
After washing, the laundry becomes dirty and not washed
Diagnostics: You have washed, you take out the laundry, and it is even dirtier than it was. These types of things usually happen when washing machines are running for many years.
The main cause of the malfunctions that were given here is insufficient care of the washing machine and inattention to it.
Causes of occurrence: this can be caused either by dirt accumulated in the machine itself, or by the use of low-quality water or poor washing powder:
- The cause may be a faulty bearing or seal.
- If dirt has accumulated under the cuff or in it itself.
- Contamination can also occur if there is mold on the drum or in the pipes themselves.
- When using dirty water for washing.
- In the case when low-quality powder was used during washing.
Where exactly can you find mold in an old washing machine? There are several most typical places for this:
- Inside is a cuvette for powder.
- In those pipes that connect the powder cuvette and the tank.
- On the walls of the drum themselves.
- There may be mold on the cuff.
- It can be located at the top of the tank on the walls.
You can detect the presence of mold by its specific smell, which is difficult to confuse with anything else. If such a smell exists, you need to carefully inspect all the places listed here. When laundry comes into contact with mold, it gets smudged black spots.
Getting rid of mold is quite simple:
- To do this, just do a single wash.
- In this case, you need to pour 150 grams of soda into the powder cuvette and wash according to the washing program at high temperature with additional rinsing.
- After this, the mold will be cleaned out.
If the cuff is dirty, this can also lead to contamination of the washed clothes.
Getting rid of this problem is quite simple; just use a brush or a dry cloth and clean off the existing plaque.
If the seals are old and worn out, then they gradually begin to release grease inside the tank and it gets on the laundry. To do this you need to do the following:
- Disassemble the car.
- Remove old bearings.
- Install new bearings.
- Assemble the car.
If you delay repairs, the seals will deteriorate more and more and release lubricant into the tank more and more.
The presence of low-quality washing powder can be determined as follows:
- Non-standard powder color.
- The powder does not dissolve well.
- The presence of a strange and unusual odor.
- The powder produces too much or too little foam.
To correct this situation, you need to more carefully select the appropriate powder.
If dirty water was used during washing, you can proceed as follows. Before refueling the washing machine, check how clean the water comes from the tap. If it is not clean enough, then you need to let it drain and only then refuel the car.
Do-it-yourself washing machine repair
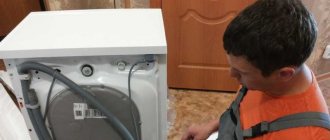
In order to repair a faulty washing machine with your own hands, you need minimal knowledge of how to handle tools. Before proceeding directly to repair work, you should carefully study the work plan. This will avoid errors that may occur during the process and bring a faulty washing machine back to life.
Bearing replacement
As a rule, replacing the bearing is necessary when unusual sounds and vibration appear during spinning. To correct this situation, the bearing must be replaced. The bearing replacement process consists of the following steps:
- Remove the back panel of the device case.
- Clear the path to the bearings by removing the belt from the pulley.
- Unscrew the bolt that attaches the pulley to the drum, then remove the pulley.
- Unscrew the screws that hold the structure in place, then remove the coupling with bearings.
- Remove the O-ring and seal. The latter will also need to be replaced.
- Reinstall new, serviceable parts.
This completes the bearing replacement, all that remains is to assemble the washing machine. This must be done using these instructions, but only from the end.
Replacing the heating element
The heating element can often turn out to be faulty. The reasons for this are different: the pipes are covered with a layer of scale due to frequent contact with water, the heating element burns out due to prolonged use or surge voltage in the electrical networks. Regardless of the reason, the heating element will need to be replaced. You can do this action yourself. Replacing the heating element includes the following steps:
- In almost all models of washing machines, this part is located on the rear panel of the case, so you need to remove the rear panel.
- Remove the terminals for connecting the electrical appliance.
- Unscrew the nut with a wrench, then press on the stud with a screwdriver. Unscrew the faulty heating element from the seal.
- Place the new part in place.
- Reassemble the devices in reverse order.
To avoid confusing anything during assembly, you can take a photo of how all the elements and wires were located. This will help avoid mistakes.
Replacing shock absorbers and dampers
These elements in the washing device serve to protect parts of the washing machine from excessive vibration and premature wear. But, despite the fact that these parts perform the protective function of other parts, these parts themselves are subject to fairly rapid wear. Therefore, you can often encounter a situation where it is necessary to replace the shock absorber and damper.
If the dampers fail, then it will be enough to replace the seal in them. With shock absorbers the situation is different. Replacement requires complete disassembly of the washing machine body. It is very difficult to do this on your own; there is a high chance of damaging something, so it is better not to risk it, but to contact a service center for help.
Cleaning filters
This procedure is not only a repair, but also a preventive maintenance of the pump. A lot of small debris can become clogged in the filter, causing the pump to stop pumping out dirty water. To prevent this from happening, it is necessary to periodically clean the filters. This process is the simplest thing a washing machine owner can do. The filter cleaning process consists of the following steps:
- Open the small door located at the bottom of the device. If it does not give in, you can lightly pry it up with a screwdriver.
- Unscrew the plug.
- Take out the filter and rinse it using running water.
- Remove small debris (threads, hair, wool, etc.) from the hole.
- Place the filter in place and tighten the plug.
- Put the door back in place.
This completes filter cleaning. This process is quite simple but very useful for the device. If, after removing the filter from the machine, it is found to be faulty, you will need to install a new filter.
Replacing a washing machine pump
The pump in the device is a part that is extremely rarely repaired, even in workshops. The reason for this is the low cost of a new part, so it is easier to replace it rather than repair it. You can replace the pump yourself, you just need to find the right part. The process of replacing your pump yourself includes the following steps:
- Remove the bottom panel of the device.
- Using a screwdriver, remove the pump from the washer body.
- Press the drain valve from the outside, thereby pushing the pump inside the device. Get it outside.
- Disconnect all wires connected to the pump.
- Remove the drain hose and fitting.
- Place the new part in place.
This completes the replacement of the pump, all that remains is to assemble the washing machine. To do this, you must follow the instructions in reverse order. After this, you need to make sure that the new element and device are working properly by turning on the wash without laundry.
It is not at all necessary to run to a household appliance repair shop at the first malfunction. After all, most problems can be fixed on your own; you don’t even need to have special knowledge and skills to do this. To successfully repair a faulty washing machine yourself, you only need a minimum number of tools, desire and free time. You also need to take time to study the structure and operation of the washing machine.
Poor laundry wringing
Diagnostics: At the final stage of washing, when drying the washed laundry, a weak spin occurs, which does not occur completely.
Causes:
- The simplest and probably most common is the case when the user has chosen the wrong washing mode.
- Another reason could be that too much laundry was loaded into the washing machine. This malfunction occurred due to overload.
- The tachometer has failed. This resulted in push-ups occurring at too low a speed, which also resulted in poor-quality push-ups.
- Problems have arisen that are caused by poor-quality operation of the electric motor brushes, which led to the malfunction discussed here.
- Defects occur in the control board, which leads to incorrect execution of various actions by the washing machine.
- The water drainage from the machine after washing does not work or does not work efficiently. This leads to the fact that the wrung out laundry again comes into contact with the water remaining in the tank and gets wet to one degree or another.
Not all types of existing faults are equivalent in complexity; in each case you need to act in your own way:
In the first of the cases described, obviously, the whole problem lies in not carefully reading the instructions for working with this model of washing machine.
If we talk about the second option, then here we are talking, rather, about caring for your household appliances. Giving it an unbearable load can, over time, actually ruin it. In this case, you just need to follow the existing standards for working with it.
The tachometer gives the machine information about the speed at which the drum with washed laundry rotates. If the information is correct, then the machine can flexibly react to the current situation, making appropriate adjustments as necessary.
If the data is incorrect, then the rotation speed will not provide the required degree of drying of the laundry. You can diagnose a breakdown by observing the washing process when setting various programs. If in this case the rotation speed does not change, then you can be sure that the tachometer is faulty.
In this case, to repair the washing machine you need to do the following:
- We remove the back wall of the washing machine.
- Remove the drive belt. To do this, you do not need to make any serious efforts, but you just need to twist the pulley a little and remove the belt from it.
- The tachogenerator can be easily distinguished. It is installed directly on the engine. It needs to be disconnected from the body.
- We put a new tachometer in place of the old one.
- Let's put the car back together.
If the brushes are worn out, it is also possible to carry out repairs yourself. To do this, you need to purchase brushes specifically for the type of engine you have. Replacement of brushes is carried out if you are well versed in the structure of electric motors.
Otherwise, it would be best to use the services of an appropriate specialist.
If the control board is faulty, it would be best if you invite a specialist. Repairs here can be quite complicated.
If there is insufficient water drainage, it is quite possible to carry out repairs yourself. Here we are talking about a drain malfunction. There may be several reasons.
It is necessary to check and eliminate every possible malfunction associated with this:
- First you need to clean the drain filter.
- Then you need to clean the drain hose. In order to do this, you need to disconnect it.
- If the problem is still not resolved, then you need to put the car on its side, remove the bottom, dismantle the drain pipe and clean it too. After that we assemble the car. That's it, the repair is complete.
Video:
What damage could have happened?
What caused the problem:
- Wear of gaskets due to frequent use.
- Defective parts, improper transportation of the machine.
- The rod that secures the shock absorber is faulty.
Whatever the breakdown occurs, it is important to know how to restore the shock absorber in a washing machine with your own hands
Diagnostics for vertical loading
If shock absorbers or dampers are damaged, a specific noise is heard - knocking during washing, coming from inside. Possible distortions of the housing or strong vibration.
Diagnostics for vertical loading is carried out as follows.
- Press the top of the tank with your hand. If you feel that there is no resistance, and after you remove your hand it continues to swing, then it is time for repairs.
- Watch how the drum rotates. If it’s tight or squeaky, it means the parts are not lubricated at all.
- Disassemble the machine, remove the cover from the back. Press down on the tank again and forcefully lower it down, then quickly release it. If the tank jumps and no longer moves, then the shock absorbers are normal.
These simple diagnostic methods will help you determine whether your washing machine's dampers need repair.
Front loading diagnostics
Diagnosis of a front-loading washing machine occurs in a different way.
- Press firmly on the tank at the top and look at the hatch seal lip. If folds form on it, then repair is needed.
- Be sure to note how much the tank drops as you press.
Normally, when pressing, folds should not appear on the seal and the tank should not sag when it is loaded.
If all these defects are found, the device should be repaired.
Preserving the car for winter storage
This procedure is necessary if the SMA is operated in country conditions. The owners move into an apartment, and leave the household appliances until the next season. Preservation involves preparing the vehicle for storage at sub-zero temperatures.
Actions taken:
- Unscrew the filter and drain the water from the hydraulic system;
- remove moisture from the powder receiving container;
- dry the drum and seal with the hatch door open.
In conclusion, a piece of advice. There is no need to neglect the maintenance of an automatic washing machine: its condition is judged by its appearance. The insides also require care: the heating element, the powder receiver, the drum and the sealing collar. Preliminary softening of water will extend the service life of washing equipment - you need to use additives and inlet cleaning filters.
Video
Water problems
Water does not flow
| Cause | What to do |
| The valves responsible for the water supply are closed | Open the valves after making sure they are closed. |
| The inlet hose is deformed | Look at the hose and if it is flattened, you should rinse the part and bend it if necessary. |
| The inlet filter is clogged | After closing the inlet valve, disconnect the inlet hose. Using pliers, remove the filter, then rinse the part under running water. Place the filter and then the inlet valve in place, and then connect the inlet hose. |
| The inlet valve is damaged | If the filter is unable to retain dirt, it will get onto the valve and cause it to malfunction. In this case, the valve will need to be replaced. After disconnecting the inlet pipes, find the valve and replace it. |
| The switch that shuts off the inlet valve after the machine has filled the water to the required level has broken (the tube could be damaged or clogged) | Check the tube that fits onto the switch - if it has a hardened end, cut it off and refit the tube onto the switch. Blow into the tube to check how the switch works - you should hear a click. Next, you need to loosen the clamp on the hose that secures the pressure chamber to the drum. Inspect the chamber, rinse it thoroughly until the inlet and outlet are completely clean. Check for damage. Make sure the switch is working properly using a multimeter. If damaged, replace the part with a new one. |
| The electric motor is broken | Depending on the breakdown, you can repair it or replace it with a new one. |
Related article: Errors and malfunctions of a Siemens washing machine
If water does not fill into the washing machine, watch the video of the “Washing +” channel.
Very slow to gain
| Cause | What to do |
| The inlet hose is pinched | Check the hose and straighten the deformed area. |
| Inlet hose is dirty | Rinse the hose until the blockage is removed. |
| Water pressure is insufficient | Check whether the valve responsible for the water supply is fully open. Perhaps the cause is low pressure in the line. If this situation occurs in a private home, installing a pressure tank in the attic can help. |
Doesn't drain
| Cause | What to do |
| Incorrect program selected | Make sure that you have not paused the machine or turned on the delayed wash. |
| Water level switch does not work | After checking its operation, install a new switch if necessary. |
| The outlet hose is clogged or kinked | Assess the condition of the hose, then rinse it and make sure there are no foreign objects inside. |
| Exhaust filter clogged | Depending on the degree of clogging, the filter can be washed or replaced. |
| The pump is clogged | Place a rag under the machine, disconnect the clamps from the hoses that are attached to the pump and make sure that they are not clogged. Using a pencil, evaluate the rotation of the impeller - if tight rotation is detected, open the pump using suitable tools. Inspect the impeller chamber, wash it, and then assemble the pump and install it in place. |
| The pump is broken | Replace it with a working part. |
| Electrical problems | After disconnecting the machine from the network, check the contacts. If necessary, tighten them and clean them. |
| The timer is broken | Replace this part with a good one. |
If during washing the washing machine stops and does not drain water, watch the video of the “Washing +” channel.
Small leak
| Cause | What to do |
| The hose clamp is a little loose | Carefully inspect the clamp to see if there are traces of water around it. First loosen the clamp and move it slightly, then tighten it. |
| There is a crack in the hose | If cracks are found in any hose, it should be replaced with a new one. |
| The door gasket has moved | Replace the door seal with a new part. |
| Tank seal is leaking | Completely disassemble the machine and replace the bearing. |
To learn how to replace a bearing in a washing machine, watch the video by Vladimir Khatuntsev.
Repair at the Pro stage
In order to effectively carry out repairs, it is necessary to follow several preparatory measures and select the necessary tools. First, you need to disconnect the washing machine from the general water supply: to do this, the hose is “bounced off” from the water line, or you just need to turn off the valve.
It is advisable to place a cloth under the washing machine, since a small amount of water may remain in the drum after direct washing. The room where repairs will be made must be well lit.
Required tools and devices:
- Crosshead screwdriver.
- Flathead screwdriver.
- Wrench for 17-19.
- 8x9 wrench.
- Service hook (supplied with the washing machine).
- Pliers.
- Electrical tester.
Approximate prices for repairs
It should be noted here that the specific price may vary in specific cases. In addition, discounts are often provided. Therefore, the final price is determined during negotiations with the technician who must repair the car.
Approximate prices are as follows.
- Emergency diagnostics are free.
- An urgent call costs from 500 rubles.
- Installation of the filter, legs and control knobs (without complex dismantling of the housing) costs from 500 rubles.
- Installation of an element heater (or drain pump, motor), including partial disassembly of the housing from 1000 rubles.
- Replacing the bearings of the drum (the housing is completely dismantled), replacing the entire drum or tank will cost from 2000 rubles.
- Installation and connection after completion of the repair - it will cost from 1200 rubles.
Repair and replacement of heating elements
To get the heating element, you need to open the back cover of the washing machine. Typically this unit is located at the rear of the equipment, but this may also depend on the model. For example, before you start repairing a Samsung washing machine, you need to familiarize yourself with its structure and the location of all components and parts.
First you need to disconnect the terminals, using a multimeter you need to check the heating element for functionality. The heating element itself is built into the seal; use a screwdriver to get it out.
The new heating element is installed in place of the old one in the same way; while removing the old heating element, you can photograph all the stages to make installing the new heater easier.
The most common malfunctions
Is your washing machine broken? Not being a professional in repairing household appliances, however, there are the most common signs that indicate the cause of the malfunction and allow you to diagnose the breakdown as accurately as possible.
Before starting repairs, be sure to read the operating instructions for the equipment.
- Does not drain water - very often after completing the full washing process and opening the door, you can find residual water in the drum. This means that your washing machine has a clogged filter or a broken pump. In the first case, clean the filter and check for residual water in the drum, and in the second, repair it or replace it with a new one.
Part malfunctions may be due to a clogged tube (it can be easily cleaned) or oxidation of the contacts.
- Does not spin - if you did not turn off the spin function yourself during the previous wash, then the tachometer (a part that controls the number of rotations of the drum and can fail if an automatic washing machine is overloaded) may break or the screw securing the tachometer may become loose. It is also possible that the motor brushes may wear out or the control module may fail.
This is a fairly rare breakdown and must be replaced by professionals.
- Does not collect water - if, when starting the first stage of washing, water does not fill into the drum and the programmer provides information about its absence in the system, then most likely the supply hose is clogged, the inlet filter has failed, or there has been a failure in the system program when supplying water. You can try to deal with this problem yourself, for which you need to disassemble the machine, clean and rinse every part in the water supply system and start the washing process. If the outcome of this procedure is unfavorable, you will have to begin repairing the system or replace the parts with new ones.
The intake valve could be broken. The way to solve the problem is to replace the part.
- Does not heat the water - this malfunction can be hidden from view for a long time, because the machine performs all functions properly, and you do not even suspect that the washing process takes place in cold water. The easiest way to check is to touch the glass in the machine door; when washed with hot water, it should heat up. There may be several reasons for this: the heating element has malfunctioned (due to voltage fluctuations, factory defects or power surges), the thermostat or programmer has failed. In the first two cases, the heating element and temperature sensor must definitely be replaced with new ones, but if the situation does not change when updating the programmer, then it will also have to be replaced.
If you notice that the quality of the wash has dropped sharply, and the hatch door remains cold during washing at +60℃ and above, it means that the heating element has burned out or a thick layer of scale has formed on it.
- A working machine makes a strong knock and shakes - imported machines work very quietly. First of all, check the correct installation of the washing machine (the washing machine must stand firmly, exactly horizontal to the floor line), the presence of small parts that during washing could get into the gap between the drum and the water heating tank, failure of the bearings (in this case, the machine will creak and they will have to be replaced), failure of shock absorbers that stop vibrations of the drum during rotation (if one breaks, the entire device will “shake”). Important: always load the washing machine with laundry of at least the weight specified for this model and control its even distribution inside the drum).
Crackling, noise and knocking noises during spin cycles are often caused by worn bearings.
- Water leaks under the washing machine - most often it is the result of a break in the hatch cuff, a break in the pipe, or a break in the gasket on the supply hose. These working parts wear out more often than others and need to be replaced, especially since their cost is not so high.
Sometimes, to prevent water leakage, it is necessary to replace the seal of the hatch.
- The machine does not turn on - this breakdown is much more serious than all the previous ones and it is unlikely that you will be able to repair the washing machine if the power supply burns out or the system programming unit is damaged; it will have to be repaired in special service centers. But it may be a faulty socket or a broken latch on the door, as a result of which the door does not fit tightly to the drum, and the machine cannot start the program - you can fix these things yourself.
You should immediately check whether at least one of the indicators on the control panel lights up and whether the display works. If not, there may be no input voltage.
- Drum immobility - if a foreign object is stuck between the drum and the tank, try removing it yourself. Carry out diagnostics of the washing machine when turning off the power supply from the outlet, rotate the drum by hand, if there is no rotation, the drive belt could break, the motor could break down, or a malfunction occurred in the programmer. All three causes of malfunction require disassembly of the device and major repairs.
There may be several reasons for the malfunction. The most common is that the drive belt connecting the electric motor shaft to the drum pulley has stretched, torn or slipped off.
Initial stage of maintenance
Complete preventative maintenance will require careful diagnostics and partial disassembly of the machine. You can turn to professionals for this, but it is not necessary - any man can cope with the upcoming events. The main thing is to follow safety rules and adhere to our recommendations. To begin with, it is necessary to carry out the primary stage of work. We proceed according to the following instructions:
- disconnect the washing machine from the supplied communications: electricity, sewerage and water supply;
- pull the detergent tray towards you, pull it out by pressing the special tab and thoroughly clean it with water;
- remove the clamp on the existing hose, take out the mesh filter and rinse it from scale;
- We clean the garbage filter, to do this we tilt the machine back, place a container under the right corner, cover the floor with rags and, using a slotted screwdriver, open the technical hatch door. We find the filter plug, unscrew it and wash out the accumulated dirt;
The garbage filter cannot be cleaned immediately after using the machine, as there will be hot water inside that can severely burn a person.
- open the door and assess the condition of the cuff - the rubber seal around the “entrance” to the drum; it should be clean, intact, without cracks, tears, rust or foreign objects;
- spin the drum, just loosen it in both directions: it should move without interference, but with a slight stretch, the main thing is not to hear a sound reminiscent of the creaking of sand.
At the end, the drain hose is disconnected and probed for blockages. But if there were no problems with draining before, then this step can be skipped. This concludes the initial do-it-yourself inspection.
Grinder and circular saw
Not the best tool to cut through a washing machine tub. The main problem with the grinder is that it does not saw, but melts plastic. As a result: torn melted edges, wide seams, high probability of damaging the surface. At the same time, the grinder is perfect for cutting stuck fasteners of a metal tank, for example, those that are installed in Bosch machines in the upper price segment. The circular saw also has disadvantages. It cuts well, but “walks”, you need to constantly keep it on the cutting line.
As is easy to see, there is no ideal tool, and there cannot be one. To quickly and efficiently cut the tank of any washing machine, you need to choose the best option for each area. For example, you can use a jigsaw on a smooth surface, and process areas with protruding elements with a saw (a backhoe or a hacksaw).
Potential problems and breakdowns
In order not to make unnecessary efforts, it is advisable to observe the equipment and understand what exactly is the deterioration in performance. If the overall quality of the wash has dropped, an uncharacteristic noise appears during the spin cycle, and the laundry remains wet after the spin procedure, the problem most likely should be looked for in the pump.
The same unpleasant phenomena are caused by clogged communication hoses. It is better to approach all these components from the front of the unit or from below. If foam comes out of the machine during operation, you need to stop washing, set the “Drain without spin” program and wait until the device completes all the necessary actions and opens the door.
Then you should remove the laundry, manually clear the foam from the inside and start the wash again without spinning. If this is not done, foam will penetrate into the engine or onto the control board, and repairing these components will cost the owners a substantial amount.
The reason for the appearance of abundant foam in the washing machine may not be a breakdown or malfunction of the unit itself, but the use of hand washing powder (it does not contain defoamers) or a significant excess of the standard dose of detergent
If the device does not gain temperature and does not warm up the water, it is most likely that the working heating element has failed. Its location is indicated in the accompanying technical documentation. It is usually located at the rear, but in some models, depending on the manufacturer and internal design features, it may be located in the front.
It may have built up scale as a result of using hard water and will need to be cleaned. Or, if the element burns out, you will need to replace it with a new heating element. The replacement process is described in detail in our recommended article.
If the machine takes a long time to wash, you should look for a fault in the electronics. It would be a good idea to check the functionality of the water temperature sensor and other controls. The same problem can occur due to an incorrectly placed drain hose.
A pressure switch or pump is responsible for uniform and rapid drainage of liquid from the washing container. Slowly pouring water clearly indicates that these elements have lost their functionality due to breakdown or operational wear.
To repair them or replace them with new ones, you will have to dismantle the side wall and penetrate into the upper part located behind the rear panel.
When failures occur in the drum or bearings, you will have to completely disassemble the device, identify the problem, carry out repairs, and then assemble the machine and start it up. If washing proceeds as usual, then operation can be continued.
This is just a short list of the main breakdowns identified in the machines. It is relevant for all household washing equipment, regardless of the brand and design features of each individual device.
Problems with electronics and software control are more complex problems and require professional intervention. To eliminate breakdowns of this level, regardless of whether the equipment is still under warranty or not, it is better to contact a specialized service center.
The certified technicians working there will carry out diagnostics, quickly identify the source of the malfunction and repair the damaged electronic unit or replace it with a new one.