Nowadays, more and more non-gas-free houses are being built as safer places to live. Apartments in such buildings are equipped with electric stoves, and residents are provided with electricity at reduced rates. But sometimes you have to pay for this convenience when the electric stove breaks down.
But it is not necessary to call a specialist to repair the electric stove. A number of common malfunctions can be eliminated with your own hands by any home handyman who knows how to work with electrical appliances.
Electric stove device
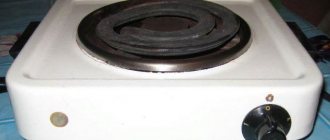
Electric stoves are divided into two large groups: portable and stationary. Portable electric stoves are small in size (1-2 burners, no oven) and are powered from a regular 220 volt outlet. They are intended for people who travel to their dachas, often move from apartment to apartment or rent rooms, live in dormitories, in general, for ease of installation anywhere.
Stationary electric stoves are equipped with ovens with 2 to 4 burners. They are designed for installation in a strictly defined place in the kitchen, powered by three-phase 380 volt sockets (each apartment, as a rule, has one such socket, designed specifically for installing an electric stove and located on kitchen).
But all electric stoves have one common part - the burners. The burner device is based on an electric heater, which can be tubular (TEN), spiral or another shape. The electric heater is a spiral wound from wire. The wire used is not simple, but made from a special alloy (usually nichrome - an alloy with the addition of nickel and chromium); This material is highly resistant and heats up when current is passed through it. This is how the heater works.
Some stoves use heaters of a different design - induction. These stoves differ from ordinary ones in that they heat not the burner, but the cookware itself by inducing currents in it using electromagnetism. Cooking on such stoves can only be done in metal (steel or cast iron) containers. Copper and aluminum cookware are not suitable for such stoves, and ceramic cookware is not suitable at all.
There are even more advanced ones - for example, halogen ones, which heat due to focused heat and light radiation. The spiral of such a stove is very similar to the spiral of a regular burner, but is enclosed in a flask filled with a special gas. This gas allows the coil to heat up more than usual; it apparently glows red. The principle of operation of such a burner is similar to a halogen electric lamp; it is, in fact, an electric lamp, but in the infrared rather than visible spectrum.
Induction and halogen cooktops are more expensive than conventional cooktops and often include electronic controls. Repairing these devices is more difficult than repairing conventional electric stoves, but this article also discusses some of the malfunctions of these stoves.
Power regulation
A heating element alone is not enough to get a working burner: its power must be varied, from weak to strong, in order to cook different dishes. Some require low heat, others require fast fire. How to do this?
Two designs are usually used: a set of several heating coils in one burner, or a thermostat. In the first case, the burner consists of two or three spirals of different power, which can be turned on simultaneously or one by one. The fire control for such a burner is discrete (stepped) and can occupy one of four or six positions. Here is an example of the design of such a burner with 4 heater positions:
- The burner has 3 spirals: two with low power, and one with high power.
- Position 1: one of the low power coils is on;
- Position 2: two low power coils are on;
- Position 3: high power coil is on;
- Position 4: all coils are on at the same time.
A stove with a thermostat is designed differently; the power regulator on it is smooth, and there is only one heating element in the burner. A thermostat is a relay that activates at a certain temperature and turns off the heating. In this way, a strictly specified heat output is achieved. Stoves with thermostats on the burners are rare, but ovens are almost always equipped with this device.
Ovens come in two main types of design: simple and convection. A simple oven is heated by two large electric heaters: an upper and a lower one. This oven has two regulators, one of which sets the temperature, and the other turns the upper and lower heaters on or off. A convection oven usually has only one heater and an air supply system that works similar to a commercial hair dryer.
Disassembly and troubleshooting algorithm
Whatever the malfunction, diagnostics should always begin by disassembling the electric stove. The mandatory first part of this algorithm is to disconnect the stove from the network. This seems obvious, but many people forget about it. The result is electrical injuries and even deaths. So, remember rule number one: the first step is to unplug the electric stove!
After this, you can start disassembling. Here's what you'll need for this:
- Screwdriver Set;
- Pliers and side cutters;
- Tester or multimeter with resistance measurement function.
- Latex gloves.
You should also have replacement copper wires, a soldering iron, solder, rosin and heat shrink in case you need to replace part of the wiring. Large diameter copper wires designed to carry high current should be used.
ATTENTION! Many electric stoves use glass wool as a heat-insulating material. Rubber gloves are necessary not only for working under voltage, but also for working with glass wool. Always handle glass wool with gloves and do not handle it with bare hands. Try to keep contact with glass wool to a minimum.
The first step in troubleshooting is power diagnostics. After unplugging the stove from the outlet, you should use a tester to check the outlet to see if there is voltage in it. After making sure that it is present, you should inspect the power cord for mechanical damage, oxide deposits on the contacts and other signs of non-contact. This step can be skipped if only one burner is faulty and the rest are working normally; If the entire electric stove fails at the same time, it is imperative to carry out power diagnostics.
Next, you can begin to actually disassemble the electric stove. This process begins with removing the hob. It is usually secured with four screws located in the corners. Find these screws and remove them. Cooktop mounting arrangements vary, and it is impossible to give precise and comprehensive instructions on how it is mounted on your specific stovetop.
After you have managed to lift the hob, it should be firmly secured in a slightly open position, like the lid of a chest. Secure it in this position with some kind of insulating stand, for example, a piece of wood.
Conduct a visual inspection of the wires leading to the burners. In some cases, a malfunction can be noticed by visual inspection: if the wires are charred, there are signs of a short circuit, or they are disconnected from the contacts, then a malfunction has been found. To eliminate it, the disconnected wire should be connected, the damaged area should be replaced by soldering another wire in its place and insulating the connection with heat shrink.
If there are no visually noticeable signs of a malfunction, you should carry out a very risky live test with a multimeter. Put on rubber gloves and plug in the stove without closing the lid. Using the control knobs, turn on each burner and probe the contacts of this burner with a multimeter to check for voltage. You should also check the voltage at the contacts of the terminal box from which the wires diverge.
How to interpret the results of such a check?
- If there is no voltage on any contact, including the terminal box, you should check the power again. Unplug the stove from the outlet, remove the power cord and check the resistance of each strand of the cord using a multimeter. If the resistance is equal to infinity, this is a sign of a break. Repair the stove by replacing the power cord.
- If there is no voltage on any one contact, but there is voltage on the terminal box, most likely there is hidden damage to one of the wires or oxidation of one of the terminals. This wire needs to be checked and replaced again.
- If there is voltage on all contacts, the fault most likely lies in the heating element itself. It needs to be replaced.
IMPORTANT! For safety reasons, it will be better if you have an assistant during this procedure, also wearing rubber gloves. If you receive an electric shock, an assistant should immediately unplug the power cord of the electric stove from the outlet.
If you have a low voltage source, such as a power supply, then you can perform a fairly safe live test using it. Apply low voltage from this source to the stove. The easiest way to do this is if the stove is 220 volts and single-phase. It won't work, but you can call all contacts without risk to your health.
Using the described procedure, you can eliminate or at least localize 90% of the faults found in electric stoves of all designs. It allows you to identify all kinds of non-contacts of wires and terminals inside the electric stove and eliminate them, or determine a specific breakdown of one of the components of the stove. Further in the article we will consider the repair of specific components.
Visual fault diagnosis
If you plug the stove into the outlet, and after a short period of time it turns off, and electricity flows to other appliances. Then the probable malfunction lies in the socket or plug itself. Perhaps the socket is not suitable for power. You have a regular household outlet, but the stove needs a high-power outlet. To identify a malfunction of the power switch or heating element, to do this you need to turn on the switches of all burners in turn and set them to different powers. If the burners begin to heat up, maybe weakly, but warm up, then you can safely rule out a breakdown of the power cord.
Burner malfunctions
A burner malfunction can be detected during diagnostics if a live test shows that voltage is properly supplied to the burner, but it does not heat up.
If the burner on your stove has a stepped power control and consists of several spirals, then most likely only one spiral will be faulty, and the burner will work too weakly in one position. If the burner has continuous regulation and is equipped with a thermostat, then it will not work at all. Both options are a sign of a broken nichrome thread. You can verify this by checking the resistance of each thread using a tester. Infinite resistance clearly indicates a broken thread.
This is usually repaired by replacing the burner with a similar spare one. Find a burner of the same design in any store or online spare parts store and install it in place of the damaged one.
If you have an induction or halogen stove, then instead of classic burners on heating elements there will be inductor coils or lamp-shaped burners. The same applies to them: a breakdown can be diagnosed by the absence of an effect in the presence of supplied voltage, and it is corrected by replacing the failed element.
If the burner has an open spiral design, then it can be repaired without replacement. This is the advantage of an open spiral: a rupture or burnout in it can be detected by a simple visual inspection of the spiral. It is not the entire heating element that will have to be replaced, but only the specific damaged thread; other threads can be left as is.
Electric stove repair at home
Disconnecting and transporting the electric power supply is a labor-intensive and troublesome process, especially if you live in multi-story buildings.
“Rembytservis” solves this issue very simply - you are offered repair of an electric stove, with a qualified specialist visiting you, with a set of necessary spare parts and tools, within an hour after submitting your application. Two problems are immediately solved - transporting the electric stove to a service center and returning the repaired equipment back.
Your task is to accurately indicate the stove model and symptoms of malfunction during the ordering process. Then it will be easier for the specialist to create the necessary supply of parts to repair the electric stove on site. This practice reduces the client’s time and money to a minimum, guaranteeing complete safety of the equipment being repaired.
Our specialists will carry out diagnostics, select the components necessary for replacement, after which they will carry out qualified repairs to the electric stove of almost any brand. During repairs, connecting and disconnecting the unit to power supply networks is free of charge.
As practice shows, calling a specialist to repair an electric stove at home is a profitable procedure, since the contractor does not need to worry about the safety of the repaired equipment during transportation, and the customer receives the required services right on the spot and inexpensively.
The proposed repair of electric stoves includes the following activities:
- accepting an order and sending a technician to the client’s address;
- preliminary diagnostics of failed equipment;
- replacement of worn out or burnt out parts;
- testing a repaired electric stove in different operating modes;
- provision of guarantees and technical documentation for installed parts;
- useful tips and recommendations for the correct use of electric stoves.
As practice shows, this approach is welcomed by the majority of clients who receive all the necessary services directly at home. Since an electric stove is an important component of everyday life, our specialists practice professional efficiency in repairing electric stoves, which also includes a quick supply of necessary spare parts.
Oven malfunctions
The oven is repaired in the same way as the burners: there are also heating elements here, the resistance of which should be checked. This applies to classic-type ovens with two heating elements: upper and lower.
Convection-type ovens are more complex, and in addition to the heating element, there is also an air blower that works on the principle of a fan. You should check whether the blower motor is working and whether it supplies air when cold or when hot. If it does not pump air at all, most likely it is the one that has failed.
Remove the fan and inspect it, especially the motor and bearings. Perhaps the breakdown is due to lack of lubrication. Try lubricating it and reinstalling it. If in this case the supercharger does not work, you should make sure that there is no bearing wedge. Only then should the motor be replaced.
If the oven heats up, but too weakly or too hotly, then perhaps the breakdown is not in the heating elements at all, but in the thermostat. This breakdown will be discussed in the next section. In addition, low heating of the oven may indicate a violation of the thermal insulation. Inspect the seal, check how tightly it fits to the oven door.
Switch and relay faults
A switch malfunction can be identified during a live test: if there is voltage on the contacts before the switch, but there is no voltage after it, this is a sure sign that the switch has failed. This switch should be replaced.
The same should be done if the voltage disappears at a certain switch position.
If the regulator is smooth and not stepped, then most likely the thermostat is working here. It is necessary to find out which of the components is faulty: the regulator or the thermostat itself (relay). The activation of the thermostat relay is accompanied by a characteristic sound in the form of a quiet click. It should sound when voltage is applied if the regulator is working. The same click will sound when turned off. Try turning on the burner in silence and listen. If you hear a click, then the regulator is working. If you cannot hear a click, the regulator is faulty and should be replaced.
If there are clicks, you need to check the operation of the thermostat relay. Turn the knob slightly to give low heat. A properly working thermostat will turn the burner on and off; you will still hear the same quiet clicks heard at regular intervals. If there are no clicks, then this is a sign of a faulty thermostat relay. A faulty thermostat may not turn off but supply power all the time; This usually results in too much heat (maximum) all the time, regardless of the control setting.
Having found out which particular unit is faulty, you can replace it with a similar spare part.
Troubleshooting Methods
If all the indicators are on, but the coil does not heat up, this does not mean that the heating element has probably burned out, although it can also burn out. In this case, the malfunction may be a broken contact between the wiring and the burner or a malfunction of the power switch. If the heating element malfunctions, it must be replaced. If the contacts are broken, they need to be cleaned and soldered again; if the power switch does not work, it can be repaired or replaced with a new part. If, when turned on, the degree of heating of the burner does not correspond to the selected mode, then most likely part of the spiral has burned out or the power switch is faulty. The spiral needs to be replaced, and the switch can be tried to be repaired, and if impossible, also replaced.
Other faults
The considered algorithms make it possible to correct most slab failures. But there are other minor faults. A short list of possible breakdowns will be given here.
- The smell of burnt fat when the burner is turned on: there is no malfunction, but the stove needs to be cleaned of dirt.
- The smell of burning rubber or plastic when you turn on the burner: this is an ominous signal that indicates an impending wire burnout. Turn off the stove, open it and conduct a visual inspection of the wires and terminals for melted or burnt insulation
- The stove knocks out plugs when turned on. This is a sign of a short circuit. Turn off the stove, open it and conduct a visual inspection of the wires and terminals for melted areas. This will allow the short circuit to be localized and eliminated.
- The oven light does not work. The light bulb has probably burnt out: unscrew it and carry out a visual inspection. If the light bulb is working, it is necessary to carefully check the power supplied to the light bulb using the method already discussed.
How to avoid stove breakage
Repair of the stove may not be necessary if all operating conditions are followed. Here is a list of the main violations of operating rules that most often lead to breakdowns:
- Turning on the burner without load. It usually happens due to absent-mindedness when you forget to turn off the burner by removing the boiling kettle from it, and it remains hot overnight. This may well lead to burnout of the coils, especially if the regulator is set to maximum.
- Using cookware with a bent, deformed or round bottom that does not fit tightly onto the burner. This can also lead to burnout of the coils.
- Using cookware that is too small, with a diameter significantly smaller than the diameter of the burner. The consequences are the same.
- Spillage of water, boiling drinks, broths, etc. on the hob. It is especially dangerous if the liquid is salty, as it can lead to corrosion, short circuit or failure of electronic components.
Troubleshooting algorithm
An electric stove is a rather complex device, which generally includes:
- electric burners;
- temperature sensor;
- oven with heating elements (heating elements) and fan;
- control Panel;
- terminal box;
- power cord, etc.
Despite the high reliability of electric stoves, they, like all household appliances, can break down from time to time. In cases where the electronic components that control the operation of the electric stove fail, only a person with deep knowledge in the field of electrical engineering and microelectronics can repair them independently. In addition, he must have on hand a number of measuring instruments necessary for diagnosing and subsequent adjustment of these components.
However, you can try to fix simple malfunctions that often arise during the constant operation of the electric stove yourself. To do this, it is enough to have knowledge of safety requirements and basic electrical engineering, as well as a set of simple tools .
Required Tools
When starting to repair an electric stove with your own hands, you need to prepare a multimeter, a set of Phillips and flat-head screwdrivers, pliers and wire cutters (side cutters). You will also need heat shrink tubing with a mounting knife and fine-grained sandpaper. The most important thing is to take a voltage tester, a set of wrenches, a flashlight, tweezers and a hammer.
Step 1
Before starting diagnostics, you must make sure that the malfunctions were not caused by violations of the operating rules of the electric stove. In general, such failures include:
- lack of power supply voltage;
- weakening or oxidation of contact connections;
- failure of the operating mode switch;
- heater malfunctions;
- broken electrical wiring, etc.
In any case, diagnostics and repair of electric stoves begin with checking the presence of voltage in the power outlet and visually inspecting the power cord. The voltage is checked using a multimeter or test light. Only after making sure that the outlet is in working order and the power cord has no external damage can you begin to disassemble the electric stove.
Attention! To safely disassemble the electric stove, you must first remove the plug from the electrical outlet.
Step 2
Next, you need to remove the hob. Structurally, electric stoves differ from each other, however, the hob of many modern electric stoves (Gefest, Beko, etc.) is secured with screws located in the corners of the body. Having unscrewed them, the surface is carefully lifted and moved to the side. This will open access to the internal parts of the electric stove.
Advice! To avoid damaging the hob, it must be disconnected from the body. To do this, remove all the wires coming from the burners and switches.
The next step is to check the presence of voltage at the contacts of the terminal box, where the wires from almost all elements of the circuit (burners, switches, etc.) are connected. Having reached it, measure each contact with a multimeter. If voltage is present everywhere, then troubleshooting continues further. And if it is not present on some contact (broken wire, oxidation of terminals, etc.), then the defects are eliminated and only then (if necessary) work continues.
Important! The voltage measurement at the terminal box contacts is carried out with the power cord connected to the network. To avoid serious injuries that may result from accidental contact with live parts, it is recommended that work be carried out in the presence of an assistant. His task will be to be near the outlet during the procedure and, if necessary, instantly turn off the power to the disassembled electric stove.
After such a check, you can immediately draw some conclusions.
- If there is voltage on at least one contact of the terminal box, then there is no need to check the power cord and socket.
- If there is no supply voltage in the terminal box contacts, then the fault should be looked for either in the power plug or in the power cord. The reason for the lack of voltage may also be broken wires or poor contact.
