How it works
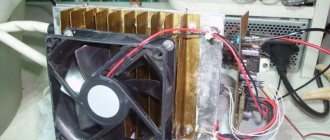
If an incandescent lamp is connected directly to a power source, when power is supplied it may cause the lamp to burn out. To prevent such sudden current surges, a power supply is installed. The photo shows the principle of how the device for smoothly switching on lamps works.
But it remains to be seen how the smooth switching of lamps works? It's actually very simple. The spiral quickly reaches an acceptable temperature, and the current gradually increases to the desired level. With this device, the lamp will shine for many more years.
The only drawback that arises when using a power supply is that the brightness of the light bulb will be much lower. Therefore, if you set the mark to 176 V, then the light will burn at 2/3 of the potential power. But for the same reason, it is best to use more powerful lamps.
Today, special stores have units for smooth power supply. They differ in their technical features. It follows from this that before purchasing such a device, it is better to check how adapted it is to a sudden supply of current.
It is also necessary to take into account the fact that the higher the input voltage, the more space is needed for where to place this unit. Because its dimensions may not be very modest.
Microcircuits for phase control
In radio engineering, special microcircuits have been developed, the main task of which is the phase regulation of various parameters. One of these radio components is the KR1182PM1 microcircuit.
It serves to smoothly start incandescent lamps. Moreover, this microcircuit provides not only switching on, but also smooth switching off of the device. KR1182PM1 is designed for current up to 150 W and has several outputs:
- 2 power – for serial connection to a circuit with a load;
- 2 auxiliary;
- 2 for the adjustment resistor and other radio components for control.
Scheme of smooth switching on of incandescent lamps on KR1182PM1
KR1182PM1 is connected to the circuit as follows.
When switch S is opened, capacitor C3 begins to smoothly charge to a value determined by the values of resistor R2 and the input current level of the controlled voltage-to-current converter (VTC) in the microcircuit. The output current at the UPNT also gradually increases, and the turn-on delay of the thyristors decreases. Thus, the lights turn on gradually. When the key is closed, C3 will discharge through R2, and this process will also occur smoothly.
Smooth switching will allow you to avoid failure of low-power incandescent lamps, because problems with burnout are not related to the power level. Even if the connection device has 12V light bulbs installed through a step-down transformer, without a soft start the lamp will fail faster.
Types of blocks and their characteristics
Today there is a large selection of devices. But the following are mainly in demand:
- UPVS is a highly sought-after system available due to its low cost.
- Granite - this device has very good technical characteristics that will allow it to work well and for a long time. It is also easy to maintain and install.
- Navigator - This is a multifunctional device; it is used for many purposes.
Smooth shutdown of 220 V lamps
To connect such a device, you must carefully follow the instructions. This will make the task of installing the block easier.
The input wire must be disconnected from the phase and attached directly to the lamp. The current from the cable to the lamp will pass through it. And the other wire is attached to the back side too.Sometimes a triac is also connected for this, this is done synchronously. But at the same time, there is a need to use a circuit designed for a current of 220 V.
DIY crafts for car enthusiasts
This craft serves as a good addition to car electrics, namely, we extend the life of halogen lamps in headlights; the circuit consists of only two parts.
In this case, we will do it for halogen lamps, although this device can also be used for another load to turn it on smoothly.
The device is assembled using a thermistor and a relay, the diagram is shown below.
Any halogen lamp has a filament or spiral, which actually shines when voltage is applied to it.
This spiral has a resistance that varies with temperature, that is, in the off, cold state, the resistance tends to zero. When the lamp is turned on, the resistance begins to increase symmetrically to the heating of the coil, and it is in these fractions of a second that the filament burns out most of the time. Just imagine how it (the filament) is in winter.
So that this does not happen, and the filament gradually warms up, we will do today’s craft, that is, we will limit the starting current when turned on, thereby the lamp will gradually gain its brightness within a few seconds.
A part such as a thermistor will help us with this.
In the picture, the NTC thermistor means a thermistor with a negative temperature coefficient of resistance. The resistance of this thermistor is 10 ohms. The relay is simple, 12-volt, 15 ampere.
So how does it work ? When we apply power, the thermistor begins to heat up; as it heats up, its resistance begins to drop, and the current passing through the thermistor begins to gradually increase. As a result, the current passes through the lamp and the lamp gradually begins to shine, when the lamp reaches its peak, the thermistor will still continue to heat up, and in order to disconnect it from the circuit, the relay comes into operation, the relay coil is triggered, the contacts close and disconnect the thermistor from the circuit. As a result, only the lamp filament and relay remain to work.
I have a 55 watt lamp and a voltage of 12 volts - this means that the current that will pass through it is 5 amperes, which means that the relay contacts must be designed for a current of at least 5 amperes.
The diameter of my thermistor is 21mm, I didn’t find a datasheet for it, but it should withstand current up to 16 amperes.
Now check this circuit, I supply 12 volts, the thermistor temperature is now room temperature, if it is located outside at -20, then the time it takes for the lamp to brighten to the maximum value will increase slightly.
In the video we look at the lamp, at first it will gain brightness and then the relay will operate, eliminating the thermistor from the circuit.
Author; Artem Kositsyn
Popular;
- Smooth on - turning off car headlights
- Smooth ignition of headlights or LEDs on a microcontroller
- Simple electronic turn signal relay for lamps or LEDs, diagram
- Battery protection circuit from deep discharge
- Delay for turning on the low beam or DRL for 8-10 seconds, diagram
- Turn signal relay on a microcontroller, circuit, signet
- Charger from economy lamp
- Methods for connecting daytime running lights DRL
Smooth switching on of 12 V lamps
When a protective block is used, during operation of a conventional lamp or one that is used in a vehicle, the triac is not used.
The following facts must be taken into account:
- It is necessary to use a system of gradual incandescence of 12 V lamps;
- Along the way, you need to introduce a ballast capacitor into the system so that it goes into the relay;
- Everything needs to be done gradually.
Homemade 12 volt power supply: selection of components and simple circuits for creating with your own hands. 130 photos of homemade universal blocksReinforcing shears (bolt cutters): types, characteristics, main differences
How a voltage control relay works: the principle of operation of the protection and the nuances of connecting a control relay for a house or apartment
Smooth switching on of 12 V incandescent lamps does not require the use of high power wires.
We make a soft start device with our own hands
There is nothing complicated about assembly. Even a person who is far from working with electricity can assemble the regulator themselves. The main thing is to strictly follow the instructions and take your time.
Preparatory work
In order to smoothly switch on incandescent lamps at a voltage of 220V, you need, firstly, to keep the regulator circuit before your eyes. Secondly, prepare the necessary parts that can be looked for in unnecessary equipment and removed from the circuits. Thyristors and triacs are found in such equipment as:
- Old TVs.
- Drills and hammer drills.
- New Year's garland boards.
- Household and industrial hair dryers.
- Car chargers.
Thyristors and triacs can pass currents of both high and low frequencies. Therefore, they can be used, for example, for a welding machine transformer.
Regulator assembly
The most popular regulators are those using a triac.
It has five so-called pn junctions and can carry current in both directions. When it opens, it allows part of the rated power to pass through it. This is a kind of electronic key, with a larger opening of which the consumer receives more power.
So, let's start in order. We will additionally need:
- 10 kOhm resistor.
- Dinistor.
- Fixed resistor 100 kOhm.
The triac itself must be selected for the load to which the device will be connected to smoothly turn on incandescent lamps. In addition, we recommend that you include a radiator in the circuit so that the triac does not overheat (and it can actually get very hot).
We do it in this order:
- One wire of the power supply is connected to the incandescent light bulb, the other to the terminal of the triac.
- From the same output of the sim-ra - to the output of the variable res-ra.
- The second output of the variable rez-ra through the dinistor and then the res-r (at 10 kOhm) goes to the second pin of the sim-ra.
- The third contact of the sim-ra goes to the second contact of the light bulb.
- The third contact of a constant res-ra (100 kOhm) is also on the second contact of the light bulb.
By changing the position of the regulator located on the variable resistor, we change the output voltage, and the incandescent light bulb lights up in proportion to this adjustment.
In this simple way we assembled an incandescent lamp brightness control.
The listed points can be used as brief instructions. But first, we recommend that you familiarize yourself with the video; from it we have prepared excerpts for you that you can write down as a reminder.
We recommend watching the video:
You can give the regulator a more corporate look, a factory one, and make it full-fledged.
We recommend watching this video:
Price of machines for smooth switching on of incandescent lamps
Those who are well versed in this topic recommend buying these devices at any retail outlet that specializes in the sale of electrical equipment. The cost of these devices starts from 200 rubles.
Experts assure that before purchasing, it is necessary to take into account all the technical characteristics of the controller in order to smoothly turn on the lamps. This will allow you to assemble a high-quality chain that can be used for many years to come.
Scheme options
The stores offer a wide selection of soft starters for lamps from Russian and foreign manufacturers. Installation does not require special qualifications. You need to make a break in the phase wire leading to the incandescent lamp and connect the device using terminal blocks.
If there are no terminal blocks, the wires are soldered.
Most often, one of three schemes is used in production:
- tourist;
- triac;
- specialized (usually a KR1182PM1 or DIP8 chip).
Reference! During operation, the lamp soft starter does not require attention; factory models are provided with a 3-year warranty.
220 V network
The simplest scheme for smooth switching on of tourist lamps.
Photos of diagrams for smooth switching on of incandescent lamps
What is a pulse relay: principle of operation, types, description of devices and connection diagrams. 155 photos of pulse-type relays and video installation instructionsPhoto relay for street lighting - selection criteria, tips for connecting and placing the device (135 photos)
Pulse protection device: classification, limiter connection diagram and tips for choosing a device (155 photos)
Did you like the article? Share

1+
