- 1 Need for leveling
- 2 Leveling the base with a leveling compound
- 3 Self-leveling mixture
- 4 Monolithic screed
- 5 DSP boards and plywood
- 6 Conclusion
A popular material for flooring is laminate. It is easy to assemble and can be installed without the involvement of specialists, which will save your budget. A wide range of colors will satisfy the most sophisticated taste and wishes of the customer. The length of service life directly depends on the skill of laying the laminate. Laminated boards bend under the weight of the load and the weight of people; if there are uneven surfaces underneath, moisture can penetrate into the cracks, which will lead to rapid wear of the coating. Therefore, one of the main requirements when laying flooring is a smooth and flat floor surface, without cracks, pits, roughness, bulges, bends and kinks.
Need for leveling
The concrete floor under the laminate must be perfectly flat for the following reasons:
- The presence of bulges and depressions on the concrete surface can lead to failure of the locking joints. If concrete floors are not leveled, this will lead to gaps at the joints and cracking of the laminate boards.
- The concrete base has a high level of humidity, which is unacceptable for laminate flooring. Excess moisture comes from the screed through cracks in the concrete floor. To prevent this, you should prepare the concrete base immediately before laying the boards.
- Laying laminate flooring is not possible on a skewed floor or concrete surface with potholes, unevenness and cracks. This will worsen the quality of installation and entail considerable consumption of building material. Laminate flooring laid on a deformed base will have a short service life.
- Leveling a concrete floor can be carried out regardless of the quality of the base and the materials used for its construction using CBPB, plywood or self-leveling compounds.
Return to contents
Leveling a wooden floor
Wooden flooring is used as a base in many interior styles, such as country or Scandinavian. But not every wooden base is suitable for leveling. Before starting work, you need to make sure that the surface does not have serious deformations or a large slope. Laying laminate flooring on an uneven floor is a futile exercise, as it will quickly become unusable.
Leveling a wooden floor under laminate
If the surface is fairly flat and most of the boards are strong, without signs of rotting, then such a floor can be used as a base, after first replacing the floorboards that have become unusable.
Planks that are loose are firmly nailed down, or even better, screwed to the joists with self-tapping screws. The method of leveling the floor is selected taking into account the characteristics of various wooden coverings. There are several varieties:
- scraping;
- leveling the floor with plywood or chipboard;
- filling with a mixture of sawdust and PVA glue;
Surface scraping
This is the easiest way to level a laminate floor with your own hands. Usually a scraping machine or a manual scraper is used for the job. But this method can only be used if the base is sufficiently level, because it is impossible to smooth out pronounced defects and irregularities. When scraping, you can level the surface before installing any finishing coating: both before laying elite parquet and affordable laminate.
Before starting work, things are taken out of the room or covered with film. The floor is carefully checked, and all potholes and voids between the boards are removed using putty or cement mortar. Boards that are loose are nailed down or replaced with new ones. The old coating is removed and the floorboards are thoroughly washed. After this, the floor should dry completely.
It is better to start looping from the corner. It is worth constantly checking whether the sandpaper has worn off and periodically cleaning it and the dust container. Upon completion of the work, you need to thoroughly sweep everything and treat the floor with alcohol.
Leveling with plywood or chipboard
Preparing the floor with plywood before laying laminate or linoleum allows you to take into account all the necessary requirements for surface quality. Before starting work, it is worth checking the quality of the gas and water supply pipes running under the floor, as well as electrical wiring. This is necessary because it will be difficult to reach them later.
Plywood sheets should be no thicker than 50 mm. At the very beginning of work, self-tapping screws are screwed into the floor, which are used as indicators. Next, slats about 3 cm thick are attached.
Sheets of plywood are stacked with a shift
For more comfortable work, it is better to use square sheets of plywood with an area of 60 square meters. cm. Sometimes the edges may peel and become unusable. It is necessary to ensure that you do not use low-quality material and, as a result, do not lay the laminate on an uneven floor.
The plywood must be placed on the joists so that the four sheets do not form a single joint. To do this, the second row of plywood should be laid offset relative to the first. The sheets are attached to the joists with self-tapping screws. To prevent the caps from protruding, it is necessary to pre-drill and countersink the holes for them.
Puttying with a mixture of sawdust and glue
It is also a relatively cheap way to level the floor in an apartment under laminate. With glue and sawdust you can prepare a large room for modest money. The main disadvantage of this method is that it takes a lot of time. The process takes a long time due to the fact that it is necessary to wait for each layer to dry completely.
Before starting work, you must clean the floor thoroughly. Sawdust must be kept moist for work so that it does not absorb moisture from the putty. As in the previous method, you need to screw the pointers. After this, fill the gaps between the boards with the prepared mixture, if necessary, in several layers. Do not leave the base with cracks: this will impair the quality of installation. When everything is dry, you can lay the flooring material. Glue can also be used to lay the laminate itself.
Leveling the base with leveling compound
Before you begin leveling the concrete surface, it should be cleaned of dust and remnants of the previous coating, dirt and construction debris should be removed. Possible cracks and potholes are sealed with cement mortar and the prepared surface is treated with a primer, which will improve adhesion between the materials. Primers reduce the absorption of concrete mortar, which prevents cracking.
The use of leveling compound will allow you to level the floor quickly and easily. The mass is a dry mixture that should be diluted with water. The required proportions are indicated on the back of the package. To give the mixture a homogeneous structure, it must be mixed with special attachments for building mixtures. You need so much water that the consistency resembles thick sour cream, then laying will be done in a layer of small thickness. When working with floors that have a slope, you should use a thick mixture. This leveling compound will allow you to level the floor perfectly evenly. You need to stir the mixture until all the lumps disappear.
Return to contents
Self-leveling mixture
A self-leveling mixture for laminate flooring can be purchased at a hardware store; to prepare it, you need to dilute the finished dry mixture with water. The proportions are indicated on the back of the package. To make a self-leveling mass, you need to pour water into a clean bowl and gradually pour the dry mixture into it. The ingredients should be thoroughly mixed using a drill or a mixer attachment. Depending on the thickness of the screed, make the required consistency by pouring in the required amount of water. Stir the mixture until all lumps disappear and the color is uniform.
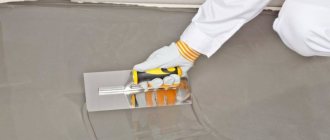
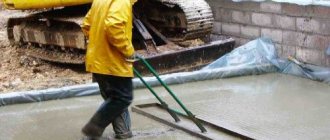
When the self-leveling mixture is ready, begin laying it. Begin pouring the mixture from a high level of the base. The mixture begins to spread on its own over the surface. To speed up spreading, use a wide spatula to spread the solution over the base. Next, level the mixture using a needle roller. When pouring a self-leveling mixture, you should ensure a monolithic coating of each poured portion. When pouring a new part, you need to use a spatula to connect it with the previous poured portion. The joints of the poured mixtures are carefully rolled out. The pouring process requires speed, otherwise the poured mixture will begin to dry out.
The self-leveling mortar sets quickly, but it will take several days to reach its maximum strength.
Return to contents
Self-leveling floor for laminate
Firstly, by saying that the self-leveling floor will help level the floor slab, I reduced the possibilities of the self-leveling floor. You can level any stone base, including: a concrete slab, cement screed, and, under some assumptions, even a wooden floor.
Secondly, self-leveling floors for laminate are no different from self-leveling floors for any other finishing material. It is important to choose high-quality material with a minimum fill level of 2 mm.
Thirdly, in all the articles in this series, I have repeatedly written: what should be called a leveling self-leveling floor is the technology for leveling the base of the floor, mixtures with cement-polymer (polymer-cement binders) substances. Due to their plasticity, such mixtures can be poured to heights of 0 mm and leveled almost independently by spreading.
Mixtures that allow the floor to be raised for leveling to heights of up to 70-100 mm are better called levelers. Also, the self-leveling floors described in this article should not be confused with polymer self-leveling floors on a two-component basis.
Monolithic screed
A monolithic screed under the laminate is used for large differences in height of the concrete base. Before starting construction work, the surface should be cleared of dust, dirt and construction debris. The monolithic screed begins with the installation of beacons and determining the level of the floor being constructed. The step between installed beacons should be 60-90 centimeters. The beacons are fastened using a solution of cement and sand. Beacons can be installed using long self-tapping screws; to do this, holes are made in the concrete surface and dowels are driven into them. Next, they begin pouring the concrete solution. To prepare concrete you will need:
- three parts cement;
- one part sand;
- half part water.
As a filling, you can use ready-made dry mixtures, which are diluted with water in the required volume. All proportions are indicated on the packaging. The poured solution should be leveled with a rule and, after hardening, the beacons should be removed. Beacons are removed after 24 hours. The resulting cracks are sealed with a new solution. After the solution has set, the surface should be rubbed and covered with plastic film. A layer of polyethylene will protect the poured surface from cracking, and sprinkling the laid concrete with water will help to avoid deformations. The concrete floor will reach its maximum strength characteristics after a month.
Return to contents
Semi-dry concrete screed
Semi-dry screed contains a minimal amount of water, but sufficient for the solution to be plastic.
Advantages of semi-dry screed
A semi-dry screed does not pose a threat of flooding to neighbors below, because does not leave water sediment and dries faster.
Due to the low water content, such a screed is less susceptible to cracking if the following rules are followed:
- do not open windows and doors to avoid drafts; — exclude elevated temperatures in the room (from stoves or the like); — the screed must dry naturally.
A semi-dry screed does not spread over the surface, and in fact is not poured, but applied to the base.
A floor completely covered with screed should be left to dry for 10-30 days (see instructions for the mixture).
After complete drying, the concrete floor is ready for laying laminate flooring.
DSP boards and plywood
Another way to level a concrete surface under a laminate is to use cement bonded particle boards. Leveling begins with cleaning the surface from construction debris and dirt. Next, wooden boards are attached to the base at the required level. The next step will be attaching cement-bonded particle boards to previously installed wooden boards. The cement-bonded particle boards are fixed with self-tapping screws, and the resulting cracks are covered with a special mass. After installing the slabs, they should be covered with a backing.
Leveling the floor with plywood is also effective. To do this, use plywood sheets and attach them to the joists. A step of thirty centimeters should be observed. A thermal insulation layer must be laid between the joists.
Return to contents
Preparing the subfloor
In order to properly level the base, it must be carefully prepared. If the wooden floor is well preserved (there are no wide cracks or gaps between the joists), it is left and prepared for laying the laminate using antiseptics, special sealants and primers. When the floor is heavily worn, the boards begin to rot and deform, it is easier to dismantle it and level the rough surface of the floor.
Before laying the laminate, the floor is sanded well or scraped. After removing dust and shavings, small defects are puttied with repair dry mixtures or polymer compounds. When the putty has dried, the surface of the base is primed with a moisture-resistant solution 2 times. After the primers have dried, plywood or cement-bonded particle boards are laid on the floor and secured with self-tapping screws. Then the laminate is installed.
But, before you start installation, in addition to the technical part, you must also take into account the design requirements. Including a combination of laminate and interior doors.
If the screed has large flaws or obvious differences in height, a self-leveling, dry or cement-sand screed is used to level the base.
Cement-sand screed
When leveling the floor surface under the laminate with your own hands, most often they use a solution of cement and sand, because this is the method that produces an excellent screed and perfectly corrects differences and unevenness of the rough foundation. But we must take into account that this option is very labor-intensive. It's better to work together.
To create a cement-sand mixture, its components are taken in proportions of one to three. The mixture is poured with enough water to obtain a solution whose consistency resembles thick sour cream. This will give it strength. With this solution it is best to level a concrete base that has height differences of 3.5 – 5 cm. The work proceeds according to the following algorithm:
- The old coating is removed and the base is cleared of debris.
- Damper tape is glued around the perimeter.
- The floor is covered with thick cellophane film so that its edges extend approximately 5 cm from the walls. The strips are secured with tape.
- Using a level, the highest point in the room is found as a starting point for establishing beacons and determining the thickness of the future screed.
- A reinforced mesh is laid on the base, raising it by 20 mm using pads. The joints of the mesh are fixed with wire.
- The level of the highest point is raised by 50 mm using a metal profile and cement mortar. Beacons are installed at this height. The distance from the wall and between them depends on the size of the rule.
- When the beacons have hardened, you can make a screed by pouring a cement-sand mortar between the two beacons. The surface is leveled according to the beacons.
Having filled one strip in this way, move on to the strip located across the row. Then they return to the one they missed. They do this until the entire area is flooded. When the solution has completely hardened, the beacons are removed; the places where they stood are covered with mortar flush with the base.
The solution should harden well. To check whether it is dry, tape a piece of polyethylene to the floor. If after a few hours condensation forms on the film, you need to wait a little longer: the solution is wet.
The prepared floor using a cement-sand screed should “rest” for about four weeks. There should be no drafts or direct sunlight in the room. The surface of the screed is periodically moistened. Laying laminate can begin when the moisture content of the concrete coating is 4 - 5%.
Self-leveling screed
A wide range of renovation materials significantly facilitates the process of home transformation. In construction stores you can buy ready-made self-leveling mixtures, with which you can quickly and easily prepare the base of the floor for laminate, if its unevenness does not exceed 30 mm. Work begins by cleaning the base.
Laying a self-leveling screed
Determine its maximum point. The level is used to mark signs on the walls where the screed will be poured. The base is primed, after one layer has dried, it is primed again and left until completely dry. Polyethylene is laid on the floor so that its edges extend slightly onto the walls.
Prepare the mixture strictly according to the instructions on the package, diluting it with water. It is best to prepare the solution in parts: it hardens quickly. The base should be filled with the mixture sectionally, starting from the farthest corner, leveling the solution with a needle roller.
Filling of the new part begins ten minutes after the previous one. Cover the completely filled floor with film and leave it there for 3 to 4 days until the screed dries. To ensure uniform drying of the base, make sure that there are no temperature changes or drafts.
To make sure that the screed is dry, place a paper napkin on its surface and secure it with tape along the edges. If it remains dry the next day, you can lay laminate.
Dry screed
To prepare an uneven base for laminate flooring, use a dry screed. In this case, the base is leveled well, but the screed must be protected from moisture, otherwise it will quickly become unusable. Therefore, this type of screed is rarely used. The main option for dry screed is the bulk type.
To lay a dry screed, cover a clean, dry surface of the base with thick polyethylene so that its edges are on the wall. The film strips are connected with tape. After this, using a level, distribute the beacons across the floor, securing them with a solution.
Screed granules are poured between the guides, leveling them with a rule. Crushed stone and expanded clay are used as granular materials. After you have finished laying the dry screed, plywood, gypsum fiber boards, OSB or chipboard are attached to the guides using self-tapping screws.
No final leveling is required. A backing is placed on the plywood or boards, and then the laminate is installed. There are other types of construction:
- Frame (floor on joists). Using a level, a metal profile or wooden slats are installed on the concrete after 30–40 cm. Insulation is placed in the spaces between them. Chipboard or plywood are mounted on the frame.
- Hard is the easiest method of leveling the base and increasing the level of thermal insulation. A clean, dry floor is primed. Plywood, chipboard or gypsum fiber board is attached to it using polymer glue or “liquid nails” in one or two layers. The optimal height of such a coating should be about 2 cm.
- Adjustable. The most labor-intensive design. Sheets of plywood or joists are supported by anchors or rods screwed into them - racks. The level of the rack is fixed using a stop or a dowel-nail. You can choose any option depending on the state of the draft basis and your financial capabilities.
