Brackets are a modern way of attaching a sink to a wall. There are various other methods and solutions to this problem, but in practice, brackets are one of the most reliable and popular fastening methods.
The invisibility of such fastening is a plus for many design solutions. This is why buyers fell in love with fastening with brackets. This type of fastening for a sink to the wall will last a long time if several conditions are met:
- The wall on which the bracket is installed must be strong, made of brick or cinder block. Plasterboard walls are an exception. They will not withstand the load;
- Brackets from different manufacturers are made of materials of different thicknesses and strengths, therefore, you need to choose one that will be able to support the intended sink;
- Before you buy brackets, you need to familiarize yourself with their characteristic features. They must ideally fit the dimensions of the installed plumbing fixtures. There are products that have universal properties, while others are made for a specific type of sink.
There are specialized types of sink fastenings, and there are also standard options. When ordering a wall-hung washbasin with a non-standard design solution, you can receive specially selected fasteners. The metals of these products do not rust, and are also covered with a protective layer of ceramics or paint (depending on the type of bracket).
In the case of standard types of mounts for wall-hung sinks, the weight of the washbasin must be taken into account. Such fasteners are made using cast iron, sometimes steel, and then painted. Paint performs not only a design function, but also a protective function.
Tools and materials
For self-installation, the following tools are used:
- hammer;
- screwdriver;
- building level;
- drill and bit;
- spanners;
- gas key;
- marker;
- sealing tape;
- fasteners (anchor screws, consoles).
Necessary tools for installing a sink
There are two types of consoles - specialized and standard. The second ones are ordinary brackets, covered with a layer of paint on top. Suitable for conventional sinks. Specialized ones are coated with non-oxidizing metal. They perform a protective function against corrosion. They have an unusual shape, due to which they perfectly dilute the interior.
When choosing brackets, you should pay attention to the weight that they can support. This characteristic is indicated in the description of the fastener.
There are several types of brackets:
- t-shaped;
- g-shaped;
- frame;
- girth.
Mounting brackets for wall-hung basins
The most reliable is the girth. It is a metal frame. It is attached to the wall, then the sink is inserted into it. The frame allows you to change the size of the mount. This console has sector, rectangular or arc parts.
The T- and L-shaped brackets are small in size compared to the previous ones. But they also securely fix the sink to the wall surface. In some cases, they are welded from a square pipe.
Factory fasteners
How is an acrylic bathtub attached to the wall? There are several options for such fixation. The delivery set may include a reinforced steel frame. This is a prefabricated structure made of steel profile (square cross-section). This frame is attached to the bottom of the bathtub. The structure takes on the weight of the bath, water and people, evenly distributing the load on the support posts and horizontal structural elements.
Installing an acrylic bathtub on a frame with your own hands is easy. The design allows the bowl to be firmly fixed. It can even be installed in the center of the room. She won't get loose. However, such a frame is not always included in the package. Sometimes, in order to save money, the manufacturer replaces it with two transverse bars. They have short legs. In this case, installing an acrylic bathtub on a frame with your own hands should be done next to the wall.
It is worth noting that simply propping the bowl up against a vertical surface will not be enough. Over time, it will begin to move away from the wall. A gap will appear between it and the bathtub. To prevent this from happening, the acrylic bathtub is fixed using special brackets. They can be purchased at a specialty store.
Before fixing the bathtub with brackets, it is recommended to seal the side with double-sided tape or sanitary sealant. After this, the product is attached to the wall using brackets. This option is also suitable if the owners want to decorate the outer edge of the plumbing with tiles.
Faucet and washbasin assembly technology
Before starting work, old equipment is dismantled. For this:
- water is blocked;
- the mixer is disconnected and removed;
- the siphon is removed and the water is drained from it;
- the holes in the pipes are blocked with a plug;
- The old sink is removed.
Mixer assembly
After dismantling the old equipment, the sink is fixed to the wall:
- trying on the sink;
- marking is carried out;
- holes are made for fasteners;
- a sink is installed;
- The mixer is being assembled;
- communications are connected (water supply and sewerage).
Installing a washbasin bowl
The sink is placed on the surface and tried on. It is placed at a height convenient for use. The best option would be a mark of 0.8 m from the floor level. And from the wall to the edge of the sink there should be at least 0.9 m. Marks are placed at a given height.
Before connecting communications, the reliability of the fastenings is checked. Connecting the mixer consists of the following steps:
- applying a special chemical solution to the contact point between the faucet and the sink;
- assembling all elements into one unit using tabs and seals;
- connection to flexible pipeline hoses using union nuts and adapters. In this case, the hoses are pushed into a special opening in the sink, and after fastening, the mixer is put in place;
- fixing the device from below with a lining and a pressure washer.
The mixer should take a stable shape after installation. The axes of the device entering the couplings must be joined. It should be remembered that the sink is already attached together with the mixer, which will greatly facilitate installation. But first, markings are made for attaching the sink with or without brackets.
Installation dimensions
Bracket mounting
Before installing the brackets, it is necessary to check the strength of the supporting surface. To do this, markings are made with a nail. If the surface is loose, then increase the drilling depth and select fasteners with a larger diameter. It is difficult to securely fasten the brackets in soft plaster or concrete, so the depth of fastening under the soft layer should be at least 25 mm. In such cases, anchors are selected individually with a length from 50 to 120 mm.
- Mark a horizontal line as indicated above.
Marking
- We measure the thickness of the walls of the washbasin, which will rest on the bracket. We put this distance down from the horizontal line and make a mark.
- Connect these marks horizontally. This will be the height of the brackets.
- We attach brackets to the sink.
- Now you will need an assistant for fitting. We place the sink with brackets against a horizontal line and, through the recesses, mark the places where the fastenings will be. All lines must match. It is important.
Determining locations for brackets
- We drill holes in the designated places. Select the diameter of the drill so that the dowel or mounting screw fits into the finished hole with difficulty. We hammer the dowels or bushings under the screws with a hammer.
- We mount the brackets. We install a sink on them, install a faucet, connect the sewer and water pipes.
- Check the horizontal position and tighten all the washers.
- We check the tightness of the system by opening the water.
- After all the manipulations, the sink should sit firmly, without moving, which means you did everything correctly.
Advice. Seal the gap between the wall and the sink with plumbing silicone sealant. This will protect you from the appearance of fungus if water gets into the gap.
Connection to water supply and sewer systems
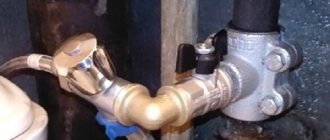
When connecting the mixer to the water supply, you must ensure that the hoses do not get twisted. Flexible hoses are connected to the water supply as follows: to the right - cold, to the left - hot. The connection is made with nuts and tightened with an adjustable wrench.
Connection to the sewerage system is carried out in stages:
- attaching the siphon to the washbasin;
- screwing a corrugated or rigid pipe to a siphon;
- inserting a pipe into a sewer drain. If necessary, use an adapter if the 2 pipes to be connected have different diameters.
After installation, check the siphon for leaks
After connection, the system is checked for leaks. When installing, do not overtighten the connections, as this can damage the sealing gaskets. You need to check the system for reliability: tug on all attached parts. They should not creak or twitch.
Customer Reviews
Customer choice is most often associated with the brand. The product line of popular domestic and European manufacturers includes console sinks, and therefore mounting brackets, which can be purchased in a specialized department of a hypermarket or in an online store.
The Russian manufacturer Color-Style offers a large selection of corner, rectangular and sector brackets. They have an affordable price and no complaints from users. offers conventional cast aluminum brackets. They will last a long time, but are only suitable for lightweight sinks or Soviet-style models.
The products of the Latvian manufacturer PAA Delta are characterized by customers as reliable and aesthetically pleasing. Corner ceramic brackets Simas (Italy) are ideally combined with a white sink. Moisture resistant and easy to install.
Consoles for sinks RAVAK (Czech Republic) made of chromed metal are stylish and durable. It is possible to place a towel holder, which attracts buyers with its functionality. Brackets for attaching a washbasin from the Polish manufacturer KOLO are convenient, affordable and reliable. We have earned positive customer reviews.
Advantages of wall mounting
You should choose a wall mount due to the following advantages:
- reliability - this is ensured by the fact that brackets or consoles made of enameled steel are quite durable materials. They secure the device with high quality;
- ease of maintenance - after installing the sink, constant access to communications is provided. This makes it possible to clean the siphon or remove any part and attach it back;
- additional space - free space appears under the sink, which allows you to place various drawers for household items, a basket for dirty laundry or other items. This often helps out in cramped bathroom conditions;
- minimalism in the interior - creating a wall-mounted structure allows you to get rid of various cabinets and shelves. Due to the variety of shapes and materials of shells, such a design will seem to float in the air.
Mounting the sink directly to the wall in the bathroom is a good solution. Mounting is quite simple, and the cost of fasteners is affordable. Such designs do not clutter up the space and allow you to use the space under the sink.
Manufacturing for a steel podium bathtub
The podium will add uniqueness to the design. It is advisable to build this structure in rooms with a large area, as it visually reduces the space of the room. There are two types of podiums:
- Frame. They are hollow and you can fit all the necessary household equipment inside.
- Monolithic. The podium can be made of foam blocks or bricks. It will no longer be possible to place any objects inside.
To build a podium, you need construction equipment:
- roulette;
- square;
- nails;
- dowels;
- solution;
- material for podium construction;
- primer;
- saw;
- soundproofing material;
- polyurethane foam;
- tile.
Installation of the podium is carried out after installation of the bathtub. It should already be connected to the drain. Soundproofing material should also already be present.
- At the stage of designing the podium, it is necessary to provide access to plumbing pipes and a siphon.
- If you plan to lay out steps, you must take into account that they should not be more than 25 cm in height. The ribs of each step must be reinforced with a profile.
- When installing the podium, you need to leave a small gap between the bowl body and the podium. It will subsequently be filled with polyurethane foam.
Making a podium from foam blocks
The podium made of foam blocks is laid out so that the edges of the bowl are in contact with the structure. The height of the structure can be any, the main thing is that it is convenient to take baths. Before erecting the masonry, the foam block should be treated with moisture-resistant impregnations. These products will prevent the formation of mold and mildew on the building material.
Making a podium from wooden beams
When installing a podium made of timber, the material must be coated with moisture-repellent agents and antiseptics. A rectangular frame is assembled from pieces of material corresponding to the required size. The individual structural elements are connected with stainless steel self-tapping screws.
Making a metal frame
The frame of the podium can be constructed from a profile pipe or a metal corner. The construction is durable. The only drawback is the need to weld individual parts of the structure, which is not always possible to do at home. If you assemble a welded structure outdoors, there is a possibility that it will not be possible to bring it indoors due to its significant dimensions.
The finished frame must be treated with an anti-corrosion agent. It is then coated with primer and paint. To prevent the frame structure from moving, it is fixed to the floor or wall. After fastening and installation into the bathtub frame, the podium is sheathed with finishing material. If the podium turns out to be of impressive size, then you can place drawers in it.
Types of shells by shape
Depending on the size of the bathroom, the appropriate size of the washbasin is selected. There are several types of shells:
- tulip;
- sink console;
- built-in
Built-in
Sink tulip
Console sink
The tulip sink is a structure consisting of a bowl and a stand. The stand is designed to hide the siphon and pipes. This option fits harmoniously into the interior of the room, but is installed in spacious rooms. Fastening is carried out simultaneously to the wall surface and to the floor.
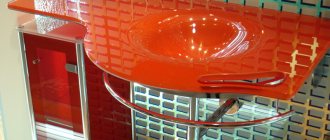
The console sink is attached to the wall surface with brackets. This option allows you to visually expand the space, because the device takes up little space. In small rooms, it is practiced to mount a corner product, which also fits compactly into cramped conditions. The disadvantage is the visible drainage system. But the problem can be solved by installing special overlays.
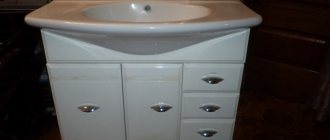
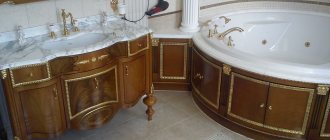
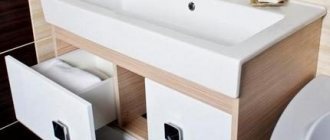
Built-in options are mounted in a cabinet or table in the bathroom. At the bottom, a convenient cabinet is formed that hides communications and provides space for storing household supplies. Overhead washbasins that are installed on the countertop are popular. They have the shape of a bowl and unusually complement the bathroom interior. But this installation option takes up a lot of space in the bathroom, so many people opt for a wall mount.
How to seal a large gap in a wall
What to do if, due to the characteristics of the room, there remains a fairly large distance between the bathroom and the wall?
You can easily get rid of this trouble with the help of a special frame. If desired, you can make a shelf out of it for hygiene products, which is very convenient. When installing a shelf, it is important not to forget that it needs to be done with a slight slope - this way water will not accumulate on it, causing inconvenience. By the way, the bowl itself is also installed with a slight tilt towards the drain.
First, a frame is made from metal profiles, then it is sheathed with plasterboard.
It is important to know that you should definitely make a door in the plasterboard box for service in case of breakdown.