Soldering methods
The problem with using aluminum conductors is their rapid oxidation. The oxide film significantly impedes the passage of electric current during connections. To do this, twisted aluminum wires are soldered.
You can solder aluminum wires in a junction box using a soldering iron or a gas torch. It is more difficult to use a soldering iron due to the inability to accurately heat to the required temperature. And for aluminum, overheating is just as unacceptable as underheating.
Metal has high thermal conductivity, and the insulation over a large area from the soldering point can simply melt.
It is easier to regulate the heating temperature with a gas burner, but it takes a long time to prepare the surface. However, it is the torch that will need to be used if it is necessary to solder any massive parts to each other. In any case, when soldering aluminum wires, they need to be prepared.
Precautionary measures
When considering the question of whether the cable can be restored, it is important to know what problems may arise during this action. It is not recommended to solder the conductor in modern smartphones. Unlike older phone models, special equipment will be required to repair matrices. It will be impossible to do this at home using a blowtorch.
When replacing a conductor, only install an identical one. If you replace it with a high- or low-conductivity one, as a result of a voltage surge, the connected element may completely fail. After replacement, all stripped elements must be covered with a protective layer. They should not be left open, as this may lead to overheating of the conductor itself.
Welding – high reliability in any conditions
When connecting wires by welding, the conductors are twisted and their ends are welded. As a result, a metal ball is formed, which provides a stable and very reliable connection in any conditions. Moreover, it is reliable not only in terms of electrical characteristics, but also mechanically - the metal of the connected wires after melting forms a monolith and it is impossible to isolate a separate conductor.
Welding - it is important to heat the metal, but not melt the insulation
The disadvantage of this type of wire connection is that the connection is 100% permanent. If you need to change something, you need to cut off the fused piece and do it all over again. Therefore, for such connections, a certain supply of wires is left in case of possible alterations.
Other disadvantages include the need for a welding machine, appropriate electrodes, flux and operating skills. In addition, welding takes a lot of time, it is necessary to protect surrounding objects, and it is also inconvenient to work with a welder at height. Therefore, electricians practice this type of connection in exceptional cases. If you are doing it “for yourself” and know how to handle a welding machine well, you can practice on scraps. The main trick is to not melt the insulation, but to weld the metal.
After cooling, the welding site is isolated. You can use electrical tape, you can use heat shrink tubing.
Using an adapter
It is a small board with an IDE connector at the end and a maximum of two SATA ports on the reverse side. It connects directly to the IDE disk, so it does not take up much space inside the system unit. You won't need IDE cables either: the SATA cable connects directly to the adapter. Among the disadvantages are the low data transfer speed, the need to switch jumpers both on the disk and on the adapter, which quite often complicates setup, as well as the need for external power (two or three-pin 12V connector, connected by the cooling system cooler cable to the corresponding socket on the motherboard) .
How to solder correctly with a soldering iron and rosin
Rosin has such unique qualities as ease of dissolution in various organic compounds, for example, acetone or alcohol. When heated, this substance can break down complex chemical compounds such as copper, tin or lead. Therefore, proper use of rosin helps reduce the likelihood of spreading of the substance, destruction of the oxide coating, as well as high-quality tinning of soldered elements.
You also need to take into account that the thinner the tip of the soldering iron, the easier it will be to work with it, especially when it comes to soldering very thin wires and parts. Therefore, if it has not yet been sharpened, this should be done before starting work.
Process description
- First, you should prepare the workspace where you plan to seal the parts. To do this, you need to open the window, since the fumes that come from the solder heavily pollute the air. You should also take any sponge, soak it thoroughly in water and place it as close to the soldering iron as possible. Well, in order not to stain your work area with drops of solder, it is best to cover the surface on which you will be working with thick cardboard or some other similar covering.
- There must be a stand for the device at hand.
- Then you need to plug the soldering iron into a power outlet and heat it up. As the device heats up, a specific smell and noticeable smoke may appear - this is normal. The device will be ready for use immediately after the tip is completely heated and the smoke and unpleasant aroma have evaporated.
- After the tool has been calcined, it should be turned off. This is necessary in order to pre-clean the tip from dirt and plaque. It is best to clean the instrument while it is hot. To do this, you can use a prepared sponge or cloth.
- Then you need to turn on the soldering iron again and let it warm up thoroughly.
- After cleaning and heating the tool, you should carry out the process of tinning the tip of the soldering iron - covering the tip with a light layer of solder, in this case rosin. Thanks to this simple manipulation, the heat transfer between the parts that are intended for soldering will significantly increase.
- Next, you need to dip the tip of the heated device into rosin for a while so that a little solder accumulates on the tip. You should wait a little while until the solder heats up and begins to soften.
- Excess rosin can be removed using cardboard or other available tools.
- If you plan to solder one copper part, then one tinning will be enough - you need to touch the rosin once, then apply the tip of the soldering iron with solder to the working surface and wait a little until the wires are covered with solder. As a result of these manipulations, the rosin will begin to smoke, and the soldered parts will flow around the molten substance.
- In order to solder two parts efficiently, they also need to be tinned separately, that is, covered with solder. It should be remembered that the tinning process is a mandatory procedure, without which it will not be possible to properly solder the necessary parts.
- After finishing work with the soldering iron, while it is still warm, you need to remove the remaining solder. To do this, the tip of the tool just needs to be wiped with a damp cloth, or better yet, a sponge soaked in alcohol or any other composition intended for these purposes.
There should not be any particular difficulties when working with the tool. For everything to go smoothly, it is best to first practice working with rosin on parts that you won’t mind throwing away later. After all, experience always comes with practice.
Solder the garland using improvised means
Problems often arise with garlands that are used to decorate a home or tree. Due to the use of thin wires, they are often interrupted and soldering is required. Among the features of this work, we note the following points:
- In most cases, the problem occurs in the control unit, since the wires are not attached securely.
- A breakthrough may occur along the entire length of the product.
- If all light sources are connected in parallel, then the failure of only one leads to an open circuit of the entire circuit.
It’s quite easy to find loose contacts, but a break is only possible when using a tester. Only after finding the break point can you start soldering. You can solder without a soldering iron as follows:
- The broken wires should be cleaned.
- You can make a small twist on which the paste is applied. It will be used to distribute the alloy used.
- The next step is to melt the solder, which can be done using a lighter or a candle.
- After this, the junction is isolated using a tube, which is also slightly heated to increase its ductility.
Similar technology can be used to restore the condition of headphones. The soldering procedure does not take much time.
Recovery procedure
Before soldering the cable to the display, for example, you should fix the area to be restored on the insulating plate. The easiest way to do this is to use double-sided adhesive tape.
The fastening ensures mechanical rigidity during soldering and will provide additional strength to the solder joint in the future.
After this, you need to place the area with the broken cable under the screen with the microscope lens and, using a well-sharpened scalpel, clean the contact area from the insulation layer (approximately 1-1.5 mm from the break). Then, using a brush, apply a thin layer of the previously prepared rosin solution to the cleaned contact.
After thoroughly warming up the soldering iron, use its tip with a small amount of solder to touch the areas prepared for soldering. If there is excess solder, they are removed, since otherwise it will be possible to bridge adjacent tracks with them. Following this, a piece of conductor is taken with a conductor freed from varnish and well-tinned, which is then applied to one of the ends of the cable.
In conclusion, having measured the length of the core according to the size of the contact and biting off its remains with side cutters, it will be possible to solder the second end to the mating part of the restored section.
The essence of soldering technology
Soldering is the joining of metal parts using solder, which is a lower-melting metal that, when molten, wets the surfaces being connected.
Thus, the soldering process is associated with heating and occurs at a temperature exceeding the melting point of the solder, but not reaching the melting temperature of the metal being connected.
During the soldering process, the joined parts of the base metal do not change shape, since they themselves are not subject to melting.
The strength of the joint created is determined by the mechanical properties of the solder solder. When steel parts are soldered to each other, the connection is always inferior in strength to the base material.
The main obstacle to creation is the oxide that forms on the surface of any metal. The oxide layer does not allow the molten solder to evenly wet the surface of the part, so the metal must first be cleaned.
To protect surfaces from oxidation during the soldering process, special substances are used - fluxes. Different fluxes are used to join different materials. For example, in order to, use borax. Rosin and soldering acid can be used as fluxes for steel.
The main process that accompanies the creation of a solder joint is the heating of the workpieces. Depending on the mass of the parts being soldered and the type of solder used, heating can be carried out in the following ways:
- soldering iron;
- gas burner;
- high-frequency inductor;
- in special ovens.
Dismantling techniques
The method of soldering microcircuits depends mainly on the type of pins, although there are universal methods.
Dismantling the microcircuit with a soldering iron
This is the most time-consuming and unreliable method. It is used only when the number of microcircuit legs is minimal. Before soldering microcircuits with a soldering iron, the tip of the tip is carefully tinned and cleaned of solder residues so that it remains only in the form of a thin film. The molten solder that surrounds the IC leg is transferred to the tip under the action of tension. By repeating the procedure several times, the leads are completely released.
Important! Before each touch of the board, the tip is cleared of solder. Touch time should not be more than three seconds
If the leg is not completely freed, you can only work on it after some time has cooled down. At this time, you can make the following conclusions.
Removing the chip using a razor blade
When working with planar elements, an ordinary razor blade will come to the rescue. For convenience, the razor blade is broken in half lengthwise. Leaning the blade close to the border of the terminal and the board, heat the scion until it melts. By inserting a blade between the leg and the board, they are separated. The blade is made of stainless steel, so solder does not stick to it.
Using dismantling braid
The special dismantling braid works thanks to the capillary effect, drawing in the molten material. You can use braided shielded cable with the same effect. The braid must be clean, without traces of oxidation. In order to improve the spreading of the melt, the braid is moistened with liquid flux.
Braid for dismantling
Dismantling microcircuits using a desoldering pump
The desalination pump is a special piston that, when moving, draws in the melt, releasing the outlet. This method is suitable for working with DIP and SIP components.
Desoldering pump
Using medical needles
This method has proven to work best when dismantling ICs, especially for single-sided printed material. Double sided PCB can also be used to remove needles from syringes. When choosing a needle, you need to ensure that its inner diameter allows the leg of the microcircuit to fit freely, and its outer diameter allows it to fit into the hole on the printed circuit board. The tip of the needle is ground with a file until a smooth surface is obtained.
The needle is placed on the tip of the leg and the terminal is heated with a soldering iron. After the solder has melted, the needle is inserted into the hole of the board and smoothly rotated around the axis until the tin solidifies. After this, the needle is removed from the stem, which is now completely free. The needle material (stainless steel) is not tinned, so rotation around the stem is only necessary to make it easier to remove it from the hole.
Use of alloy rose
Using a rose alloy, you can desolder all the terminals of the IC at the same time, due to the fact that the low-melting alloy spreads between the terminals and evenly and simultaneously transfers heat to all of them from the heated soldering iron tip. After complete heating, the part is carefully removed from the board using tweezers.
This method has one disadvantage - after dismantling, it will not be possible to collect the remaining rose alloy, since it will be clogged with excess tin and lead, which will change its composition and melting point.
How to desolder a microcircuit from a board with a hairdryer
When working with SOJ, PLCC, QFJ and BGA packages, a soldering station or hair dryer with temperature control is required. Using the station, the entire section of the board is heated until the microcircuit is released, and using a hair dryer with a nozzle, a stream of hot air is directed to the terminals of the IC until they are released.
Radioelements must be desoldered at a temperature of 250⁰C. To prevent overheating, adjacent elements should be covered with aluminum foil.
Soldering gun with attachments
How to remove capacitors from a motherboard
To desolder capacitors or other two-terminal elements, there is no need to use a special soldering tool. During the dismantling process, one of the terminals of the capacitor is heated, while simultaneously tilting the element so that the leg comes out of the hole. Next, repeat the same with the second leg, tilting the part in the opposite direction. To avoid tearing, do not press hard on the capacitor. By warming up both terminals in turn, they are gradually released.
Method one
In order to repair the phone cable, you need to perform the following steps:
- Remove the back cover of your device and remove the battery.
- Now you need to unscrew the fastening screws using a flat-head screwdriver.
- Remove the main circuit board and the plastic trim that is located under the screen. The last component is attached with double-sided tape.
- Next, you need to start looking for a gap in any of the tracks. To do this, you need to get rid of the insulation with a needle.
Important! To make the procedure easier, use a magnifying glass.
- We take a soldering iron in our hands and wrap a piece of copper wire around its tip. A component with low power parameters (about 20-25 watts) is best suited. Solder off the remaining wire insulation.
- The edge that has just been cleaned needs to be prepared for connection to the board.
Important! If for some reason several conductors were damaged at once, then repeat the last manipulation for each of them.
- If you are done with the previous point, then move on to the soldering itself. We solder the edges onto the printed circuit board and carefully inspect the entire circuit for any gaps between the tracks.
- Take thermal film or a layer of polyethylene in your hands and wrap it around the edges of the soldered cable in at least one layer. Warm up the whole thing until the film melts, thereby gluing it to the tape. An iron is perfect for this action, but you need to take into account that the entire procedure must be carried out with extreme caution.
- It happens that the path breaks not at the edges, but in the very center. To resolve this problem, it is best to duplicate this track using pieces of the mounting conductor.
- Now we assemble the mobile device in reverse order and check its functionality.
Important! You should also know that you can make the train yourself. To do this, you need to place the conductors on a layer of ordinary medical plaster.
How to repair a phone cable in another way? Everything is very simple.
Soldering the cable
Flexible cables made of thin conductors have long been used in modern household equipment. They can be found in a regular mobile phone, as well as in any type of computer equipment that has multi-core connections.
As a rule, the conductor tracks in a cable are very thin and located close to one another, which imposes the following restrictions on soldering work:
- to solder the cable to the board you will need a soldering iron, the power of which should not exceed 24 watts;
- when soldering, it is advisable to use a special magnifying lens mounted on a working stand-bracket;
- To ensure good heat removal from the work area, you will need massive tweezers.
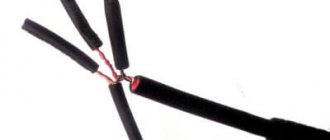
It is often necessary to connect two thin wires together (to eliminate their break in a loop formed from several conductors). In this case, you first need to strip the broken ends and then twist them tightly together.
In order to isolate the connection point, a plastic tube of suitable diameter (cambric) is first pulled onto one of them.
Upon completion of soldering of the twisted area, the insulating tube is moved with slight interference to the connection area.
Tools and materials
To independently solder a damaged cable, you will need to prepare consumables and tools:
- flux alcohol solution;
- easy-to-use tweezers;
- rosin and low-melting solder;
- wire with a diameter of 0.15 mm with varnish coating;
- a piece of insulator plate (polyamide or Kapton);
- a miniature soldering iron of 10-15 watts, a scalpel and a bracket with a microscope (or magnifying glass).
In addition, the work will require a soft brush, adhesive tape and side cutters. The home craftsman always has most of the materials, so you don’t even have to buy them.
How to solder aluminum
Fluxes for aluminum soldering
Thanks to modern fluxes, soldering aluminum has become generally no more difficult than copper. F-61A flux is intended for low-temperature soldering, see fig. Solder – any analogue of Avia solders; There are different ones on sale. The only thing is that it is better to insert a tinned bronze rod into the soldering iron with notches on the tip approximately like a file. Under the layer of flux, it will easily scrape off the strong oxide film, which prevents aluminum from being soldered just like that.
F-34A flux is intended for high-temperature soldering of aluminum with 34A solder
However, you need to be very careful when heating the soldering zone with a flame: the melting point of aluminum itself is only 660 Celsius. Therefore, it is better to use flameless chamber soldering (furnace-heated soldering) for high-temperature aluminum soldering, but the equipment for it is expensive
Copper plating of aluminum for soldering
There is also a “pioneer” method of soldering aluminum with preliminary copper plating. It is suitable when only electrical contact is required and mechanical stress in the soldering area is excluded, for example, if it is necessary to connect an aluminum casing to the common busbar of a printed circuit board. “In a pioneering way,” aluminum soldering is carried out on the installation shown in Fig. left. Copper sulfate powder is poured in a heap into the soldering zone. A harder toothbrush, wrapped in bare copper wire, is dipped into distilled water and the vitriol is rubbed with pressure. When a copper spot appears on the aluminum, it is tinned and soldered as usual.
Soldering parts from boards with one soldering iron
Small-sized SMD parts can be desoldered using a conical tip. Both contacts of the part heat up and it quickly comes off the board. Also, a conical tip is convenient when soldering SMD parts, since you can accurately dose the amount of solder onto the contacts.
Braided soldering
Braid consists of strands of thin copper wires.
You can use shielding insulation from the antenna as a braid. Using a braid, you can quickly and easily remove solder from a contact. It is necessary to apply flux to the braid and contact. Next, using a soldering iron, the soldering area is slowly heated and the tin is transferred to the braid. This soldering method is good for small parts and small DIP contacts. If you need to unsolder the PCI connector, then the braiding will quickly be wasted.
Vacuum syringe and needles
The vacuum syringe quickly removes massive burnt parts of solder. And with the help of DIP needles, the contacts are easily unsoldered from the board. The needle is put on the contact and heated up using a soldering iron. You need to have time to pass the needle through the board contact onto the microcircuit body while the solder is in a molten state. Or vice versa, when the contact is already warmed up, and at the same second the needle is inserted.
Such soldering methods are outdated. Modern boards are manufactured for machine assembly, so the gap between the contacts and pins of the parts is minimal. The needle is already weak, and the vacuum syringe does not have time to pick up the sharp drops of solder. It is no longer possible to desolder a regular electrolytic capacitor using a syringe. In this case, the liquid sting method will help.
Liquid sting and its advantages
The liquid tip is a drop of solder, which allows you to avoid using additional tools (braid, hair dryer, needles or syringe). The technique is the same as with the Rose alloy. The main difference is in temperatures. The hatchet-type sting has a massive longitudinal working surface. It allows you to capture multiple contacts at once.
Apply solder to the tip. A paste-like flux is applied to the chip to be soldered using a syringe. The part and its contacts are heated with a sting until the tin melts, and the same must be done on the other side. Using this technique you can also remove DIP contacts.
Using an adapter
It is a small board with an IDE connector at the end and a maximum of two SATA ports on the reverse side. It connects directly to the IDE disk, so it does not take up much space inside the system unit. You won't need IDE cables either: the SATA cable connects directly to the adapter. Among the disadvantages are the low data transfer speed, the need to switch jumpers both on the disk and on the adapter, which quite often complicates setup, as well as the need for external power (two or three-pin 12V connector, connected by the cooling system cooler cable to the corresponding socket on the motherboard) .
Sequence of actions using the example of an SMD component
Let’s say that on the working printing surface of the electronic unit being repaired there is a burnt-out SMD box that needs to be dismantled. To remove it and install a new one, you need to select a compact nozzle for the hair dryer and prepare flux.
The temperature regime on the soldering hair dryer is set within 345-350 degrees using a regulator. Then they apply flux to the part to be replaced, and begin to slowly “warm up”.
The air pressure during the process should not be too strong, otherwise there is a risk of blowing away nearby elements. The culprit of the breakdown continues to be heated until the solder begins to melt, which will be immediately noticeable.
It may take about three minutes to warm up, and this is normal, there is no need to rush. If the solder persists for a long time, you need to add 5 degrees.
After the solder has liquefied, carefully dismantle the SMD part.
During the process, it is important not to knock down neighboring components, since they have probably lost stability due to the melting of the solder holding them in place.
Upon completion of the operation, the copper braid must be used to clean the “spots” (contact pads), then provide small bumps in the same places with solder paste or solder.
A serviceable smd is placed in the old place with a minimum amount of flux. Heat the part with a soldering hair dryer until the solder shines brightly, spreading over each of the contacts.
What to do if the cable installation failed
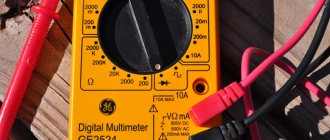
Having figured out how to restore the cable, you can get to work. To achieve a successful result, you must carefully follow each step and apply the solder adhesive carefully. Only after the applied mass has hardened can the device be tested. To do this, check the voltage level on the connected element with a voltmeter.
If there is no voltage and the cable itself does not function, it is better to seek help from a specialized workshop. Not all parts and cables can be glued or soldered at home.
However, experienced specialists note that a set of tools and materials will not be enough to carry out soldering. To do this, expensive equipment and various devices are used, which would be problematic to purchase on your own. Therefore, to avoid the risk of damage, it is better to immediately seek help from professionals.
Soldering safety precautions
Soldering correctly means, among other things, soldering safely.
The two main hazards when soldering are high temperatures and harmful gases released when the soldering wire melts and the flux boils.
Based on this, security measures should be as follows:
- Before starting work, you should inspect the equipment for the absence of mechanical damage, the integrity of the power cable and plug, and the reliability of the tip.
- The workplace should be well ventilated, preferably equipped with exhaust ventilation.
- The workplace must not be cluttered; the work area should contain only those items that will be soldered right away.
- Each time you release the electric soldering iron from your hands, place it on a special massive stand that prevents it from tipping over.
- Beware of splashes of solder and flux, for which you must use safety glasses or a transparent shield.
- To fix parts, you should use only inventory devices: tweezers, clamps, a “third hand” device.
If splashes get on the skin, it is necessary to rinse the affected area with a stream of cold, clean water and apply an antiseptic healing ointment. If splashes come into contact with the eyes or other mucous membranes, or in case of severe burns, consult a doctor immediately.
When working, general electrical safety measures should be observed, and when using a gas soldering torch, additional fire safety measures should be taken.
Purpose and classification of wires
A wire is an electrical product that consists of 2 or more metal wires covered with a winding of some non-metallic fabric. Serves to connect the current source with the consumer.
The wire consists of 2 parts. The first is the core - the part that conducts current. The second part is insulation, that is, what protects the core from external irritants. Copper and aluminum wire is usually used as a core; the insulation is made of paper, rubber, or varnish.
There is a certain classification of wires:
- winding;
- copper;
- high resistance wires;
- installation connecting;
- output;
- wires for rolling stock;
- insulated for overhead lines;
- non-insulated;
- wires for geophysical work;
- heat resistant;
- thermoelectrode;
- warm-up;
- automobile;
- aviation;
- installation;
- communication wires;
Related Posts
- GOST 17325-79
- How to solder a cooling radiator
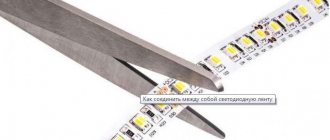
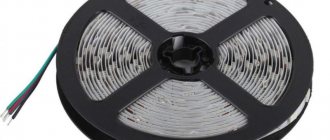
- How to properly solder LED strips to each other
- How to seal the joint between the bathtub and the wall? 8 popular options
- How to solder copper pipes correctly: do-it-yourself soldering technology, tools, basic mistakes
- How to glue fiberglass correctly?
- Benefits of using a duct extension for radiators
- The door handle creaks: causes of the problem and solutions
- How to paint wood with stain and varnish it
- What and how to drill into the tiles so that they don’t crack?
- Alabaster: what is it? how to divorce? where to apply?
- How to cut metal using a grinder
- How to make markings with your own hands for the foundation: rules
- How to update old tiles in the bathroom
- Caring for matte and glossy stretch ceilings
- How to clean a dried out foam gun. how to clean a foam gun and remove stains from surfaces. which foam guns can be cleaned
- Mounting a mirror on the wall in various ways
- Fum tape technical characteristics, how and how much to wind on the thread
- How to seal the joint between the bathtub and the tiles
- DIY foam cutting
- Kitchen cabinet hanger: strip mount, hangers for wall cabinets in kitchen
- How to plaster a stove to prevent it from cracking: types of putty for stoves and execution technology
- Why line the roof and ceiling with clapboard and how to do it correctly? nuances of the procedure
- How to make a garden swing from wood?
- How to attach drywall to a wall: 2 installation methods
Read with this
- GOST 17325-79
- How to solder a cooling radiator
- How to properly solder LED strips to each other
- How to seal the joint between the bathtub and the wall? 8 popular options
- How to solder copper pipes correctly: do-it-yourself soldering technology, tools, basic mistakes
- How to glue fiberglass correctly?
- Benefits of using a duct extension for radiators
- The door handle creaks: causes of the problem and solutions
- How to paint wood with stain and varnish it
- What and how to drill into the tiles so that they don’t crack?