General rules for installation work
Gas-discharge lamps, traditional incandescent lamps, fluorescent and LED devices are allowed for installation of components of electrified lighting systems. In systems that are based on gas-discharge radiation elements, it is necessary to provide protective equipment - as a rule, this requirement applies to objects where the influence of radio interference is expected. Sometimes combined lighting is allowed - that is, several groups of devices of different types are introduced into the lighting infrastructure.
The main power line in relation to the installation of general purpose lamps must have a voltage of no more than 380V. The limit value applies to industrial use, when electric lighting is installed in three-phase networks. For home and street lighting, elements powered by 220V are more often used. Spot models of lighting devices and lighting elements can have power supply with voltage characteristics of 127V and lower. In this case, luminescent devices with a voltage in the 127-220V spectrum are mounted at a level of no more than 2.5 m.
Stages of installation of electric lighting
When carrying out repair work in a house, as well as when completely or partially replacing electrical networks, installation of electric lighting is also carried out in parallel.
For this purpose, the electrical project is first approved. Then, based on it, it is necessary to draw up an electrical wiring diagram, which indicates the total number of electrical points and takes into account the types and power of lighting devices.
The calculation of the electrical part involves determining the method of installing the power cable, panels, and protecting the lighting network. It is better to calculate in advance the required power of the lamps based on the square footage of the room.
When installing external and internal electrical lighting, it is important to correctly select the appropriate cable cross-section, correctly install the electrical conductor, and connect the lamps to the switches. The neutral conductor must be connected to the lamp, and the phase to the switch. When conducting electrical networks, both two- and three-core wires can be used.
Installation instructions for emergency power supplies
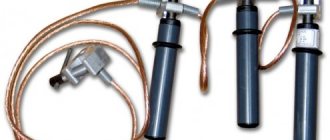
Emergency power supply is mandatory for industrial lighting and for devices that are planned to be operated in an open area. The regulations require that such luminaires be supplied with energy from separate independent sources. For example, leased lines can be connected to different transformers, and multiple transforming stations can be connected to a single distribution source.
It should also be noted that there is a need to separate working and evacuation lighting. Working light refers not only to a set of devices in production, but also to the communal infrastructure in ordinary residential buildings. Escape routes must have a separate supply line from the entry point that is independent of the operating panel. In critical areas, lighting installation is carried out together with the installation of protective frames that insure against accidental damage. This applies to both production premises and external lighting systems. If difficulties arise with the organization of separate power supply lines, then you can use autonomous power sources in the form of internal or external batteries, as well as generator sets (gasoline or diesel).
Key installation features
When installing lighting in treatment and prevention centers, educational institutions, sports or shopping and entertainment complexes, it is very important to select effective lighting devices and ensure hidden placement of wires. Most often, suspended ceilings are installed at such facilities, behind the structure of which all the components of the system fit perfectly.
Installation of lighting in administrative buildings and warehouses is a rather labor-intensive and painstaking process that requires the most responsible approach. When carrying out electrical installation work, it is very important to adhere to existing safety measures and use certified consumables.
Increased attention is paid to the installation of street lighting. In this matter, the terrain and the power of lighting devices are of great importance. Moreover, this work is not limited only to the installation of lanterns and floodlights. They also provide illumination for billboards and placement of city lights.
Electrical panel installation
A cable is inserted into the electrical panel through which power is supplied to the apartment or house. In addition, the following equipment is installed in the electrical panel:
- electricity meter;
- voltage relay;
- RCD (residual current device);
- circuit breakers;
- ground bus;
- zero bus.
Electrical installation is carried out using DIN rails on which all specified devices are mounted. All electrical consumption elements connected to them are divided into groups - socket and lighting groups.
The internal wires of the lighting group are connected to circuit breakers connected to each other by a comb. Each machine is responsible for the operation of lighting fixtures in one or more rooms.
The technical characteristics of the machines must correspond to the power of the connected devices. Usually they use 16 A machines for a group with a power of 2300 W.
Street lights
Lamps for utilitarian street lighting of roads and streets are also regulated by rules, because safety depends on their characteristics.
Today, LED lamps have become widespread, but due to their high cost and frequent degradation, they are being replaced by analogues - halogen and fluorescent lamps.
Selection of lighting fixtures
The lighting device must meet the following requirements:
- ease of maintenance;
- availability of anti-vandal protection;
- the degree of protection of the lamp from dust and moisture is at least IP55;
- high resistance to temperature changes and gusts of wind;
- low level of electrical energy consumption while maintaining intense luminous flux;
- durability in operation.
For cantilever-type lamps mounted on building facades, it is important to have an optical system that helps direct the light flux.
Regardless of the type of lighting device, for its uninterrupted operation it is necessary to carry out periodic maintenance and routine repairs by service personnel to the extent established by the technological map.
Connection
Installation or replacement of the lamp, as well as its connection, is carried out by qualified personnel (electricians, electromechanics). Work is carried out at a height of more than 5 m using specialized equipment (aerial platform, lift) in compliance with labor protection rules when operating electrical installations POTUE (POTEE) (https://docs.cntd.ru/document/573264184). Work technology:
- Before starting work, the team receives access from the dispatcher to the workplace, prepares it (fencing, signage) and de-energizes the section of the line where the work will be carried out:
- with automated control: the dispatcher from the control panel turns off the required section:
- with manual control: after notifying the dispatcher and his permission, the personnel disconnects the line section using a switching device (switch, contactor, disconnector) in the control cabinet.
- The functionality of the new lamp is checked:
- inspection for damage;
- checking contact connections and pulling them;
- connecting the lamp to the power supply;
- supplying voltage to the lamp.
- Then the lighting support is checked for the presence of a junction box and a grounding drain with a bolt connected to it.
- Attaching the new lamp to the lighting support.
- Connecting the lamp to the power supply. In the installation box, using a terminal block, equivalent cable cores are connected to each other: L – supply core (phase), N – neutral core (neutral, zero), PE – grounding core.
- Connecting through a bolt to the grounding drain the grounding conductors of the input cable (from SHUNO to the distribution box) and the supply cable (from the distribution box to the luminaire).
- Checking the reliability of contact connections and tightness of the lamp, closing it.
- Measurement of phase and zero resistance.
- Checking the connections of cable lines in the distribution box, installing it in the technological window and then closing it.
- Supplying voltage to the line and taking control measurements:
- insulation resistance and phase-zero loop;
- grounding.
- The obtained values are compared with the standard values; if there are no deviations, the connection of the lamp is completed.
Connecting a lamp on a pole
Installation
The method of installing the lamp to the support depends on their design.
To attach a cantilever street lamp to a lighting support, use a bracket (console, headband). It has several lamps (up to 4 pcs.) and mounting methods:
- Bracket on flange (washer). A flange with a diameter larger than the base of the support is placed on top of its upper base and tightened with bolts from the outside. Used for round faceted conical supports (OGK, OGKS).
Example of a bracket on a flange
- Bracket on the shell. The structure is put on the pole and bolted through the holes in the shell. Used on power and tubular supports.
Example of brackets on the shell
- Bracket with clamp. Direct fastening to the support is performed with a clamp, which tightens the console to the support until it fits snugly. Its advantage is the ability to adjust the height of the console.
The type of clamp depends on the type of support: for cylindrical ones - round, for square ones - square. Suitable for wooden, reinforced concrete and OS type supports.
Fastening with a clamp
Installation of the spotlight on masts and lighting supports is carried out using a T-shaped bracket. Their type and size depend on the number of installed spotlights.
The spotlight is bolted to the bracket with a fixing bracket (lyra), which is installed on its body. The structure is then installed on the upper base of the support and tightened with bolts.
Fixing the spotlight with a fixing bracket
- Related Posts
- What is an LED (device, parameters, markings)
- Types of lamps and lighting
- LED dimmer 220V
Wiring installation
For indoor lighting, cables with copper conductors with a cross section of 1.5 mm² are used. The number of cable cores is different: both two and three wires are used (the protective wire is optional).
Installation of electric lighting requires compliance with the following rules:
- In an open way (for wooden houses), in cable channels or grooves, two-core cables are laid from the electrical panel to the junction boxes. Cables must be double insulated.
- Cables are laid from the junction boxes to the installation site of lamps and switches. For light sources operating in two or three modes, choose a three-core cable. Similarly, a two-wire cable is laid to a single-key switch, and a three-wire cable to a two-key switch.
- Connect the “zero” conductors of the power cable with the “zero” wires of the lighting fixtures. “Phase” conductors are connected to the lamp through a switch.
- Surface mounted switches are attached directly to the wall. Mortise switches are installed in a plastic cup pre-built into the wall, called a socket box.
- Connecting lighting devices to electrical wiring is done using terminal blocks - special connecting devices with a plastic housing and brass terminals with tightening screws.
Important: the switch must necessarily break the phase wire.
Wiring in junction boxes can be done in several ways:
- Simple twisting and soldering. The following condition must be met: the twist must be tight and at least 40 mm long. Insulated with adhesive-based polyvinyl chloride tape.
- By welding. A special machine welds the top of the twisted bare wires.
- Crimping with sleeves.
- Using PPE caps.
- Terminal blocks.
- WAGO type connectors.
Electrical installation must be carried out using cables with copper conductors. Connecting copper conductors to aluminum is not recommended, but if necessary, WAGO connectors and terminal blocks can be used.
Installation of lighting in the apartment is completed by installing lighting devices and connecting them to the electrical wiring. There are pendant (ceiling) lamps, wall lamps (sconces), floor lamps (floor lamps) and table lamps. Only pendant and wall lamps are connected to the electrical wiring of the lighting group. They are attached to the base surface using a special strip or hook, which is hidden by a decorative element. Connection to the electrical wiring is carried out using terminal blocks. It is important that the “neutral” wire is connected to the lamp base jacket, and not the “phase” one.
Connecting lighting devices to electrical wiring can be done directly or through a voltage-stepping transformer. To turn the light on and off from different points in the room, pass-through switches are used; there can be two, three or four of them. In this case, installation of electrical wiring is carried out according to a special scheme.
Comprehensive service: turnkey lighting of the territory
When ordering turnkey services, you get more attractive prices and neutralize any risks that may be associated with uncoordinated actions of various companies. We implement projects of any level of complexity from scratch and guarantee flawless completion of every stage of work. In general, comprehensive lighting installation in Moscow includes the following stages:
- Design. A modern electric lighting system necessarily begins with competent design. It is important to collect and analyze a large pool of data in order to determine standardized lighting parameters, determine the types of equipment needed and its location, and also solve many other problems. As a result, a detailed document is created with floor plans of the facility. Coordination and approval of the general estimate is also carried out.
- Equipment. Devices are selected taking into account the parameters of luminous flux and luminous efficiency, service life, ease of use, as well as sanitary, hygienic and fire safety requirements. Before the main stage of work, the necessary equipment is supplied to the site: electrical panel, lighting fixtures, switching equipment, cables and consumables.
- Electric installation work. The facility and the adjacent street area are being prepared for major work. Routes are being laid, lighting panels are being installed and lighting equipment is being installed. All significant data is entered into the executive documents.
- Delivery/acceptance of the object. Once each panel, switch and landscape light is installed, the entire system needs to be tested. After this, all required documentation is transferred to Elektronadzor, and the network is completely ready for effective use.
Connecting wires inside the junction box
The most typical cross-section of the lighting wire is 1.5 mm2, which is a maximum load of 4 kW. Of course, it is unlikely that the lighting in the apartment will reach such an indicator, because it will be equal to 40 100 W light bulbs turned on at the same time. Don’t worry, you might turn on a lot of electric stoves.
Well, if you don’t want to pay extra money for a cable, you can calculate exactly what cross-section of wire will be needed in each individual case. It's simple. Let's say there is a lighting area that consists of 3 spotlights, each with a 60 W bulb. A wire with a core cross-section of 1.5 mm2 is suitable for the junction box. For 180 W this is a bit much. We take the total power of the lamps, which is exactly 180 W (60 + 60 + 60) - and divide it by 220.
If the number turns out to be less than 10, then you can safely install a wire with a TPG cross-section of 0.75 mm2 from the box to the lamps. When it is less than 15, the TPG cross-section is 1 mm2, and if it is more than 17, then a TPG of 1.5 or 2.5 mm2 is suitable. In this case, it turned out to be 0.8 - less than one. If there is a wire with a cross-section of 0.35 mm2, then that will do. The difference in price for cables with cross sections of 0.75 and 1.5 mm2 is at least 1.5 times, not to mention 0.35 mm2.
Once the thickness of the wire in various sections of the lighting network has been determined, it is necessary to decide which wire is needed. If there is no grounding in the apartment and it will not be installed in the future, then the three-wire wire disappears by itself. What remains is a two-wire one with phase and neutral conductors. Most lamps do not have a contact for a ground wire, so there is no need to be upset. A three-core wire will be useful if the apartment has grounding and fluorescent lamps with electronic ballast will be installed.
Remember that it is advisable to place separate boxes for lighting. In this case, there will be less confusion and it will look neater. Whether to use stranded or single-core wire is a personal choice. In some cases, for example, when laying lighting in a tight space on a suspended plasterboard ceiling, it is better to use a flexible wire such as PUGNP.
Replacing lamps in luminaires
In the production shops of industrial enterprises, there are two ways to change lamps: individual and group. With the individual method, lamps are replaced as they fail; in the group method, they are replaced in groups after they have served the required number of hours. The second method is more economically profitable, as it can be combined with cleaning lamps, but is associated with high consumption of lamps
When replacing, do not use lamps of higher power than allowed for the lighting device. Excessive lamp power leads to unacceptable overheating of lamps and sockets and worsens the condition of wire insulation.
Lamps and fittings are cleaned of dust and soot in workshops with a small emission of pollutants (mechanical and tool shops, machine rooms, tanneries, etc.) twice a month; with a large emission of pollutants (forges and foundries, spinning factories, cement factories, mills, etc.) - four times a month. Clean all elements of lamps - reflectors, lenses, lamps and outer surfaces of fittings. Windows for natural light are cleaned as they become dirty.
Installation of switches
One of the basic rules in installing any type of switch, lighting or automatic, is that it is always placed on a phase wire. It would seem that what a difference it makes - after all, if you install a switch on the neutral conductor, the circuit will still be open and the light will go out. There is a difference. Let's say the switch is installed on the neutral conductor. The light bulb in the lamp burned out and needed to be replaced. Your first step is to flip the switch, disconnecting the circuit, and calmly unscrew the faulty light bulb in full confidence that there is no current in the circuit (the light bulb is not lit).
However, if the circuit is broken at zero, the voltage in the phase wire does not go away. Having accidentally touched the phase contact in the cartridge, a person instantly becomes a freshly baked zero, that is, he gets an electric shock. If the TPG contacts the lamp body as a result of a breakdown, then touching such a device may be the last. For an analogy, we can give an example with a water pipe: having turned off the tap, the unfortunate plumber begins to drill the pipe before the tap, and not after. As a result, a fountain of water will come out of the pipe, although not a drop will flow out of the tap.
There is always one wire going to the switch, which opens and closes inside the switch. From the outside it looks like there are two wires. This is easy to explain - the phase conductor forms a loop that goes down or up to the switch. At the top, the loop is cut and the ends of the disconnected wire are connected to the switch contacts. Now, by clicking a key, you can connect and disconnect the circuit.
The wire becomes 3 if the switch is two-key. Current flows in through one conductor, and out through two. One key breaks one line, while the second one works. Accordingly, a three-key switch will have 4 wires - 1 for input and 3 for output. As an example, you can show how wires are installed in a chandelier with several light bulbs. So let's say there are 5 light bulbs in a lamp. It is required to install a two-key switch so that when you press one key, 3 lights come on, and when you press the second, 2.
Almost every chandelier has a block in the bowl through which the wires are connected. A phase wire is inserted into this block on one side, and a cable on the other end, which branches into 3 - according to the number of connected cartridges. The second phase conductor is connected in the same way, only it branches into 2 wires. The neutral wire is 1, and it, joining the second contact of the cartridge, is combined into an outgoing conductor.
What work is done when installing lighting?
When installing lighting, several types of work are performed:
- Lay low-current electrical wiring. It is needed to power office equipment, computer and household equipment. In this case, special attention should be paid to protecting cables from mechanical damage. For this purpose, trays, tubes or boxes are used.
- Laying power wiring. It is needed for production equipment and engineering systems.
Power wiring must be laid separately from low-current wiring.
- Install sockets, switches, distribution boxes, electrical panels, meters, circuit breakers, residual current devices.
- Install lighting fixtures. With their help you can create directional, indirect, diffuse or mixed light.
- Installation of grounding and lightning protection systems. They ensure safety when using the lighting system.
- Install an alternative power supply system (if provided for by the project). A gasoline or diesel generator set or an uninterruptible power supply can be used as a power source.
- Perform equipment testing and commissioning. After this, the lighting system is ready for operation.
Interior lighting system