Features of installation and operation
The most common ballast devices are ballast inductive chokes, which limit and stabilize the current.
The connection diagram for sodium lamps involves supplying supply voltage to the terminals of the lamp. If you connect the NL yourself, it is recommended to use a wire connecting the ballast to the sodium lamp, no more than 1 m long. The use of cotton gloves is also recommended.
When used for artificial lighting of plants, NLs are located no closer than 50 cm from them. Power can be from 75 to 400 W. However, in the case of a power of 400 W, the distance to the plants should be increased to 1.8 - 2 m
Compliance with these conditions is important in order not to damage the plants
A sodium lamp (usually an outdoor one) must be reinforced with a protective glass bulb to avoid damage due to differences in the internal temperature of the bulb and the external environment.
The quality of NL light also depends on their timely cleaning from dust and dirt. To do this, you can use a cloth moistened with alcohol.
Disposal of NL by special institutions is mandatory in order to avoid environmental pollution with mercury vapor (if contained), as well as to prevent an explosion of sodium gas that can occur when it comes into contact with oxygen.
Characteristics and features of using HPS sodium lamps
DNAT consists of the following elements:
- Ceramic plug.
- A tube that allows light to pass through.
- Glass flask, which has high mechanical strength.
- Electrode.
- A metal rod through which gas is evacuated from the device.
- Barium rod.
- Base.
The burner is filled with sodium compounds, mercury vapor, and xenon. These gas-discharge substances are necessary to start the lamp.
Reference. There are two types of HPS light sources: low and high pressure. The former emit a muted yellow light, while the latter emit a light yellow light. High pressure devices do not distort color as much as low pressure HPS.
The burner is a cylinder-shaped tube made of aluminum oxide ceramic. Thanks to this material, the flask is resistant to sodium vapor and transmits up to 90% of light. Electrode elements are located on both edges of the tube.
How to make a sodium lamp lamp
Since it is advisable to use HPS products in the household, the use of such light bulbs is relevant for many. But for their operation you will need special lamps. Their cost is high, so it makes sense to build a lighting device with your own hands.
What will you need?
To complete the task you will need:
- a metal-coated plate, its dimensions should be 35x40 cm;
- aluminum sheet that will be used as a reflective element;
- set of self-tapping screws;
- hammer;
- metal scissors;
- pipe with a diameter of 15 cm.
User Anatoly King Crimson spoke in detail about the preparation for the manufacture of a lamp for a HPS light bulb, as well as the creation of such a device.
https://youtube.com/watch?v=mbmFqzkRe_I
Step-by-step instruction
DIY Assembly Guide:
A metal-coated plate is prepared. It should have a mirror surface on the working side, and also be elastic and rigid. If it is not available, it is possible to install a stainless steel plate; this material is used in chimneys. The reflective element is designed to focus the light energy of the device and direct the lighting flux to the desired location. To calculate the dimensions of a reflex device, you can use special computer software that allows you to accurately calculate the efficiency. The plate is bent manually. When carrying out this task, when the central part is bent, you can use a hammer. The rest of the sheet is bent using a previously prepared pipe. To level the surface, you must act carefully. But this can only be done with your hands. At the next stage, the cartridge with the sodium light source is fixed; it can be secured to the back wall. In this example, it is made from the side cover of the PC processor unit. It is recommended to make holes in advance for ventilation of the system. To make a lid, it must be cut out of metal; special scissors are used for this. The socket is fixed to the back surface of the lighting fixture using homemade pins, the diameter of which is 4 mm. These elements are made from hooks purchased in the store. It is desirable that their threaded part be elongated. This will allow you to make several studs. The reflective device is fixed on the rear wall using special aluminum rivets. Their diameter should be 3.2 mm. If you do everything correctly and securely fasten the elements, the structure will ultimately turn out rigid. Then the throttle element, as well as a high-voltage pulse device, is installed in the lighting device
It is important that these components are suitable in size for the lamp body. For more convenient placement, it is possible to remove the board from the case
But the power plug, as well as the switching device with the filter capacitor element, can be left. The throttle is being installed. This example uses a Galad 250W ballast choke element and is optimally suited to the hull width, height and length. A pulse charger is installed next to it. It should have a wiring diagram for the inductor and light bulb, and you need to follow it. At the next stage, wires must be brought out from the housing to the lighting device; their length should be 3 meters. To connect to the socket, only heat-resistant cables must be used. Their insulation should be made of fiberglass. Then the assembled lighting device is configured; this must be done before using it. The lamp is activated; this must be done in a dark room. You must wait until the sodium light source is completely heated. It is necessary to visually assess the quality of the lighting flux, which is reflected by the reflector device. If necessary, this element is bent, but this should be done before it gets hot.
The reflector adjustment procedure must be performed carefully so as not to catch the light source itself. Otherwise, not only the light bulb may be damaged, but it may also explode. To optimize the luminous flux, you can slightly bend the edges of the so-called parabola on the lamp.
User Dmitriy Rostkov spoke in detail about the creation of a reflective device for a HPS light bulb.
Luminous flux and other basic technical characteristics
The abbreviation DNaT 400 stands for sodium arc tube lamp with a power of 400 watts. The device has a simple design. The glass outer housing contains a cylindrical aluminum oxide discharge tube. Inside the tube there is a mixture of inert gases: sodium and mercury vapor, as well as xenon. Two electrodes are soldered into the edges of the tube. There is a vacuum inside the glass flask.
The DNAT 400 lamp has the following technical characteristics:
- service life 12000-25000 hours;
- Efficiency 30%;
- operating temperature from -30С to +40С;
- light output 130 lm/W;
- power 400 W;
- switching time 6-10 minutes;
- voltage 220 V +/- 5%;
- shape – tubular;
- luminous flux 47000 lm;
- color temperature 2000 K;
- color rendering 20-30 Ra;
- pulsation coefficient up to 70%;
- base type E40;
- length 278 mm;
- diameter 48 mm.
Parameters such as luminous flux, luminous efficiency and average burning time depend on the power of the device. HPS bulbs come in 70, 100, 250 and 400 W ratings. HPS lamps are inferior in their characteristics to their LED counterparts, but they are used more often due to their lower cost.
Important! Efficiency directly depends on the ambient temperature. With negative values, the lamps function worse.
There are other types of sodium lamps:
- DNaS - arc sodium in a light-scattering bulb, used as a replacement for mercury gas-discharge lamps;
- DNaMT – arc sodium matted;
- DNaZ – arc sodium mirror.
Since sodium lamps contain harmful substances, they are disposed of in a special way.
Disposal
Sodium, by its nature, is a volatile substance and, in contact with air, can ignite rapidly. For this reason, sodium light sources should not be disposed of as regular waste. Like any energy-saving lamp that contains mercury, they also need to be disposed of in special containers
If you cannot dispose of HPS sodium lamps yourself while observing safety precautions, you should call a special service
Gas-discharge arc sodium lamp DNaT is used to illuminate large areas, city streets, and greenhouses.
Do not confuse low and high pressure sodium lamps. They have different designs and operating principles.
The emission spectrum of both is dominated by orange light. For low-pressure products, the radiation is almost monochrome; they shine with a bright golden light.
If they are used for lighting in rooms, the colors will be practically indistinguishable.
In high-pressure lamps the spectrum is more diverse.
In those models that are used in greenhouses for growing plants, a little blue light is specially added to the light spectrum.
The kit for connecting a high-pressure lamp includes several components, without which you simply cannot start it. That is, simply by applying 220 volts to it, it will not light up.
To do this, you need a special device - a choke or ballast, which in turn is connected according to a certain circuit.
This diagram is often depicted directly on the body.
Here is a more detailed drawing of it.
Painted on it:
the inductor itself (ballast), to which the phase is supplied
then this phase is supplied to the pulse ignition device - IZU
Through it you can connect instances of different power, from 70 to 400W.
The IZU creates a starting impulse for the breakdown of the burner contents in the flask and the formation of an arc. The voltage reaches several thousand volts!
And the burner itself heats up to 1300 degrees during operation.
Only after the IZU is the gas-discharge lamp itself connected.
The same connection diagram can be depicted on the walls of the ignition device.
In addition, it is recommended to use a capacitor in the connection kit. Although it is not present in all schemes.
Why is it needed? As is known, circuits using power chokes consume both active and reactive power. From the second, you will not get any beneficial effect.
This will not make the lamp shine brighter, but the losses will increase. It is in order to remove this reactive component that a phase-compensating capacitor is used.
A visual comparison of the current consumption of a HPS lamp with and without a capacitor:
As you can see, more than double the difference. In the first case, the compensated current (active) is shown, and in the second case, the full current (without a capacitor in the circuit).
Some people think that by doing so they also reduce energy consumption, but this is not entirely true.
Your meter is not designed to count reactive or apparent energy, and the actual cost savings can be a maximum of 3-4%.
But you will eliminate unnecessary losses due to heating of wires and iron.
Here is a compact shield assembled with your own hands, according to the connection diagram.
You can, of course, assemble all this in the overall body of the lamp, if the dimensions allow.
It is very important, before assembling such a circuit yourself and using any components, using a conventional multimeter in the maximum resistance measurement mode, check the insulation of the inductor and capacitor. Is there a hole in the body? Is there a hole in the body?
Is there a hole in the body?
To supply and disconnect 220V power, use a two-pole input circuit breaker.
For one lamp with a power of up to 400W, a machine with a nominal value of 5-6A is quite suitable. In addition to on-off switching operations, it will also play the role of a protective device.
A circuit breaker is mounted at the very beginning of the circuit. Do not forget to also ground the entire panel body.
Two neutral wires come out of the machine. According to the diagram, one of them is connected directly to the lamp, and the second one is connected to the corresponding terminal labeled “N” on the starter.
Otherwise, you can accidentally burn the product if during operation the neutral wire after the ballast choke accidentally shorts out.
And connect the wire from the output contact to terminal “B” (Balast) of the ballast.
After that, connect the middle terminal Lp (Lampa) to the light bulb socket.
Please note that there are two-pin and three-pin IZUs. The first ones are connected in parallel with the lamp itself.
Areas of application
Sodium lamps are used when economic considerations are more important than color rendering. They are not suitable for residential premises, public buildings and production workshops. In addition to poor color rendering, the lamp is dangerous if it malfunctions.
Can be used for seedling growth
DNAT is used to organize street or greenhouse lighting, illumination of architectural monuments and buildings. They are especially common in large cities. They can be recognized by their yellowish-golden hue. The most common elements are 250 and 400 W.
Relatively recently, low-power sodium lamps with a color rendering index of 80 appeared on the market. This indicator is significantly higher than that of other similar models. Therefore, such lamps are effective for lighting decoration in public places.
Sodium light sources are used in the final stages of seedling growth in greenhouses, where shades of blue are often present. Radiation of a significant proportion of the ultraviolet spectrum promotes plant growth. It is important to handle the elements with care, because... destruction of the flask can ruin the entire crop and spoil the soil.
Designers often use sodium elements to imitate fire or the light of the sun.
Low pressure sodium lamps
Low pressure lamps are extremely efficient. The wavelengths indicated above become dominant, but are far from the only ones in the glow spectrum. For low-pressure lamps, most of the lines lie in the area of sensitivity of the eye. This means the light is as bright as possible. In other words, low pressure lamps have an attractive efficiency.
In laboratory models, the efficiency reaches 50-60%. As a result, the luminous efficiency rises to 400 lm/W (the theoretical limit for the current level of technology is 500 lm/W).
We invite you to familiarize yourself with Lamps for plants characteristics
In practice, sacrifices have to be made (Philips bulbs are still good and achieve a luminous efficiency of 133-178 lm/W). The temperature of the flask rises to the required 270-300 degrees Celsius due to special measures for thermal insulation (exceeding the radius of the flask over the maximum effective one) and a slight increase in the operating current to the optimum.
Thermal insulation is sometimes supplemented with other measures. A reflective shirt made of semiconductor materials allows useful yellow radiation to pass out, but reflects infrared radiation inward. The temperature inside rises further. But the design of a sodium lamp is more complicated.
Low pressure lamp
In addition to sodium, mercury vapor and xenon vapor, which reduces the ignition voltage (up to 2-4 kV), are added to the gas mixture. The pressure in the flask ranges from 4 to 14 kPa. It is easy to notice that, according to the general classification of discharge lamps, the indicated range refers to low pressure. For sodium lamps above 14 kPa, the indicated parameter does not rise. The range of 4 – 14 kPa is classified as high pressure.
The maximum efficiency lies around 10 kPa. The partial pressure of sodium vapor is a tenth or twentieth of the total. The rest comes from mercury and xenon. The pressure of the latter (cold) is 2.6 kPa. If a mixture of neon and argon is used to reduce the ignition voltage, the luminous efficiency of a sodium lamp is reduced by a quarter.
Aluminum ceramics is used as the flask material. Ordinary silicate glass is unsuitable; sodium vapor, under the influence of considerable temperature, then enters into a chemical reaction. The compounds formed are stable, and the flask noticeably turns black within a few minutes after the product starts working. The changes are irreversible; under the influence of strong pressure there is a possibility of complete destruction of the glass.
Polycrystalline ceramics and tubular single crystal with wall thicknesses from 0.5 to 1 mm are equally resistant to aggressive environments up to a temperature of 1600 K, with some margin relative to the optimal point. Ceramics exhibit decent transmittance in the visible range, accounting for 30% of the energy consumed by a sodium lamp.
Extreme temperatures require special bushing designs. Made from niobium with a small (1%) zirconium impurity, they are sealed at the entrance to the flask with a special glass cement (capable of withstanding these aggressive conditions). Such a sophisticated alloy in composition was chosen for a reason. The designers have found a material whose thermal expansion coefficient is close to ceramics.
High-pressure sodium lamps are characterized by inertia. When first switched on, the light is yellow and monochromatic. Gradually, the product reaches a mode with a simultaneous expansion of the emitted spectrum. To re-ignite the arc, the gas cools down, taking 2-3 minutes. In order not to exceed operating temperatures, it is necessary to exclude the reflection of radiation onto the flask. Otherwise, the sodium lamp fails due to overheating.
Pros and cons of HPS lamps
Such sodium lamps have several main advantages:
- The efficiency factor is very high.
- The luminous flux from such a lighting device is quite stable.
- The power of this flow is high and amounts to about 150 lumens/watt.
- The durability is one and a half times longer than that of other similar lamps.
- The color temperature is optimal, the glow has a pleasant golden hue.
- Works great even in fog or snow.
Appearance of the HPS lamp
- Almost ideal as a phytolamp, since the radiation from HPS actively helps plant growth.
- These lighting devices perform well at temperatures ranging from -60 to +40 degrees Celsius.
But, of course, not a single device is without its drawbacks - there are no ideal products. There are 5 main disadvantages:
- These lamps are extremely explosive.
- There are heavy metals inside.
- It takes a long time to ignite (sometimes up to 10 minutes).
- When used as a phytolamp, it is not suitable for growing radishes, onions and lettuce, since they are non-flowering.
- If it is necessary to connect HPS of higher power (for example, HPS 250 or HPS 400), additional cooling of the lighting device is necessary.
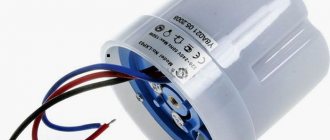
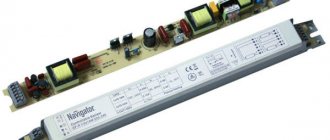
Ballast
Essentially, this is a combination of two main devices - ballast (throttle) and IZU. Without a doubt, electronic ballasts are the best of their kind, unlike inductive devices. However, they are inferior in terms of cost - they are quite high. For this reason, ballast inductive chokes are much more widespread. In some lamps they are already included in the device. That is, it remains to apply voltage to the terminals.
Currently, double-winding chokes are already outdated and in this regard, it is worth paying attention to single-winding types. In this case, the ballast must be designed specifically for light sources of the HPS type and have the same power as the light sources themselves
In this case, the original (that is, “original”) ballast must be present in the connection diagram of the HPS lamp through the choke. Otherwise, no one can guarantee full operation, including their service life. Or the light output of the lamps may decrease significantly.
Other situations cannot be ruled out either. For example, the “blinking” effect is when the lamp can go out immediately after heating, and after it cools down the whole process is repeated again.
Connection diagram for a HPS lamp with a two-pin IZU
The connection diagram for the HPS lamp, which is shown in the first figure, is designed to contain a compensating capacitor connected in parallel to the power source. This is a dry type C capacitor, which is designed to compensate for the inductive component of the system - reducing reactive power consumption, reducing overall electricity consumption, as well as extending the service life of the finished product.
For example, to connect a HPS lamp with a power of 250 W (3A), a compensating capacitor capacity is provided (operating voltage indicators are 250V) of only 35 μF. This capacitance can be formed using several capacitors connected in parallel.
Sometimes capacitance indicators may be provided by the manufacturer, but an extremely large increase can lead to resonance in the circuit, and, consequently, to ineffective operation of the finished product.
If the HPS connection occurs independently, the permissible value of the location of the IZU should be taken into account. It should be located as close as possible to the base of the product, while the length of the connecting wires in this area should be minimal (the maximum permissible value is 1.5 m).
To ensure a high-quality and safe connection, high-voltage ignition wires for special purposes are used.
Connection diagram and what is needed to start DNAT
To do this, you need a special device - a choke or ballast, which in turn is connected according to a certain circuit.
This diagram is often depicted directly on the body.
Here is a more detailed drawing of it.
Painted on it:
the inductor itself (ballast), to which the phase is supplied
then this phase is supplied to the pulse ignition device - IZU
Through it you can connect instances of different power, from 70 to 400W.
The IZU creates a starting impulse for the breakdown of the burner contents in the flask and the formation of an arc. The voltage reaches several thousand volts!
And the burner itself heats up to 1300 degrees during operation.
Only after the IZU is the gas-discharge lamp itself connected.
The same connection diagram can be depicted on the walls of the ignition device.
In addition, it is recommended to use a capacitor in the connection kit. Although it is not present in all schemes.
Why is it needed? As is known, circuits using power chokes consume both active and reactive power. From the second, you will not get any beneficial effect.
This will not make the lamp shine brighter, but the losses will increase. It is in order to remove this reactive component that a phase-compensating capacitor is used. For lamps of different power, you need to select the appropriate capacity. Here are the recommended capacitor capacitance parameters, depending on the power of the chokes:
A visual comparison of the current consumption of a HPS lamp with and without a capacitor:
As you can see, more than double the difference. In the first case, the compensated current (active) is shown, and in the second case, the full current (without a capacitor in the circuit).
Some people think that by doing so they also reduce energy consumption, but this is not entirely true.
Your meter is not designed to count reactive or apparent energy, and the actual cost savings can be a maximum of 3-4%.
But you will eliminate unnecessary losses due to heating of wires and iron.
This is interesting: The introductory machine knocks out when the load is turned on: reason
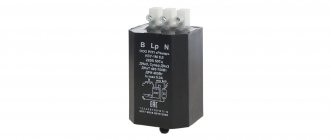
Pulse ignition "apparatus"
This is the same device that is used to start a sodium lamp. Different manufacturers produce IZUs with both two and three terminals. Because of this, the connection diagrams for gas-discharge lamps are also different. As a rule, it is already depicted on the IZU cases. Among the domestic devices, it is worth taking a closer look at the UIZU - it is suitable for lamps of different wattages and can be combined with all types of ballasts.
Ballasts for HPS (UIZU) can be located in the immediate vicinity of the ballast and near the lamp itself, connected to its contacts. In this case, polarity does not play a special role. However, it is recommended to connect the red "hot" wire to the ballast.
Operating principle
An arc discharge must be maintained inside the sodium lamp bulb. For generation, a pulsed ignition device (IZD) is used. During switching on, the pulse can reach a power of 2-5 kW.
Under the influence of voltage, a breakdown occurs with the formation of a discharge. It takes about ten minutes to warm up the burner and reach the rated power of the device. At this time, the brightness increases and normalizes.
How DNAT works
In modern elements you can find a built-in choke, which limits the arc current and guarantees a stable supply of energy without ripples and other undesirable moments.
Device
According to the established abbreviation DNaT, these are (D - arc, Na - sodium, T - tubular) devices. Based on their operating principle, they belong to high-pressure lighting equipment. Structurally, HPS lamps are a glass bulb with a base, usually E27 or E40.
Rice. 1. Design of a HPS lamp
The internal structure consists of:
The flask is made of heat-resistant glass, since the gas in the tube can heat up to 1300ºС, as a result of which the HPS lamp itself on the surface will have from 100 to 400 ºС. A vacuum is installed inside the lamp for better light output.
Connection features
If you don’t know how to connect DNAT, you can contact a specialist or try to figure it out yourself.
First of all, you need to prepare a kit, which includes the light bulb itself, an inductor, an IZU and preferably a capacitor. The connection diagram for a sodium lamp is usually shown on the body of the ballast or igniter.
To connect the light bulb, use a two- or three-pin igniter. The photo above shows a diagram of connecting a HPS lamp with an IZU, which has 3 outputs.
The picture above shows how to connect a HPS lamp using a two-terminal igniter with a capacitor.
The included capacitor device reduces the load on the wiring. That is, the cables will heat up less.
The DNAT is connected to a three-pin IZU according to the following plan:
- First, use a multimeter to check the insulation of the ballast and capacitor. Before dialing, the device must be switched to maximum resistance. This is necessary to check whether current is passing through the housing.
- The kit is assembled in a compact two-phase panel. For a 400W light bulb, a 5A automatic machine is suitable. It allows you to turn the lamp on/off and protects parts from damage.
- Remove 2 wires with a negative charge from the shield: connect one to the lamp, and the second to the “N” terminal on the IZU. The ballast is installed in the gap of the phase, and not the neutral core, which goes to the lamp.
- Disconnect the phase cable. Insert one core from the machine into the incoming contact of the ballast. And connect the cable from the output contact to terminal “B” on the ignition device.
- Route the middle wire “LP” from the IZU to the light bulb socket.
After connecting, you can check the bulbs for functionality.
If you have an ignition device with 2 terminals, then connect them in parallel with the HPS. To do this, after the choke, insert a phase conductor into the IZU, and connect a neutral conductor to the second terminal. It can even be pulled from the cartridge.
Two-pin ignition devices are not recommended for use with high-power HPS, since during startup the voltage is applied not only to the bulb, but also to the ballast. This can damage the inductor insulation. IZU is safe when connecting low-power light sources, which require no more than 2 kilovolts to start.
The capacitor device is connected in parallel to the entire circuit. To do this, one wire is connected to the phase output of the machine, and the second to the zero one. Then stretch the wire and disconnect it on the socket.
Features of operation
HPS 250 gets very hot during operation, so you need to follow some rules when using the lamp:
- Do not touch the housing for 15 minutes after turning off the lamp.
- Do not touch the light bulb with your bare hands; grease will remain on the bulb, which will turn into dark spots after heating the device. Then the risk of damage to the hull in these areas increases.
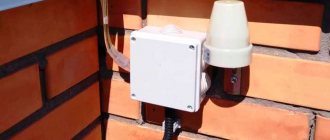
- Provide ventilation to the light source and ballast as they need to be cooled. Install them at a considerable distance from flammable devices.
Protect the lighting element from impacts, as when it explodes, fragments fly over a long distance. If the burner is damaged, mercury will enter the room, then it will need to be disinfected.
Connection diagrams
The set of elements for starting high-pressure gas-discharge lamps is called ballasts (ballasts). Recently, its electronic analogues (electronic ballasts) have appeared, in which all the parts are installed in one housing. They provide a more optimal operating mode for the lamps, but have exactly the same principle of operation. Therefore, for a better understanding, we will consider all the elements separately.
The DRL connection diagram is shown in the figure below.
Its main element is the ballast choke. This is an inductor on a ferromagnetic core, usually in the shape of a torus. Its task is to dampen the starting current, which in the first seconds after switching on is close to the short circuit current, because the distance between the main and auxiliary electrodes is no more than a millimeter.
The action of the inductor is based on the effect of the appearance of a magnetic flux in the core, the direction of which is opposite to the current that generated it. The inductor must be rated for the same wattage as the lamp. The capacitor is necessary in order to smooth out the current ripples that occur when the arc burns. In principle, it is an optional element.
If you do not have a factory choke, the DRL can be ignited by connecting an incandescent lamp of the same or higher wattage in series with it. As an option - an autotransformer, with which you can ensure a smooth start of the device. Typically, the arc combustion stabilizes 10-12 minutes after switching on.
The circuit for switching on DNAT is more complicated. In it you see an additional element - IZU (Pulse Triggering Device).
IZU is a thyristor continuous pulse generator. One of its diagrams is shown in the figure below. It is designed for point-to-point connection.
However, there is also a three-point option.
High pressure arc lamps have very high energy efficiency, especially HPS. In terms of it and the number of hours of continuous operation, they are practically not inferior to LED lamps. Moreover, their reliability is often higher. Therefore, it is too early to write off these light sources as technical rarities.
How to select and check ballasts for lamps
Any starting and control device (electronic ballasts/electronic ballasts) must necessarily correspond to the power of the lamp. For example, to connect a 400 W lamp, you need a ballast of at least 400 W.
When choosing a ballast, also pay attention to which lamps it is intended for, since the same device is not always suitable for starting sodium (DNaT/DNaZ) and metal halide (DRI/DRIZ) lamps. Moreover, it also happens that the electronic ballast, as a whole, intended for igniting HPS, does not ignite this lamp when connected. Therefore, it is best to purchase electronic ballasts/electronic ballasts and lamps at a time and from a reliable store where good consultants work. And before purchasing, be sure to ask your consultant if there are any problems with the interaction of the devices you have chosen; as a rule, they are aware of such things. In addition, you can always ask the seller (either an online store or an offline one) to check and connect the lamp to the electronic ballast/electronic ballast before selling.
If you buy a lamp in one place, and electronic ballasts/electronic ballasts in another (for example, at a metal market or electrical equipment store), then you can find out whether they will work together only at home after the connection.
Advantages and disadvantages
Like any other lighting devices, lamps with HPS lamps have their advantages and disadvantages. The advantages include:
- High light output. According to this parameter, HPS lamps occupy a leading position among gas-discharge lighting devices, although they are inferior to LED lamps.
- Long service life. The mean time between failures of HPS lamps reaches 15,000 hours. A powerful LED lamp with the declared brightness will work the same or slightly more.
- Relatively low cost. The technology for producing lamps is not particularly complex and has been established for a long time (the HPS lamp is almost 100 years old!), and the device itself does not contain expensive materials. In this regard, LED lighting devices are catastrophically behind sodium ones - they are tens of times more expensive.
- Anti-fog effect. The yellow-orange spectrum emitted by HPS lamps is poorly absorbed by water. Even in rain and heavy fog, the lighting quality remains at a fairly high level.
As for the shortcomings, they are very significant:
- Short . The HPS lamp emits light in a narrow yellow-orange spectrum. The color of almost all objects in this light is greatly distorted. It is precisely because of the low quality of light that sodium lamps are absolutely unsuitable for use in residential and industrial premises.
- High ripple factor. When using an electromagnetic ballast (choke), the light of the HPS lamp pulsates at twice the network frequency. In this case, the pulsation coefficient can reach 15-20%. When exposed to such light for a long time, a person's eyes quickly become tired. The problem is completely solved by using electronic ballasts, but their cost is often higher than the cost of the lamp itself.
- High operating temperature. During operation, the temperature of the HPS lamp reaches 300 degrees, and the ballasts (in particular, the choke) heat up to 100 degrees. This not only threatens serious burns if accidentally touched, but also requires special fire safety measures.
- Difficulty starting at low temperatures. Due to their design features, HPS lamps are difficult to start at low ambient temperatures. This problem is partially solved by using an external flask with a vacuum, but nevertheless, in severe frost the lamp may not start. For this reason, the use of HPS lamps in the far north is not recommended.
- Long ignition time. After switching on, the lamp barely shines and only gradually flares up as the burner warms up. HPS lamps need 10-15 minutes to reach operating mode. A hot lamp that has just been turned off will not start immediately: first the bulb needs to cool, and then start and flare up again.
That's probably all the information about high-pressure sodium lamps. Now you know how this device works, why it is good and what disadvantages it has. And if you decide to independently organize lighting using HPS lamps, then after reading this article, you will be able to select ballasts without outside help and connect the lamp to it.
Previous LED How to choose an LED garland for the street and home Next SpecializedConnecting DRL lamps of 125, 250, 400 Watts and their technical characteristics
Design features of HPS lamp and operating principle
Design of a HPS lamp
The operating principle of a sodium gas-discharge lamp is based on the chemical properties of sodium vapor, which, under certain conditions, are capable of emitting bright monochromatic bright light. The gaseous medium is placed in a special tube, which is called a burner. Heated sodium vapor has a destructive effect on glass surfaces, so high-quality borosilicate glass or polycrystalline aluminum oxide is used in production.
Each side of the burner is equipped with electrodes, the task of which is to create arc discharges that heat the sodium vapor. This entire structure is placed in a sealed glass flask, which ends with a threaded base of different types.
The sodium lamp burner is ignited by an electric arc, which is formed by electrodes. As a result, a large number of charged particles are formed in the channel. For better glow, the flask contains not only sodium vapor, but also mercury, xenon or argon. Today, lighting devices that do not contain mercury have already been developed, but their design features are extremely complex.
Ignition of lighting devices occurs at the moment when a high pulse voltage is applied to the cathodes. The lamp can glow dimly for no more than 5 minutes, then it will reach the optimal operating temperature.
You can't just throw away sodium lamps. Failed devices must be handed over to special collection points. If the flask is recycled with glass, the entire melt will be damaged due to the content of aluminum oxide and quartz in the composition.
Advantages and disadvantages of DNAT
The advantages of this type of lamp are visible from the table above. First of all, it has greater energy efficiency. The working resource is also significantly higher. Due to its compactness, it can be installed in smaller luminaires. The color temperature matches natural sunlight. At this spectral frequency, the luminous flux is not affected by snow flakes, raindrops, fog or dust.
It also has its drawbacks. The time it takes to reach full luminous flux is very long - in severe frost, DNAT 250 can flare up to full power only after 15 minutes (the time depends on the power of the light source). Due to the low color rendering index, interior items may have a completely different appearance when illuminated. During operation, flickering appears from an industrial network with a frequency of 50 Hz, which has a negative effect on the visual apparatus. You won't be able to work for long in this light.
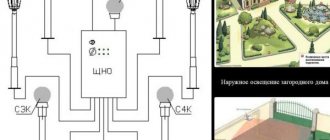
Application area
HPS is most widely used as street lamps for illuminating the territory of cities, parks, highways and other objects. Indoors, they are often installed to illuminate greenhouses for the growth of various crops; they can have a mixed range of light for different plants. At home, they are installed to illuminate seedlings and other house plants, flowers, etc. They have proven themselves well in lighting sports facilities, stages and other locations for public events.
Precautionary measures
When using sodium discharge lamps, it is important to remember:
- It is unacceptable to turn off the power to the element immediately after it has been turned on. You need to wait at least 1-2 minutes. Failure to comply with this recommendation may result in complete startup failure.
- The room with the lighting element must have a ventilation system. This is due to the increased heat transfer of the device and the presence of harmful substances in it.
- Do not touch the lamp or reflector with bare hands during operation as this will cause serious burns.
- It is advisable to use gloves when installing the flask. Fatty deposits when heated can cause the flask to explode. It is prohibited for water to enter open elements.
- The ballast used together with the light bulb can heat up to temperatures of about 150 degrees. It is recommended to place it under a fireproof casing to protect it from moisture and debris.
- Do not touch conductive elements with bare hands or allow them to get wet. It is also recommended to periodically check the wiring for damage, burns or short circuits. In this case, the wires must be special, designed to work with extremely high voltages.