“The light in your window, how I need it”
Alas, a person is not given night vision, like a cat - without light, even the native inhabitant of the house will feel uncomfortable, as if he lacks protection. In addition, a dark garden, dense bushes and flower beds attract all kinds of snakes, insects, and frogs at night. Street lighting today consists of entire systems of lamps and lanterns that perform both decorative and technical functions.
In the case of landscape decoration, lighting is installed throughout the local area and illuminates gazebos, benches, fountains, flower beds and flower beds. The color of the rays can be very different and will easily turn the green area into a fairy-tale world.
Lighting also has a purely technical function - the safety of the inhabitants. Proper calculation and placement of lighting fixtures allows you to walk through the garden even at night without the risk of tripping over a curb, catching on a tree branch, or missing the path straight into thorny bushes. Technical lights are installed at all important entrances and exits, along paths, near the garage and at the porch. Calculating the illumination of the territory allows you to economically cover the entire territory with light from lamps.
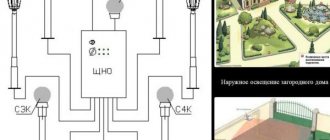
Quite high demands are placed on modern street lighting systems - for example, to illuminate the parking area, you should purchase lighting devices that turn on automatically when the gate or entrance gate is opened. At night, it is necessary to provide for the automatic switching on of the so-called security lighting, which will ensure visibility of all approaches to the house. In order to save money, the automation should also work in the morning, turning off all lights.
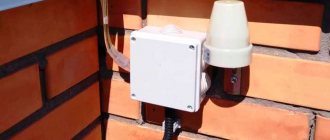
To ensure automatic switching on and off of lights when doors or gates are opened, lamps and spotlights with a built-in motion sensor are often used today. The most economical devices are modern lighting devices based on LEDs. On the sensors, you can set the response range, the glow time after switching on, the degree of natural light at which the device begins to operate, and the sensitivity of the sensor. And yet, be prepared for the fact that during strong winds the spotlight will constantly turn on due to the movement of tree branches and react to large pets. If the device is installed near the bedroom windows, it will interfere with sleep. Therefore, be sure to provide the possibility of completely turning off the device.
Calculation of outdoor lighting network
The cross-section of the lighting network conductors must be as follows:
— sufficient mechanical strength;
— passage of load current without overheating above permissible temperatures;
— required voltage levels at light sources:
— activation of protective devices during short circuits in the network.
The required minimum cross-section of the cable line conductor is calculated by the formula:
(8.15)
where is the sum of the moments of this and all subsequent sections in the direction of energy with the same number of wires in the line as in this section;
- the sum of the moments of all branches fed by a given section and having a different number of wires in the line than in this section;
— the torque reduction coefficient, depending on the number of wires (luminaires) on the branch from the main section, is determined according to table P.I.1 ;
— coefficient, depending on the power supply circuit and conductor material, is determined according to table P.I.2 ;
– the amount of available network voltage losses, depending on the power of the transformer at the transformer substation, its load factor and load cosφ, is determined by
Table P.I.3
With different distances between the lamps and unequal power of the lamps in them, the load moment for a three-wire network is calculated by the formula:
; (8.16)
-if the power of the lamps is the same, but there is a different distance between the lamps, then the moment is calculated by the formula:
; (8.17)
-if the power of the lamps and the distance between the lamps are the same, then
The load moment is calculated by the formula:
; (8.18)
– the load moment for a three-wire network with one or two lamps is calculated by the formula:
; (8.19)
where is the lamp power, the length of the cable line to the lamp and the number of the lamp.
— the power of street lighting fixtures is calculated using the formula:
; (8.20)
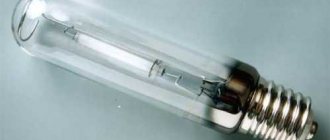
where KPRA is the power loss in the ballasts of the luminaire, for lamps with a DRL type lamp - KPRA = 1.1
The calculation of the external lighting network is carried out according to the busiest branch departing from the transformer substation.
Example of street lighting network calculation:
Figure 8.1 shows a diagram of one section of street lighting at a machine tool plant.
1. We calculate the load moment of the longest section of the network M (1-17), since the power of the lamps in the lamps is assumed to be the same RL = 125 W, and the distance between the lamps is different, we will make the calculation using the formula (8.17)
2. Using the same formula, all branches from the main section are calculated:
M(18-23); M(24-27); M(28-31); M(32-34); M(35-39); M(40-44); M(45-49)
3. Load moment with excellent number of wires in the line:
m(50) = RSV
4. The required minimum conductor cross-section is calculated using formula (8.15)
5. The nearest larger standard cross-section of the lighting cable line is accepted according to table P.Z.6
Selection of lamps and lanterns
Today, consumers have simply a huge selection of lighting fixtures. Classic lanterns on poles, wall and pendant lamps, bright spotlights and luxurious LED strips, autonomous lamps with short legs and much, much more.
And yet, when choosing street lamps, focus on the practical side of the issue and the standards for illumination of certain zones, which are given in SNiP (23-05-95). This document will help you choose the right lighting fixtures for parking lots, driveways, and playgrounds.
Solar-powered lanterns are perfect for illuminating garden paths - they will save you a lot of time and money on wiring.
They can be arranged completely chaotically, highlighting both entire compositions and individual shrubs. Decorative lanterns in the form of garden figurines are also perfect for the garden. It is better to illuminate the porch of the house with lanterns on brackets mounted on the front side - they will not take up much space and will cover the largest lighting area.
Calculation of the illumination scheme of the local area must take into account some mandatory points. So, when laying cables in trenches, the following distances must be observed:
- cables are laid no closer than 0.6 m to buildings;
- maintain a distance of 0.5 m from the pipeline;
- from parallel cables – from 0.3 to 0.5 m.
The depth of the trench is at least 0.7 m. If you intend to lay the cable through the air, then do it at a height of 3 m from garden paths and 6 m from the roadway. The lighting radius should not overlap, otherwise you will overpay for electricity. All switches should be hidden in places protected from precipitation, and if this is not possible for a number of reasons, take care of a reliable plastic cap or container. Be sure to ground all devices. Don't forget about your neighbors - if light shines through their windows or even into their territory, this may cause a scandal.
Example of street lighting calculation
To calculate street lighting, you need to know the standard illumination (in lux, lx) that is required for a specific area. The value can be found in SP 52.13330.2016.
Example - it is necessary to organize comprehensive lighting for an area measuring 140x150 m. The standard illumination (E) for this object is presented in clause 7.5.1 of SP 52.13330.2016, in particular in table 7.11. It is at least 10 lux.
Formula for calculation
To calculate the number of lamps, you must use the following formula:
N = E S Z k/(F ɳ),
where N is the required number of luminaires, E is the required illumination, S is the area, Z is an indicator of uneven illumination of the territory, k is the coefficient for taking into account long-term operation, F is the luminous flux, ɳ is an indicator of the reflectivity of objects.
How to find each value
Where to get each value:
- E – 10 lux at ground level.
- S – 21000 m2.
- Z – is defined as the ratio Eav/Emin. The coefficient is taken equal to 1.1, since the minimum illumination should not differ from the standardized value by more than 10%. How is Z calculated: if we take Eav as one, then Emin should be at least 0.9, i.e. 100 – 10 = 90% (this is stated in clause 4.1 of SP 52.13330.2016), then the ratio Eav/Emin is 1/0.9 = 1.1.
- K – taken equal to 1.2, takes into account some deterioration in the characteristics of lamps over time.
- F – luminous flux is calculated depending on the characteristics of the selected lighting device. For example, it will be an ATR-STREET-ELL40 street lamp with a power of 350 W and a luminous efficiency of 130 Lm/W. The luminous flux F will be equal to 350 · 130 = 45,500 Lm.
- ɳ – the reflection coefficient for light gray asphalt laid on the area is 0.5.
Having the numerical values of all parameters for calculating street lighting, you can calculate the number of lamps:
N = 10 · 21000 · 1.1 · 1.2/(45,500 · 0.5) = 277,200/22,750 = 13.
Calculation result
Thus, as a result of calculating the illumination of street lighting for an area of 140x150 m, it turned out that 13 lamps are required to provide 10 lux at ground level. Now all that remains is to correctly arrange them throughout the entire area. The distance between street lighting fixtures is selected so that there are no shading areas. With the chosen arrangement, it is necessary to determine whether the required illumination is provided. If not, the layout needs to be adjusted.
We calculate the number of lighting fixtures
If you set out to calculate the costs of lighting fixtures in advance, forget about measuring “by eye” - you risk overpaying for extra lights. There is a special calculation that takes into account the luminous flux utilization factor. To select the number of required lamps, use the following formula: N = E * S * z * k / (F * η).
- N is the required number of lamps.
- E – required minimum illumination, measured in lux (lx).
- S – illuminated area, m2.
- z – coefficient taking into account the unevenness of lighting produced by a certain type of lamp. For example, for LED and fluorescent lamps the coefficient is 1.1, for incandescent lamps – 1.15.
- k – safety factor. Takes into account a possible decrease in lamp brightness due to prolonged use and dirty glass. For LED lamps it is 1.2, for fluorescent lamps – 1.5.
- F is the amount of light emitted by one lamp, measured in lumens (lm).
- η is a coefficient that takes into account the reflectivity of objects located next to the light source.
So, as an example, let’s calculate the number of lighting fixtures required for a parking area of 150 square meters. m. First, let's determine the luminous flux F that the lamps emit. To do this, we will use the approximate data that can be found in the description of the lamps. We are interested in P – lamp power in W and K – luminosity coefficient per 1 W of power. For example, an LED spotlight has a power of 40 W and a luminosity coefficient of 90 lm/W. Let's multiply these values to get F: F = 40 * 90 = 3600 lm.
The coefficient η can be found in special instructions CH 541–82. In our parking lot, the surface is made of light gray concrete, for which η = 50%. According to the standards, the minimum illumination for areas such as parking lots should not exceed 10 lux - in the formula this is E.
So, we have found all the necessary data for the calculation, now all that remains is to calculate the required number of lighting devices for the site we have chosen.
N = E * S * z * k / (F * η) = 10*150*1.1*1.2/ (3600*0.5) = 1.1
As you can see, approximately one powerful 40 W LED spotlight or two 20 W lighting fixtures will be quite enough to illuminate the selected area.
Example of outdoor lighting calculation
Let's look at specific examples of the calculation scheme for calculating outdoor lighting.
Example 1: street and yard lighting
Project data: street and yard lighting. You need to calculate the required number of lamps. The following formula is used for this:
N=E*S*z*k/(F*ɳ)
In this formula:
N is the required number of lamps;
E – indicator of the minimum degree of such a definition as illumination;
S – area;
Z – indicator of uneven illumination of the territory;
K – long-term use accounting factor;
F – indicator of emitted light;
ɳ is an indicator of the reflective abilities of elements.
Keep in mind that the necessary physical characteristics and parameters of lighting devices are indicated in their technical documentation.
Let's say we need to calculate the required number of lighting fixtures in the local area of a new building measuring 250 square meters. m. As a rule, LED spotlights are used to illuminate these areas. Their parameters will be taken into account.
So, first, we fix the value of F. This data is written in the instructions for the spotlight.
Secondly, we find the device power values and the possible luminosity coefficient. In our case, these indicators remained at 40 W power and 90 lm/W luminosity.
Thirdly, we find the value of the network flux F=40*90=3600 lm.
Fourth, we need the value of ɳ. In our case, given that the coverage of the territory is light gray, its reflectivity is 50%.
Fifthly, let's take the standard lighting level - 10 lux.
All that remains is to substitute the numerical values into the formula:
F=10*250*1.1*1.2/(3600*0.5)=1.8
Rounding the resulting value, we get the answer - for a common area of 250 sq.m. It is enough to install 2 LED spotlights with a power of 40 W.
External entrance lighting
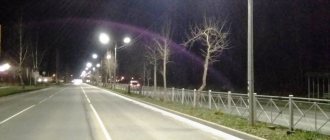
Example 2: roadway lighting
Roadway lighting.
Calculate the required distance between lamps 9 m high on a roadway 6 m wide. The lamp models used are RKU01-250. Installation lamps - DRL-250.
The distance between lighting fixtures (luminaire pitch) is calculated using the formula:
Ф=L*K*π/η
In this formula:
L – normalized brightness coefficient of the coating;
K – safety factor (incandescent);
η – parameter for using the luminous flux.
To carry out the calculations, you will also need special data from luminaire utilization factor tables. Tables can be found in technical literature.
First of all, the normalized coverage coefficient in our case will be equal to 0.4 cd/m2.
Next, we find the ratio between the width of the road and the height of the lamps: b/h = 6/9 = 0.66.
We determine the luminous flux coefficient from the table: η = 0.044.
The pitch of the lamps in this case will be equal to: Ф = 0.4*1.5*3.14/0.044 = 42.8.
All that's left to do is install the lights!
The calculations are left behind, now it’s time to start bringing the project to life. Having found out the number of lighting fixtures, take a plan of your summer cottage and distribute them evenly throughout the area, maintaining the required distances. Then it's time to install supports or drill holes in the walls for mounting, if we are talking about wall-mounted units. The most difficult thing is with the supports - for the work you will need a building level, cement, sand, fine crushed stone, a plastic pipe, and wooden formwork.
How to install lights - step by step diagram
Step 1: Dig a well
Using a brace, dig a well with a depth of about 70 cm. At the bottom of the well, add a layer of sand and crushed stone with a total thickness of 20 cm. This cushion is carefully compacted, after which wooden formwork is installed - it should rise above the ground level by 10–20 cm. The formwork should include the exit point of the plastic pipe, which will serve as a passage for the underground cable to the lamp through the concrete base. The ends of the pipe must be sealed so that the solution does not clog it.
Step 2: Pouring the Foundation
Then a standard batch of concrete is mixed and poured into the well with formwork. After compacting the solution, an anchor is installed vertically in the center of the future support, which will serve as a fastener for the future lamp post. The solution must harden completely - this may take several days. Remember to water the concrete in hot weather to prevent it from drying out and cracking.
Step 3: Connecting the Lights
The supports are attached to the anchor at the base, then the wiring is supplied and the lights are installed. Don't forget to provide light switches if necessary. The wires should be connected using terminals and heat shrink tubing, which will provide the best degree of waterproofing.
Step 4: Check
After installing the lighting fixtures, do not forget to check the connections, zero-to-phase resistance, and operation of the switches.
To install lighting fixtures, there is no need to contact professional electricians - by following safety rules, you can complete this task completely independently.
- Author: Mikhail Malofeev
Rate this article:
- 5
- 4
- 3
- 2
- 1
(3 votes, average: 2.7 out of 5)
Share with your friends!