Have questions ? Call!
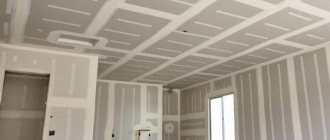
In this article I will talk about various operations for leveling and removing wall defects using plaster. Here are its varieties with their strengths and weaknesses. The principles of working with surfaces made of different materials (brick, concrete, gas blocks) are also outlined.
Due to the unevenness of the walls, the quality of the finish can be seriously affected. Therefore, it is important to know how to properly plaster walls, because this measure corrects many shortcomings.
You might be interested
Finishing work. Stages of finishing work How to properly glue wallpaper. The foreman shares his experience. How to fill the floor in an apartment with your own hands
Measuring room parameters
To understand how quickly the walls will be leveled, you should estimate the amount of work.
At this stage it is necessary:
- Measure the parameters of the room, or better yet, depict them graphically on a blank sheet of paper.
- Measure the height of the walls to know the total area. After this, it will be clear how much material will be needed to level the walls.
- Calculate the parameters of differences in the wall surface. A level is applied to the operation. We attach it to the wall. This will help to maintain a strictly vertical position and determine the parameters of interest.
The count should be taken from the wall containing the doorway. When we begin the alignment procedure from another wall, a significant asymmetry often forms in the door area.
After all operations, you can begin the main work.
Materials and tools
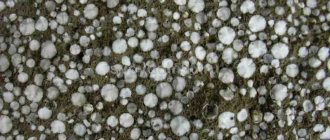
Today, the range of plasters for leveling surfaces is huge. When choosing, you need to start not only from one brand or another, but also know the strengths and weaknesses of each type. This makes it easier to decide which plaster is best suited for repairs.
Today we most often use the following types:
- Plaster. Great for indoor spaces. Disadvantage: poor moisture resistance.
- Cement. They are resistant to high humidity and are much cheaper than item 1. Their disadvantage is serious expense.
- Combination of items 1 and 2. It tolerates any humidity and is quite plastic, but has impressive price tags.
When asking how to plaster walls with your own hands, it is important to follow the suggested steps. To get started, provide yourself with the following arsenal:
- spatula,
- ironer,
- building level,
- as a rule,
- trowel,
- hatchet,
- grater
Have questions ? Call!
Plaster application technology
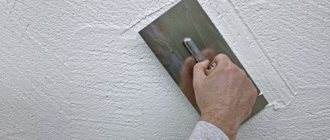
Plaster, regardless of its type, is applied the same way. Using a trowel, you apply the mortar evenly along the edge of the trowel and apply it to the walls in a semicircular motion. If you are leveling the walls, then you need to check them with a rule to prevent “pits” and “humps”.
Decide for yourself how best to plaster the walls. Many people neglect this or that type of plaster, thereby saving their money. Remember, plastering walls is done once, so there is no point in saving at this stage. We recommend applying cement plaster first and then using gypsum plaster, but a lot depends on the condition of your walls.
Thus, you learned how to properly plaster walls with your own hands.
Also find out how to putty the walls?
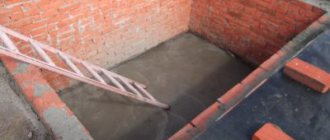
Preparing the surface for repair
The plane of the walls must be thoroughly processed, otherwise the plaster will not lie firmly on the curved surface. Do not apply a new coat unless the old finish has been removed. Before work, you should familiarize yourself with the rules of how to plaster walls with your own hands. This activity requires:
- Remove old sections of wallpaper and places where paint is visible. The wall surface must be smooth and clean.
- Tap the wall with a hammer to identify bad areas where the previous plaster layer may collapse. Sometimes it can affect the entire wall area, so it must be removed completely.
- Remove oily elements. The reason is that because of them the plaster material does not adhere well to the surface.
- Eliminate cracks and other defects from the wall surface. Their presence is fraught with the collapse of a new layer. Putty will help here.
- Use a construction vacuum cleaner to remove any adhering debris, as the surface should be smooth and not interfere with the new layer.
- Prime the walls well to give them roughness. This way the plaster layer will adhere better to a flat surface. At a minimum, two coats of primer are applied.
After this, you can begin repairs.
Customers often ask the question, at what temperature can they plaster? Answer: Any conditions above zero are suitable.
Features of preparing different surfaces
Various materials can be used to create a wall: brick, concrete, aerated concrete, etc. Plastering the first ones is quite difficult.
How to properly plaster such walls with your own hands? What is required here is:
- Using a metal brush, remove dirt, including grease. After this, wash the surface with detergent.
- Apply primer to a clean surface. Approximately 2 layers. The next layer is applied after the initial one has completely dried.
- Reinforcement. A metal mesh is used. It is secured using dowels, with special caps every 30 cm. I do not recommend plastering here without a mesh.
- Fastening metal vertical slats to walls with cement. We set them strictly according to the level using the rule.
In the dilemma of what is the best way to plaster brick walls, base it on the humidity levels in a particular room.
Working with a concrete wall has its own characteristics.
Here the sequence of actions is as follows:
- Complete removal of old wallpaper. The surface remains clean and free of debris. We use a spatula.
- Removing paint from a wall. We wet it with warm water and then remove it with a hammer.
- Repairing cracks and other damage. To do this we use putty.
- Thorough priming of the surface. The primer creates a film that serves as a link between the concrete and the plaster solution.
- Installation of beacons
If you don’t know how to plaster the walls in an apartment under wallpaper, then I recommend gypsum or cement composition.
Before plastering, we fill the wooden surface with shingles. Before this, cover the surface with felt or matting.
Plastering walls
If all the preparatory work has been carried out with due diligence, then the next stage of our work is the actual plastering of the walls under wallpaper or other coating of your choice.
Attention! If you are working in a room with uneven walls or it is necessary to plaster the walls before painting, then it is better to carry out surface plastering work using so-called beacons.
Since when painting or any further processing of walls it is necessary to obtain the most even surface of the wall, then the application of the plaster mixture must be done in an even and uniform layer, for this the installation of beacons is necessary.
Beacons for walls made of wood will be a fixed mesh or wooden shingles; for surfaces with brickwork or consisting of concrete, it is possible to install metal guides or beacons made of building or gypsum mortar.
Installed beacons under plaster
Stages of work carried out
- plastering walls with your own hands using beacons begins with marking the surface to be repaired - at a distance of no more than 20 cm, we drive a self-tapping screw with a weight onto the ropes at the top of the wall, and fasten another nail at the bottom of the improvised plumb line at the required level;
- between the installed screws we throw several piles of mortar and secure the metal profile of the lighthouse;
- according to the proven scheme, we install metal beacons at the end of the wall, in the middle and between them, observing the rule that the distance between the beacons is kept at 1 meter;
- after the mortar has hardened on the lighthouses, rough plastering of the walls is carried out - the construction mixture is applied over the entire surface of the lighthouses, protruding beyond their boundaries by no more than 2-3 cm;
- using the rule, we fill the remaining voids - we apply plaster from the bottom up, thus filling all the voids and removing any excess mortar;
- plaster is applied to the walls using the rule until the surface begins to look perfectly smooth, and, of course, within the maximum possible thickness of the plaster layer - up to 3 cm, after which we wait for the construction mixture to dry completely and begin further processing surfaces - painting, gluing or processing with other finishing materials.
Using the rule for plaster
Features of the manufactured plaster mixture
We have already talked about the types of mortar produced, now we will note some subtleties depending on the composition of the plaster:
- Cement-based plaster is prepared from 3 parts sand and 1 part cement mixture and is used within an hour after preparation. That is why you should be extremely careful and prepare only the required amount of the mixture, otherwise the remaining composition will dry out and its use will be impossible.
- A cement-lime mixture is made from 1 part cement, 5-6 parts sand and 1 part lime composition.
- Gypsum plaster made from 3 parts of lime diluted to a dough and 1 part of powdered gypsum dries and hardens the fastest, so it is recommended to make them before the application process itself and in small quantities.
Display of beacons
These are important guides that set the strict verticality of the entire surface. Thanks to the profiles, the plaster layer lies flat on it.
How to plaster walls using beacons? Here it is important to mark the points correctly, maintain evenness and other principles. More on this below.
In this work, the specified criteria should be adhered to. The process itself consists of the following stages:
- Creating signs on the wall. We will focus metal beacons on them.
- Horizontally apply the rule in the area of the risks taken. Using a marker, mark points until the wall is completed.
- Designation of vertical lines. Here we use a long rule with a mounted bubble level. The lines must be completely visible: from the ceiling to the floor.
- Creating an “Abstract Plane”. We build profiles from it. On the adjacent wall we mark approximately 5 cm.
- Location of the laser builder on the floor. Its optimal position: between the profile lines.
- Create alignment symbols. We make them on a rule that has an impressive length.
- Application of this rule to all features running along a vertical vector. Here you need to make sure that a planning layer of 1 cm is obtained. Thus, the preparation of the area for the profile is completed.
You might be interested
Finishing work. Stages of finishing work How to properly glue wallpaper. The foreman shares his experience. How to fill the floor in an apartment with your own hands
After this, we proceed to installing beacons ourselves. This process consists of the following steps:
- Preparation of the composition for fixing the guides. We use the same mixture that we use when repairing the surface.
- Applying the composition along the initial line of the lighthouse. Apply the product in slides. Their height should exceed the intended plaster layer.
- Using a profile that is optimal in terms of parameters. We heat it into the solution.
- We press the rule with the marked marks firmly against the profile. The position of the beacon should allow the builder's beam to follow exactly the designations of the rule. This way we eliminate the appearance of distortion.
- Let's move the rule in our direction. We act very carefully, not allowing the profile to shift.
- Elimination of excess mortar along the entire length of the profile. It is important here not to disturb his position.
- Additional check of the beacon position. It should be carried out until the composition dries completely.
We also often use string installation of lighthouses.
We screw self-tapping screws into the fence, and wrap wire around them, which protrudes beyond the guide. We pull it on. There remains free space under it, which we then fill with plaster mixture.
We usually use thermal insulation in the walls, which makes the room warmer and protects from extraneous noise. Therefore, in the dilemma of whether it is possible to plaster with Penoplex, the answer is only positive.
Wall plastering technology
Before starting work, reinforcement should be carried out. This is a necessary measure, because we do not recommend plastering without a mesh. Then we begin preparing the solution.
The following is an algorithm of actions. This is the answer to the dilemma of what is the best way to plaster brick walls inside a house:
- We make the solution in small quantities, since it hardens quickly. You can plaster the wall with cement mortar or gypsum mixture.
- We sift the sand to remove any debris and mix it with dry cement in a 3:1 ratio.
- Add water and gradually stir the solution until it is completely cooked.
- We thoroughly wet the surface of the wall and plaster until the composition is finished. After this, the treated area is leveled using the rule.
- Using a trowel, apply the finishing layer. Its approximate density is 2 mm.
Types of plasters on cement
“Knauf”, in addition to standard plaster, produces a special mixture called “Adhesive”, which is used for spraying the base and has high adhesive ability. The company also produces Grünband plaster filled with expanded polystyrene; the material retains heat well and has good water repellency.
Ivsil produces cement decorative plaster and a special type of mixture - a thermal insulation coating with a porous filler. The products of this company contain polymer additives that add plasticity to the material.
Ceresit makes high quality plaster that has excellent adhesion to any mineral base. The solution can fill deep uneven areas and can also be used for finishing work.
“Perfekta” – coatings that level concrete bases and bricks. If there is a problem with how to plaster brick walls, this solution is suitable in such a situation for both external and internal work.
Domestic produces lightweight cement plaster, suitable for any type of base, it is durable and has good thermal conductivity. The Hercules brand has the lowest price of the mixtures presented, but is quite high quality. Suitable for any surface.
Before plastering the walls, it is necessary to apply a primer of the same brand as the plaster used. This ensures better optimal adhesion of the coating to the surface.
Plastering walls in the bathroom
In this room it is also necessary to tidy up the surface of the walls and install beacons.
How to plaster bathroom walls under tiles? There are two types of tools used here:
- a gypsum composition that perfectly absorbs moisture.
- cement, coping with any level of humidity.
The order of work is as follows:
- Thoroughly clean the surface of the old coating so that the wall is smooth
- Then the wall is wetted with water. After this, a liquid mixture of at least 5 mm is applied with a trowel.
- After complete drying, apply a finishing layer of maximum 2 mm.
- We level it with a spatula, wait for it to dry completely, and begin finishing operations.
What should you consider when plastering walls?
To get a high-quality result (perfectly smooth walls), you need 4 components of success:
- experienced master plasterer;
- high-quality plaster mixture (you need to carefully familiarize yourself with its composition and the manufacturer);
- proper preparation of the solution;
- proper storage conditions for the plaster mixture before starting work (no moisture allowed).
In addition, it is very important to consider the material of the walls. It could be foam block, wood, brick, aerated concrete - each situation requires a special approach.
In addition, you need to clearly understand the purpose for which the walls of a given room are finished with plaster. Plastering walls under wallpaper is a slightly different situation than plastering bathroom walls under tiles. In this case, you need to properly plaster the walls with gypsum plaster so that the main decor (tiles or wallpaper) sticks.
Foam concrete plaster
We carry out this work only at positive temperatures. What is required here is:
- Thoroughly clean the wall from dirt and dust.
- Degrease oil stains and apply primer.
- Install the mesh and pull the line diagonally so that you can see the required plaster layer.
- Moisten the wall with water and apply the mixture with a trowel. We align it with a rule.
- Remove excess plaster while the layer dries
- Apply primer to give a smooth surface.
- Using finishing putty, bring the wall to perfect condition.
Have questions ? Call!
How to plaster a wall with gypsum plaster
This is not a difficult process at all. You don't spend a lot of time on it. Here you can do without specialists.
How to plaster drywall? You must follow this algorithm:
- To obtain a gypsum mixture you will need water and powder.
- After preparing the solution, you need to moisten the surface with water. And use a trowel to spread a thick layer of the mixture so that it hangs slightly over the wall.
- If the plaster is applied correctly, then after leveling all the cracks will be filled with the mixture.
When asking how to plaster drywall, rely on its resistance to moisture. This is the key criterion.
Plastering walls made of foam blocks
This is quite a complex process. The work order is as follows:
- Remove all stains from the wall.
- Apply the primer with a roller. Here we use only a product with deep penetration.
- We install a polymer mesh and install beacons if the thickness of the plaster turns out to be serious.
- Wet the wall with water. Then we throw in the solution and level it with the rule.
- After the mixture has dried, we eliminate unnecessary lumps and apply finishing putty. Thanks to her, the wall takes on an ideal look.
The best way to plaster walls
There are several types of plaster. Plaster can be gypsum, cement-lime and cement-sand. Each has its own pros and cons. Now let’s figure out what’s the best way to plaster walls.
Gypsum plaster is the best option for indoor plastering. It sticks firmly to the surface and is easy to handle when doing plastering work. This type of plaster is relevant if the plaster layer does not exceed 5 cm. Otherwise, it is better to use drywall.
Cement-lime plaster is very popular in plastering the walls of cottages, where there are large areas of walls, there is a place to store lime mortar and there is a place for a concrete mixer. Cement-lime plaster is as warm as gypsum plaster but costs an order of magnitude less.
Cement-sand plaster is heavy and cold. Its only correct use is plastering facades. Plastering indoors with cement-sand plaster is not profitable either from a financial point of view or in terms of the convenience of plastering work.
Tongue-and-groove slabs
Recently, their popularity has increased significantly. They are used to install partitions in the apartment. In this regard, questions often arise such as: do tongue-and-groove slabs need to be plastered?
The fact is that this innovative material can be created on the basis of silicate or gypsum. There are standard and moisture-resistant modifications. These products do not burn and are highly environmentally friendly.
And if they are installed correctly, then the question of whether tongue-and-groove slabs need to be plastered will only give a negative answer. It is enough to prime them and putty the joints.
How to properly plaster walls made of gas silicate blocks
Such materials are widely used in finishing works. To professionally plaster them, we carry out the following operations:
- We thoroughly impregnate the entire working area with a special primer. It will close the surface pores and will not allow moisture to be absorbed from the plaster mortar.
- We install the reinforcing mesh.
- We are preparing a special composition. In this process we rely on the manufacturer's instructions.
Also, aerated concrete is often used to build the walls of houses, which is inferior in all respects to gas silicate, but superior to it in moisture capacity.
How to plaster aerated concrete walls indoors? Observe the key criteria for applying plaster to the surface:
- The first layer (“spray”) is applied with a liquid solution. Its maximum density is 5 mm.
- When the initial layer dries, we cover it with a thicker layer of soil. This forms the thickness of the main coating. Then we level it. We are waiting for it to dry completely.
- Apply a third layer to areas that need leveling. Then we grout to obtain a smooth surface.
You might be interested
Finishing work. Stages of finishing work How to properly glue wallpaper. The foreman shares his experience. How to fill the floor in an apartment with your own hands
How to plaster a wall: step-by-step instructions
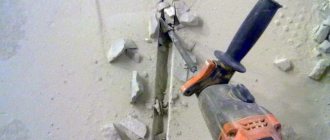
Cleaning the walls
Remove old wallpaper and wood blocking from the walls. The old plaster needs to be tapped; if there is a dull sound, this area must be removed, otherwise sooner or later the old composition will fall off along with the new one. Deep cracks must be repaired.
After removing old materials, the wall must be sanded with a wire brush, then cleaned of dust using a vacuum cleaner or compressor. When working, use a protective mask and ensure the room is ventilated.
When the walls are free of everything unnecessary, treat them with 2 layers of primer. The second layer can be applied only after the first has dried.
For concrete walls, a “concrete contact” type primer is used, which imparts a pronounced roughness to the surface. For bricks and blocks - deep penetration composition.
We install beacons
Beacons are the basis of alignment. The success of the application of the material and the repair as a whole will depend on how you install them.
Draw the entire room with vertical stripes at a distance of 1.2 meters from each other, starting from the corner of the wall, retreating 15 centimeters from it.
Then install the laser level against the wall, leaving a margin of 6 mm for the beacon.
The lighthouse is attached using plaster patches. Place the beacon along the laser strip using a building level. After fixing the beacon, it must be cleaned of any adhering mixture.
How to prepare a solution for plaster with your own hands?
If you are wondering what is the best way to plaster brick walls, then use a clay product. This is the best option for rooms with dry humidity.
Features of the work are as follows:
- A lot of time is spent on production. The reason lies in the long soaking of the clay.
- Dry clay is cleaned and filled with water. Then it is mixed and left to infuse for approximately 24 hours.
- The mass should be thoroughly kneaded until it reaches the consistency of sour cream. If necessary, add water.
- We remove solid impurities from clay. To do this, rub it through a sieve,
- Be sure to add sand to the finished mass in appropriate proportions. This measure significantly increases the storage period of the created product. Just periodically moisten it with water.
You can also use the following compositions:
- Based on lime and gypsum.
- Cement.
Gypsum plaster
Companies that produce ready-mixed cement usually also produce gypsum plaster. This type of material is used quite widely, although it is not suitable for wet rooms.
It is recommended to use a gypsum-based solution if the ultimate goal is to create a completely smooth surface. The material has high plasticity, but quickly becomes hard, so when applying it you need to work quickly, mixing the plaster in parts. The solution cannot be used for external use.
To understand what is better for plastering walls, you need to start from the type of room and the quality of the surface on which the plaster will lie. If the mortar is based on cement, it can be used in rooms with high humidity, but after puttying the walls will also have to be primed. The gypsum mixture can make the surface even and smooth; after this treatment, the walls are ready for whitewashing, painting or wallpapering. But the mixture has a significant drawback: it is afraid of moisture, so it is only suitable for dry rooms.