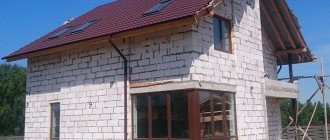
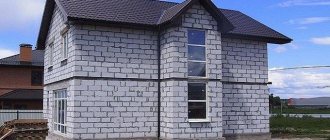
Today private low-rise houses are being built from foam blocks. This material has become widespread for many reasons. Firstly, it is light in weight. Secondly, it is quite inexpensive. Thirdly, with its help you can quickly erect a building that will have excellent performance characteristics.
But after all the work is completed, you also need to think about how to decorate the facade. The most common material for this is plaster. It can have special properties, in addition, it makes the walls outside protected and aesthetically attractive.
Plastering foam blocks on the outside can be done with different compositions. Some of them are suitable only for professional use, as they are difficult to apply, but others are well distributed over the surface and are elastic, which means they are suitable even for beginners.
What is a foam block
Foam block is a product made of lightweight cellular concrete, which is distinguished by its rather impressive size and low weight. The material is based on:
- cement;
- water;
- sand.
The cellular structure is formed due to hydrogen released during chemical reactions. Foam concrete is a breathable material, which makes the walls vapor permeable. Among the main types of foam blocks, the following should be highlighted:
- structural;
- thermal insulation;
- structural and thermal insulation.
The first of them are suitable for the construction of load-bearing walls, while the other two types can be used for partitions and insulation.
Why do you need foam block plaster?
External foam block plaster is necessary to protect the house from negative factors, such as precipitation, temperature changes and humidity. In addition, foam blocks are not very attractive from an aesthetic point of view. Therefore, they are covered on the outside with a layer of plaster, which plays not only a functional, but also a decorative role.
Such work is also carried out in order to increase the service life of the building and maintain a suitable indoor microclimate for humans. Walls made of foam blocks can be plastered not only from the outside, but also from the inside. These works should not interfere with natural air exchange. Therefore, it is so important to choose the right building material for cladding.
Plastering on the outside of the foam block is also done for the purpose of eliminating defects in the masonry if unskilled craftsmen worked on the construction of the house.
Attention: dew point
No matter how thick the foam block is, it will cool in winter; additional cold will begin to penetrate through the masonry joints. The plaster layer reduces cooling, but at the same time retains heat in the room. A temperature difference is formed under the inner plaster layer.
If the plaster of the walls made of foam blocks inside the house is made in too thick a layer, then a dew point is formed under it - an area where the cold environment comes into contact with the warm one. Temperature differences will cause condensation. In the future, the accumulation of moisture will lead to the appearance of mold and peeling of the decorative layer.
The only way to combat an undesirable phenomenon is to prevent the conditions for its occurrence. To ensure that moisture leaves the house without lingering and that thermal conductivity is uniform, it is important to maintain the correct proportions of layers. The outer plaster for foam blocks should be twice as thin as the inner layer (5-10 and 10-20 mm, respectively). Maintaining the proportions will shift the dew point outward and keep the interior lining intact.
Applying the first layer Source mr-build.ru
See also: Catalog of companies that specialize in finishing materials and related work
How to plaster foam block
Before starting work, you need to decide what to use to plaster the foam blocks on the outside of the house. Since the wall material is gas and vapor permeable, and also absorbs water well, the mixture must be selected so that it does not exclude natural air exchange. The composition must have a high degree of adhesion. Water absorption should be less than 5%. The material must have high crack resistance and frost resistance.
Before plastering foam concrete walls, you should make sure that the composition will dry well when wet and will be able to withstand more than 200 cycles of wetting and drying. The most common option for brick houses today is a cement-sand mixture, but it is completely unsuitable for cellular concrete. Although this composition is cheap, it is not worth choosing, since in a few years it will require updating.
How to plaster foam blocks inside the house
Interior plaster is needed to prevent mold and mildew from appearing on the walls. Such finishing can increase the resource of the material and create a favorable indoor microclimate. To carry out the work, you can use mineral, acrylic or silicate mixtures.
The latter are made on the basis of synthetic resins and have good elasticity, which means they are perfectly distributed over the surface. The vapor permeability of such compositions is quite high. As for silicate plasters, they are produced on the basis of liquid glass, which ensures their excellent performance characteristics. For internal plastering, you can use cement-lime compositions; they will provide good adhesion.
How to plaster foam blocks outside the house
When choosing plaster to apply to the facade, you should be more careful. For this type of work the following mixtures are used:
- silicone;
- silicate;
- lime-cement.
The latter are the cheapest, but they are also worse in quality than the others. The presence of lime makes it possible to achieve vapor permeability and plasticity and gives the main disadvantage, which is the need to apply a preliminary layer, the thickness of which is 0.5 cm. This increases the weight of the cladding. In addition, such a layer also increases material consumption. After this finishing, it is also necessary to paint the walls.
When consumers think about the question of how to plaster foam blocks outside the house, they often also pay attention to silicate mixtures. Such compositions inhibit biological processes, do not attract dust, and after drying return to their original color. The material is sold in containers, already tinted, but in a rather limited number of shades. This drawback can be solved by additionally painting the facade.
If you do not want to carefully care for the walls after covering them, you should choose silicone plaster, which is also called self-cleaning. With its help you can create a favorable microclimate indoors. The layer is resistant to low temperatures and tolerates exposure to sunlight well.
The adhesion of this mixture is excellent, after drying the layer is durable, and the material is sold in a wide range of colors. You can also use acrylic plaster to improve the facade, but it does not have good vapor permeability.
REASONS TO USE PLASTER
Plaster for foam blocks in this case is a very suitable option. But it must be taken into account that the surface of foam concrete has poor adhesion.
This means that the usual cement-sand or lime plaster mixture will not work here. It simply will not stick to such material. Therefore, you will have to use a special plaster composition.
It will allow you to do the following:
- improve the appearance of a foam block house;
- enhance the moisture protection of the material;
- ensure vapor permeability of walls;
- protect the surface of the blocks from temperature changes;
- improve the thermal insulation of the house;
- prevent walls from becoming saturated with dust and carbon dioxide - this process can lead to shrinkage of the building over time.
But to achieve the desired effect, you need to choose the right plaster. Read below about what type of plaster should be used on foam blocks.
Surface preparation
We apply the solution only after preparing the walls. To do this, they are coated with a primer, regardless of whether work is being done outside or inside. This will reduce water absorption of the surface, enhance adhesion and remove dust from the wall. Universal primers or deep penetration formulations are ideal. You should pay attention to the purpose of the mixture; it can be intended for internal or external work.
Attention! You should not use the common and familiar concrete contact in the case of cellular concrete, since the mixture during the drying process forms a film that does not have a sufficient level of adhesion.
The primer is applied in several layers, between which you should wait the time necessary for drying. To apply the composition, you can use both brushes and a roller. You can speed up the process using a sprayer; even a garden version will do. If the facade has an impressive area, it is better to use a spray gun.
Preparing the base
Just like working with any other surface, plastering foam block walls outside the house requires preliminary cleaning of the surface from dust, debris, and stains. Use a wire brush for a more thorough cleaning. It wouldn’t hurt to be able to use a drill for these purposes, where you can attach the attachment.
The next stage is a primer, which will be applied in several layers to carefully close the deformations and improve adhesion. The second layer is applied after the first has dried.
Don't underestimate the surface priming process. It determines how well the applied material will adhere.
After the walls are prepared, you can begin mixing the mixture. You can do this manually, or you can use a drill and a special attachment. In this case, the composition will be more uniform, without lumps.
How to properly plaster walls made of foam blocks
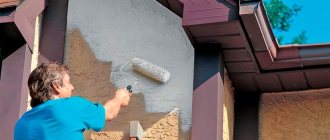
Before plastering the foam blocks from the outside, it is recommended to strengthen the mesh on the surface, which will reinforce the layer. After this, the plaster mixture is diluted in a convenient container. If a mechanized method is used, the tool is set at medium or low speed so that the composition does not become saturated with air. The material is applied from bottom to top. In this case, you can use a small spoon or a spatula. The final layer thickness should not be more than 2 cm. When carrying out interior work, this value is 4 cm or less.
Primer
The primer is applied after cleaning the wall from dust and debris. It is necessary to remove the buildup of mortar or glue. To do this, it is most convenient to use a spatula or a brush with metal bristles. If there are greasy stains on the walls, you can get rid of them with hot steam. You can find a universal degreaser on sale.
It is not recommended to ignore this stage, because otherwise the primer may not penetrate the structure of the foam concrete. The priming process is as follows: the surface is treated with a brush in hard-to-reach areas. But a spray gun or roller is used in the main area.
After the layer has dried, you need to make sure that the material is saturated with primer. To do this, intense light is directed onto the wall. Unpainted areas can be re-treated.
Fastening the plaster mesh
To strengthen the surface, you can use fiberglass or metal mesh. For significant differences, it is better to use the second option. The material is sold in rolls. It is fixed over the entire area, unwinding the roll according to the principle of wallpaper. The canvas is rolled out horizontally from one edge of the wall to the other.
Fixing the fiberglass mesh is much easier. It is installed only on a few screws. To attach metal reinforcement, you can use mounting tape. It is cut with metal scissors. The tape is divided into separate sections so that they can be used to strengthen the mesh to the wall without sagging.
Installation of beacons
Lighthouses are U-shaped. They are a profile that is positioned vertically. A distance of one meter is maintained between the elements, which will be enough to level the mixture as a rule. The first two beacons, which are installed along the edges, should be leveled using a level. To install beacons, it is most convenient to use thick gypsum glue. Cement-gypsum mortar is also suitable.
Laying plaster in several layers
The first layer is applied by spraying. To do this, prepare a more liquid solution than what is supposed to be applied in the following stages. The thickness of this layer may vary depending on the base. Using a trowel, the solution is placed in the center of the falcon, then it is brought to the surface and the mixture begins to be poured. For convenience, you can help with the same trowel. The distribution must be carried out from the same distance, then the layer will be uniform.
As soon as the first layer dries, you can begin to form the soil. The mixture is poured over the area between the four beacons. Using the rule, you will need to make zigzag movements to smooth the surface. Before applying the final layer, the beacons should be removed. Then the covering is carried out.
In some cases, beacons are left in a layer of plaster. But experts have recently advised against this approach. The thickness of the covering layer should not be more than 2 mm. All components of the dry composition are pre-sifted to ensure the perfect layer.
Grout
At this stage you need to use a wooden grater. Its working surface can be curved or flat. The grater is applied to the surface, and then with its help the master begins to smooth the base according to the principle of an iron. At this stage, it is important to regulate the intensity of the pressure.
Popular manufacturers
Plaster mixtures are very popular among home craftsmen and professionals. But before you make a choice of one or another composition, you should pay attention not only to its purpose and characteristics, but also to the manufacturer. Often, the supplier company allows you to understand how high-quality the products are.
Among domestic brands, Volma should be highlighted. This is a group of companies that began its activities in 1943. The company's products are environmentally friendly and allow you to take care of the environment. Volma plasters are affordable and of fairly high quality.
A popular German brand is Knauf. The company has been on the market for more than 25 years and offers a wide range of mixtures for construction and renovation.
Another worthy brand is. It was founded in 1998, and today specializes in the production of dry mixes. The company supplies the market with products with high adhesive properties.
Nuances of plaster
- For novice craftsmen, the technology of plastering under the rule is most suitable. By correctly installing the beacons and using this tool, you can achieve good results.
- If it is necessary to plaster walls that already have a layer of plaster on their surface, the old decorative layer should be removed. If you do not plan to do this, you need to at least make sure that the surface does not have easily falling off particles.
- Beginners, after completing plastering, notice that the wall has unevenness. You shouldn’t be upset, because they can be treated with plaster again.
- If there are no budget restrictions, you should choose the Ceresit CT24 composition, which acts as one of the most successful solutions for carrying out interior work. This mixture has excellent performance characteristics, and it can be applied not only to cellular concrete.
Attention! In order to prevent the dew point from moving, so that the walls do not become damp and moldy, you must adhere to one important rule. The ratio of the thickness of the layer of external and internal plaster should be 2 to 1.
- If plastering work is carried out after the construction of the house, you need to wait about 1 month for shrinkage to occur. Otherwise, the applied layer of plaster may become cracked or completely destroyed.
- Work should not begin if the ambient temperature is close to zero. The optimal mode for this is the limit from +5 to +30 ˚С.
Recommendations for carrying out work
Before plastering the outside of a foam block wall, familiarize yourself with a number of features of the technology.
Before you begin applying the solution, you will need to install beacons. These elements will help you get a smooth surface during your work.
It is important to remember what temperature is permissible for outdoor work. For example, you plan to plaster the exterior of the garage walls using foam blocks. The outside temperature should be between +5 and +30. If you still have to work on a hot day, it is recommended to treat the building material with water from a spray bottle.
You must clearly decide how to plaster the walls made of foam blocks from the outside. We have already mentioned that it has a too smooth surface, which would seem to be good, since you don’t have to level the surface, but, unfortunately, the mortar does not stick to it.
To increase adhesion, a primer or special concrete contact is used. Such compositions are applied and dry for about a day, and are partially absorbed into the material, and partially harden on the surface, creating the layer necessary for adhesion.
A mesh is also suitable, thanks to which additional fixation of the plaster occurs. Don't ignore the preparatory work. This is actually a very important stage, which will ensure long-lasting results and prevent the appearance of delamination, cracks and other defects.
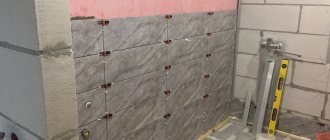
Plastering foam block walls occurs only after thermal insulation work has been carried out. The material used in this case is a good insulator, but the temperature changing at the joints can lead to the appearance of condensation, which will not have the best effect on the plaster. This is why it is worth monitoring the applied layers of the product. Strict relationships must be observed between the inner and outer layers, where the first layer must be 2 times smaller.
From all of the above, we can conclude that work should take place according to the instructions, taking into account a number of rules. In addition, you need to pay attention to the packaging with the compositions, where the manufacturers prescribe recommendations.
