Selecting poles for installing a fence without concreting the supports
If you are planning to build a wooden fence without concreting the posts, supports made of oak, beech and coniferous trees brought from the northern regions of Russia are optimal. The resulting structure will be durable, reliable, environmentally friendly and aesthetically attractive.
With timely and correct treatment with protective compounds, a wooden fence will last only slightly less than, for example, a fence made of corrugated sheets. Most often, timber 100*100 or 120*120 mm is used for construction work.
Photo No. 1: timber 100*100 mm
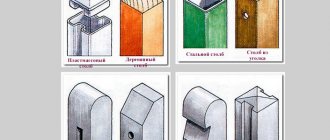
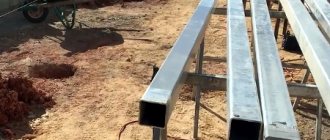
If you want to install a metal or polycarbonate fence without concreting the posts, profile pipes are suitable. To erect fences made of corrugated sheets or euro-fences, use supports with a rectangular cross-section. It will be easier to attach logs to them.
Photo No. 2: profile pipes with a rectangular cross-section
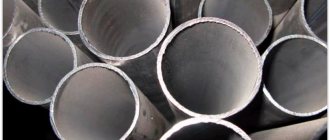
A more economical option is round pipes. They are optimally suited for constructing a chain-link fence or welding openwork sections.
Photo No. 3: profile pipes with a round cross-section
Important! Take care to protect the poles from precipitation and purchase plugs of the right size.
Photo No. 4: plugs for protecting poles
Next, we will look in detail at the procedure and methods for installing a fence without concreting the pillars.
Calculation of important parameters for installation with your own hands
To count the number of materials purchased, you should determine the parameters of the fence - total length, height, frequency of installation of supports, and so on. The calculation method is as follows:
- Measure the overall length of the fence using a tape measure. Determine the height of the fence for safety reasons and based on your own desires. As practice shows, building a continuous fence more than 2.5 m in height does not make economic sense. The best height, which allows you to save materials, is 2 m (a six-meter pipe is divided into 3 parts).
- Set the height of the posts. The principle is this: to create a reliable support lever in the ground, the stand must be immersed in the ground at least 1/3. If you plan to build a 2-meter fence, then at least 1 m of the support must be in the ground, then its total length will be 3 m.
- Count the number of columns depending on the interval of their installation.
Fences with a height of more than 2.5 m are best made of mesh
Advice. At the preparatory step, it is necessary to approve the construction with the neighbors, so that later there are no disputes regarding the delimitation of plots.
It is important to choose the correct step for installing the supports, depending on the area and windage of the fence. The distance between the pillars should be between 2 and three meters. A smaller interval is not advisable from the point of view of economy, and a larger interval sharply reduces the strength of the structure. The exact selection is made on an individual basis.
Continuous hedge with ideal post spacing of 2.5m
Calculation example for a fenced area length of 13.4 m with a fence height of 1.5 m:
- If you divide this distance into 4 parts, then the pitch of the pillars will be 3.23 m. With a similar span length, you can begin to build a fence from brick or chain-link mesh on iron posts. It is very undesirable to install corrugated sheeting or other solid material; the racks will be shaken by the wind.
- Dividing into 5 sections will give a good spacing of 2.56 m. This is an acceptable option for many fences, both wood and iron.
- If you divide the distance into 6 spans, then the length of each span will be 2.12 m. The strength of such a fence will be high, although the cost of construction will increase. However, here you can save on the cross-section of the pillars and take a smaller standard size according to the assortment.
An example of a breakdown into 4 spans
Advice. The ideal distance between the posts of a solid fence 2 m high is 2.5 m. This is an excellent option in terms of price/strength ratio when it comes to the most popular fences made of profiled roofing sheets on iron supports.
An example of a breakdown into 5 spans
If you choose a good pitch of 2.5 m, then the construction of the fence will require 6 supports protruding 1.5 m above ground level. According to calculations, the total length of the post along with the underground part is 1.5 / 2 x 3 = 2.25 m, with a margin of 2.5 m. As a result, you will need 2.5 x 6 = 15 m of pipe or channel.
Breakdown into 6 spans
Reference. Concrete Euro fences have a specified span length of 2 m, so it will not be difficult to calculate the number of posts.
Stage 1. Measurements and calculations
Make the necessary measurements, determine the dimensions of the future fence and the distance between the posts. Draw a drawing of the fence and calculate the number of supports and materials from which you will build the sections.
Note! Don't make the sections too long or tall. The optimal distance between fence posts installed without concreting the supports is 2 m. This design will be strong and reliable. The most suitable height is 1.8 m. In this case, two logs per section will be enough.
Buy everything you need at the construction base and begin installation work.
Stage 3. Installation of fence posts without concreting
Installation of fence posts without concreting can be done in two ways.
Method 1. Butting
This method of installing pillars without concreting is the simplest. All work can be done alone.
You will need:
- manual or electric drilling rig;
- spacers;
- level;
- crushed stone of medium fraction;
- tamper
Install each support according to the following diagram.
Image No. 1: diagram of butting fence posts
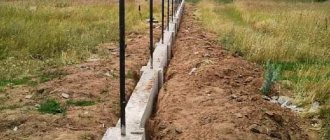
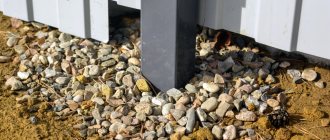
- Dig a hole 1.2–1.5 m deep. The length and width should be 20 cm larger than the dimensions of the pillar.
- Place the support in the hole.
- Secure the post with spacers in a vertical position.
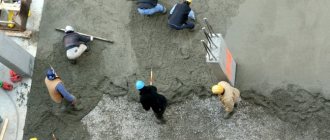
- Gradually fill the hole with crushed stone and a small amount of sand, compacting every 20-centimeter layer.
- Make sure the pole is positioned correctly.
Note! Install wooden or metal supports with a rectangular cross-section so that the front surfaces are at the same level. To make the job easier, make additional markings.
Photo No. 6: chain-link fence posts installed using the butting method
Method 2. Hammering
This installation of fence posts without concreting is more labor-intensive. It is almost impossible to hammer the supports correctly alone.
Important! This method is used for installing metal supporting structures. A wooden beam will not withstand the load.
You will need:
- two partners;
- level;
- manual or electric drilling rig;
- ladder;
- sledgehammer.
Image No. 2: diagram of driving in fence posts
- Drill a small hole in the ground.
- Place the post in the hole.
- Climb onto the stepladder and hammer in the support using a sledgehammer.
During the installation process, one of the partners will hold the ladder, and the second will control the verticality of the supporting structure.
Photo #6: hammering in fence posts
Helpful advice! To simplify the installation process and reduce the number of installers to two people, rent a portable pile driver.
Photo No. 7: driving in pillars using special equipment
Support installation technology
On land plots where the soil is not prone to swelling, installing pillars without filling the holes with concrete is quite simple - you need to dig holes of a certain depth, insert posts into them, cover them with soil and strengthen them. Strengthening can be done in different ways.
Butting
The simplest way to install supports. To perform bottling you will need:
- any drill;
- spacers;
- construction level;
- crushed stone, sand;
- tamper
The operating algorithm is very simple.
- Dig a hole.
- Install the support.
- Use spacers to secure the post exactly in a vertical position.
- Fill the hole with a mixture of crushed stone and sand, compacting it every 20 cm.
- Check that the pole is level.
The big advantage of backfilling is that even under the influence of heaving forces, the pillars cannot be squeezed out of the soil. The crushed stone will move along the pipe, the position of which will not change. Such a fence will stand without repair for a very long time.
Driving into the ground
This method is more labor-intensive. You can drive the racks using:
- sledgehammers are a classic method. There are no particular difficulties in it, but you need to constantly check how level the support is, and you will also have to put in a lot of physical effort;
- an instrument called a "grandmother". It is made by cutting off a piece of pipe with a diameter larger than that of the support and a length of approximately 80-100 centimeters. A massive plate and a metal holder are welded to the end side of the headstock. A pipe is placed on top of the rack. The “grandmother” is raised and lowered, and from the severity of the blow the pillar gradually enters the ground;
- copra is a type of professional special equipment. The machine drives the stand into the ground using a vibration hammer or impact immersion.
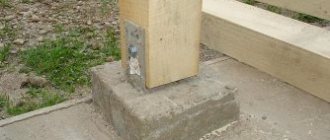
Prefabricated structures
Fence supports can be made prefabricated. Such pillars are made of concrete blocks, empty inside. There may be a relief on the outside, or it will be completely smooth. Installation is simple - the blocks are placed on top of each other, reinforced, filled with concrete or covered with crushed stone.
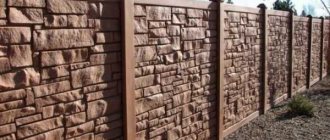
Composite structures made of metal are quite common. They are assembled from pipes with a mesh stretched between them. For such fences, a shallow strip foundation is poured.
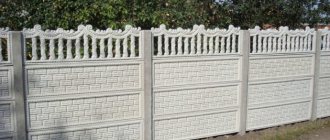
Prefabricated structures made from profiled sheets are no less popular. Their main advantages are attractive appearance, durability and reliability. Sections of such fencing consist of two parts, between which there is a sheet of corrugated sheeting. First you need to dig in the pillars, then secure the canvas.
Screw piles as fence supports
A screw pile is a hollow pipe with blades at one end. Thanks to these blades, when immersed in the ground, the element seems to be screwed into it. Installation is very simple and does not require special skills or tools.
To make the fence stable, it is recommended to fill the pipe cavity with a solution of sand and cement or simply stones and sand. Screw piles are immersed in the ground to a depth of 120 to 150 cm. Additional reinforcement is not required, the piles are very firmly held in the ground.
Stage 4. Installation of logs and sections
In the process of attaching logs and section elements, for example, picket fences, you cannot do without:
- drills;
- screwdriver;
- galvanized self-tapping screws.
Make markings and fix the crossbars in the right places. To connect wooden supporting structures, use galvanized self-tapping screws, lubricated with drying oil or waste machine oil. Metal logs can either be welded (if the apparatus is available) or attached to the supports using special clamps.
Photo No. 8: fixing metal joists using clamps
After you assemble the frame, proceed to installing the sections and finishing the fence.