Installation of LED lamps
An LED lamp, as the name implies, consists of LEDs, the number of which varies from one to several dozen. These elements always correspond to the total power of the lamp, control circuit and device body. Lamps intended for domestic use are equipped with an E14 or E27 base, which are completely identical to the bases of traditional incandescent lamps.
All LEDs in the lamp are connected to one circuit, which, in turn, is connected to the control circuit and power supply. During operation, LED elements generate thermal energy. Radiators are used as coolers, which are usually installed directly under the LEDs. To increase cooling efficiency, the connection area between these parts is coated with thermal paste.
LED lamp circuit
The input part of the circuit is the place to install a quenching resistor and capacitance. These elements are used by the system as a step-down power supply. Behind them is a diode bridge designed to transform alternating voltage into direct voltage, which is required by the LEDs.
There are three basic diagrams for connecting LEDs in a lamp:
- Consistent;
- Parallel;
- Mixed.
In most cases, individual LEDs are connected in series. The key problem of such a circuit is that if at least one element in the circuit becomes unusable, then the entire circuit will become inoperable. In addition, there is always the possibility of a breakdown of the LED - in which case power will continue to flow to the remaining elements, but in overload mode. This will eventually cause all the LEDs to burn out. Of course, such an LED ceiling lamp circuit cannot be considered sufficiently reliable.
The mixed connection scheme for LED ceiling lamps also has the disadvantages of serial connection, but the design of the lamp is different. So, in this case, the lamps are connected in series and combined into groups. The groups, in turn, are connected in series, which provides some guarantee of protecting the circuit from complete burnout.
The most reliable scheme is a parallel connection, in which each lamp operates independently of the others. In the event of any problems with one of the lamps, all the others will continue to operate normally, without overload or risk of breakdown. The disadvantage of this scheme is its high cost, largely due to the fact that a separate resistor is connected to each LED. Due to the high cost, LED lamps with parallel connection are used extremely rarely.
Serial connection
To connect LEDs in series, you need to solder the anode of another to the cathode of one device, and so on until the desired length of the chain.
The connection is made through a current-limiting resistor. According to the circuit, the same current will flow through all elements. The voltage level will be the sum of the drops in each section. So, to connect to a power source with a voltage of 12 Volts, you will need no more than four 3 Volt LEDs (3*4=12). More diodes require a more powerful battery.
Advantages and disadvantages
The pattern was previously used in Christmas tree garlands. Now it has been replaced by a mixed compound.
Assembly
Today, the lighting market boasts an incredibly rich assortment. LED lamps can be purchased at almost any hardware store, or at a store with household electrical appliances. Assembling a lamp is quite simple - but before that you need to decide on the desired type of lighting, because a wide range indicates a variety of characteristics.
The main classification of LED lamps includes the following groups of devices:
- Linear;
- Ceiling;
- Wall-mounted;
- Industrial;
- Spotlights;
- Underwater;
- Controllers.
It is worth considering several of the most common types of lamps to understand what we are talking about:
- LED strips
. This type of lighting is best suited for corridors where there is no particular need for spotlights. LED strips are sold assembled. On one side of the product there is a plug, and on the other there are wires that connect to the power supply. Of course, the power supply must match the power of the tape, and when connecting, you need to pay attention to the polarity of the wires. The disadvantage of such devices is the high degree of heating, which is why they cannot be installed in narrow channels with poor ventilation. - Spotlights
. Since LED strips are not enough to fully illuminate large rooms, they have to use spotlights. Such devices are located on the walls or ceiling, and are often tilted slightly to create the most comfortable lighting. When selecting such devices, you need to carefully calculate the entire electrical network so that its individual elements correspond to each other. - Lamps with motion sensors
. By and large, this is just a modification of conventional LED lamps. These devices have sensors that track movement and turn on the lights only when needed. Such devices, firstly, are very well suited for illuminating areas where constant light is not required, and secondly, they have a higher working life due to significantly shorter operating time. - Assembled lamps with radiators
. Perhaps the most convenient type of device is ready-made lamps that do not require assembly. Typically, such devices are purchased in the absence of the experience or knowledge necessary to independently assemble all the elements of the device.
However, if you still need to assemble the lamp yourself, then you need to purchase the entire set of parts and get to work. First you need to attach an LED (or LEDs if the radiator is designed for several lamps) to the heatsink covered with thermal paste. When assembling, be sure to follow the instructions and always ensure that the power of the installed LEDs matches the power of the remaining elements of the system.
Connection methods
The simplest method of connecting a lamp to a 220 V network is to use a damping resistor located in series with the LED. The voltage is constantly changing, the amplitude value can reach 310 V. This value must be taken into account when calculating resistance.
The diode should also be protected from reverse voltage equal to forward voltage. Let's look at the main methods.
Series connection of a diode with high reverse breakdown voltage (400 V or more)
In this case, it is correct to connect a 1N4007 rectifier diode to the circuit, the reverse voltage of which is 1000 V. If the polarity is changed and the voltage goes in the opposite direction, it will be smoothed by the rectifier diode, which protects the LED from breakdown.
Bypassing an LED with a conventional diode
This method involves the use of a simple low-power semiconductor connected in an anti-parallel direction with an LED. The reverse voltage will affect the quenching resistance since the diode is connected in the forward direction.
Back-to-back connection of two LEDs
The method is similar to the previous method, except that the LEDs will light only on their section of the sine wave, providing each other with breakdown protection.
A significant disadvantage of connecting LEDs to a 220 V network through a quenching resistor is that enormous power is released at the resistance.
Let's look at an example. Let's assume that a quenching resistor with a resistance of 24 kOhm is used when connecting the LEDs to a 220 V network with an output current of 9 mA. Let's calculate the power at the damping resistance: 9*9*24=1944 mW (about 2 W). Thus, to ensure optimal operation, you need to take a resistor with a power of at least 3 W.
When several LED diodes are used that consume a larger current, the power will increase in proportion to the square of the output current, which is why using a quenching resistor will simply be impractical. If a resistance of less power than required by regulations is used, the resistor will quickly fail and a short circuit will occur.
Therefore, the role of a current-limiting element should be played by a capacitor on which power is not dissipated, since the resistance is reactive.
In the simplest circuit for connecting an LED lighting device through a capacitor, the following picture is observed: after the power is cut off, a residual charge remains in the capacitor - a source of threat to human safety, which must be discharged using resistance. A second resistor is required at power-up to protect the circuit from current flowing through the capacitor. The rectifier diode serves to protect the LED diode from reverse voltage. Choose a non-polar capacitor designed for operation in a network with a voltage of at least 400 V.
It is strictly forbidden to use polarized capacitors in an alternating current network, since current passing in the opposite direction will lead to destruction of the structure.
To calculate the required capacitance of the capacitor, an empirical formula is used, where the derivative of 4.45 and the current passing through the LEDs must be divided by the difference between the amplitude value of the current (indicated above - 310 V) and the voltage drop across the LED after direct passage.
For example, if you need to connect an LED diode with a voltage drop of 3 V and a current of 9 mA, then according to the formula above, the capacitance of the capacitor will be equal to 0.13 μF. This value is influenced to a greater extent by the current strength, and to a lesser extent by the voltage drop.
Ceiling installation
Installation of LED ceiling lights is possible in almost any room. Even for rooms with consistently high humidity, you can find suitable products. Perhaps the only limitation is the heating of LEDs, which is why it is strongly not recommended to install them in kitchens right next to the stove - regular exposure to high temperatures will significantly reduce the service life of the lighting.
The installation of LED lamps may vary depending on specific conditions - for example, in the case of a suspended ceiling, the elements must be installed in the following sequence:
- First, the legs are attached to the ceiling;
- Then the rack is mounted;
- Next, a protective and thermal insulating ring is installed, between which the stretch ceiling fabric is located;
- Lastly, the lamp itself is installed.
Using the same scheme, lamps are installed on plasterboard ceilings. To install LED lighting on concrete floors, spotlights are not suitable - you will have to choose from an assortment of surface-mounted and pendant fixtures that are attached directly to the concrete.
Features of connecting 12V lamps
Many people prefer to use 12 V spotlights for lighting. Connecting them requires a voltage-reducing transformer and a device that stabilizes the current (can be made from a capacitor, resistor, diode bridge). Factory-produced devices are more reliable and are sold with a guarantee.
The driver parameters must be calculated after purchasing the lamps. Its power should be 20% higher than the total power of the lamp(s). It’s difficult to make a mistake with your choice, since popular manufacturers indicate the power on the packaging. It is imperative to evaluate the conditions at the installation site of this equipment. For example, for a bathroom you need to buy a driver that is resistant to high humidity.
The connection diagrams are the same as for a 220 V network. The transformer is mounted and connected first, wires are pulled from it to the lamps.
Most often, spotlights are used in suspended ceilings. These are built-in models that come with a driver and a connection connector. The cable in the ceiling structure is laid in advance. At the installation site of the lamp, a hole is drilled, the braiding and insulation are removed from the cable cores, and the covers hiding the terminals are removed from the transformer. The wires are connected according to the diagram on the case. Two terminals are provided for the cable, the rest (usually on the other side) for lamps. First, the cable wires are connected (exact polarity is not necessary, since the current from the network is alternating). On the other side, the wires of the lamp (or several lamps, if the driver is designed for this) are connected.
Next, the transformer covers are put in place, the device is hidden in the hole, and only the connector for connecting the lighting device remains outside. The lamp body is installed in the hole, the clamp is removed, the light bulb is installed, and secured with the clamp.
Connection
Before connecting any electrical equipment, including LED lighting devices, you need to make sure that there is no voltage supplied to the network. Otherwise, when performing work, the master will definitely receive an electric shock.
When the network is turned off, you can start connecting the LED ceiling light, which is done like this:
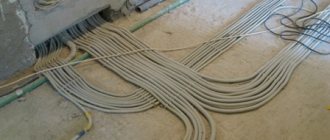
- The first step is to install all the communication lines necessary for the operation of the electrical network. In the case of suspended and suspended ceilings, a corrugated plastic pipe, which is attached directly to the ceiling, will be sufficient for laying wires. If you have to deal with concrete slabs, you will have to make grooves in them.
- When the wires with the lamps are installed, you need to organize good ventilation for them - for example, using a suspended ceiling. A number of holes are cut in the box that matches the number of lighting fixtures. The lamps are connected to the wires removed from the holes and fixed in place. You need to work carefully, especially if the ceiling is mounted from tension fabric - it is very easy to damage. To protect the stretch ceiling from heating, it is necessary to install thermal rings, unlike plasterboard structures, which can do without such rings.
After connecting the lamps and applying voltage to the network, you need to check the system for functionality. If the lamps light up, then the installation of diode lamps in the ceiling was carried out correctly, but otherwise you will have to look for the problem and bring the electrical network to working condition.
Process Details
Determining the purpose of the wires in the chandelier
The simplest option would be to use a specialized electrical circuit, which you can find in the data sheet for the lighting device. There, as a rule, the purpose of all types of cables and step-by-step connection instructions are indicated. According to normal standards, cable color markings should be done as follows:
If there is no documentation for the chandelier, and the color marking of the wires does not clearly indicate their identity, you need to determine their purpose using a multimeter.
Find the phase wire. To do this, you need to place the multimeter probe on the middle contact of each of the cartridges, and next touch the two wires that remain. Using a sound signal, you need to identify the phase wire, mark it, or simply remember it.
Let's look at how to connect a double-circuit chandelier to the network.
How to connect a double-circuit chandelier to the network
How to connect a chandelier with 3 wires? To do everything correctly, and two of the three are phase, you need to inspect the switch and the wires coming out of the ceiling. The simplest option is when the switch is a two-button type, and only 3 cables come out of the ceiling. You can find out the purpose this way:
Turn off the breaker. All three wires need to be checked again and the lamp should never light up.
If the switch is a single-key type and only a couple of wires come out of the ceiling, then you need to check them with the switch connected with a voltage indicator and find the neutral and phase wires. The latter need to be connected to each other and to the phase wire of the electrical wiring, and the neutral wires are also connected. Check switching on and off. If the switch is a single-key switch, and there are three wires in the electrical wiring, you need to find out the purpose of the third wire. To do this, turn on the switch and check for voltage on all wires. If a phase is detected on two wires, the chandelier can be connected using a three-wire circuit. If the phase is on only one wire, and the third wire is yellow-green, then the connection is made as in the last case - connect both wires of the chandelier phases to the phase wire of the electrical wiring, and the grounding type conductor must be insulated and removed.
How to connect chandeliers with a ground wire
If the lighting device has a metal body, it must be grounded. In new apartments, all electrical networks, including lighting, according to standards, must have a yellow-green grounding conductor. If your electrical network meets this requirement, then to connect the chandelier it is enough to connect wires with the appropriate color markings using an adhesive pad or even twisting.
If the network is old and the insulation of all wires is the same color, then it is important to proceed in the following sequence:
Replacing the LED lamp
Despite the durability of LEDs, it is still not uncommon for even such reliable elements to fail. There may be several reasons for this - from random changes in the voltage characteristics of the network to improper operation or installation of LED lighting. In any case, if at least one of the lamps burns out, it must be replaced.
The lamp replacement technology is as follows:
- First of all, you need to turn off the voltage in the room or in the entire apartment, if it is not possible to turn off one room;
- Next, you need to carefully remove the locking ring that secures the protective glass of the lamp;
- The lamp is carefully removed from its place, and a new one is installed on it;
- All previous operations are repeated in reverse order.
It is best to perform these operations while wearing protective gloves. Their purpose is not to protect the technician, but to prevent damage or contamination of the LED lamp.
Consistent
If there is a need to save wires, but there are no special requirements for the room, then a serial connection is better than others. This will require a small amount of double or triple wires. In this case, it is allowed to place no more than six lamps in one circuit, otherwise the brightness of all devices will be low. And also if one of the lamps fails, the power supply will stop, and you will have to check each device separately to find the defect.
The connection process itself is simple: a phase is laid from the switch to the first lamp, then a wire is supplied from it to the next one, and so on until all devices are connected in one circuit. A zero is laid to the latter, coming from the distribution box. If you mix up the wires and connect zero instead of power, the lamps will always remain energized, which is unsafe.
Diagram of serial connection of LED lamps
All modern lamps are produced with the expectation of connecting the ground wire. If in your case there is grounding in the apartment, then you will have to run the cable directly from the outlet to each lamp.
To save money, when implementing a serial circuit, a wire is used, since the second core in the cable will simply break off and not be used in any way.
