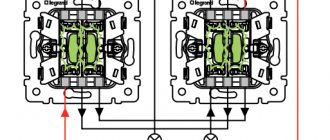
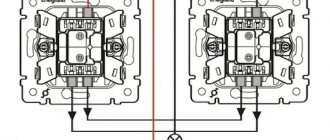
Legrand pass-through switch connection diagram
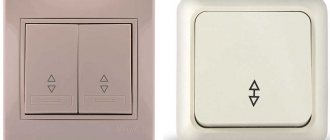
- keyboard devices are designed to control one lighting device from two different points;
- a model with one key is used when you need to control a group of lamps from at least three different points;
- equipment with two keys is suitable if you need to control two light sources with one electrical accessory.
The design of the Legrand pass-through switch differs from conventional models. This is due to a different operating principle. Unlike the classic product, it has not two, but three contacts, and it works by switching one contact to another.
How does a switch with two keys work?
The equipment has a total of 12 contacts, 6 for each double switch (2 inputs, 4 outputs), therefore, to connect equipment of this type, you need to take 3 wires for each key of the device.
- the device consists of a pair of independent contacts;
- The upper contacts of the device N1 and N2 are switched to the lower ones by pressing the keys. The elements are connected by a jumper;
- the second contact of the right switch, shown in the diagram, is in phase;
- the contacts of the left mechanism do not intersect with each other, joining two different sources;
- 4 cross contacts are combined in pairs.
Wiring diagram for Legrand single-key switch
- N (neutral wire) - to the lamp directly;
- L (live phase) - alternately passes through the switches, and then is supplied to the lamp.
The light is adjusted not by connecting or closing the contacts, but by switching them.
See how to connect legrand switch: the diagram is below:
Legrand: connection diagram for a two-key switch
A device with two keys is more common. It is used to control the lighting of different rooms from one point. Often installed in apartments to add accents with light.
In fact, this equipment combines two independent devices in one housing. The phases are combined and function by switching among themselves. When the user presses one button, the second one breaks the circuit and automatically disconnects.
The Legrand switch, the operating diagram of which is shown below, has its own characteristics. It has independent groups of contacts, so the keys do not depend on each other in any way. When you press one of the buttons, you switch from the upper lines to the lower ones. Moreover, the former do not have a final output, but the latter are connected to exactly the same switch.
It turns out that the device is equipped with two groups of independent contacts - right and left. This point is typical for the entire Legrand Valena series - the schemes will also depend on it:
Before installation, study the Legrand switch - the installation diagram is often included with the electrical equipment. If it is not there, refer to this article.
source
Two-key switch: connection diagram
A feature of legrand two-key pass-through devices is the presence of two independent groups of contacts. If you press on the keys, they switch from the upper lines to the lower ones, and the first do not have a final output, and the second are connected to another similar switch.
Thus, we found out that these Legrand transition devices have 2 groups of contacts - right and left. Knowing this, it is easier to understand how to connect a two-key pass-through device.
According to the diagram, the second contact of the right switch is supplied with the phase coming out of the distribution box of the house. The contacts within this group are connected to each other using a jumper; the same ones that belong to the left group provide current supply to two lamps independent of each other. The important point here is that these two pins should not interact with each other. Next, these four cross contacts must be connected to each other as a pair.
The procedure for connecting a Legrand switch with two keys
Modern residential buildings are characterized by the presence of long flights of stairs and the same corridors inside the apartment, which are not very convenient in terms of lighting control. In order to solve this problem, manufacturers of installation products have developed modern models of switches, called pass-through switches. They allow you to turn the lighting on and off in a common corridor or in an apartment from two places at once. Common models from Legrand (Cariva, Etika and the like), which are valued by most domestic users for their reliability and attractive design, also fall under this category.
Areas of application of two-gang switches
To solve the problem of long corridors, the company has developed not only walk-through, but also so-called “cross” two-key models that are part of a three-point light control system. Before connecting Legrand switches of this type, you will need to understand their structure and circuit diagram. Both pass-through and crossover models from the Cariva, Life, etc. series have several groups of switched contacts, through which it is possible to implement the desired function.
When a key is pressed, each of the two mechanisms included in the switch set closes one of the connecting lines, simultaneously opening the other. The specified operating procedure allows for separate control of the lighting device using two different switches separated by a considerable distance.
The most obvious example of their use is the installation of one of the switches in the entrance vestibule at the entrance, and the second on each landing.
When entering a building, the user turns on the lighting on all areas with one button, and when approaching his apartment, turns it off.
Pass-through switch
Any electrician knows that conventional switches operate on the principle of interrupting the current circuit.
Transition models differ from them in this regard, since they are equipped with three contacts that allow the device to be switched. In turn, the double pass-through switch has 6 similar contacts. Among the advantages that transition switches have, the main one is that they can be used to turn off and turn on lights from different places.
Scope of application of pass-through switches
Modern pass-through switches have become widespread in several areas:
- Stairs. A prerequisite for them is that switches must be installed on the first and second floors. This will make it possible to turn on the light on one of the floors, after which, when a person goes up or down, he can turn off the light using another walk-through switch.
- Sleeping rooms. In these rooms, switches of this type are installed at the entrance to the room and next to the bed. This option provides a lot of convenience, since a person does not have to get out of bed and go to the entrance to turn off or turn on the light.
- Corridors. Pass-through switches are especially convenient for long corridors, since they can be installed at the very beginning and at the end.
- Dachas. Here, the benefit of using transition switches is that the owner has the opportunity to provide lighting to the yard and paths.
Two-gang switch with backlight
In the simplest case, connecting a two-key Legrand switch is done according to the classical scheme. At the bottom of its body there is an input working contact to which the phase wire is connected. At the same time, two conductors “depart” from above it - each to its own illuminator or group of light bulbs.
Often these wires are laid to a distribution box, from where they are routed according to the required loads. In some cases, pre-formed groups of illuminators are used as such loads.
Installation procedure for conventional Legrand models
Before installing the Legrand switch in the usual version, you should prepare the simplest tools: a screwdriver, side cutters and a sharp knife.
Installation procedure for two-key models:
- The input machine is turned off.
- The conductors supplied to the product are prepared for connection - the insulation at their ends is stripped.
- The keys and decorative cover are removed from the device.
- Next, you can connect the stripped ends of the conductors to its terminals, and then return the decorative frame and keys to their place.
When installing double switches from Legrand, special attention is paid to the distribution of outgoing wires. Each of them is designed to connect a separate load located within the serviced premises. When installing the product, you must take into account the markings on its body, indicating the connection points of the incoming and outgoing single cores of the cable.
Nuances of connecting switches from Legrand
When considering the installation features of two-key switches from Legrand, special attention is paid to the following important details:
- according to the instructions for walk-through models such as Quteo, Etika and others, open or closed distribution boxes are used when installing them;
- to connect the wires, they use special “walnut” type clamps or they are fastened with screws included in the package of each product;
- Before installing the switch in an open design, a plastic or wooden base is prepared for it, on which it is convenient to mount the housing.
If it is necessary to remove the backlight from the switch, it is better to do this before installing it.
Before installing pass-through switches from the “Ethics” series and the like, it is necessary to thoroughly prepare for work operations. To do this you will need:
- remove the decorative frame and keys from the case - they have special grooves;
- insert a screwdriver with a thin tip into the groove, and then press firmly in the desired direction;
- remove the frame of the product in the same way.
Upon completion of all preparatory operations, the circuit breaker is completely ready for installation.
Direct installation
It is recommended to install walk-through products in the following order:
- Before installing each of the switches, the power supply is removed from the line - the input circuit breaker is turned off.
- The housing of the first switch is placed in the installation box and securely fixed in it.
- Already laid conductors are connected to its contacts on both sides, which are connected according to the attached instructions.
- The same operations are performed with the second switch.
Most models of switches from Legrand must have an electrical diagram in the accompanying documentation.
At the final stage of installation work, the decorative frame and double key are returned to the already installed devices.
The Legrand two-key switch is no different from a conventional keyboard device. Well-known models of this device Life, Quteo or Valenon are integrated with household electrical wiring in exactly the same way as domestic products. Problems associated with the peculiarities of their installation can be easily solved after reading the instructions for use.
source
Installation features
Now let's turn to the installation details. According to the instructions, the Legrand pass-through switch can be installed in open or closed mounting boxes. The fastenings in these boxes are done either with clamps or with screws.
Before installation, you need to remove the frame and key. They are attached using special mechanisms and have special grooves on the side. First, insert a flathead screwdriver into the key groove and lift it up.
Next, this same procedure is carried out relative to the frame. Now you know how to properly disassemble a Legrand pass-through switch.
After this, attach the base of the device for turning on the light to the installation box and connect the wires according to the presented diagrams. At the end, the frame and the upper part of the key are mounted.
The process of connecting the Legrand switch is also shown in this video:
Leave a comment Cancel reply
Related Posts
How to quickly and easily connect a Viko switch
German ABB sockets combine reliability and stylish design
Installation instructions for sealed open type switch
How to connect pass-through switches in your home, tips.
Peculiarities
In terms of their structure, the models from the French manufacturer do not differ from their analogues. These include:
- base: all the fasteners are located on it, due to which the device is mounted to the wall;
- body and frame;
- contacts and keys;
- terminals.
The base is made of galvanized steel. This ensures secure fastening. Decorative panels made of plastic or ceramic. The latter can withstand heavy loads. Some devices have LEDs: they are responsible for external lighting.
Features of this switch
Pass-through switch Legrand with two keys
It is worth noting that the pass-through switch from Legrand, the connection diagram of which is very simple, is made of materials that make its use not only long-lasting, but also safe.
These materials are galvanized steel and polycarbonate. Elements such as calipers, grips, and screws are made of galvanized steel.
The frame, body, keys and connection mechanisms are made of polycarbonate or ABS plastic. This means that for many years these elements will not crack or be destroyed by ultraviolet rays.
A notable fact is that the manufacturer produces keys, housing and frame in different colors and with different patterns. The lid can also be made from:
- Porcelain.
- Tree.
- May be covered with skin.
As noted in the instructions, the Legrand switch housing itself can have two types of protection:
IP44 housings protect all internal contacts from moisture. The switch itself is secured either with screws or with clamps.
An important feature of the Legrand one- or two-key pass-through switch is the presence of screwless CuZn15/X12 CrNi 177 clamps, which greatly simplifies the procedure for connecting copper wires.
These clamps allow the connection of both single-wire and multi-wire flexible conductors. They are designed for wires that have a cross-section from 1 to 2.5 square meters. millimeter.
Helpful tip: to insert the wire into the clamp, you need to remove 12 millimeters of its insulation.
An important point is that ArNi contacts do not contain cadmium. This element leads to contact contamination and premature destruction. Any disconnector model from this company can operate in conditions where temperatures exceed 5 and are less than 40 degrees Celsius.
It is also worth saying that the pass-through switch is designed for a current of 10 amperes. In other words, the power of lighting devices can be up to 2.2 kW.
Another feature that is an important plus is the presence of an indicator light in some models.
How to connect a Legrand two-key switch
The design of devices with two keys is, in fact, two single models enclosed in one housing. When the user presses the button, the circuit is broken. It is important that there is a break in the phase wire that is connected to a specific lamp. When connected correctly, the neutral and protective conductors are connected directly to the lamps, and the phase passes through the switch itself.
The figure shows how to connect a Legrand switch with two keys:
How to connect a Legrand pass-through switch with one key
Devices of this type are used when you need to regulate light from different places. For example, turn on the lights when you are at the beginning of a long corridor, and turn them off at the end. It is logical that in this case the installation of two devices is required.
Pass-through products work together. They have a contact at the entry point, and a pair at the exit point. In addition, unlike traditional models, they have three contacts, and the phase switches from the first to the second.
When installing, keep in mind that, unlike conventional devices, three wires will be used at once, not two. One is needed to supply a phase, and the remaining two act as a jumper between electrical equipment.
The answer to the question of how to connect Legrand switches looks schematically like this:
Connecting a two-gang switch
Before making the connection, you must first strip the ends of the wires by 1-1.5 centimeters to ensure good contact with the terminals. If the wires are powerful, multi-core, at this stage you need to press off their ends.
A switch with two keys should have three wires. One of them is input - phase, and the other two are output, which will supply voltage directly to the lamp itself.
The neutral wire and grounding, as already mentioned, are connected directly to the light source (to the light bulbs, or more precisely to their contacts).
After this, you need to find the phase wire and the entrance to it (unlike the outputs, there is only one). Look at the switch, previously freed from the top casing. At least one arrow must be drawn on it. It usually indicates where the phase will come from and where it will go. Near the base of the arrow, the phase wire should have an entrance.
How to connect a Legrand backlit switch
There are two types of LED models. The first ones operate in induction mode, and the glow indicates that the load is on. They connect like this:
The latter perform the function of night illumination, making it easy to detect the device in the dark. Their connection diagram differs from the previous one:
Before connecting the Legrand Etika backlit switch, make sure that the type of installation matches the intended purpose of the device.
source
How to connect a Legrand Valena switch
An important element of any modern home are special devices that allow you to control energy sources; one of such devices is a switch. This part of the electrical network must be highly efficient and reliable, because it has to work in a fairly intensive mode.
Today, home improvement equipment manufacturers produce many types and types of switches. At the same time, according to reviews of many property owners, the best devices of this type are produced by the French company Legrand.
In addition to high functionality, Legrand switches also have an excellent design, which allows them to easily fit into the interior of literally any home. This article will discuss the features of the Legrand system, as well as methods for correctly installing such switches. A wide selection of Legrand Valena switches and mechanisms is presented here.
Connecting Legrand switches - diagram
Electrical installation products are used by consumers as functional devices and play an important role in interior design. Therefore, when developing such devices, manufacturers pay attention not only to the technical characteristics, but also to the appearance of the products, trying to ensure that the products meet the requirements of modern design. Among the world's manufacturers of electrical accessories, one of the first places is occupied by Legrand, whose products are distinguished by a variety of shapes and colors.
Legrand company
The international company Legrand, whose headquarters is located in Limoges (France), was founded in 1866 and was initially engaged in the production of table porcelain. However, the company subsequently switched to the production of porcelain insulators (1904), and then focused on the production of electrical accessories (1949). Since then, continuously developing, the small enterprise has turned into a large international company with branches located in more than 60 countries around the world. Its enterprises produce a wide range of electrical products, from sockets to the creation of complex technical solutions for electrical and information networks.
Legrand is the only company that offers Russian enterprises and trade organizations a full range of electrical equipment developed taking into account the latest scientific and technical achievements and meeting the requirements of international standards.
Legrand products are fully certified for compliance with regulatory and technical documentation in force in Russia.
Features and advantages of Legrand electrical accessories
Electrical installation products manufactured by Legrand are in steady demand all over the world. They differ from existing analogues in high quality manufacturing, advanced functionality, ease of installation and ease of operation. A distinctive feature of this brand is also its stylish and elegant design. At the same time, without exception, all electrical installation products produced at the company’s enterprises have a high level of:
- electrical safety;
- fault tolerance;
- fire resistance;
- energy saving.
In Russia, the Legrand company offers consumers electrical accessories that can easily give office and residential premises a modern and attractive look. For their production, only high-quality materials are used (porcelain, metal, glass, plastic, etc.) with a wide range of colors, which allows you to select the necessary installation products for the interior of any room.
Popular series and classification
Legrand offers consumers a large number of different switches. All of them are divided into series, which differ from each other both in functionality and appearance. The most popular series among them are:
- Valena and Valena Life are one- and two-key switches and switches of a classic (square) shape, made in the colors “aluminium”, “white”, “ivory”. Some models are equipped with backlighting. Products from the Valena Life series are distinguished by the gracefully curved shape of the keys, which allows you to turn on the light with a light touch of your finger.
- Galea Life - waterproof models included in this series of one- and two-key products, are distinguished by a strict design and original colors (dark bronze, titanium, mother-of-pearl, etc.). Many of them are equipped with backlight or indication.
All Legrand switches and switches are classified according to their functional purpose, type of installation and control method.
Based on their functional purpose, the following groups of products are distinguished:
- Switches are devices equipped with one or more pairs of contacts. When on, these contacts are closed (lighting is activated), and when off, they are open (lighting is off). As a rule, switches open only the contacts to which the phase wires are connected, but there are also two-pole options - in which the contacts also break the neutral (“zero”) wire.
- Switches are devices that use three or more contacts. In the “On” position, the first and second contacts close together, and in the “Off” position – the first and third. Switches equipped with three contacts are sometimes called "dual-way switches." They are usually used in cases where lighting is controlled from two places.
- Cross switches are devices that switch two separate lines crosswise (when switching, phase and “zero” change places). Such switches are also called “intermediate” - in lighting control circuits they are installed between switches in two directions, which allows you to turn on light sources from three or more places.
- Circuit breakers are devices designed to protect light sources from overvoltage or short circuit.
Based on the type of installation, switches/switches are divided into surface-mounted and built-in.
- Invoices are used with open wiring.
- Built-in ones are designed for use when laying electrical wires hidden. Unlike overhead models, their actuator is hidden in a specially made recess on the wall surface.
According to the control method, switches/switches are:
- push-button;
- sensory;
- keyboards;
- responsive to people's movements.
Key type switches/switches are the most common. Most residential and office premises are equipped with them. Such devices differ from each other in the number of keys with which you can control certain groups of lighting fixtures.
The introduction of innovative technologies allowed Legrand developers to create actuators:
- activated by a light touch of the hand (touch type models);
- activating lighting when it appears and turning it off when there are no people in the room (devices equipped with infrared sensors).
Models with push-button control, which appeared relatively recently, are easy to use and can bring a certain originality and elegance to the interior of the room. However, their use will require some time for the user to get used to it.
Connecting Legrand switches/switches
Installation of Legrand switches/switches is carried out in accordance with the attached instructions. In addition, the connection diagram is duplicated on the back of the product.
How to connect Legrand switch
For a correctly connected Legrand switch (two- or single-key), the keys in the on state occupy the “up” position, and in the off state, the “down” position. To do this, the phase wires are connected to the input terminals, which are marked with the letter L or arrows indicating the path to the center of the switch. In this case, the conductors going to the load (lighting lamps) are connected to the output terminals, indicated by arrows indicating the direction from the center of the switch.
This ensures that the switch is connected to the lighting fixtures according to the “phase -> switch -> load -> zero” scheme, which guarantees that the load will not be energized after switching off.
If you connect the phase wire to the output terminals, and the wires going to the load to the input of the switch, the key will be in an inverted position and there will be a danger of electric shock to the user when replacing the light bulb, which will be energized after turning off.
Connect the switch in the following order:
- The power supply is turned off.
- Using a flat-head screwdriver, carefully remove the keys and frame from the switch.
- Strip the electrical wires to the length indicated on the back of the switch.
- Connect the electrical wires to the corresponding terminals of the switch.
- Install the switch in the installation box.
- Return the frame and keys to their place.
A two-key switch is assembled from two single-key switches, so the connection diagrams for each half are identical.
Connecting a Legrand switch with backlight and indication
An additional lamp in switches is used for the following purposes:
- Backlight, where it acts as a pointer showing where the switch is located. It lights up when the switch is off. To connect the backlight in Legrand switches (with one or two keys), a phase wire is sufficient.
- Load indication in cases where lighting fixtures are located out of human visibility (shed, storage room, etc.). If the switch is inoperative, the indicator lamp does not light.
The load indication mode is activated only if not only the phase wire, but also the neutral wire is connected to the input contacts of the switch.
source
How to properly connect a two-key light switch and avoid mistakes.
Before purchasing and installing a two-key switch, you first need to decide what it is for? And it is designed to control two lighting circuits from one point.
Don't confuse it with pass-through switches, which have different roles. They differ in the number of contacts. Therefore, when choosing, look first of all not at the front panel, but at the back of the switch.
two-key pass-through light switch
two-gang simple switch
Let’s say if you have 2 or more light bulbs in a chandelier, using a two-key switch you can make it so that when you press one key, only half of the lamps turn on, and when you press the second, all the rest turn on at once.
It can also control two different lamps located at separate points from each other - for example, sconces at different ends of the room or in another room altogether.
The two-key switch differs from its single-key counterpart not only in the number of switches, but also, most importantly, in the number of contacts. There are only 3 of them here. One common and two outgoing. Through them, the phase is separated and then returned to the junction box via separate wires or directly goes to the lamps.
There is nothing complicated in the connection diagram and in the process of installation, installation and connection of wires to the switch contacts. First of all, the switch needs to be disassembled. To do this, remove the keys themselves. If you can’t do this manually by simply pulling them towards you, use an ordinary screwdriver, prying the keys off from the side.
Next comes the insulating decorative backing; it can either be snap-on or screwed on. Remove this frame.
As a result, what you have in your hands is the body itself with the fastenings on the sides and the internal contact part. The main task is to supply voltage from the phase conductor to the common contact. Further, when two keys are closed, this phase will diverge into one or the other lighting circuit.
To find the central contact, look at the marking, since it may not always be located alone and according to class=”aligncenter” width=”596″ height=”600″[/img]
What to do if you don’t understand the inscriptions or they are erased and painted over? Then you need to use a contact screwdriver with a battery-powered tester with a continuity test function. Insert any metal object (nail, screw) into the supposed common contact. You wrap your fingers around it and touch the other two contacts with a screwdriver.
When you press the keys one by one, that is, turn on one - check, then turn off the first and turn on the second - check, the screwdriver LED should light up each time. If this does not happen, then this is not a common contact.
