Purpose
Electrical plugs with grounding are intended for detachable connections of devices to the general network. They include a plug and socket. The socket is a separate part of the connection that provides power through direct contact with the network.
The plug assumes contact with the electrical device, so the connection parameters must match. A grounded Europlug must meet the following requirements:
- have reliable contact;
- go with high-quality electrical insulation;
- have the correct polarization;
- protect from touch;
- technically exclude the possibility of incorrect connection.
What is important for plugs is non-flammability, good protection from excessive loads, and adherence to the correct order of connecting the contacts. Conventional electrical plugs with grounding have a high protective class and good electrical safety. The structures are usually collapsible; electrical cords with 2-3 cores with a cross-section of no more than 2.5 mm are connected to them. You can also select other Euro grounding plugs to suit your current configuration and sizing requirements.
Adaptation of non-standard three-pole plugs
Sometimes, after traveling abroad, people bring home appliances that have electrical plugs that do not fit into the socket niches, although they meet all the characteristics of the network. If you use a grounded cord, you can find a way out of the situation using an adapter, but finding it can be extremely difficult; you can cut off the plug and replace it with a collapsible one. The issue of adapting adapters for laptops, household appliances and cell phones is especially acute, because the pins are located in the adapter body itself and it cannot be replaced with a collapsible plug.
You can use an IEC 60906-1 plug, where the distance between the two pins is 19 mm, while their diameter is 4 mm, but there is a pin in the middle for grounding, which prevents it from being inserted correctly into the socket. To solve the problem, it is enough to place the plug in a vice and cut off the unnecessary grounding pin with a hacksaw.
Types
There are two types of grounded electrical plug:
- monolithic;
- collapsible.
Regardless of the form, the content will be the same. Non-separable devices outperform collapsible ones in terms of reliability and ease of use. Maximum elasticity will allow you not to worry about moisture getting inside, contacts being closed or oxidizing. A standard fault with such products is a bend at the base of the connector. But repairing such forks is not impossible. Other parameters of right angle grounding plugs:
- pin contacts – 2 or 3;
- shape - from flat to polygon.
When choosing, be sure to consider the safety factor. Almost every modern plug with grounding comes as standard - the usual ones, where a pair of wires are connected, are not used. Pay attention to the contacts - they are copper, steel or galvanized, nickel, tin with galvanization.
Lawn mower fork repair
I was faced with the repair of a non-standard plug, the pins of which were pressed into the body of the switching unit of an electric lawn mower.
Due to the design peculiarities, it was not possible to replace the plug and we had to come up with a technology for fixing the pins.
Not only were the plug pins heavily oxidized from poor contact with the socket on the cord, but one of them was sunk into the plastic housing.
To secure the pins, it was necessary to disassemble the block, but I was faced with the fact that the self-tapping screws had slots with three oblique edges, allowing only the screw to be tightened. I had to heat the heads of the screws with a soldering iron and unscrew them with a flat-blade screwdriver of a suitable tire. After the repair, I screwed in other screws with heads under a standard cross.
The ends of the pins connected to the wires were located under the limit switch, which was fixed in the grooves of the block body.
After removing the switch, the recessed pin was heated with a soldering iron and returned to its original state. But the reliability of its fastening was low. When pressed with fingers, the pin swayed.
To prevent repeated breakage of the plug, the pins on the wire connection side were filled with epoxy resin, as shown in the photograph.
After the resin had cured, the block was assembled and the pins were sanded using fine sandpaper. The test showed reliable operation of the unit. Now the pins of the plug, even in the case of strong heating, will not be able to move.
Sources
- https://FB.ru/article/383000/kak-podklyuchit-vilku-k-provodu-pravila-i-rekomendatsii
- https://stiralkainfo.ru/remont/kak-zamenit-vilku-na-stiralnoj-mashine.html
- https://YDoma.info/ehlektrotekhnika/ehlektricheskie-izdeliya/electricity-vilka-elektricheskaya.html
- https://lightika.com/bytovaya-tehnika/kak-pomenyat-vilku-na-provode-s-zazemleniem.html
- https://StrojDvor.ru/elektrosnabzhenie/kak-podklyuchit-vilku-k-provodu-evrovilka-i-staraya-vilka/
- https://vodatyt.ru/elektrika/zamena-vilki.html
[collapse]
Installation procedure
The angled plug with grounding is installed according to the following diagram:
- A phase is connected to one contact of the plug, which supplies voltage to the consumer.
- The wire with zero is connected to the other contact. Ideally, the zero, neutral contacts should carry a current of the same value. In the event of a short circuit, it increases and the protection is triggered. Connecting the neutral to the housing or ground loop is prohibited.
- The third ground pin is connected to the ground wire. It does not have a direct connection with the phase wires. It is inextricably linked with those parts of the structure that are grounded.
Since there is no uniform standard for the production of electrical plugs with grounding in different countries, there are many types of plugs. Here are some food types in other countries:
- 110-127 V and 60 hertz - USA;
- 220-240 V, 50 hertz - Euro plug with grounding.
In Russia, the euro version is accepted as a single standard, not the American one.
Answers from experts
Replacing the plug on the cord or installing the plug is done as follows. 1. First, use a knife to strip the ends of the wire going to the plug, solder them (if you have a soldering iron :)) and make rings. 2. Unscrew the screws on the contact legs of the plug. 3. Screw the ends of the wire, sealed with a ring, to the contact legs of the plug. 4. Unscrew one screw of the bracket attached to one half of the case and move the bracket to the side. 5. Insert the housing halves with the bracket into the recesses, and the ends of the wire with the contact legs, turn the bracket and press the wire with it. Screw the screw into the hole in the bracket. 6. Cover the assembled part of the plug with the other half of the housing, insert a screw into the hole in the housing and twist it on the other side of the housing with a nut.
Replacing a permanent plug Non-removable plugs are an electrical cord made of rubber or plastic, which is molded integrally with the plug. If a permanent plug fails, do this. The unusable plug is cut off, and the connecting ends of the cord, after being sealed with a loop, are attached to a dismountable plug according to the above method.
Particular attention should be paid to connecting the grounding wire (it is striped yellow-green) - it should be connected to the grounding pins of the plug, and not to the pins. Miracle:
the old one is cut off. expose the wires, strip them, screw them into a new one as usual.
using a screwdriver and, if necessary, a knife...
Unscrewed and screwed
cut off the old plug, strip the wires and attach them to the new one.
the Soviets unscrewed. modern ones are melted to the wire and nothing.
Everyone has everything written correctly... but why did the plug melt? the problem is somewhere
Take a good look at the socket (tighten the contacts and, if possible, scrape the cheeks - there may be carbon deposits there.
Cut off the old plug, disassemble the new one, strip the wires, connect the wires to the plug, the yellow-green one must go to the grounding contact (usually in the center), assemble the plug, plug it into the socket.
Connector A standards
Angled plug with type A connectors is used in Japan and America. In the American version, the pins have different thicknesses, in the Japanese they are the same. Another name is Class II. An Asian plug fits into an American outlet, but not vice versa. Here is an example of an American plug. If the standard of the plug or socket does not coincide with the Russian one, then adapters are used.
Types of sockets
If you look at photos of sockets with and without grounding on the Internet, you can understand that there are a huge number of varieties of sockets. And these are only those that are connected to the power grid. If we omit the types that are not used in our country such as; American sockets - with two rectangular slots for a plug of an electrical appliance or a socket with a pin grounding, then several main types can be distinguished.
Soviet style sockets. They are used less and less nowadays. They do not have grounding and are connected only to a cable with two cores. Due to insufficiently rigid contact with the plug, breakdowns are common. As a rule, when using these products, electrical appliances are grounded separately.
The most common sockets nowadays are products of the European standard. It has a deep socket for fitting the plug, which makes it a little difficult to disconnect the electrical appliance from the power supply. Such sockets are available with or without grounding.
In addition to the Soviet and European sockets often used in our country, they have several types:
- Built-in (internal) sockets. They go deep into the wall in such a way that the entire mechanism is hidden in a socket recessed into the wall. They come with or without grounding.
- Surface-mounted sockets with and without grounding. The very name of this species speaks for itself. They are simply mounted on the wall without the need to drill holes and install a socket box.
In addition to single sockets, there are double, triple products and so on.
Domestic devices
A plug produced in Russia must meet the standards of GOST 7396. Technical parameters are applied to the body - these are voltage, frequency, current. Device groups of this category:
- CEE 7 / 16 or C 5 with 4 mm contacts, insulated from the housing, designed for current limits of 6 Amperes;
- CEE 7/17 – here the plug belongs to class C 6, has thickened pins, a current limit of 10 Amperes.
Old C1 - b plugs are equipped with pins 6 mm thick and do not have grounding.
Three-phase socket connection diagram
The connection diagram is selected in accordance with the household appliances used. Most of them are connected to regular 220 V sockets. However, there is equipment that may require a three-phase socket.
A three-pole 40-amp circuit breaker is installed at the entrance. Three phase and one neutral wires are connected to it. After the machine, the same three-phase meter is installed. Next, the phases are distributed among the loads, including three-phase power sockets connected to them. For laying lines indoors, wires and cables only with copper conductors are used. In external networks, the use of cables and wires with aluminum conductors is allowed.
Connection features
Electrical plugs with grounding must be connected strictly taking into account the parameters of the device being connected and the current capabilities of the plug part. A Euro grounding plug is the safest option; it is not advisable to use others. Be sure to first find out the power of the connected device (and calculate the current that will flow through the plug contacts). For example, a simple plug cannot be connected to an induction hob, since the hob consumes around 7 kW, and not every plug can withstand these loads. The current can be calculated using the formula below.
For an oven and electric boiler, calculations are carried out in a similar way.
Disassembling the suspension fork
Replacing the entire mechanism does not require disassembling it. But to repair a bicycle fork, lubricate the inner surface, or replace faulty elements, you need to get inside it. The general process of disassembling parts with a shock absorber is approximately the same for their different models:
- the bolts from the bottom of the “pants” are unscrewed with a hex key;
- unscrew Preload (this is a bolt that regulates spring compression and is responsible for the shock absorber stroke);
- the “pants” are removed from the fork “legs” (if you can see that there is dirt under the seals, then those too), the old oil is drained;
- the “leg” rods are cleaned of old grease and dirt, the travel stops and stops are removed from them;
- unscrew the adjustments located at the top of the “pants” (in order not to spoil the edges of the nut, it is advisable to use a wrench-head with a trimmed edge);
- take out, clean the foot rods, elastomers, and springs from dirt and old grease residues.
Tools
To connect a Euro grounding plug, take:
- side cutters;
- a screwdriver (depending on the type of screws, Phillips or slotted);
- electrician's knife.
Auxiliary accessories are usually not required. Procedure: standard diagram Let's look at how to connect a 220 V plug with grounding in stages:
- Take a cable - for example, round 3 * 1.5 mm.
- Unscrew the body - from the side or from below.
- Strip the wires of insulation - you need to get three wires with stripped wires at the ends (1 cm is enough).
- Disassemble, unscrew the contact group, connect neutral and phase to the pin contacts (grounding is the contact on the side).
- Connect blue and brown wires to the contacts, yellow to the ground contact.
- Stretch the contacts so that the wires fit tightly.
- Place the parts, assemble the body, tighten the fastening screw.
Check the build quality. How to connect a wire to a grounding plug, see video below:
Typical malfunctions of electrical plugs and methods for eliminating them
Plug malfunctions can result from their incorrect use. Any problem is easy to detect in the early stages.
Important! If the pins burn, you need to check the lamellas in the socket. With a high probability they overheat and are in disrepair. Do not use overheated plugs or sockets. Heating can cause a fire in the wiring.
Replacing a broken euro plug
Procedure for breaking pins or melting:
- Cut off the plug to be replaced and remove the outer insulating sheath of the wire.
- Strip 3 wires by 20 mm, twist them, strip up to 10 mm of wire insulation - this is enough to connect a new plug yourself. Use side cutters to bite off what you don’t need.
- To improve contact with pliers (if the wire is single-core, hard), bend the copper ends of the wire and connect the wires.
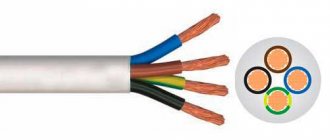
- Cords for connecting washing machines, refrigerators, and other equipment have three contacts, separated by colors. Zero is the blue color of the wire insulation, grounding is yellow and green, phase is the latter (different shades are possible, usually brown). For correct replacement, you need to connect the ground to the contact in the center, the other two to the pins, which one does not matter where.
- Clamp the cable with a plastic jumper - it will fix it in the landing area.
- Assemble the Euro fork body and fasten the structure with a screw.
As you can see, the procedure is simple, you just need to follow the sequence.
Which fork is better - collapsible or cast?
The cast plug is more reliable; its main advantage is the density of the contacts that connect to the pins. The cast model uses spot welding, soldering and crimping. Another advantage of the model is its tightness.
But there are annoying drawbacks: it cannot be disassembled to eliminate the cause of the breakdown. If the cord frays at the base due to prolonged use, then the only solution is to cut off the molded plug to replace it with a collapsible model. It is possible to completely change the cord and plug to a new one, but to do this you will have to disassemble the device.
However, if such a replacement does not frighten you, it is better to purchase a cast product, especially since, due to its increased reliability, such a fork fails much less often than its collapsible counterparts.
Replacing an old electrical plug
If the wiring in the apartment is old without a grounding wire, and it is necessary to replace the plug with a plug without a grounding contact, then for replacement you will need to use a different circuit:
- Cut off the old electrical plug that has failed.
- Remove the outer sheath of the wire, strip the ends to 20 mm, and bite off the excess.
- Attach the cores according to a similar pattern above, forming rings from the stripped ends, as in the photo.
- Insert a pair of conductors into a plug without being tied to poles. If there are 3 wires in the cord, the yellow-green one will need to be cut off - there is no place to connect it.
- Clamp the plate and assemble the body.
The technology for replacing an electrical plug with grounding is simple; the main thing is to connect the wires correctly. To do this, take into account the standard color coding of the wires.
How to change an electrical plug on a wire
If there is a need to replace the plug on the wire, then you first need to decide on its type, based on the power consumption of the electrical appliance and the need for its grounding. To avoid any hesitation, it is best to replace the faulty electrical plug with a plug of the same type.
How to change the electrical plug on C1-b
If there is a need to replace the plug on the cord, then you need to start by preparing the ends of the wires for connection. To do this, you need to cut the cord at a distance of 3-5 cm from the plug. If the plug became very hot due to poor contact, then usually the insulation of the wire at the point where it exits the plug becomes rigid and this part of the wire must be removed. Next, the insulation is removed from the wires to a length of about 20 mm and rings are formed at its ends. Screws are inserted into the rings, onto which first spring washers (grovers) are first put on, and then flat washers. A Grover is a must.
Then the screw is screwed into the pin until it stops. In the same way, the wire is connected to the second pin. The pins are installed in the housing with protrusions in special round recesses. Next, a strip is placed on the wire and pressed to the body with two screws. If the wire insulation is thin, then to prevent it from chafing at the point where it exits the plug, it is advisable to put a rubber or PVC tube over the insulation.
All that remains is to connect the halves of the housing and tighten them with a screw and nut. If the halves do not completely touch, it means that the wires running next to the tightening screw are in the way; you need to move them away. To do this, you need to unscrew the screws on the rings a little, turn the wire and tighten the screws back. If you do not do this, you may break the plug when tightening. If you connect a cord with three wires to a two-pole plug, then the yellow-green
colors (grounding) should be stripped of insulation and do not need to be connected anywhere.
How to change an electrical plug to a three-pole C6
Preparing the ends of the wires for connection to the three-pole plug C6 of the cord is carried out in the same way as for plug C1-b. The assembly technology is also similar. The main thing is that if the grower fork is not included in the kit, be sure to find and install these spring washers. To connect the cord to the plug, you need to insert screws with washers into the ends of its wires, previously formed into rings, and firmly screw them to the contact pads of the plug. Please note that the yellow-green wire can only be connected to the ground contact.
It is usually located in the middle between the contact pads of the pins.
If the cord is two-wire and there is no yellow-green
wires, the ground contact in the plug is left free.
How to replace a faulty electrical plug C5 or C6 using wire extension
In practice, you may encounter a situation where the power plug has failed, an electrical appliance is urgently needed, and there is no collapsible plug at hand to replace it. It’s a long way to get to the store, and not every village has an electrical goods store. But even from such a seemingly hopeless situation, there is a simple way out.
Almost every household has some kind of faulty electrical appliance, for example, an electric kettle. You can take a plug from it for repair and replace the faulty one according to the instructions below.
The photo shows an old stand for an electric kettle, from which comes a wire with a molded C6 plug at the end. The length of the power cord for electric kettles is usually short, but, nevertheless, if the length of the cord of the electrical appliance whose plug needs to be replaced was insufficient, then you can take the opportunity to make the cord longer. In this case, you need to bite off the wire from the electric kettle stand to leave its maximum length. Sometimes at the bottom of the stand a piece of wire is wound onto a spool. Therefore, its length may be greater than apparent. If you do not need to extend the cord of an electrical appliance, then it is enough to leave about 15 centimeters of the cord.
Next, you need to carefully, so as not to damage the insulation of the wires, cut the sheath of the cords lengthwise to a length of about 10 cm and pull the wires out of the sheath. Attention, there is no need to cut off the shell. Typically a standard cable has three wires of different colors. Brown
(phase),
light blue
(zero) and
yellow-green
(ground conductor).
At the next step, it is necessary to adjust the length of the conductors so that the places of future twists of the wires are shifted relative to each other by a couple of centimeters. When adjusting the length of the wires, you need to take into account that wires of the same color must be connected to each other.
Next, the insulation is removed from the wire cores to a length of about 15 mm. If one of the cables is missing yellow-green
wire, then the insulation should not be removed from the existing one, since it cannot be connected anywhere. He must remain free.
In the next step, the copper strands of the wires, stripped of insulation, are connected to each other using the twisting method. For good contact, three turns of entanglement are enough.
For reliable long-term contact between the wires, they must be soldered with solder using a soldering iron. To remove possible sharp solder protrusions and wire ends, the soldering area must be treated with sandpaper. If you do not solder the twists, then with a high power of the electrical appliance, the contact may be broken over time.
You can do without soldering if, before twisting, you put pieces of thin-walled copper or brass tube on the wires with an internal diameter slightly larger than the diameter of the wire insulation. After twisting the wires, move the tubes to the junction and flatten them in several places with side cutters.
Next, the connected wires are tucked into the previously cut sheath of one of the cables. There is no need to insulate the connections, since due to the shift of the twists, the exposed sections of the wires do not have the opportunity to touch.
Next, the connected wires are tucked into the previously cut sheath of one of the cables. There is no need to insulate the connections, since due to the shift of the twists, the exposed sections of the wires do not have the opportunity to touch. If the distance between the twists is less than 10 mm, then they need to be covered with insulating tape.
Now all that remains is to cover the cable connection with one layer of insulating tape, and the job will be finished.
As you can see, a working plug is installed on the cord of the electrical appliance using the wire extension method, and the electrical appliance can now be connected to the electrical network for further operation.
The spliced cables were taken in white and black colors specifically for clarity. If you choose the color of the plug and PVC insulating tape to match the cable of the electrical appliance, the connection point will be almost invisible.
Old electrical plug and its replacement
The old electrical plug has a simpler design. Here the replacement technique will be slightly different. Here are the main steps you will need to complete:
- First, you need to cut off the old electrical plug housing and disassemble it.
- As with the Euro plug, you need to expose the wires. The ends should be stripped to 15 cm of the wire. The design of a regular plug may differ, which is why it is necessary to strip the wires, as indicated in the photo below.
- There is no ground here, so you only need to connect two wires. When connecting, be sure to pay attention to the polarity.
- Now you can begin assembling the electrical plug housing.
As you can see, the old electrical plug has a simple assembly design. You can see how to do this in the video below. If your washing machine is noisy, then you should read about this problem.
Replacing the old Euro plug
You may need to replace the electrical plug if one of the pins is broken. The electric plug has a simple replacement technology, which includes:
- It is necessary to cut off the old Euro plug and remove the outer sheath from the cord. From the end you need to cut about 5 cm from the cord.
- You need to strip all the wires to 15 cm. This length will be enough to connect the wires to the electrical plug.
- Now you need to cut all the wires so that only 10 cm of bare wires remain. This will be quite enough to change the plug yourself.
- To improve contact, you need to bend the ends of the wires with pliers.
- Replacing a broken Euro plug has the most important step, which includes connecting the wires. As a rule, all cords have three wires. The blue contact is zero, the yellow contact is ground and the brown contact is phase. In order to correctly change the plug yourself, you will need to connect the ground to the central contact.
- To prevent the electrical plug from wobbling, you will need to clamp the wire using a plastic jumper. It will securely fix your wire.
- Now you need to assemble the finished Euro fork body.
As you can see, the design of the electrical plug is quite simple. If your refrigerator does not turn off, then you should read about this problem. That is why you can easily carry out the replacement yourself. You can watch this process in the video below.
Replacing plugs
A plug is an electrical connector that provides a plug connection. With its help, you can quickly connect and disconnect an electrical device using different connector contacts.
To replace the plug structure, you will need the following working equipment: small Phillips and flathead screwdrivers, a stripper, a craft knife and a new plug. The replacement technology is as follows:
- Unscrew the screw, the task of which was to ensure a reliable connection of the halves of the mechanism, and disassemble it.
- Using a stripper, remove about 5 cm of the top sheath of the cable. If the plug is equipped with a fuse, you need to select it correctly, for example, a red three-ampere with a power of 720 to 3000 watts.
- About 12-15 mm of braid is removed from the ends of the wire. The wires are twisted with your fingers to make the end neat and smooth. The plug is disconnected and the cable is inserted into it. The end of the latter is securely fixed using a plastic clip.
Most plug modifications are equipped with special metal sockets into which the bare end of the wire must be inserted. It is tightened with a miniature screw.
Replacing a collapsible fork
If you have an old-style electrical plug, it is collapsible and has only two wires, then the instructions will be very similar to the previous one. Grounding is not provided for this type of plug, so we plug the grounding conductor (cut it off at the root). Let's take a step-by-step look at how to install a plug on a wire:
We disassemble the new plug. We clean the wires. We screw the wires to the contacts. We fix the wires in the body. We tighten the plug body with fixing screws.
Replacing an old Soviet-style electrical plug
One of the most common plug designs in the USSR, designed for 220V.
The old electric plug has an even simpler design compared to its previous analogue. The replacement algorithm in this case is slightly different. The main steps that make up the replacement:
- The old building is dismantled and disassembled.
- As in the previous case, the wires are exposed. The ends are trimmed to 15 mm.
- In this case, there is no grounding, so you only need to connect two wires. When connecting, it is important to pay attention to the polarity.
The final stage is the assembly of a ready-made electric plug.
Is it possible to change the cord?
Quite often, the malfunction of the power cord plug is explained by a short circuit that has occurred, and the original source of the problem is hidden in another place. For example, it may be a power cord that has a breakdown. A similar problem arises as a result of crushing by bulky objects, and external damage caused by a nail or sharp corner also occurs. In this regard, you should not rush to disassemble the plug until the cord has been carefully inspected for cracks, bends or traces of burning.
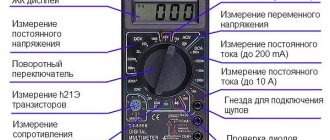
The easiest way to check the functionality of the machine's power cord is with a multimeter. The prepared tester switches to the “buzzer” mode, after which you can ring the cord. As soon as the device detects an electricity leak, it will emit a high-pitched signal.
When testing a circuit whose length exceeds two meters, it is recommended to prepare a second wire and insert it into a single circuit. If there is no spare conductor, there is a second option - the “zero” and “phase” wires are connected at one end of the cord. The probes of the measuring device are connected to the nearest contacts. It should be noted that this verification method has certain advantages:
- in one step, the probability of leakage is checked on both wires connected in a common circuit in series;
- there is no need to find a suitable conductor and build up the circuit.
In the absence of a multimeter, the integrity of the conductor is checked using a universal device made by yourself. To do this, you will need a 3.5 V light bulb, a battery with a slightly higher power, a connector and a pair of connecting wires. The elements are connected in a certain sequence:
- a light bulb is connected to the positive contact of the battery;
- The second contact is connected to a flexible wire equipped with a clamp.
How to connect a three-phase outlet to a 220 network
Very often, powerful electric stoves are used in everyday life, consuming current in the range of 40-50 amperes. As a rule, such equipment is connected to dedicated power lines. The connection can be made directly from the input terminals located on the back wall of the stove, or through special power connectors consisting of a socket and plug.
The second option is most often used, which is considered more convenient. If you don’t want to break the tiles for hidden wiring, you can use a three-phase overhead socket, which is best suited for connection. Its rated current must be at least 32 A.
First of all, the cable is connected to the electric stove itself according to the diagram located on the right side of the back wall of the device. It schematically shows the terminal block located next to where the conductors will be connected. The phase contacts are connected by a common jumper. The second jumper connects the zero contacts. The last, sixth contact is provided for connecting the ground wire. Usually the jumpers are already installed, but it is recommended to check their presence just in case.
Connection to the plug must be done carefully. The top contact is usually provided for the ground wire. The other two are phase and neutral, which can connect any wire. The most important thing is that all the wires in the power outlet are located in the same way. Otherwise, incorrect connection will cause a short circuit.
How to connect a three-phase socket
After considering the theory, you can move on to direct practical actions. It is recommended to consider the standard connection of a three-phase outlet using the example of a typical power device. This socket is equipped with a protective cover and is used for external installation on wall surfaces. Regardless of the manufacturer, they are all standard and connect in the same ways. Three-phase power connectors are used not only with industrial equipment, but also at home to connect water heaters, electric boilers, fan heaters and other powerful devices.
Connecting a three-phase outlet is carried out in several stages. First of all, it is disassembled into separate parts by unscrewing the mounting screws located on the front side. Thus, the design of the socket includes a base, an internal mechanism, a protective cover and an O-ring. In addition, the kit is complemented by a rubber plug used for hidden power cable routing. It enters the socket through a hole located in the base, where this plug is inserted. A hole of the required diameter is made in it for the cable.
The base of the socket is fixed on the wall in a pre-selected location. Alignment is done using a level, and the locations of the mounting holes located in the corners of the connector are marked with a pencil or marker. The base is fastened in accordance with the material of the walls where it will be installed. Most partitions are made of brick, so you will need a hammer drill to make a hole. On wooden or plasterboard walls, only self-tapping screws can be used for fastenings, without any additional holes.
After the base is securely fixed in the wall, preparation of the input power cable begins. It is laid all the way to the socket and inserted into the base. The cable cross-section is selected according to the project or in accordance with the power of the connected equipment. Even before connecting a three-phase outlet, the electrical network must be de-energized. The end of the cable should be marked in such a way that the corrugated pipe extends into the socket by 20-30 mm, and the cores themselves by 80-100 mm.
Before connecting, a sealing ring is put on the corrugated tube in advance, which is included in the design of the socket. Next, it is adjusted in such a way as to ensure free entry into the grooves located in the base. At the same time, the corrugation should not be overly tense or compressed.
The next step is to directly connect the cable. For this purpose, the protective insulation is removed so that about 30-40 mm remains from the edge of the sealing ring. After this, the cable cores are arranged in a certain order and the insulation is also removed from each of them to a distance of approximately 10-12 mm. It is necessary to take into account that the grounding conductor is made a little shorter relative to the others, and more insulation needs to be removed. The most optimal length of the cores can be selected by installing a socket into the base of the socket mechanism. Then it will be clearly visible to what length to cut them.
All cable cores are distributed among the socket terminals in accordance with the markings. It indicates the connection points for phase, neutral and grounding conductors. After installing the conductors into the terminals, they must be securely secured with mounting bolts. Upon completion of installation, a protective cover is installed, and the three-phase socket is ready for operation.

