Defect removal technology
If the question is how to fix a cracked self-leveling floor, it is advisable to seek qualified help from professional builders.
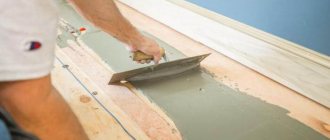
If you decide to cope with the task yourself, we work according to the following instructions. Deepening and dust removal of crack cavity
Sealing cracks
- If the cracks in the self-leveling floor are 0.5-1 cm wide, they will have to be doubled.
- Next, we clean out large fragments of dirt and dust from the formed recess.
- Use a vacuum cleaner to remove fine dust.
- The internal cavity of the recess is treated with a primer.
- To fill cracks, we use flooring mixtures such as Ceresit ST 724, Plitonit P3 or Glims SL.
- The mixture is introduced into the recess and leveled.
The results of sealing cracks can be judged with confidence only after 28 days, when the material is completely dry.
Replacement of coiled fragments of self-leveling floor
- If individual fragments of the floor are movable, we remove them down to areas of stable and durable coating.
- After the coiled fragment of the coating is removed, we check the quality of the concrete base under the floor, since most likely there is a break in it.
- If the subfloor is also movable, remove the part of the screed that sways.
- The resulting depression is thoroughly dusted and primed.
- After the primer has dried in the resulting recess, fill in a material identical to the composition of the used polymer floor.
The final result can be assessed after 28 days.
Removing cracks
Cracks in self-leveling floors are the most common defect. It is safe to say that the installation technology was not carried out or was not known about it at all. Minor ones up to a millimeter will not play any role, but larger defects should be removed immediately. There will be little work and no special experience is required.
The cracks that appear must be widened, cleaned and treated with a strengthening primer. As soon as the surface dries, special repair concrete is poured into it and then sanded.
Cracks in the self-leveling floor may appear periodically, even after they have been eliminated. This indicates subsidence of the poured solution. It would be a good idea to check the base for defects: the floor slab is “walking” and shrinkage cracks are forming in it. In this form, repairs will take much more time and money. Otherwise, it will not be possible to obtain a perfect self-leveling floor. Local elimination of cracks on the surface will not give any result.
READ MORE: Concrete screed: technology, floor device
A large number of cracks cannot be repaired. You should contact specialists who can dismantle the self-leveling floor and replace the concrete screed if this is the cause.
If the self-leveling floor is cracked, you need to repair the damage as quickly as possible. Methods for eliminating them depend on the depth of the crack and its size. If there is minor damage no more than 1 cm in length, there is no need to refill the flooring.
All you need to do is follow these steps:
- using tools, the crack is expanded to 2 cm along its entire length;
- all dirt is removed with a vacuum cleaner;
- along the base and walls the crack is treated with a primer;
- then the polymer mixture is poured into the cracks and the surface is leveled.
If the area where the floor is cracked is quite large, the entire damaged area of the flooring must be removed and re-flooded. They do this as follows:
- the filler layer is chipped off, cleaned and the base is examined;
- if the concrete base contains cracks, use cement putty;
- the area is cleared of contamination;
- they are priming the exposed side surfaces, priming the concrete base itself;
- everything is filled with new mortar and leveled.
Errors related to pouring technology
Even when the surface is perfectly prepared, defects can appear if the manufacturer’s instructions are not followed, as well as by careless adherence to technology. In particular these are:
- There is not enough water for the solution to achieve its final hardness and strength when drying;
- Excessive amount of water, which leads to partial or complete separation of the bulk mixture;
- The mixer is too powerful, which excessively saturates the solution with air, which leads to porosity of the surface;
- The foundation was not primed, which leads to poor adhesion and uneven spreadability of the finished mixture;
- The production of the solution proceeds at a slow pace, the next portion is added too late, when the first has already partially hardened and is no longer able to adhere to the new one.
- After pouring, the floor was not treated with a squeegee or rule, which led to bumps and holes;
- Air was not removed from the solution using a needle roller;
- The heating system was turned on early;
- There were drafts;
- High or low humidity levels;
- Temperature changes.
Types of unevenness on the screed floor
Cracks
Irregularities can be divided into several categories; they all have their own cause of occurrence and individual methods for eliminating defects.
| The reason for the appearance of irregularities | Type of irregularities |
| Wrong proportion of water and dry ingredient | Water is required to ensure optimal chemical reactions during curing. Insufficient moisture results in incomplete hardening of the floor. As a result, some areas quickly wear out, and depressions appear on the surface of the dried floor. Excess moisture causes partial or complete detachment of the self-leveling floor from the base. |
| Violation of mixing technology | Too high mixer speeds create many air bubbles of various diameters. All further measures (settling, use of a needle roller, etc.) remove only large ones; small ones remain in the mass. During hardening, air bubbles rise up and the floor surface becomes lumpy. |
| The base is not primed before pouring | Due to the lack of primer, areas with different moisture absorption appear on the base. In one place the mixture loses moisture too quickly, and in another it holds it for too long. Another consequence is the peeling of the self-leveling floor. This is a very unpleasant phenomenon; ordinary leveling cannot be done to eliminate it. |
| Insufficient labor productivity | When determining the volume of the finished mixture, actual capabilities were not taken into account. The solution has its own maximum time frame for use; in the future, the course of chemical reactions significantly reduces fluidity. As a result, it is difficult to level, and tool marks are noticeable on the floor. |
| Poor leveling of the surface with a rule and squeegee | Poor leveling of the surface with a rule and squeegee |
| Drafts indoors | Drafts cause uneven drying of the mixture. Some areas lose moisture too quickly, while in others it stagnates. The floor becomes not only unstable, but also uneven. |
| Failure to comply with recommended indoor microclimate indicators | Too high a temperature or low humidity disrupts the optimal hardening regime. The self-leveling floor deviates from horizontality. |
| Large unevenness on the base | Any material containing water shrinks. Depending on the components, it may fluctuate within different limits, but it will definitely happen. If there are large depressions on the surface of the base, then an increased thickness of the liquid mass will be required to level them. During hardening, it is in these places that depressions appear. |
| Absence of damper tape around the perimeter | The tape compensates for linear expansion of the self-leveling floor. Its absence causes separation from the base and swelling of the material. |
| Weak concrete screed | If the strength of the screed is much lower than the physical characteristics of the self-leveling floor, then peeling is inevitable. A dirty base can lead to the same negative result. |
| Non-simultaneous filling | With large areas of premises, it is almost impossible to fill at the same time. And any interruption of work inevitably leads to differences between the old and new solution. |
After we have figured out the reasons for the appearance of irregularities, we can begin to talk about various methods and technologies for eliminating them.
All existing defects of the finished surface of the self-leveling floor are divided into 2 large groups:
- Local (for example, differences in height, cracks, sagging, pits, craters, peeling);
- Serious (excessive drying of the top layer, the presence of deep cracks, complete delamination, voids and porosity that affect the entire depth of the hardened layer).
And if in the first case you can save the situation with the help of a grinder and simple methods of leveling the surface (primer, putty, plastering), then in the second case you will have to completely dismantle it, clean the floor down to the foundation and fill it all over again.
READ MORE: Wooden floors: types and installations of floors, do-it-yourself installation technology
When it is quite possible to correct errors, you need to do the following:
- Level the surface;
- If necessary, expand slightly;
- Clean from dust and small debris;
- Pour the quick-drying putty or plaster mixture;
- Level with a spatula or rule;
- Dry;
- Prime;
- Reapply the finishing layer.
When the defects are irreparable, the self-leveling floor will have to be completely dismantled. These disadvantages include:
- Cracks, small and deep, that affect the entire coating area;
- The floor peels off completely;
- The presence of many voids under the frozen surface;
- Porosity that extends throughout the entire depth of the screed.
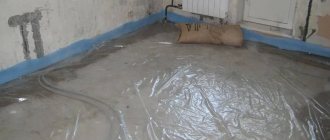
Self-leveling floor is cracked
They ask us:
Hello
! I turn to you again for advice. I was disappointed with the pouring of the floor; a week ago the floor in the hall was done with Volma Nivelir self-leveling floor. We followed the proportions (per 20 kg bag 5.8-6.8 liters of water, we added a little over 6 liters). We went over it with a needle roller, everything seemed to spread and dry well, but we came back 3 days later and found that the entire floor was cracked, like a spider’s web, and now we don’t know what to do.
They advised diluting the same solution into an even thinner consistency and rubbing it into the cracks with a spatula, roller, brush, etc. We tried it on a small area, during the day something seemed to have rubbed off, but the surface in that area was rough. Tell me why this could have happened (we still need to fill the floors in two more rooms) and what to do about it now? Everything is done for further covering with linoleum. Thanks in advance for your time! We answer:
In such cases, there are two options: a “burnt” mixture - defective or counterfeit (which is rare, but it happens), or a violation of technology, including in terms of preparing the base, preparation and application. Start with preparation: follow the instructions exactly, the “leveler” (self-leveling floor) is very demanding in terms of compliance with the conditions. If it is written that you should pour the dry mixture into the water, and not vice versa, then that’s exactly what you should do. The amount of water +/- 1 liter will not make a difference. Stir with a mixer for five minutes, then let it sit for a minute or two and stir again, immediately before pouring. The finished mixture spreads like a stain on a non-absorbent surface. The base must be well primed. If it is ordinary concrete, or cement. screed, then it is necessary to prime and wait for the primer to dry completely (at least 3-4 hours).
If it is a porous surface (say, insulation), you cannot pour it onto such a surface, unless it’s a layer of 2-3 cm, otherwise it will crack and that’s it. A self-leveling floor is like putty - it is mainly designed to smooth the surface. But again it depends on the layer.
The photo shows that there are dents left on the “level” from the roller, this should not happen. The surface must be flat; after rolling to remove bubbles, dents from the roller needles should immediately heal. The mixture is laid for 5-10 minutes, a maximum of 20 minutes, after which it begins to set. You can safely throw away the unused mixture; you cannot add water afterwards to dilute it again if more than 20 minutes have passed. If traces of the roller remain, the mixture has already set; rolling it is useless.
I recommend: How to install and concrete fence posts
Subsequent grouting with a more liquid composition is possible. But it’s better to take a cement-based putty, like “vetonite” or something like “uniflot” (gypsum mixture for sealing gypsum board joints). But here the main danger is not in cracks; for linoleum up to a millimeter they are not critical, but in possible peeling and destruction.
If everything is prepared scrupulously and applied as expected, then the only problem is the quality of the mixture. or comment
Step-by-step execution of work
Like any other coating, self-leveling floors have their strengths and weaknesses. The advantages include the following:
- are able to level any surface, which is especially important in rooms with uneven floors;
- do not have seams in which germs and dirt could accumulate;
- are characterized by a long period of operation, and also do not lose their attractive appearance even after several years;
- practically immune to the effects of aggressive chemical environments;
- do not crack under mechanical stress, withstand impacts and falls of heavy objects;
The self-leveling coating is distinguished by its durability
- resistant to fire, do not emit harmful substances when heated;
- They are environmentally friendly, so they can be used in medical institutions or children's premises.
Read more: Filling bathtub or acrylic liner – which is better?
Before you make a self-leveling floor with your own hands, you should know about its disadvantages:
- relatively small selection of design options compared to other types of flooring;
- before pouring the self-leveling floor, the surface must be carefully and long-term prepared, leveled and the humidity level reduced;
Self-leveling flooring is resistant to high humidity in the kitchen
- dismantling the self-leveling floor is very difficult, which takes a lot of time and effort;
- some types of self-leveling floor coverings may turn yellow when exposed to direct sunlight;
- price per sq. m of self-leveling flooring is higher than for other types of flooring, as is the cost of installation;
- repairing self-leveling coating is difficult and expensive;
- The material itself is also not low in cost.
As can be seen from all these factors, before installing a covering, it is worth carefully considering whether it is practical. The price for a 25 kg bag of self-leveling flooring may depend on the type of material, manufacturer and other parameters and vary over a very wide range.
As already mentioned, this type of flooring is relatively easy to install. To successfully fill, you need to adhere to a clear pattern, then your floor will be as attractive as possible and will serve you for many years.
Scheme of decorative and conventional self-leveling floor
To create 3D self-leveling floors, one- or two-component solutions can be used. Two-component formulations are of higher quality. To pour such a mixture, you need to prepare the surfaces in the same way as described above. If you plan to use a pattern, it can be made on a special thick backing or self-adhesive vinyl base. Instead of a drawing, you can use special paint, which is applied to the prepared stencil.
Sequence of application of self-leveling 3D floors:
- The mixture prepared according to the instructions is poured onto the base from the distant wall and leveled using a squeegee. You can use a spatula to push the solution under the batteries. When the entire room is filled with the composition, an aeration roller is rolled over it to remove bubbles from the air.
- If decorative elements in the form of coins, shells, sand are used, they are laid immediately after pouring the base layer.
- Drawings are applied only after the solution has completely dried. This will help prevent paint from peeling and bubbles forming.
- When using a design on matte banner fabric, its back side is covered with special glue, after which the fabric is applied and pressed to the surface. It is imperative to expel the air from the cavity. Drawings must be done with polymer or acrylic paint.
- The designs on the self-adhesive vinyl film are carefully separated from the base, applied to the self-leveling floor, pressed and leveled using a scraper. The places where folds have formed are heated with warm air from a hairdryer and the air cavity is removed with a scraper.
- One or two layers of polymer varnish should be applied on top of the drawn image or glued pattern with your own hands. After it has dried well, you can prepare for the final coating of the floors.
- The finishing solution is prepared by mixing all the components and stirring them for several minutes. The finished mixture is poured onto the surface and leveled with a notched spatula. To remove air bubbles, a needle roller is rolled over the finishing layer.
Self-leveling 3D floors will dry completely no earlier than in a week. But after 3-4 days you can move carefully along them. After complete drying, it is recommended to treat the surface with polymer varnish. This will prevent damage to the coating and improve the wear-resistant qualities of the floor.
Creating a 3D floor in your home yourself is quite difficult, but possible. The process takes place in several stages: making calculations and preparing the base, creating a leveling layer, applying a pattern and then the finishing layer. It is the latter that will provide that very 3D effect that people like so much.
Self-leveling floor with ornament
After the drawing has been selected and printed, all the necessary tools and materials have been purchased, you can begin the work itself.
Step 1. The first stage is preparing the base. The subfloor is thoroughly cleaned of debris and dust. The surface is degreased if there are stains of oil or paint on it. All cracks and chips are sealed with sealant, irregularities are sanded. The surface is thoroughly dried (acceptable humidity levels for the base are no more than 4%, air humidity is no more than 50%).
Cleaning the subfloor
Step 2. The surface is primed with a special primer mixture for self-leveling floors. The mixture can be applied with a roller or spatula. This is necessary so that the base and the leveling layer are connected very firmly.
Floor priming
Step 3. After the primer has dried (about 4 hours), white epoxy material is poured onto the surface to level the base. Leveling the layer is done using a wide spatula. You must wear special spiked shoes (paint shoes) on your feet, which will allow you to walk on wet surfaces.
Leveling the epoxy layer
When working you need to use paint shoes
Step 4. The surface is treated with a special needle roller. This will remove excess air from the thickness of the material. The surface is dried for at least 24 hours, after which the evenness of the layer is checked.
Processing the layer with a needle roller
Step 5. The design is applied (paint, banner fixed, etc.). The base layer is primed, a transparent polymer solution and a solvent are applied to it, mixed in a 2:1 ratio - an adhesive solution for a banner. The finishing material can also serve as an adhesive composition. It is applied to the rough surface, and a banner is glued on top. It is very important to expel all the air from under the banner fabric. The work can be done with a clean roller.
A banner with a pattern is laid out
Step 6. The amount of polymer mixture of the finishing layer is calculated - it will depend on the required thickness and floor area. On average, consumption is 4-4.5 kg/m2. Next, the material is poured onto the surface of the banner and carefully leveled. The air is expelled with a needle roller. Next, the floor is covered with plastic film until completely dry, and then varnish is applied to the surface, which will protect the surface from mechanical damage.
Pouring the final polymer layer
Kinds
All self-leveling floors can be divided into several large types depending on the binding material:
- polyurethane;
- epoxy;
- gypsum;
- on a cement base.
Polyurethane self-leveling floors
As the name suggests, their base is polyurethane. They have high strength, immunity to chemical influences, and wear resistance. Increased elasticity prevents cracks.
Can be used in both residential and industrial premises.
Polyurethane flooring can be poured onto almost any substrate: floorboard, laminate, metal, concrete.
Epoxy self-leveling floors
The basis of the epoxy floor is epoxy resin and hardener. These are the most beautiful polymer self-leveling floors; a good craftsman can use it to create a real work of art.
The floor can be transparent with any pattern, glossy like glass or matte. It is very hard, resistant to various chemicals and mechanical stress, but is afraid of pinpoint impacts.
Epoxy floors are recommended for areas with high loads (schools, cafes, offices) and for residential premises due to their high decorative properties.
Due to the more complex manufacturing technology, it is recommended to entrust their filling to specialists.
Self-leveling cement-based floors
These are cement-based dry mixtures to increase plasticity and greater spreadability, special modified additives are added to them.
Suitable for leveling large differences, cracks and other defects on the subfloor.
Used as a base for laying the finishing floor covering on it:
- laminate,
- tile,
- linoleum, etc.
One of the leaders in the modern construction market is the fast-hardening mixture OSNOVIT SKORLINE T-45; using its example below, step-by-step instructions for pouring a self-leveling floor in an apartment will be given.
Osnovit Skorline T-45 is used for surfaces with unevenness up to 10 cm, both for final leveling and preliminary leveling. It is non-shrinking, high strength and crack resistant.
It is also suitable for those who want to install a “warm floor” system. This is facilitated by its high self-leveling and spreadability.
Founder Skorline T-45 complies with all hygiene standards in force in the Russian Federation, it is environmentally friendly and does not contain harmful impurities. When hardened and completely dry, the surface is completely smooth and does not require further sanding.
Materials and tools
In order to install self-leveling flooring, you do not need special construction skills or specialized tools. All you need to do is take the following things:
- container in which the mixture will be mixed;
- tape or thread for marking;
- a special attachment for a drill or construction mixer for stirring the solution;
- set of spatulas;
- needle roller for uniform distribution of the mixture over the surface;
- level and rule;
- personal protective equipment, special shoes and clothing.
Set of tools for pouring floors
If you use a self-leveling coating for pouring, it will spread evenly over the surface, so you don’t need to use a roller. But it is imperative to wear personal protective equipment, since the mixture may contain aggressive chemicals.
Read more: Do-it-yourself installation of a geyser in an apartment; norms and requirements
In order to create a 3D floor, certain materials and tools are required:
- primer necessary for treating the subfloor;
- a polymer mixture, thanks to which a leveling layer will be formed;
- the design itself, which is usually made on banner fabric;
- a transparent two-component polymer that will act as a finishing coating;
- an adhesive composition, thanks to which the pattern will be fixed on the leveling layer;
- protective varnish used to cover the topcoat;
- masking tape;
- polyethylene film;
- spatulas;
- rule;
- brushes;
- special shoes.
Tools for pouring self-leveling floors
Paintshoes
masking tape
If the drawing is created by hand, then you will need acrylic paints and brushes. A protective composition will also be useful, which will ensure the safety of the drawing.
Filling and leveling a layer
Polyurethane floors
Polyurethane decking can be repaired in two ways:
- apply a uniform polyurethane layer over the damaged area;
- removal of the damaged area, complete refilling.
For the first option, that is, to apply a new top layer of polyurethane fill, you must perform the following steps:
- Wash the surface of the flooring thoroughly and wait until the surface of the washed floor is completely dry. Do not proceed to the next step until the top layer is completely dry.
- After drying, the surface of the flooring must be sanded well, removing blisters, bubbles and other irregularities. This can be done using sanding material. If the area of the flooring to be sanded is quite large, it is more convenient to do this work using a grinding wheel.
Next, the floor must be treated with a degreasing compound. At the next stage, a layer of primer is applied to the degreased and dried surface of the flooring. After completing all operations, a new one is evenly applied to the treated old layer.
It is important to follow all instructions when working with the coating solution.
To completely refill the damaged area of the flooring, you will need to do the following:
- Chip and remove the top layer.
- Grind the exposed layer of concrete base. Grinding should be deep enough until visible pores appear in the concrete layer.
- Clean the polished concrete surface from debris and remove dust using a vacuum cleaner. Make sure the surface is well dried.
- Then it is necessary to degrease the joints and the surface of the concrete base. After treatment, allow the surfaces to dry.
- After performing the above steps, a new solution is applied to the treated area.
Removing polymer self-leveling floors
When assessing the methods for dismantling these coatings, we can distinguish three levels of complexity of the work:
- A. Average labor intensity
- B. High labor intensity
- C. Extremely high labor intensity
Level A dismantling
Most epoxy and acrylic decorative flooring companies claim that their coatings are “virtually impossible to remove.” The information is close to reality if the thickness of the polymer fill exceeds 5 mm and there is no decorative substrate underneath.
However, in most cases, when printed interlayers are used, the adhesion of the top layer is reduced. You can remove this type of self-leveling floor using spatulas and special cutters. There are ways to facilitate the process using local chemical or heat treatment.
As a rule, coatings of this type are mounted on leveling fills made from self-leveling cement mixtures. Accordingly, the easiest way to remove a 3D floor is to remove it “in company” with a level.
Dismantling level B
To remove polymer concrete self-leveling floors, use the same techniques as when destroying rough screeds. However, the duration of work is significantly longer than when dismantling concrete of comparable thickness.
Polyurethane, epoxy and acrylic coatings, arranged without printed substrates and intermediate cement level, are removed using disc scrapers and self-propelled grinders. Some experts use a combined technology consisting of two stages: first, the upper part of the layer is sanded off, then the remaining material acquires the properties of softened linoleum and is scraped off with a spatula.
Dismantling level C
We are talking about the removal of floors made according to the principle of diffusion to a depth of several millimeters into the concrete screed. In this case, it is possible to dismantle the polymer only together with the concrete.
Issue cost
Most companies do not differentiate between prices for the dismantling of conventional concrete screeds and levels. The price depends on the thickness of the coating. In the “up to 30 mm” category it ranges from 70 to 250 rubles/m². Cheaper dismantling implies a separate price list for consumables, protective equipment and equipment rental.
As for the removal of polymer self-leveling floors, the numbers here can go off scale. These works are estimated to be more expensive than installing new coatings without taking into account the cost of the material.
Defect 2. Cracks
There are many reasons for dismantling the self-leveling floor.
Standard prerequisites include poor quality work, non-compliance with technology, and unauthorized changes in the composition of the mixture being poured. The list of more impressive reasons is headed by the owners’ desire to install a “warm floor” system in rooms with low ceiling heights and similar compelling excuses for radical alterations.
The choice of method for removing self-leveling floors is influenced by:
- Composition of the solution used in filling. It is important that a polymer leveling solution or mixture based on cement or gypsum was used.
- The purpose of the fill. Mixtures with a cement or gypsum base solve the problems of leveling and forming a base for further laying of finishing materials. Polymer compositions serve as finishing coatings or substrates for the finishing decorative layer.
- Final thickness. Compositions with a cement or gypsum base are poured in a layer with a thickness of 1 cm to 8 cm. The optimal thickness of polymer floors is 2.5 mm. Maximum limit 5 mm. The minimum thickness may be 0.3 mm polyurethane coating and 1.0 mm methyl tetacrylate finish shell.
- Option for screed device. More precisely, the screed is connected to the base or there is an insulating layer between it and the base. Insulation prevents the diffusion of self-leveling floor and reinforced concrete base. If it is not there, then the molecules of the poured solution partially penetrate into the ceiling, which makes it much more difficult to remove.
- Technical condition. It is necessary to find out the location of the damage and decide on the feasibility of expensive dismantling.
The technical condition of the floor does not matter if major alterations or redevelopment are carried out in the room. The situation is completely different when defects spread over 10–20% of the total area.
It is not necessary to remove the screed or decorative finishing shell completely if it is possible to eliminate only the swollen or cracked areas.
The methods used today for dismantling self-leveling floors require impressive labor efforts and do not spare customers’ wallets or floor materials. The costs can add up to a very significant amount. Therefore, if it is possible not to resort to major transformations, it is better to carry out partial removal of the self-leveling floor or local repairs.
The work of completely removing the screed is often carried out much easier and faster than cutting out fragments or almost precision removal of surface convexities. However, it should be remembered that it is worth taking on them after carefully weighing the costs and the expected result.
An operation to completely remove the screed is performed in the following cases:
- Increasing the height of ceilings in rooms with multi-layer powerful screed.
- Preparing the base for installing a “warm floor” system, if the ceiling height does not allow reducing it by another 7–10 cm.
- Low adhesion of the screed to the base, if strong adhesion over the entire area was assumed.
- Deterioration of the old leveling layer, requiring major replacement.
- Cracking and dusting of the base floor, precluding further arrangement of the premises and living in it.
Dismantling is carried out by simply destroying the screed with a hammer drill. To make it easier to solve destructive problems, it is recommended to first cut the floor into segments with a grinder.
You need to use a diamond blade. You should cut carefully, being careful not to catch the ceiling or the bottom leveling layer. It is better not to go deep into the entire thickness, but to leave about a centimeter of the uncut layer. Otherwise, serious repairs will be required.
After the grinder divides the floor into sections, the hammer drill enters the fight to destroy the screed. To work with it you will need two attachments:
- Scarpel chisel. With its help, the bulk of the screed is crushed.
- Pike. With its help, work is carried out to separate the layer with high adhesion.
If the screed was designed according to the “floating” principle, there is no need to use a peak. The leveling layer is simply crushed into small pieces, collected in craft bags and transported to a disposal site.
If the floor was poured onto a concrete base so that the adhesion was maximum, then you must first act with a scarpel, then clean it with a lance. The width of the scarpel can be different: from 3 to 10 cm or more. If it is necessary to remove a figuratively poured floor, it is worth using several similar devices. Usually the largest scarpels are found in the most powerful hammer drills.
It was not in vain that we touched upon the issue of careful dismantling work. If the underlying screed is significantly damaged during the dismantling of the top layer, it will also have to be removed. It is possible to refuse complete dismantling only if there are no more than 20% defects in the subfloor, and it is also possible to restore the technical characteristics of the base through repairs.
Screeds made on a small area can be cleaned without a hammer drill. But more effort and time will be spent than renting a drilling machine.
Thin screeds created by pouring mortar with a gypsum or cement base are much more difficult to remove than thicker leveling layers. They are rarely arranged according to a “floating” scheme.
Basically, it is poured to eliminate the relief of the concrete subfloor, with which the leveling screed should adhere as much as possible.
There are much fewer reasons for dismantling thin layers of leveling, these are:
- Partial detachment from the concrete base. Manifests itself in the form of “swelling” of individual sections. This happens due to the subfloor not being sufficiently dried before pouring, poor preparation for pouring, or the presence of oil stains on it.
- The appearance of cracks over a large area of the floor. Occurs due to violation of the proportions of the solution or instructions from the concrete mix manufacturer.
- The presence of bubbles and voids in the body of the fill and on the surface. The traditional result of non-compliance with technology is associated with a large number of air bubbles in the mixture being poured.
The removal of thin screeds must be treated with special attention. There are many actions to be performed “automatically”, but one must not lose vigilance. A careless movement can very easily damage the rough base, to repair which you will need to re-fill the floor.
The priority is manual labor; the tools used are a narrow and wide spatula. It is better not to cut the screed into segments if you are not fluent with an angle grinder. If a hammer drill is used, it is installed at an angle of 10 - 20º to the surface of the screed. Among the permitted attachments is only a lance, which, when crushing the floor, many craftsmen lightly hold with their free hand.
It is generally better to remove leveling layers up to 1.0 cm thick using a mobile unit designed for grinding concrete. For one-time work, it is more profitable to rent it.
Industrial options are connected to a vacuum cleaner, which during operation collects and removes harmful dust. A thin layer of up to 0.5 cm can be cut with a grinder, using it not as a cutter, but for its intended purpose as a manual grinder.
Dismantling of screed sections is carried out according to one of the above-described schemes, depending on the thickness of the layer and the technology of its filling.
Work on cleaning the self-leveling floor area is carried out as follows:
- Marking the area with defects. It is carried out so that there is at least 10 cm between the edge of the cracking zone and the line of future dismantling.
- Cutting out a section of the floor with a grinder. Performed strictly along the intended lines.
- Grinding the screed inside the cut area. Produced with a hammer drill with a lance or chisel and spatula. Without fanaticism with the desire not to damage the rough base.
- Preparing the base of the site for pouring a new mixture, which should be identical in composition to the previous one.
- Pouring the solution into the floor segment freed from the screed, taking into account future shrinkage during the hardening period.
READ MORE: How and with what to wash linoleum in the kitchen
The amount of shrinkage is usually indicated by the manufacturer of the mixture. If the thickness of the screed is insignificant, it can be neglected. If the leveling layer was 7–8 cm, the shrinkage should be calculated. Before pouring along the perimeter of the removed segment, you need to make a kind of formwork from thin sheet plywood and fill the mixture with a layer that takes into account the amount of shrinkage.
After waiting for the floor to completely harden within the repaired segment, the formwork must be removed. Place twine in the seams, then seal them with a solution of similar composition.
Manufacturers of acrylic and epoxy-based leveling mixtures eagerly claim that their products are practically non-removable. It is truly impossible to remove a polymer floor if the thickness of the fill exceeds 5 mm and the floor was built without a decorative layer.
Advice not to install a polymer floor without thinking about the consequences is worth heeding. Another question is that it is removed in extremely rare cases, because... it is thin and even enough to serve as a strong rough base for laying the next coating.
Suppose there is an urgent need to cut and remove the polymer floor installed on top of the decorative print. For example, the rough base was prepared poorly, as a result of which bumps and dents appeared on the surface, or the owners got tired of the drawing.
Although the thickness of the fill allows you to simply level the floor or apply a new film with photo printing on it, there are ways to remove the polymer shell. To remove manually, use spatulas or thin cutters. Depending on the composition of the polymer floor, it can be partially dissolved or heated to facilitate dismantling efforts.
Most self-leveling floors created with a 3D effect are installed on top of a thin layer of cement or gypsum leveling. In such situations, it would be wiser to sacrifice the rough screed and remove the polymer floor along with the subfloor.
Dismantling methods are equivalent to methods for removing screeds; they depend on the thickness of the layer and the design of its structure. True, the destruction of such a floor will require much more time and effort.
To clean polyurethane, acrylic and epoxy coatings, you can use rented mechanization equipment - grinding machines with a disk working body. If the floor area is small, a regular grinder will do.
The upper part of the polymer coating is simply cut off, after which the lower part, which resembles softened linoleum in structure and plasticity, is scraped off with a spatula.
And yes, after dismantling the old screed, you will most likely have to make a new one. And in order not to make a mistake with the materials, we recommend that you read a review of the best self-leveling mixtures.
How to operate an electric floor leveling machine
The machine has a round disc onto which sanding paper of various grain sizes is fixed.
Sander
Replaceable grinding discs
The machine is connected to a vacuum cleaner
The disk spins in only one direction, the number of revolutions is not adjustable. In order to drag the machine to the workplace, there are special wheels at the bottom. The unit tilts all the way against them and rolls into the desired room; this does not require much physical effort.
To facilitate the process of leveling the floor, correctly adjust the height of the control lever. It is determined simply - the palms of the lowered hands should touch the handles. Changing the direction of movement of the machine is carried out due to the height position of the handle. When it is slightly lowered, the unit moves to the left, and after lifting, to the right. You need to raise/lower the handle smoothly, the grinding unit reacts immediately.
Self-leveling floor grinding process
The photo shows dust from grinding, the movement of the machine to the right and left
The cutting width of one pass should not exceed half the diameter of the grinding disc. This will ensure leveling of the area in two directions, which improves the quality of the work performed. Along the wall and in other hard-to-reach places in the room, the floor will have to be leveled manually using special sanding blocks.
Floor after sanding
Stages of work
Defects or cracks in the self-leveling floor can be corrected in various ways, depending on the degree and type of damage to the flooring.
For work on eliminating cracks and defects, the following algorithm will be common:
- areas with defects, those in which the floor is cracked, has moved away from the base and has an uneven top layer, are removed;
- the exposed base is sanded;
- the area is filled with prepared concrete mortar for the base of the flooring;
- the surface is thoroughly cleaned of dust and dirt;
- a top protective layer is applied.
This is the most general scheme of restoration and repair work. Next, the stages of work to eliminate specific defects in self-leveling flooring will be discussed in more detail.
bubbling
Some surface defects of the self-leveling floor can be combined with each other. After I filled it, the floor cracked in certain places. This may also be accompanied by detachment. This phenomenon is usually called “swelling”. In addition to the cracking of the self-leveling floor, it began to peel off, which leads to squeaking. There may be several main reasons for this:
- The humidity of the surface where the self-leveling floor is poured is more than 4%.
- The surface was not prepared for work (there is dust, dirt). There is no quality adhesion.
- There is no waterproofing layer on the base. Even if it is present, there may be cracks that are transmitted to the finished self-leveling floor solution.
READ MORE: Do-it-yourself methods for leveling a concrete floor
To get rid of such a negative phenomenon, you should remove the area that has moved away from the base, and then thoroughly clean it of possible dust and dirt. Additionally, you can wipe the area with a damp cloth. Next, a primer is applied in 2-3 layers. All that remains is to fill the self-leveling mixture to the same level as the entire surface.
To achieve the best result, an additional finishing layer is poured over the entire area.
The process of polishing a self-leveling floor with a grinder or renovator
You need to start leveling the self-leveling floor the next day after pouring. After complete drying, the material becomes so durable that special mechanisms do not even out the bumps, but grind them. Correcting errors is very difficult.
Let's consider the process of removing small deposits; the problem can be detected with a laser level. Point it at the floor and rotate it in a circle. The tubercles will obstruct the beam; in places where it is interrupted, there are elevations. To carry out the work you will need an angle grinder with a dust cover and a diamond blade. To make it easier to control the size of the area, outline it with a felt-tip pen.
The photo shows the area for sanding outlined in pencil and the tool that can be used
Inexperienced builders are better off using a renovator; it works relatively slowly and allows you to constantly monitor the process of removing the elevation.
Multifunctional tool for cutting, sharpening, grinding and polishing Renovator
Professional battery renovator
In addition, the working body is significantly smaller in size than the grinder disc. And the last advantage is that the nozzle makes reciprocating movements, rather than circular ones. Such movements completely eliminate involuntary changes in the direction of grinding. The nozzle should be segmented with tungsten carbide chips.
Tungsten carbide nozzle
Step 1: Mark the alignment area with a bright marker. During work, dust covers the surface, and the marker will allow you to constantly monitor the size of the flat area.
Step 2. Place the renovator segment head on the tubercle and turn on the power
Hold the body of the tool from above, making sure that the working element is always located in a horizontal position. You need to work in a respirator, dust from self-leveling floors has a negative effect on the respiratory system
Step 3. Walk once along the intended area, do not press the body of the machine too hard. It is better to level several times in one place than to make a hole.
The process of polishing self-leveling floors
Step 4: Remove dust. This can be done with a vacuum cleaner or an ordinary broom. Check the surface condition with a laser. If there are still bumps, outline them with a marker and sand them down again. Never rush, sanding work requires maximum care.
Cleaning dirt with a broom
Using a cyclone to remove dust
Questions and answers
What to do if there are both bumps and depressions on the same floor?
A very unpleasant situation. First you need to determine the adhesion strength of the self-leveling floor to the base. To do this, there is no need to tear it off; just tap lightly on the surface in several places. The presence of a dull drum sound indicates that there is an air gap between the self-leveling floor and the base.
Dismantling self-leveling floor
What to do if there are many small bubbles on the surface?
READ MORE: Soundproofing the floor in an apartment under laminate
The main reason for this phenomenon is that the concrete base had high humidity. Due to it, chemical reactions occurred with the release of gases that rose to the surface of the liquid self-leveling floor. Such irregularities can be sanded using electric units or removed manually. The main thing is not to waste time, correct problems before the composition completely sets. Shallow pores can be left untouched; they do not affect the quality of the final floor covering.
What thickness of concrete can be ground, and what should its strength be?
What to do if the material begins to harden in the container?
https://www.youtube.com/watch?v=L8VR7Ck1otE
A thick mixture cannot be used; it will never be able to be leveled to the desired parameters. The costs of subsequent elimination of defects are much higher than the loss of several liters of material. Hence the conclusion - the frozen composition should be thrown away, and only freshly prepared mixtures should be used for filling.
Thickened self-leveling floor mixture should not be used.
Is it possible to level small depressions with repair compounds?
As practitioners say, it is possible, but not necessary. The fact is that the thinner the layer, the worse its performance. The small thickness speeds up the drying process; during the remaining time, chemical reactions do not have time to proceed fully. Another problem is that two layers never have the same adhesion as one. This means that the risk of detachment of the thin repair layer increases significantly.
Recesses can be sealed with repair compounds, but this is not recommended
How to smooth out cracks?
First, find out their cause and determine the parameters. If cracks have formed as a result of swelling of the coating, then it must be completely removed; leveling will not have a positive effect. If the cracks are the result of drying too quickly, then the floor can be leveled, this should be done in the following sequence:
- Use the end of a metal spatula or a diamond grinder disc to widen the cracks if possible;
- use a vacuum cleaner to remove all dust;
- Prepare the repair solution according to the manufacturer's instructions;
- carefully pour the mixture into the cracks, using a spatula, drive it to the maximum depth;
- remove all excess from the floor plane; if the surface is uneven, you can use a clean sponge instead of a spatula;
- The filling of deep and wide cracks must be repeated the next day, due to this the primary shrinkage will be eliminated.
Repairing a large crack
What should you do if the thin film on the floor surface peels off?
This happens if the room was very warm, and the evaporation of moisture was enhanced by drafts. The situation is very unpleasant, you should act this way.
- Remove the film with a spatula. It should be easy to remove.
- Remove debris and determine the magnitude of the differences in height. If it exceeds 2–3 mm, it will have to be leveled. If the unevenness is minor, then such a floor is quite suitable as a base for laminate flooring. Make a specific decision taking into account further work on arranging the floor.
Removing peelings with a spatula
When is leveling a self-leveling floor after drying impossible?
We have already partially answered this question throughout the article. But it would not be superfluous to list these conditions again.
- The cracks are scattered throughout the surface and have great depth.
- When tapping the surface, dull sounds are heard.
- The strength of the floor does not meet the standards; it crumbles and gathers dust.
Self-leveling floor is cracked and crumbling
The reason for all cases is gross violations of the recommended technology. The only possible leveling method is to completely remove the old coating. Do not entrust the work to coven workers, do not undertake to do it yourself without practical experience.
How to level local problem areas of the floor?
There is no such thing as a local defect of a self-leveling floor among professional builders. A local problem does not mean that it occupies a limited area. This only means that due to lack of experience, you were unable to notice the same flaws in other places on the floor.
The sequence of work is not much different from repairing cracks.
The process follows the same principle as crack repair, but has some nuances. Therefore, it is also worth considering step by step:
- After an inspection and detection of swollen and locally cracked areas of the self-leveling coating, the damaged area should be marked before dismantling the layer.
- When marking, the area of future dismantling should include the entire area of swelling or cracking, plus at least 100 mm of the area unaffected by deformation on each side. This must be done due to the weakening of the adhesive abilities of the leveling layer and the base. If this recommendation is ignored, swelling of the coating may continue next to the newly repaired area.
Preparatory work
After choosing the material for repairing concrete floors, you should begin the repair. First comes the preparatory stage:
- All foreign objects are removed from the room.
- Existing debris, concrete chips and dust are swept away. Potholes and cracks are thoroughly cleaned with a vacuum cleaner.
- Any dirt, rust, mold or old soil is removed with a stiff metal brush.
- To remove grease stains, you need to use a special solution.
- The concrete floor is swept with a wet broom, then it needs to be dried.
- If the reinforcement is visible, it should be cleaned with sandpaper and primed with a compound with anti-corrosion properties.
It is better to tap areas of the concrete surface that have lost strength with a hammer and clear them. The rule also applies to the edges of problem areas.
Useful tips
Strengthening the screed can also be done with the help of special compounds that penetrate deep and improve the properties of concrete. They extend the service life of the screed, eliminating the need to dismantle the coating in the future. Before applying such products, the surface should be thoroughly sanded.
Minor repairs to the cement screed are justified if no more than ⅓ of the area is damaged. If a large area of the floor has been deformed, then it is best to replace the old screed with a new one.
Repairing a broken or cracked screed is a fairly simple undertaking with the proper approach and preparation. You can do it yourself, but you need to do it in a timely manner to avoid unpleasant consequences. The main thing is to correctly determine the cause of the destruction and take appropriate measures.
For more information about screed repair, see the following video.
Floor unevenness
According to first impressions, self-leveling floors are characterized as a rather fragile coating. But in practice, even a decorative coating can withstand the fall of something weighing 10 kg.
In a residential area, such floors can be characterized as follows:
- the coating is abrasion resistant;
- have excellent hygienic characteristics;
- form reliable protection for the concrete base.
Example:
If the solution is made too viscous, then many uneven areas will most likely form on the surface. To fix this, you will need to sand it and then fill it with new mortar.
Types of subfloors and possible defects
It is worth understanding that the final outer floor covering is only the visible part of the entire floor pie. Repairing only it is not enough when it comes to major repairs of the floor and its necessity. In fact, the main part of the floor is located below, under the finishing coating, and can be presented in two variations - wooden and concrete.
Table. Main types of floors.
| Type | brief information |
| Concrete floor | This is a strong, heavy and durable base, which is made from a cement mixture - in other words, it can be concrete floors and a concrete screed poured onto them. Typically, such options are found in modern houses, as well as in old panel houses. Apartments located on the first floors in Stalin buildings may also have a concrete base. Typically, such flooring options do not require repairs for many years, but much will depend on how well the screed was poured. If the technology is violated, the floors can become quite fragile and begin to crumble over time. In this case, major repairs may be required. |
| Wooden floor | This option is a boardwalk laid on logs standing on a concrete or wooden base. Moreover, the logs can be stationary or adjustable. Typically, such floors are found in wooden houses, and can also be present in Khrushchev and Stalin buildings. By the way, such floors were often installed on top of a concrete base. To overhaul them, you need to remove old boards, as well as joists, and replace them completely with new ones. Or you can remove all wooden elements and pour a concrete screed. |
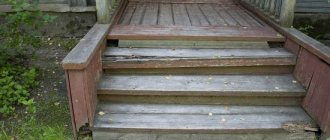
Gaps in the wooden floor
As for defects, depending on what the rough base is made of, they can be different. In general, floors must meet certain requirements of aesthetic, sanitary, and operational standards. The following defects are distinguished in concrete floors:
- abrasion;
- subsidence;
- the appearance of chips;
- cracking.
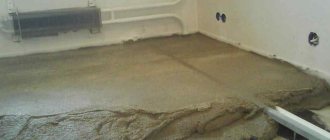
Concrete screed repair - sealing cracks
If you regularly monitor the condition of your floors and promptly eliminate minor defects such as small chips, you can easily avoid the need for major repairs.
As for wooden floor defects, these can be:
- floor subsidence;
- the appearance of creaking floorboards or logs;
- rotting;
- the appearance of cracks, chips;
- the appearance of fragility and brittleness of wooden elements;
- infection of wooden elements by bacteria, fungus, parasites.
The rotting process is the destruction of cellulose under the influence of microorganisms and fungi
If the wooden floor is warped, then most likely some of the joists have failed. In this case, you will need to disassemble the wooden base and replace the old logs with new ones. The same will have to be done if the floors sway strongly when walking.
To get rid of squeaks, sometimes it is enough to break through the places where the floorboards join the joists. But if after this the creaking does not disappear, then you will have to look for defective lags and change them, since they will be the cause of the unpleasant sound.
The floor in the apartment creaks, how to fix it
In general, the end result of floor repair should be the complete elimination of all defects, from cosmetic and aesthetic to structural. In the first case, sometimes you only need to change the floor covering and update it, but in the latter, a major overhaul will be required.
It is important to understand that the durability of floors largely depends on how they are used. Thus, frequent rearrangements of furniture, heavy objects falling on the floor, etc. can have a negative impact on them.
etc. High humidity, which is usually observed in apartments on the ground floors, as well as in bathrooms and kitchens, will also have a negative effect on the floors. To avoid rapid damage to the floors in this case, you should ensure that good air exchange is ensured between the layers of the floor cake. First of all, this applies specifically to wooden floors.
Wooden floor
Proper surface care
Caring for self-leveling floors is simple, but it must still be done regularly to preserve the beauty of the coating for many years. For example, every 6 months a special mastic should be applied to the surface, and when repair work is carried out, the floor should be covered with covering material. Also, special protective caps are put on furniture legs or pads are used.
For daily maintenance of 3D self-leveling floors, it is best to take clean water with a small amount of detergent
Self-leveling floors should be washed with an aqueous solution of detergent, and then wiped with a clean cloth.
How self-leveling floors are made
After putting in some effort and spending a lot of money, you want to get the perfect job right away. However, creating a self-leveling 3D floor is not an easy task, so you should be prepared for the fact that you won’t get a beautiful coating the first time. However, over time you will be able to practice, and the drawings on the floors will turn out better and better.
In order to correctly fill a self-leveling floor with your own hands, you should prepare the necessary tools for the job:
- construction tape;
- rags;
- paint-shoe nozzles;
- soft brushes and rollers;
- grinder saw and disc for working on stone;
- beacons;
- a needle roller with drop-shaped needles to remove bubbles from the mixture;
- raclette;
- spatulas of various widths;
- measuring container for determining the amount of mixture and water;
- a tall round basin or bucket for mixing the mixture;
- an electric drill with a whisk attachment or a construction mixer.
Beacons are required only for coatings thicker than 20 mm.
Mixtures for pouring self-leveling floors are used ready-made. They are diluted strictly according to the instructions in a certain amount of water and kneaded using a drill or mixer. In addition to mixtures and water, you will need:
- sealant for repairing the working surface;
- damper tape;
- if the floor is poured on a wooden surface, then a wood antiseptic is needed;
- for pouring onto concrete – deeply penetrating primer;
- construction tape and waterproofing material for pouring onto the separating layer.
Read more: Ventilation grille with non-return valve types of device operating principle installation instructions
The room is cleared of furnishings, and debris, dust and various stains are removed from the floor. The cleaned surface is inspected for potholes, cracks, chips and other defects. All damage is repaired with a repair compound in the form of putty, etc.
Preparation of various bases:
- Wooden floors. Rotten or damaged wood elements are replaced. The prepared base is treated with antiseptic impregnation, antifungal and fire retardant composition. Dried wood is covered with kraft paper or polyethylene.
- Separating layer. The base is covered with plastic film or roofing felt. The rolled waterproofing material should extend onto the walls by more than one centimeter. The strips are laid overlapping, and their joints are sealed using construction tape. After laying, the canvas should be carefully smoothed, expelling air bubbles from under it. After this, the material is glued to the walls with damper tape.
- Concrete floor. If the concrete base crumbles, then the collapsing layer is removed, and the solid layer is puttied. After repairing the surface, it is necessary to remove debris and dust using a construction or other powerful vacuum cleaner. Then the concrete is primed twice with deeply penetrating compounds. After the primer has dried, a damper tape is glued to the walls around the perimeter of the room, the width of which should be 8–10 cm greater than the top level of the screed.
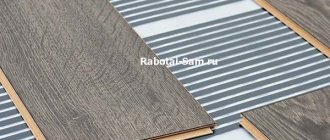
If the self-leveling floor is to be poured with a thickness of more than one centimeter, then the surface is covered with a reinforcing mesh made of fiberglass. It is attached to the floor using “liquid nails”.
The beacons are placed in increments of 150–200 cm and installed so that the filling level coincides with the lower edge of the adjustable pin located in the center. You can check the height using a construction or laser level.
Before you start pouring, you need to prepare the working mixture yourself. The following factors must be taken into account:
- consumption per unit area;
- liquid temperature;
- ratio of dry mixture and water;
- shelf life of the finished composition.
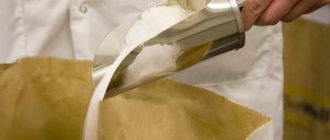
First, liquid is poured into the container, into which the dry mixture is added in small portions. To avoid lumps from forming, use a mixer to stir the resulting mass all the time. The composition for pouring floors should be homogeneous, without separation or lumps. The filling should be used immediately, since it is ready for use in no more than forty minutes.
Stages of pouring a self-leveling floor:
- To minimize movement on the treated surface, you should start pouring in the direction of the door from the far wall. It is recommended to use shoes with spiked soles.
- A plywood protective edge is installed in the doorway, which will prevent the composition from overflowing over the threshold.
- The solution is poured in strips, maintaining its quantity per unit area. This is indicated on the package with the dry mixture.
- The spilled mass is evenly distributed and leveled on the floor using a spatula. In a room with a large area, it is recommended to use a squeegee on a rod.
- A roller with needles is rolled over the evenly distributed solution in different directions. This will help remove any air bubbles from the mixture and help it level out well. Stop working with the roller only after the solution has set. It is necessary to remove the beacons immediately so that the traces from them have time to be covered with the composition.
In a large room, the working surface is filled in parts, between which special partitions are installed. Floors in small rooms are poured over the entire area at once. If everything is done correctly, you will get a single-level monolithic screed.
The self-leveling floor will harden for about an hour, and you can move on it within 2-3 hours after pouring. However, experienced craftsmen do not advise walking on the surface for 6–7 hours.
During the hardening of a self-leveling floor, it is unacceptable:
- walking on a freshly poured surface;
- overheating of the frozen mixture by heating devices;
- getting random objects and liquid debris onto the fresh floor;
- draft in the room.
Work on pouring the solution is carried out at an air temperature in the range of 10–25 degrees Celsius and at a surface humidity of no higher than 4%. The room must be protected from direct sunlight and drafts.
A three-dimensional image on the floor is a great way to give the room a stylish and original look, show off your design talents and surprise all your guests. You can make such a coating with the help of qualified specialists, or you can do it yourself. The second option will take much more time and effort, but will allow you to apply any picture you like to the floor.
The simplest option for a volumetric floor is small objects poured into it, for example, pebbles, shells or coins. The second most difficult is photorealistic image. The most difficult thing is to create an optical illusion on the floor, but the effectiveness of such a floor will be at its best.
Self-leveling 3D floor with the image of a dolphin
The cost of a self-leveling floor depends on its thickness, binder composition and other factors. The average price of a screed per m² is 210–350 rubles.
The finished floor is highly wear-resistant, but it also requires regular maintenance. Usually it consists of banal dry or wet cleaning. The polyurethane coating is dust-repellent, so cleaning it is not particularly difficult. You can use a regular vacuum cleaner or water and detergent for this.
The main requirement for caring for self-leveling flooring is to prevent heavy objects from falling if you are using a decorative floor. Other types of coatings withstand mechanical and natural influences well.
Causes of screed cracking
Gypsum plaster almost does not shrink when maturing, but a cement-sand mixture does. Consequently, despite the small time gap between the installation of the beacons and the laying of the screed, depressions and peaks on the surface of the screed will still be obtained. In its structure, any gypsum-containing mixture differs from cement mortar. They differ in ductility, linear expansion coefficient, and adhesion. The probability that cracks will form to the full depth at the junction of the gypsum and cement mortar along the beacons is almost 100%.
The second common mistake is preparing a solution with too much water. The purpose of adding more water than necessary is to make the task easier for yourself, since the solution becomes more convenient to work with and very plastic. Of course, this is very convenient during the process of pouring the solution, but after a while you will have problems with such a screed:
- Excess water in the solution exposes it to greater shrinkage and deformation. Therefore, most likely the screed will crack and swell.
- An increased ratio of water to cement during the preparation of any cement mortar greatly reduces the strength grade. That is, the screed will not acquire the strength it needs and its surface will turn out to be loose. Accordingly, it will generate dust and be swept away, which will negatively affect the installation of any floor covering. To add strength to the screed, you will have to coat it with a special deep penetration primer.