How to fix a dowel in a loose wall: an overview of the rules
There are certain rules with which you can secure a dowel in a loose wall, ensuring a reliable connection.
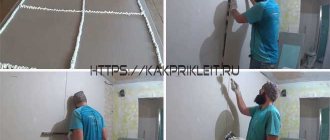
Loose surfaces include: a thick layer of finishing, foam blocks, old brick, heterogeneous composition of walls and others. If you decide to install a suspended ceiling yourself, fix a lamp or chandelier, or mount a cabinet, make sure that the fastening is secure. The fasteners you use to complete the job must form a strong connection. You may also experience walls collapsing when drilling a pilot hole. In the literal sense of the word, building material will crumble from them. In this review, we will learn how to cope with a difficult task and get the job done efficiently.
Simple ways to secure a dowel in a loose wall
If you are not ready to run to the store in search of special compounds for securing dowels in loose walls, you can first try traditional methods. How can you strengthen the dowel in the base using available materials?
- Wooden bars. You will need small bars or even matches that will match the length of the fasteners. They need to be installed in the hole where the dowel will then be driven in. If you use matches, experts recommend installing them inside a plastic structure. This option is only suitable for light loads. For example, if you decide to hang a picture.
- Insulating tape. You may need electrical tape for a strong connection. This is a fairly well-known method that pays off in practice. The fasteners are wrapped with electrical tape in the direction of the thread. If you don't have electrical tape, you can use cellophane. This method is good for installing structures without dynamic loads. Otherwise, there is a risk of weakening the connection.
- Plaster bandages. You can buy them at the pharmacy, but they may also end up in your first aid kit. With their help, the dowel itself is wrapped. Be sure to wet the textile to ensure a strong connection. Only after the gypsum has hardened can the fasteners be loaded. This option is good because when installing the dowel, it is prevented from turning. Due to this, you can attach even large and massive objects.
- Liquid Nails. The method is relatively expensive and requires free time, so its use must be justified. It is used in cases where it is necessary to ensure a durable connection without the risk of weakening or unwinding. Liquid nails are poured into the hole, then the dowel is inserted. The last step will be screwing in the hardware, which needs to be screwed in all the way. Such a fastening connection will withstand heavy loads, including brackets and profiles.
All of the above methods are used in practice in home repairs. They only work if you need to install up to 5 fasteners to install one structure. If we are talking about large-scale work or industrial projects, it is better not to take risks. In this case, turn to proven innovations that will definitely prevent the dowels from unwinding.
Wall mounting device
There are many ways to restore a wall mount. The choice of the optimal option depends on the wall material, the weight of the hung object, the skill of the craftsman and the availability of the necessary materials. Usually a hole is drilled in the wall with the expectation of a future nail or self-tapping screw, a dowel is driven tightly into the hole, and the selected nail or self-tapping screw is driven into it.
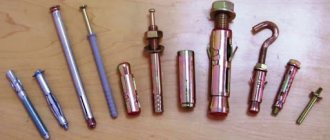
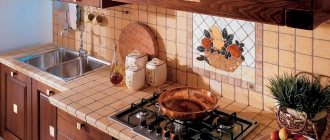
A dowel is a plastic plug of complex configuration that is tightly driven with a hammer into a prepared hole in the wall. And a self-tapping screw is tightly screwed into the central hole of the dowel or a nail is hammered. Here the hook or loop of the desired item is hung on his hat. Unfortunately, very often a tightly driven dowel begins to dangle in its socket. The figure below shows dowels for the simplest fastening cases
For special cases there are also special dowels. Their installation gives a more reliable result than “folk methods”.
Dowels for gas and foam concrete are plastic for small loads and metal for large loads, for example for hanging an air conditioner. In a loose wall, large diameter dowels with transverse ribs should be installed. A dowel with longitudinal ribs can come out of its socket.
PHOTO: vseinstrumenti.ru Dowels for foam and aerated concrete
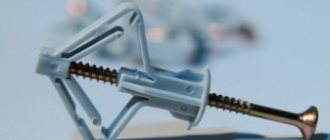
Drywall is often used in the manufacture of interior partitions. But it is very fragile. Drywall dowels have their own thread. They can be immediately screwed into drywall. The higher the planned load, the larger the dowel diameter should be.
PHOTO: vseinstrumenti.ru There are several types of dowels that are used together with drywall
General procedure for installing dowels of all types:
- First you need to drill a hole in the wall with a drill with a diameter 1-2 mm smaller than the diameter of the dowel (do not drill with a hammer drill).
- Vacuum and clean the hole from dust.
- Drive an adhesive mass (glue, epoxy, liquid nails) into the hole.
- Hammer the dowel in there.
- Allow the required time for the adhesive to harden.
- Screw a self-tapping screw into the dowel.
How to fix it in a loose wall?
Tell me how best to securely fasten it in a loose slag wall (house built in 1964, slag walls plastered with sand-cement.) We need to fix shelves, mirrors and a wall cabinet. I don't know how to solve the problem. A regular d/g does not hold, it turns along with the dowel. You need something with a very wide thread.
Masters online: 150 Orders per week: 2,304 Offers per day: 1,265
In order to give a definite answer, you need to have a complete understanding of your wall. There are many fastenings for different materials and loads. Fastener stores will help you find what you need. Options are possible: both screw and opening according to the “butterfly” principle. If you plan to store heavy items in cabinets, it is better to provide longer anchor bolts. There is also a liquid anchor. - Fill the hole with it, screw in the bolts and wait until it dries. You can combine all this, I repeat, it depends on the looseness of the wall and the load.
The simplest option is to screw in a 150-180mm wood screw carefully until it stops without turning (it may turn out to be unreliable). The most reliable, but expensive, chemical anchor (it will only come out with a bite of the wall). Something in between - butterflies. Try it, experience it.
There is such a thing - mounting rail https://www. Its purpose is to redistribute the point load. And if it doesn’t stay in the wall, use an expansion anchor.
Chemical anchor, everything else is half measures.
special glue is sold for mounting in such walls
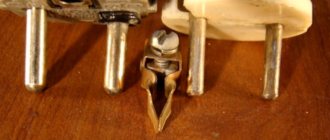
Use metal dowels, popularly called “hedgehogs”. They hold securely. Sold at any point that sells fasteners. I wish you good luck. Sergey.
drill 8 d with a drill. and hammer in the wooden plugs
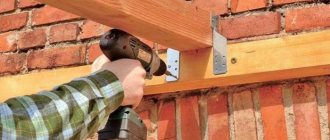
For reliable fastening (as is your situation), a suitable method is to use metal plates 3 mm thick, 50 mm wide and along the length of the structure itself. We attach the plate to the wall and to a metal frame dowel 10 × 150 (4 pcs per 1 meter). Can be embedded under the sheathing or under plaster. And for fastening (the heaviest ones) to the plate, the most reliable dowel is a “molly” metal (lighter) screw for metal (bugs) That’s the only way.
special nails for cinder walls are sold
Hello. You can use an anchor (but it has a big head) Now it’s cheap with serious, - Mark the drilling points, make holes with a 10 drill, and hammer square caps (wood) into them, then drill with a 1.5 drill and screw in a self-tapping screw with a standard thread 3 ,2
Denis, make holes with a diameter above 14 mm with brown, then fill them with tile adhesive and insert the dowel you need in the middle of the hole and calmly screw it in tomorrow.. If you find express glue, you can fix it in 2 hours. Cheap and reliable. In this way you can work with many soft and porous materials .
on the Internet - there are hundreds of fastening options
chemical anchor Mungo or Hilti look .. expensive, but it will only come off with the wall .. or the barefoot version - drill a hole for example 4, pour liquid nail into it with a syringe and then drive a self-tapping screw at 4.3-4.5, wait a day, rejoice . )))
drywall fasteners are ideal in your case.
The best means
There are many ways to secure the mount. I advise craftsmen to wrap the dowel with a moistened plaster bandage or polyethylene, use wooden choppers, and fill a hole that is too wide with hot glue or liquid nails. Putty, epoxy resin, and repair cloth will securely hold the fasteners.
putty
Suitable if the funnel is large and the wall around it has cracks. It's better to take adhesive putty. After hardening, a dense plug is obtained. Moreover, it is easy to apply.
What should be done:
- Screw the screw into the dowel.
- Moisten the wall surface and holes with a spray bottle.
- Apply the prepared putty with a spatula if the hole is shallow.
- Remove excess.
- While the cork is still wet, place a screw in it.
To quickly fill deep holes, use a disposable syringe. The fastener can only be loaded after it has fully set.
Epoxy resin
Putty can be replaced with epoxy resin or glue. To make the mass plastic, add filler. What will suit:
- chopped fiberglass;
- fine sand;
- sawdust;
- ground cotton fiber;
- silverfish
How to fix a dowel in a loose wall? 5 ways for every taste
Probably each of us who has hung or mounted something on not very reliable, not entirely uniform surfaces has encountered such an urgent problem as how to secure a dowel in a loose wall.
Moreover, you can encounter them in houses built from a variety of materials. Stalinist buildings sometimes boast walls that appear to be made of sand. There, of course, any fastening does not hold well. Brick buildings, considered almost the strongest and most reliable, can unexpectedly make their owners happy with elements that are not entirely durable and crumble. Concrete panels sometimes resemble clay huts from the early 20th century. However, even if you are unlucky with the walls, do not refuse to carry out repairs or fastening work because of this. And I would like to live in an apartment with decent comfort. That is, have curtains on the windows, a sufficient number of cabinets and shelves to hide your things in, and hooks in the bathroom for towels. At first glance, the problem should be solved simply: cement the hole and install the fastener. In practice, it turns out that walls don’t give up so easily. If the surface is loose, the cement solution or adhesive mixture does not adhere well to the hole. As a result, this fastener still falls out, but it is already cemented into the cork itself, which, of course, is not a high-quality solution to the problem.
How to fix a dowel in a loose wall?
There are several ways to do this, both folk ones, invented by people who found themselves in similar circumstances, and those developed by professionals who tried to solve this problem. In this article we will try to consider each of the possible ones. We hope that our advice will help you complete your tasks.
They were invented by people who were desperate to reliably strengthen a shelf (for example) on a frankly unreliable wall.
Traditional methods of dealing with loose, loose and soft surfaces are simple, cheap, proven, and most importantly, they work. One of the most budget-friendly: the dowel is wrapped in a well-wetted bandage and inserted into a hole drilled in the wall. There is no need to wait, the self-tapping screw can be screwed in immediately. But hang anything on a screw only after the liquid has evaporated. It is better to take the dowel that is recommended for brick partitions.
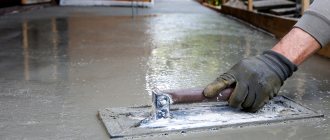
The cement option is also suitable
, you just need to approach it wisely. Firstly, the funnel must be moistened before covering with the solution. It is best to do this with a household spray bottle - the water will be distributed evenly and not excessively. Secondly, before installing the dowel into the standard, a screw is screwed into it, which pushes its walls apart and stabilizes the position. The fastening can be loaded with a load only after it has completely set.
Cement plug is not always able to provide you with the desired quality. But the tree will not let you down. A hole with a slightly larger diameter than you need is drilled into the base. A chopper with an even larger (but slightly!) diameter is cut from nearby wood (any board or block) and driven into the hole. A dowel is already screwed into the resulting cork - and, as always, an excellent result. Due to the natural expansion of wood, such a cork will hold firmly and will not drop the furniture element entrusted to it.
If the wall is not crumbling too much, you can resort to this method: a thin strip of ordinary cellophane is wound around the outside of the dowel (you can even cut it from a supermarket bag). The layer being screwed on is quite thick: it should be difficult to squeeze the dowel into the hole. The winding direction is along the thread.
In most cases, such methods of securing a dowel in a loose or loose wall save even inveterate skeptics. But if they don’t suit you, let’s move on to high-tech options.
You can immediately pay attention to special offers, or you can first use, again, artisanal (from the point of view of an advanced builder) methods.
The drilled hole is vacuumed or otherwise cleared of all small particles present. After this, the hole is filled with something affordable - epoxy or liquid nails will be just right. Dowel – we choose a metal one, but out of desperation a plastic one will do. It is degreased and driven into the base. When the putty thickens, the screw is screwed in - but what it is intended for is not hung. The final work is carried out when the composition has completely set.
Disposable Hot Melt Glue Gun
can make your life much easier if the dowel is not mounted individually - otherwise the costs will be unreasonably high. Using it is elementary, preliminary preparation is unnecessary, you can hang the shelf in just a couple of hours (although it would be wiser to wait until the morning). The hot melt hardens almost instantly, without interfering with adjusting the direction, tilt and other fastening details.
For those who don’t particularly consider money, specially designed “loose wall” dowels will be a tempting option. In the same Leroy network, they are supplied with special syringes with astringent solutions that will definitely securely bind your fasteners even to the most unreliable bases. However, they are very expensive, and if you don’t need to hang a shelf or two, but do serious installation, then you should think about the advisability of using such compositions.
When fixing external structures, it is worth remembering that fasteners also vary. And before inventing intricate ways to secure a dowel in a loose wall, you can first turn your spoiled attention to the hardware. It is quite possible that after selecting the right one, no additional tricks will be required. So “Butterfly” is suitable not only for fixing to gypsum boards. Void materials are quite willing to hold a load with its use.
Expansion dowel
will cope with any load even on an unreliable foundation. Hollow ones will cause its effect like the same “butterfly”, and full-bodied ones will cause the effect of expansion. A dowel for foam concrete will be an ideal choice if there is a suspicion of fragility of the load-bearing material.
The “umbrella”, also known as a spring dowel, can cope with both fragile and loose materials or those with voids. The main rule that will be the key to victory in deciding how to secure a dowel in a loose wall is to choose the right fastener. It is necessary to choose a longer length than usual and provide the fasteners with additional fixation. And then even the loosest surface will hold your furniture for a very long time.
Types of dowels for concrete
There is a fairly large number of fasteners for concrete, the most famous and effective of them are presented in the table:
| Dowel type and photo | Peculiarities |
| Spacer |
Self-tapping screw in concrete without dowel
Type of dowels
There are many types of dowels. For each specific case, different ones are selected - it all depends on the task at hand. All dowels are divided into two large groups: universal and spacer.
Expansion
Expansion dowels include fasteners whose body undergoes expansion during installation. The top part of the part is usually made of dense plastic, while the core, which is screwed into the sleeve, is made of plastic or metal. Such dowels are mainly driven into solid walls with solid filler.
Universal
Universal dowels can be fixed in a wall that is hollow. The material of the upper part of such a dowel, under the influence of the rotating force of the core, twists and forms a nylon surface that fits tightly to the surface of the hole made in the wall. To fix insulation, dowels with wide heads are used.
Disc-shaped
The length of the dowels varies widely - from 20 to 120 mm. The same applies to the diameter of parts – from 4 to 20 mm.
One of the most popular fasteners are plastic expansion dowels. The body in such parts is made of nylon, polypropylene or other identical materials. The sleeve of such a dowel looks figurative - many sharp protrusions and tendrils are visible on it, thanks to which the part “sits” firmly in the wall. The plastic expansion dowel is equipped with a metal core that is longer than the outer base. The core is threaded or has cone-shaped formations. Thanks to them, the inner part of the dowel, when screwed in, is firmly held in the plastic sleeve and, accordingly, in the wall.
How to fix a dowel in a wall?
What are the ways to fix a dowel in a “bad” wall?
There are modern materials that will help strengthen the dowel in a “bad” wall, for example, the same plaster bandage, the dowel is wrapped, then soaked in water and into the wall, after hardening it will hold. I’ll focus on the “grandfather’s” methods, they really work.
In my work, I often come across stone walls that are plastered with a lime mixture; there is practically no cement there and therefore the walls are extremely loose. If you need to fasten something quickly and don’t have time to wait for the same “liquid nails” or another mixture to harden, I take a drill for the diameter, two smaller, for example, an eight dowel, I drill with a six, but with a Pobedit tip, the tip is larger than the drill and the hole it turns out a little larger, it is important to drill without a hammer drill (without impact); such walls can be easily drilled with a regular drill, after which a dowel of the required diameter fits well and tightly into such a hole (in our case, 8).
Second option: everything is the same, but we take the dowel with a “skirt” limiter, this will not allow the dowel to go into the wall. Another “trick”, if everything is really bad, then feel free to drive in a wooden chopper, don’t believe those who say that wood is short-lived, I worked in “Stalinist” houses, everything there is on such choppers, it’s already been standing for seventy years and will sag for the same amount of time.
Dowel concept
To be fair, the dowel is not the fastening itself, but that part of it that is inserted into the base and provides the very possibility of fastening. Its predecessor was an ordinary wooden plug - a chopik, which was driven into the walls so that it became possible to drive a nail into the base.
The dowel still plays the same role today. But, it is true, modern models offer the possibility of mounting on a wide variety of materials: heavy concrete and porous, hollow brick and dense natural stone, gypsum, drywall and loose slag concrete. The design of the product provides such wide possibilities.
A dowel is a sleeve or sleeve. The dowel itself does not form a fastening, but is firmly fixed in the wall material. An object or material is secured by screwing or driving a nail, screw or screw into the sleeve. At the same time, the sleeve changes shape - it expands, twists, folds, that is, it forms a very reliable adhesion to the base.
The video below will tell you how to choose the right dowel for the job:
Expansion and non-expansion parts
The dowel consists of two parts: expansion and non-expansion.
- Non-expandable - the upper part of the sleeve, does not change shape when passing through hardware. This gap ends up inside the attached material, where there is no need to form a strong adhesion. In addition, the non-spacer part prevents contact of the base metal with the fastener material. The length of the non-expanding part is determined by the purpose of the product. If the thickness of the material being fixed is small - panels, slats, furniture, brackets - then the length of the non-expanding part is small.
- If the fastener must pass through voids or a layer of thermal insulation, then the length of the non-expandable fragment increases.
Expansion dowel type 2 (K)
Additional items
Various additional elements enhance the spacer properties of the product:
- locking ones - mustaches, spikes, ailerons, prevent the dowel from twisting during installation;
- spacer - various protrusions, spikes and teeth of different shapes and sizes, which, when expanded, form more dense contact with the walls of the hole and prevent the elements from being pulled out - directed against the outward movement;
- axial - as a rule, this is a channel that helps maintain the axial direction of the sleeve;
- cuts on the body of the bushing - slits along the entire length of the spacer part facilitate deformation of the dowel body. There can be 2, 3, 4 cuts: the more of them, the more uniform pressure the bushing exerts on the surrounding material.
Construction exceptions
The design may differ quite noticeably from that described, since the purpose of the fasteners requires special solutions.
- Thus, models for thermal insulation are distinguished by a large length of the non-expanding part, since they pass through the insulation layer and a very wide cap, thanks to which this loose material is retained.
- But non-removable spacer models may not even have a collar and are practically invisible, but at the same time they are “equipped” with a mass of protrusions and spikes in order to better stay in the wall.
Common to all types of dowels, with rare exceptions, is the installation scheme, which necessarily includes pre-drilling holes. On the one hand, this increases the time required to complete the work, on the other hand, it provides a much more reliable fastening than when using different types of nails or self-tapping screws. A dowel is a more universal solution; besides, today there are a lot of materials in which another type of fastening is practically impossible.
Next, the classification of dowels is subject to consideration.
How to fix a dowel in a loose wall: instructions for home repairs
Contents
During repairs and installation work at home, the problem often arises of how to strengthen the dowel in a loose wall. Old brickwork, low-density foam blocks, a thick layer of plaster, concrete with a low cement content - it is difficult to drive fasteners into such materials so that they are securely fastened in the hole. When taking on the task of installing lamps or assembling suspended heavy structures, the master risks giving up his work if he encounters such a phenomenon as a falling out dowel. He will not be able to drill a suitable hole: the material will crumble, and the diameter and shape of the hole will not correspond to the size of the fastener. And if you work on concrete with a low cement content, sand will literally fall out of the walls! How to cope with this difficult task? Use our tips.
Types of spacer structure
The choice of the required modification is made based on the characteristics of the material of the parts being fastened:
- Studded - the presence of spikes ensures tight adhesion to the wall, and the spacer itself occupies most of the length of the part.
- Universal S-type. Used for concrete or brick with a solid structure. The teeth are denser and higher, and there are special locking elements.
- Universal U-type - used with hollow and solid bases. The presence of 3 petals and the formation of a powerful thrust unit allow you to mount parts on concrete and brick
- The butterfly plasterboard dowel is used when attaching products to sheet panels with a small thickness of up to 12 mm. After passing the sheet, the fastening element is folded and pressed against the panel from the reverse side.
- Three-lobe - provides expansion along the entire length when entering concrete or brick.
- Four-lobe – gives uniformity in load distribution. The advantage is increased load-bearing capacity.
There are also fasteners for foam concrete and a “piranha” modification with reverse-directed teeth when fastening to chipboard, wood, or brick.
How to remove an anchor
What is usually inserted into the anchor is not a screw or bolt, but a pin (the same bolt, only without a head) or a hook. A bolt is screwed into the frame anchors, at the lower end of which the expansion element is held using a thread.
In general, the anchor is pulled out using pliers:
- Remove the nut.
- Hit the pin with a hammer and push it deep into the hole.
- Grab the sleeve with pliers and remove.
- Unscrew the bolt.
- Use pliers or pliers to remove the anchor bushing.
- Insert the bolt into the vacated hole and turn clockwise to fit the wedge onto the bolt.
- Remove both elements.
If the bolt is rusty
If you cannot remove the bolt because it has oxidized, you should try to revive it. To do this, the parts are well moistened with a rust converter, kerosene or WD-40. Leave for the time indicated on the package or longer (up to half a day). During this time, the oxides should go away. After cleaning the bolt, you need to try to remove the nut or unscrew the bolt.
Important When unscrewing a rusty structure, you need to be extremely careful not to break the pin/screw.
If the bolt is broken or its spline is torn off
If you tighten a bolt, screw or screw too quickly or with the wrong screwdriver, it is easy to tear off its grooves. Less often, it happens that the head is torn off completely or partially - in particular, in an unsuccessful attempt to pull out the frame anchor without removing the conical “anchor”.
To unscrew a broken self-tapping screw or bolt, it is drilled out and a chopper (extractor: a wedge-shaped screw with a left-hand thread) fixed in a drill, screwdriver or pliers is driven into it. Then the entire structure is rotated counterclockwise.
Important: Never try to drill out dowels for a masonry gun. They are made of especially strong and hardened steel - if you break the drill, you risk being injured by splinters. Try knocking out such a dowel or heating it.
Step-by-step instructions for attaching dowels
The following tools will be useful to carry out the work: an electric drill with drills, dowels, a sharp nail, electrical tape, and a medium-sized hammer.
We recommend: Why an air conditioner warranty is important
The dowels are fastened step by step according to the following algorithm:
- We make markings using a pencil or pen. Then use a nail to deepen the intended point.
- We select the dowels according to the dimensions of the self-tapping screw correctly. It is also important to calculate the correct number of dowels. As a last resort, if these fasteners are not enough, the missing ones can be made from a wooden block.
- Then we insert the drill bit into the drill and make holes to the required depth. In order not to be mistaken with the depth of the hole, make a mark on the drill with electrical tape.
- We clean the finished hole from dusty surface residues and cement chips. A small diameter brush or vacuum cleaner will do.
- Place the dowel against the hole and carefully drive it in with a hammer. It is not recommended to rush and apply excessive force when striking.
Attention! Attaching dowels to a loose base is much more difficult. But there are special ways that will allow you to do this as reliably as possible. You can strengthen the connection of structures using ordinary electrical tape. It is simply screwed onto the product. If the structure is heavy and large, it is better to use a plaster bandage. Only after winding it needs to be moistened. A more expensive method, but also effective, is the use of liquid nails.
We recommend: Advantages of forged gates