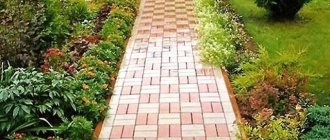
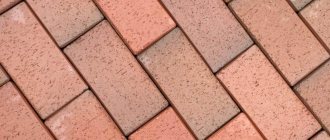
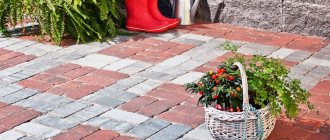
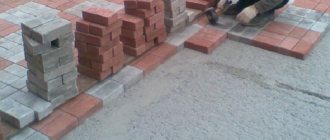
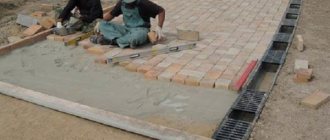
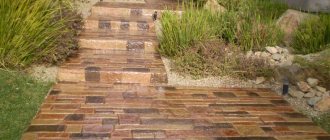
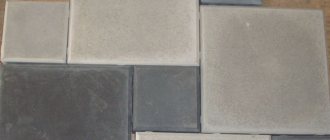
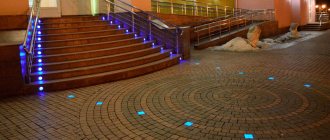
Many owners of summer cottages like to decorate their garden paths with paving slabs. Thanks to it, you can place a special emphasis on a barbecue area or a place to relax. Rectangular paving stones, the most common type of paving slabs, are often used for arranging the blind area of a house or paving simple paths.
Paving slabs, compared to conventional asphalt or concrete pavement, have many advantages. For example, during rain, puddles do not form on a paved path, and during hot weather, paving stones do not emit harmful substances (which cannot be said about asphalt). In addition, if it is necessary to lay communications, the coating in this case can be easily removed and then put back in place without worrying about disturbing its appearance. And, of course, a garden path decorated with masonry looks very beautiful and neat.
What is needed to make paving stones
Making paving stones with your own hands first of all requires a free room in which you can place a molding table and a rack where the molds for pouring will be stored.
In addition, you will need the forms themselves. If the paving stones are designed with a pattern or some kind of relief on the surface, then you need to prepare special “stamps” in advance, for which rigid wire is used. While pouring the molds, the wire is pressed into the surface of the future tile until the desired pattern is obtained.
To make paving stones you will need cement, clean water and sand. The grade of cement must be at least 500, and coarse-grained river sand must be used. The ratio of cement and sand can be 1:2, 1:3 or 1:4. If desired, some of the sand can be replaced with fine crushed stone. Only clean water should be used, otherwise the quality of the finished paving stones will not be very high. While preparing the solution, water is added gradually and carefully until the mixture becomes homogeneous.
To ensure that the masonry later looks exactly as it was intended and has the desired properties, you can add fine gravel or any similar stone, small scraps of reinforcement, dry powder paints, as well as metal rods to add additional reliability.
To increase the quality of colored paving stones, pigment dyes, plasticizers and reinforcing materials will be required.
The use of plasticizers improves the strength of products and their resistance to frost. The plasticizer is usually added in an amount of 0.7-1% to the total mass of the solution, and the dye necessary to give the paving stones the desired shade is added in an amount of 0.5-10% of the total mass. The strength of future tiles can be increased through the use of reinforcing materials (reinforcing fibers or metal mesh).
To give the paving stones the desired shade, mineral dyes should be used. Coloring can be done in two ways:
- Adding dye to the solution while mixing. Thanks to this method, you can get a muted, not too bright shade. It can only be used if the solution is mixed with white cement and light sand, otherwise the tiles will not look neat.
- Products that are at the drying stage are sprinkled with dye, which is carefully rubbed in using a metal trowel. This method will give a very bright and rich shade, but you need to work very carefully so as not to damage the surface of the tile.
Types of paving stones
The basis of production are materials of artificial and natural origin. Both product options have an attractive appearance.
Paving slabs are currently available on the market in the following varieties:
- Clay.
- Hexagonal in the shape of a honeycomb.
- Turtle tile.
- A coating called “Brick”.
- Vibropressed paving stones, on a stone base.
- Stone slabs, vibro-cast.
- Concrete products.
- Tiles based on artificial raw materials.
- Paving stones made from natural materials.
Each option has its own scope of application and manufacturing features. Manufacturers themselves choose which type of material is most profitable. And buyers have access to their own technology for making paving stones with their own hands.
Considering the production of paving stones as a business, it is worth deciding on the most cost-effective type of product to produce
Basic technological operations for the production of paving stones
To prepare the solution, a simple plastic bucket and a drill (or a hammer drill with a mixer attachment) are perfect.
The production of paving slabs includes the following steps:
- The mixture is poured into the molds until about halfway, then a mesh of metal rods is laid and the mold is filled to the end. After this, the solution is compacted until the surface becomes as smooth as possible.
- Once the solution is leveled, take the stamps to apply the pattern and press it into the surface to the desired depth.
- To decorate the paving stones, you can lay out the surface with several small stones, for example, in the shape of some kind of pattern. If a glossy surface is required, it must be thoroughly polished. To achieve the desired effect, wet tiles are sprinkled with dry cement, which is rubbed into the surface with gentle polishing movements.
- Then the mixture must dry, which takes about three days. To prevent cracks from forming on the surface, which happens especially often in the summer, the surface of the paving slabs is periodically moistened with water.
The sequence of stages does not depend on the characteristics and volume of the paving stones being produced. If it is necessary to produce a large quantity of paving slabs (for example, to design a car park near a house), you need to use more powerful equipment.
Vibrocasting
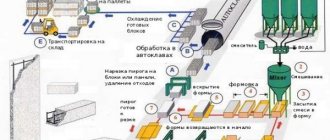
The production of paving slabs using the vibration casting method involves pouring a liquid cement-sand mixture into a matrix mounted on a vibrating table. Thanks to consistent vibration, the composition spreads evenly over the mold and is compacted. At the next stage, the resulting “tile” blank is sent to a heat chamber, where it is dried.
Among the advantages of such production of paving slabs it is worth highlighting:
- Slabs for sidewalk paths are made in a minimum amount of time.
- The surface of the products is glossy.
- Due to its easy sensitivity to dyes and additives, stylized elements, for example, marbled tiles, can be produced in this way.
- Low cost of products.
However, this technology also has its disadvantages:
- Low strength.
- Instability to low temperatures.
- Short service life.
Such products, photos of which you see below, are suitable only for the southern regions. In addition, keep in mind that vibration casting can only produce thin tiles, no more than 60 mm thick, which is why they are rarely used for parking spaces.
Large production of paving stones
When producing large volumes of paving stones, many more molds are required, which will significantly speed up the manufacturing process. Today on the construction market you can find a huge number of different models and sizes.
Traditionally, molds are made of plastic or rubber. The material used, as well as the quality of the finished product, affects its service life (usually from 100 to 500 filling cycles). It is worth immediately noting that the forms are almost impossible to repair after the end of their service life. In addition to the material for decorating the path itself, you need to think in advance about the supply of tiles needed to repair the coating during further use (10-15% of the total quantity).
If you try to classify the forms for making paving stones by service life and material, you will get the following list
- Rubber (silicone). It can have both a glossy and matte surface. Additional devices such as formwork are not required when using it. It is enough for approximately 500 cycles of pouring paving stones. You can, of course, use it longer, but the quality of the product will decrease.
- Plastic, has a wide range of different configurations and reliefs. Designed for approximately 250 cycles of pouring paving stones.
- A polyurethane product that lasts for 100 cycles. Thanks to its use, it is possible to cast a surface with many small details.
- DIY paving molds. Wooden boxes, plastic containers are usually used as homemade ones, and they are also made from scraps of metal pipes. If desired, you can even use milk cartons.
Attention!
If the mold for casting paving stones is made by hand, then it must be lubricated, otherwise it will be very difficult to remove the finished product from it. For lubrication, simple machine oil or drying oil is perfect. To independently prepare the concrete solution in the required quantity, you will need an electric concrete mixer. The volume of the working tank is selected taking into account its productivity and the number of molds to be filled.
To compact the solution of future paving stones in the molds, a special vibrating table for paving slabs is used. A vibrating table with a simple design can be built on your own; with a complex one, you can purchase it in a store.
To make a vibrating table with your own hands, you can take a simple car tire. A metal plate is laid on it, the thickness of which is about 5-10 millimeters. A jigsaw should be attached to the stove and vibrate when turned on. In addition, concrete can be compacted in another way. To do this, the base on which the forms are located is simply shaken slightly with your hands.
To dry paving stones, racks are usually used, which are installed in places reliably protected from moisture and sunlight. The product should be kept in shape for at least a day. Later, when the products are removed from it, they need about three more weeks to dry completely.
Preparation of concrete mixture for the production of paving slabs
The mold is manufactured in production using both traditional and latest technologies.
The concrete mixture for the production of paving stones and paving slabs is prepared from additive-free Portland cement M 500 D0 (GOST 10178-85) for road surfaces, sand with a size of at least the second fineness module and small crushed granite stone with a fraction size of 0.5-0.1 or screenings taken in proportions 1:1, mineral additives plasticizer and dispersant, which significantly increase the quality of finished products, as well as pigments made on the basis of iron oxide compounds for the preparation of colored paving slabs. The technology for preparing concrete mixture involves the following steps:
Preparing the mixture for the front layer. The concrete for this layer must be highly durable and provide a glossy appearance. Abrasion should not exceed 0.7 g/cm2. Achieving these guidelines is ensured by strict adherence to proportions:
- 1 part cement;
- 2 parts of a mixture of crushed stone and sand;
- 0.02 parts dispersant;
- pigments.
High-quality vibropressed paving slabs will last for decades.
When preparing concrete for the facing layer of paving stones and paving slabs, it is necessary to take into account that cement produced under different conditions has different effects on the color shade. Therefore, it is advisable to use cement from one manufacturer for production. The amount of pigment is selected experimentally depending on the desired color intensity. The pigment is mixed with cement in dry form. This technology allows you to obtain a more uniform color. Before use, the dispersant is filled with hot water (about 60°C) in a ratio of 1:2.5 and added at the end of concrete preparation. It liquefies the concrete, which ensures uniform spreading of the mixture over the form and a glossy surface of the finished product. Direct preparation of the solution is carried out in the following order:
- 1 part of water, 3 parts of screenings with sand, 3 parts of cement and another 3 parts of screenings with sand are poured into the concrete mixer. The solution is kneaded for 10-12 minutes;
- A liquid dispersant is added to the composition prepared in this way and the solution is kneaded for another 3-5 minutes until it is completely ready.
The consistency of the finished solution should be similar to thick sour cream.
To prepare the second layer, 1 part of water is poured into a concrete mixer, then 5 parts of a mixture of sand and screenings, 3 parts of cement, 4 parts of screenings with sand and 0.01 part of a plasticizer, prepared using the same technology as the dispersant, are added. The mixture is stirred for 10-15 minutes.

