Connection Features
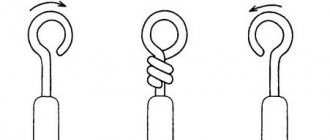
There are quite a few ways to connect wires - using screw and self-clamping terminals, crimp sleeves, a bolt and nut (through a washer). But most often, the ends of the wires are connected by twisting, that is, they are simply twisted.
All of the above methods have one significant drawback. Even if the rules and technology of work are followed, the area of the contact zone of two conductors turns out to be less than the working cross-section of the core.
At a sufficiently high load (not exceeding, however, the permissible load), the contact area will heat up. Which can lead to insulation melting, short circuit, or fire.
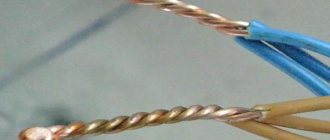
Twists have an advantage over other types of connections, since twists can increase the contact area of the wires. To do this, it is enough to solder the ends of the cores in a twist or weld them.
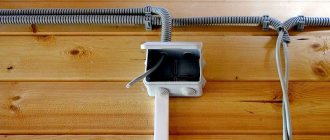
Soldering connections are quite labor intensive. And if you consider that distribution boxes, as a rule, are located at a level of 2.3-2.5 meters from the floor, it is very inconvenient to carry out the work.
After all, in addition to a soldering iron, you need to have solder with you, and sometimes also flux. And all this is at its best. In addition, in order for the connection to be of high quality, it must be heated for quite a long time, which also does not speed up the work process.
Advantages of the method
Twist welding is a more technologically advanced type of connection. It is faster and does not require any filler material. The melted ends of twisted wires form a strong connection that is not subject to electrochemical corrosion.
Welding requires additional equipment, and this is the only drawback. If you do not have a special welding machine for welding twists, you can use an inverter welding machine, or you can make such a machine yourself.
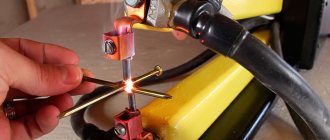
A special feature of twist welding is that it is carried out with a carbon non-consumable electrode, which for convenience is better sharpened to a cone.
Welding technology
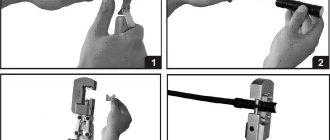
There is a technology for welding strands of wires made of copper. We will talk about it further. First, remove the top sheath from the wire. If you have never done this, then simply take scissors or a knife, visually measure 3-4 centimeters from the end of the wire and trim the sheath. Then, with a slight movement, pull it up. The wires should be exposed.
Exposed wires need to be twisted. The total length of twisted wires must be at least 2.5 centimeters. Then connect the clamp and ground to make soldering of copper wires with the inverter possible. Next, set up your welding machine to weld strands. Set the current and power. Leave the electrode to warm up.
Further actions are no different from conventional welding. The only difference is the duration of the work. The electrode must be pointed at the wire for a few seconds and then removed. This is enough to form a compound. If you overexpose it, the copper will simply melt and you won’t succeed. And if you hold the electrode for a fraction of a second, the connection will be porous and fragile. In a word, skill is important here.
That's all. Welding copper wires with your own hands is not as difficult as it might seem to a beginner. The most important thing is to set up the machine correctly and select the welding time. The more you practice, the better the result will be.
Process technology
Before connecting, the ends of the wires to be welded must be cleared of 7-8 cm of insulation. After this, they are twisted and cut so that the length of the twist is about 5 cm. A heat sink is installed on it near the insulation, which can be used as an electric alligator clip.
Next, “ground” is applied to the wires and by briefly touching the end of the twist with the electrode, an arc is excited, which melts the copper conductors. The duration of the arc should not exceed 1-2 s, otherwise the twist will become very hot and the insulation may melt.
As a result of welding, at the end of the twist you should get a homogeneous frozen drop of metal in the shape of a ball. The cooled connection is isolated by any acceptable method. At the moment, heat-shrinkable tubing is popular, which is first placed on one of the wires.
Using an inverter device
To weld twists, you can use an inverter-type welding machine. The advantages of such devices are that, with a relatively low weight, they have significant welding power, while consuming a small amount of electricity.
This allows you to use inverter devices by connecting them to a household AC network without fear of voltage surges and drops. Inverters provide excellent output current parameters, which allows you to maintain an even and powerful arc.
The current value may vary depending on the core material and cross-section. Since aluminum cables with aluminum conductors are currently not used for internal electrical wiring, the parameters of the welding machine can be selected based on the requirements for welding copper conductors.
Example requirements are:
- for welding two wires with a cross-section of 1.5 mm², a current value of 70-75 A is required;
- the twisting of three such wires is welded with a current of 80-90 A;
- two or three wires with a cross-section of 2.5 mm² need to be welded with a current of 80-100 A;
- three or four of the same wires are connected using a current of 100-120 A.
Due to the high cost of inverter welding machines, it is unprofitable to purchase them to perform only twist welding. If you use some parts that can be easily purchased or removed from old electrical appliances, making a device for welding twists with your own hands will not be difficult.
Device for welding from improvised means
You can make a simple welding machine yourself. Most often, a broken microwave is used, in which the primary winding of the magnetron remains working.
- Cut the secondary winding and remove it.
- Wind a new one with a wire with a cross-section of 6 mm2, you need to lay at least 16 turns, more is better. The output current will be 14 - 18A. It is optimal for welding wires with your own hands.
- Connect a multi-core copper cable with a cross-section of 10 - 12 mm2 from the device to the handbrake.
- Insert a graphite electrode into the copper tube on one side and weld the cable to the other end.
- Use pliers instead of a clamp. Attach the wire from the “plus” to one handle.
- Connect the wires to the microwave outputs on the back wall.
Before fixing the graphite electrode, the copper tube is given the appropriate shape and a longitudinal cut is made for fixation.
By making your own welding machine, you can save on purchasing an electrode. It is a massive piece of graphite. You can replace it with a brush from an electric motor. Contacts from trolleybus rod pantographs are best suited. They are easy to find at final stops, where drivers constantly change brushes and throw away old ones. For convenience, recesses are made in the graphite electrode into which the end of the twist is inserted.
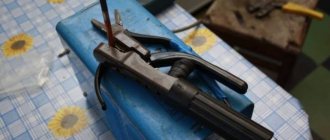
do-it-yourself twist welding machine requires a holder . It is made from a piece of wood. A file handle is suitable. A hole for the cable is drilled along the axis. Everything is well insulated. Experts recommend a holder for cored wire welding. It has a wide opening and a socket for connecting a cable.
A broken microwave is not always at hand. Electricians can easily calculate and make both windings themselves and select the right rectifier. The assembled apparatus will speed up their work on site.
Homemade apparatus
The main component when assembling a machine for twist welding is a transformer with a power of at least 600 W, with an output voltage of 12-36 V. It must provide such voltage when connecting a supply voltage of 220-230 V.
When assembling the device, a durable metal case of suitable dimensions is required, in which it is necessary to provide the possibility of installing a fuse or circuit breaker with a rating of 16 A.
The supply voltage to the transformer must be supplied by a cable with copper conductors and a cross-section of at least 1.5 mm². It is better to use a KG 3x1.5 cable with rubber insulation for this. The device body and the transformer core must be connected to the grounding conductor.
To connect the transformer to the ground contact and the holder, two wires with a cross-section of 10.0 mm² are used, for example KG 1x10. Their length should be as short as possible to avoid current losses. The holder can be used from any used welding machine.
A carbon electrode can be made by disassembling an old 373 battery. The core, also known as the positive electrode, is perfect for this purpose.
If you cannot get such a core, you can purchase carbon brushes for electric motors used in electrical appliances or power tools at the store. The brush is clamped into the holder and sharpened into a cone shape.
It is convenient to use pliers as a ground, connecting one of their handles to the transformer with a KG 1x10 wire. After this, the handles must be insulated. This device will allow you to comfortably hold the twist while welding. At the same time, the pliers will also act as a heat sink.
Requirements for a homemade welding device
An electrician constantly repairs electrical wiring. Purchasing special equipment is worth it. An amateur, he does renovations in his own house occasionally. It is more convenient for him to use a welding inverter with a current of up to 100A, or to make a device with his own hands.
A homemade welding machine must meet the following requirements:
- have a clamp;
- work from a 220V network;
- transformer power from 600W;
- withstand short-term overloads;
- the electrode is firmly fixed in the handle;
- adjust to the operating modes of welding copper wires;
- It is advisable to have a push-button switch on the holder.
The main requirement for a welding machine is safe operation. All contacts must be insulated. Before connecting to the network, the equipment must be connected to ground.
The twist is not easy to accurately bring to the electrode and press for the required time. For novice specialists, it will be easier to cook if you press the end of the connected wires and turn on the current by pressing a button.
Assembling the device yourself
Security measures
Welding twists with a homemade device is not inferior in efficiency to welding with an inverter machine. When carrying out work, it is necessary to take into account the harmful factors that appear during conventional welding.
It is necessary to use shields with light filters to protect against ultraviolet radiation, gloves and clothing made of fireproof material . In addition, it is necessary to ensure compliance with fire safety measures.
Proper use of equipment and adherence to technology, as well as safety measures when working with welding, will allow you to obtain a reliable connection of cables. Ultimately, the reliability of all electrical wiring increases and the period of its trouble-free use increases.
