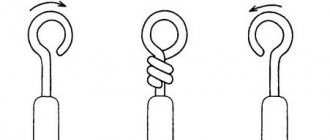
What is crimping with sleeves?
The essence of crimping is that electrical wires or cables are connected using conductive sleeves, which are tubes made of metal. The process of crimping cables, as a result of which a strong and reliable electrical connection is created, is as follows:
- The cores of the electrical wires, previously stripped of insulation, are inserted into the inner part of the crimp tube at both ends and must be connected.
- Using special press pliers or ordinary pliers, crimp the sleeve around the conductor placed in it. For higher reliability, the tube is crimped in two or three places.
- The place where the crimping is performed is isolated using TUT or electrical tape made of PVC for this purpose. If connection sleeves covered with a layer of insulation are used for crimping, there is no need for additional insulation of the formed connection.
Stages of crimping an electrical wire with a sleeve
Crimping wires with sleeves is especially relevant in the following situations:
- when connecting elements of electrical networks operated under high load;
- when connecting wires with a large cross-section;
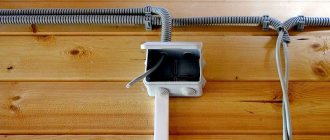
- in cases where it is not possible to connect the wires in any other way (in particular, this method is used to connect wires in a junction box in which it is quite difficult to mount a terminal block;
- In addition, crimping sleeves are used to connect wires located at high altitudes or in conditions of limited visibility).
Crimping of wires with sleeves ensures excellent electrical contact and high mechanical strength of the connection
Let us list the most significant advantages of connecting wires by crimping.
- The tool for crimping wires, which is mainly used as press pliers, does not need to be connected to an electrical network, which distinguishes it favorably from electrical devices with which wires are connected by soldering. Thus, crimping (or sleeve, as this process is also often called) is practically the only possible way to form a high-quality connection of wires in places where there is no possibility of connecting the tool used to the electrical network.
- To connect wires using the crimping method, special knowledge and skills are not required. This cannot be said, for example, about soldering, which is unlikely to be done efficiently without the appropriate skills and experience.
- Using a special tool for crimping sleeves, you can create high-quality wire connections even in hard-to-reach places, such as distribution boxes and socket boxes. Moreover, the use of the crimping method for connecting wires in socket boxes makes it possible to reduce the length of the connected contacts to a minimum, which makes it possible to increase the density of the electrical installation performed.
An important advantage of using crimping is that using this method you can successfully connect wires whose cores are made of different metals. The same soldering cannot achieve this.
Video on the topic
In practice, several methods are used to connect electrical wires. They can be twisted, soldered, connected using electric welding or a special block equipped with bolted fastenings. Each method has its own pros and cons, which manifest themselves during operation of the line in operating mode.
For medium and high currents, the optimal way is to connect the wires by crimping with sleeves . This method achieves two important goals - the connection has excellent electrical contact and high mechanical strength.
Technologically, the method is very simple: the stripped ends of the wires to be connected are inserted into a special metal sleeve, and the sleeve is crimped using special tools. To do this, you need manual or mechanical press pliers, which provide very tight crimping of the contacts along the entire length. Hand pliers are used for sleeves with a cross-section of up to 120 mm2. Connections larger than this size require the use of a hydraulically driven tool.
If it is necessary to crimp a large number of sleeves of different sizes, you should choose pliers with an adjustable punch or rotary dies designed for different sections. For crimping small-diameter sleeves, pliers with shaped jaws, without dies and punches, are used.
In terms of mechanical strength, connecting wires by crimping exceeds all other methods, but it turns out to be non-separable. To disconnect the crimped wires, the switching section must be cut off. Both copper and aluminum wires of any cross-section are suitable for connecting wires by crimping.
Today I want to talk about such an interesting area as crimping single-core wires with sleeves and, as an example, consider crimping VVGng-3x2.5 sq. mm copper wires.
Types of sleeves and crimping tools
To ensure contact between the connected conductors, special materials are used - sleeves. They are made from copper or aluminum tubes of various diameters according to the wires being fastened, so that electrochemical equality is maintained. Crimping is used in cases where it is necessary to withstand high current loads or when using other methods is problematic.
Table. Types of produced sleeves
| Name | Material | Description | |
| Copper | Aluminum | ||
| GM | + | – | Without protective coating, looks like pipe scraps |
| GML | + | – | The surface is subjected to electrochemical sputtering (tinning). This protection protects the surface from corrosion and oxidation. |
| GA | – | + | For joining cables made of aluminum |
| GAM | + | + | They are used specifically for connecting cores of various materials. Made from two tubes by friction welding |
| GSI | + | – | Made from tinned copper tubes with external insulation. During crimping, the protective layer is not damaged and the assembly does not require any more additional manipulations |
For your information!
GML are not suitable for aluminum conductors. Metal deformations in the area where pressure is applied by the pliers cause damage to the tin coating; the conductors will come into contact with each other.
To install wiring with a cross-section of up to 120 mm², you will need manual ones, and above that, hydraulic press pliers. The professional tool is equipped with dies and punches designed for different diameters. The size is adjusted by turning the matrix or punch. When working with aluminum conductors, quartz-vaseline paste is used to remove the oxide film from the metal surface.
What is the essence of the method?
Crimping is a method of connecting wires using special sleeves. Outwardly, they look like ordinary tubes and serve as a connecting mechanism.
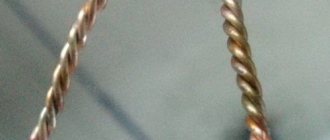
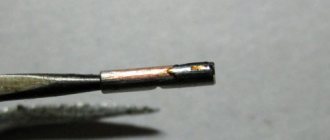
The wire strands that are to be connected are inserted into the tube from two opposite ends, crimped with press pliers, and as a result, a strong and reliable electrical unit is obtained. The tube is compressed in two or three places, depending on its length and the cross-section of the switched conductors. The connected cores and the sleeve are jointly subjected to deformation. At this moment, the tube compresses and squeezes the conductive surfaces of the conductors. Due to this, the wires interlock with each other, which provides reliable electrical contact.
The junction is then isolated.
Most often, this method is used in situations where it is not possible to use another type of connection. For example, welding requires the presence of electricity so that the welding machine can be connected. When working in a small junction box, it is inconvenient to position the bolt connection, nut clamp or terminal block. And reaching up to the distribution box from the ceiling with a soldering iron is also not very convenient. It is in such cases that crimping wires using sleeves helps out.
Sleeves for crimping wires: how to choose
As you already understood, sleeves can be used in two ways to connect wires end-to-end (wire extension) or connecting several wires. Now let's look at how to choose the size of the sleeve for crimping wires using a live example.
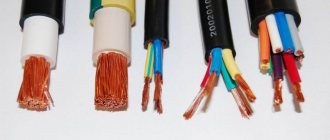
And as an example, let's conduct a small experiment. I'll take several sleeves of different sections and stuff them with wires. Look how many wires and what cross-section will fit there. The following sleeves will participate in our experiment: GML-4, GML-6, GML-10, GML-16.
Capabilities of GML-4 - four
Three wires with a cross section of 1.5 mm2 normally fit into the four. You can also stuff two wires of 2.5 mm2 and one of 1.5 mm2. In my case this is true. The last one fits tight, but you can put it on.
Side view, you can see that the sleeve is packed tightly:
Capabilities of GML-6 - six
The six normally includes four wires with a cross section of 1.5 mm2. If it is necessary to crimp a larger cross-section, then the six will include three 2.5 mm2 wires, and one 1.5 mm2 wire will also be included for compaction. The wire at 1.5 already fits tightly, but that’s how it should be.
Also, GML-6 will include one wire with a cross-section of 4 mm2 and two wires with a cross-section of 2.5 mm2.
Capabilities of GML-10 - ten
The ten includes four wires with a cross-section of 2.5 mm2 and one wire with a cross-section of 1.5 mm2. If you take a wire with a larger cross-section, then from the options in GML-10 you can drive two wires with a cross-section of 4 mm2 and two wires with a cross-section of 2.5 mm2. They fit tightly. You can also drive three wires at 4 mm2 and one at 2.5 mm2. They enter tightly.
The photo on the side shows how many wires go into the sleeve:
Capabilities of GML-16 – by sixteen
GML-16 will include six wires with a cross-section of 2.5 mm2 and one wire with a cross-section of 1.5 mm2.
And again, a photo of how the sleeve is clogged:
To make it clearer, I took a general photo of all copies
We continue our research. Now let's test all the specimens and try to cut each sleeve. Let's look at crimping from the inside, so to speak. This is what happened.
The photo shows that the sleeve is pressed normally, tightly. Well, that's basically it. My PK-16 press pliers are not capable of more (I mean the cross section).
Classification by material of manufacture
One of the main parameters, depending on which wire sleeves are divided into different types, is the material of their manufacture. The need to use dissimilar sleeves is determined by differences in the electrochemical properties of the connected wires made of different metals. So, if an inappropriate sleeve is chosen to connect wires made of a certain metal, the place of the formed contact will oxidize, which over time will lead to a decrease in its reliability in terms of electrical conductivity.
The main types of sleeves for crimping electrical wires, depending on the material from which such tubes are made, are:
- copper sleeves;
- tinned connecting sleeves;
- combined;
- isolated.
Each of the above types is used to solve certain problems, which should be taken into account when choosing such tubes for connecting conductors.
Copper cable sleeves
Designed for connecting copper wires, there are the following types:
- GM - ordinary copper sleeves. They are not subjected to any processing and do not have any protective coatings. The simplest and cheapest option, which is used where there are no aggressive influences.
- GML is an analogue of the previous version, which was tinning. A protective layer is applied to their surface, which protects against harmful influences. They are more expensive, but they can be used where there is an aggressive environment.
- GSI – insulated connecting sleeve. In addition to tinning, it has PVC insulation, which serves as additional protection.
It is curious that you can still find advice and opinions that say copper sleeves can also be used to connect aluminum wires. In fact, this is completely wrong. During the crimping process, the surface layer will in any case undergo deformation, and as a result of the interaction of copper and aluminum, a chemical reaction will occur that will cause corrosion.
Connecting copper sleeve
Tinned
To connect electrical wires operated in an aggressive environment, tinned copper sleeves for crimping are used, which are marked GML. In order to protect the main material of their manufacture - copper - from electrochemical corrosion, GML sleeves are coated with a special compound.
It should be borne in mind that a tinned sleeve is not used for crimping aluminum wires.
This is explained by the fact that part of the protective coating of such a tube is destroyed when it is compressed, which will lead to contact between aluminum and copper and, accordingly, to the development of electrochemical corrosion.
Connecting sleeves type GML, made of electrical copper with a tin-bismuth protective coating
Aluminum cable sleeves
For aluminum wires you will have to use aluminum sleeves (HA). They require special operation, in particular they need to be cleaned and lubricated. They are usually made of AD1 aluminum and are designed for connecting cables and wires under voltage up to 10 kV. In general, the design of aluminum sleeves is no different from conventional copper sleeves, but their price is higher. Available in non-insulated version.
Aluminum connecting sleeve
Isolated
Among the crimping tubes used for crimping electrical wires, the category of insulated connecting sleeves is distinguished. The use of the latter eliminates the need to perform additional insulation of the contact area formed with their help. In terms of their design, insulated sleeves are the same tinned copper tubes, the outer surface of which is covered with an insulating layer of fairly durable and at the same time plastic PVC. Due to the mechanical properties of such a protective layer, sleeves of this type can be successfully crimped without compromising their original characteristics.
Fully insulated connection sleeves
Insulated sleeves for hermetically sealed connection of SIP wire cores
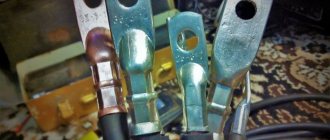
Copper-aluminum
When a combined connection (copper-aluminum type) is needed, copper-aluminum sleeves (CAC) are used, which can also be called aluminum sleeves. One half is copper, the other is aluminum. Both parts are connected by friction welding and have a partition inside that controls the depth of the cables.
Since the features of different types of wires and cables are different (we will not go into details, but aluminum wires at the same voltage will be thicker), the parts have different diameters (the copper part has a smaller one). The current load is similar.
These are the main types of sleeves that are used most often. You can also find the following types on sale:
- Nickel;
- Heat shrinkable;
- Steel;
- Various shapes (T-shaped, etc.);
- Completely sealed.
They are used for fairly narrow purposes and are much more expensive than traditional types. Most sleeves are produced for crimping or soldering; the first option is more popular, simply because it is much simpler. Soldering requires certain skills and experience, it takes longer, but is considered a more reliable option.
Aluminum-copper connection sleeve
Typical mistakes when connecting wires by crimping
Some important tips for novice electricians, or people who independently use such a connection method as crimping wires with sleeves .
The use of sleeves with a cross-section smaller than the wire.
Never use sleeves smaller than the required diameter. To insert wires into them, it is necessary to reduce the diameter of the core, which is done by cutting off part of the conductor and reducing the cross-section of the wire.
Those. if you want to extend a wire with a cross-section of 2.5 mm2, and your sleeve is 1.5 mm2, you do not need to take a file and trim the wires so that they fit into the sleeve.
Thinning the wire leads to an increase in the resistance of the contact area and also reduces its throughput. Therefore, the purpose of maintaining the same conductivity along the entire length of the line is lost. At the junction, the wire begins to heat up and quickly collapses, it’s good if there is no smoke or flame.
Reducing the cross-section of the wire also leads to a decrease in the mechanical strength of the connection. With any external influence it can simply break. Finding a break in an extensive network is not an easy task even for a professional electrician, unless, of course, there are special instruments. But they are not in every home.
Use of large diameter sleeves.
Increasing the diameter of the sleeve also does not bring any benefit. It is not always possible to achieve a reliable and strong connection. The use of the “folk” method of bending the ends of the wire in half can be considered only a partial solution. Practice shows that the mechanical strength of the pressed joint in this case is also reduced by almost half.
Cutting cartridges into several pieces.
Many beginners use this method to save on cartridges. Do not shorten the factory sleeve. This leads not only to the inconvenience of working with pliers, but also to an increase in resistance. The consequences are described in the first tip. Mechanical strength also decreases due to a decrease in the length of the contact section.
Crimping of wires with sleeves should be performed only with a special tool - press pliers.
Engineering thought for performing such an operation as connecting wires by crimping with sleeves came up with a special tool - press pliers.
Therefore, you should not use pliers for these purposes, and especially not a hammer. You can flatten the wires, changing their geometry, and thereby the resistance of the section, damage the sleeve itself, and break the wire.
Connecting wires by crimping sleeves is not a complicated operation, but it requires careful execution and compliance with safety precautions, like all work with electrical wiring. The crimp density and reliable insulation of the connection area are especially important. It is not recommended to use homemade sleeves. It will not be possible to save much on them, and the reliability of the connection will be much lower than when using factory sleeves.
If you liked the article, share it with your friends!
Recommendations for crimp testing
If difficulties arise in selecting a sleeve that is ideally suited for the wires in size, it is better to opt for a tube slightly larger than required. In this case, the void can be filled by cutting bare wire with a slightly shorter length than the sleeve. Compaction in this way will improve the quality of the crimp.
Extending the wire using crimping should imply that the connection joint is located exactly in the center of the tube.
When isolating the joint, the connecting tape must extend beyond the edges of the sleeve by at least 10 mm. If multi-core wires are connected to each other or it is necessary to splice different numbers of them on both sides, then the correct solution would be insulated type connecting sleeves.
Note that crimping as a process is not difficult if you act consistently, use a special tool and suitable sleeves. One way or another, you need to remember that we are talking about a permanent connection, so you will need a wiring diagram. Having a plan at hand will help you avoid mistakes during the work.
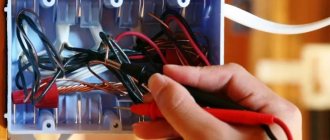
Tools for crimping
Despite the fact that it is possible to crimp wires using special sleeves even with simple tools such as pliers, a hammer or a chisel, this is not recommended. It is quite difficult to achieve the formation of high-quality and reliable contact between two conductors in this way. In addition, using such tools, you can easily damage the sleeve, which you simply have to throw away.
Manual crimping tool for cable sleeves with adjustable crimping force
Special tools allow you to obtain guaranteed high-quality electrical connections using crimp sleeves:
- press jaws, which today are available in various modifications;
- press of mechanical and hydraulic type (manual or powered by an electric drive).
Wire crimping pliers with ratchet mechanism
The main elements of the tool designed to perform wire crimping are:
- a matrix, which, acting on the sleeve with its shaped working surface, compresses it around the conductor;
- punch - a movable element that transmits pressure from the power mechanism of the tool to its matrix.
In order for the connection made using such a tool to be of high quality, it is necessary not only to correctly select the replacement matrix for a sleeve of a certain diameter, but also to apply sufficient pressure to the connecting tube.
Wire crimping
For this purpose, I use press pliers, with which I crimp a copper sleeve placed on twisted wires several times. It is important to follow one rule: do not overdo it! After all, a twist cut by a tool can cause a lot of trouble for such a would-be electrician - everything will have to be done again. If the diameter of the connection point is smaller than the diameter of the sleeve, you can always show soldier ingenuity, that is, slip pieces of wires under the copper product - and “Basta”!
The advantages of crimping are obvious: you put a handful of copper sleeves in a small container, took the press pliers with you and that’s it, you don’t need to drag around an extra bulky tool. The crimping process itself is incredibly simple, just calculate your strength.
Application of press jaws
The most common crimping tool for sleeves is press pliers. They are even used for domestic purposes, since they can be used to crimp various terminals and non-standard connectors.
There are several types of press jaws depending on their purpose:
- for crimping sleeves;
- to remove the insulating layer from the core.
The crimp design is divided into several varieties, their main difference being the size and shape of the sockets. The nest may have a trapezoidal or square shape. Also, nests are divided according to additional equipment or the absence of plastic flanges. With their help, a reliable crimping of a multi-core cable is carried out.
To obtain a reliable connection, the tool size must match the diameter.
Modifications of crimping pliers:
- A tool designed for non-insulated parts. Equipped with one rod, which is located at the dividing joint during the crimping process. The pipe itself must be crimped in the very center.
- Equipment designed for insulated parts. Equipped with three oval die press shapes. Each of them has blue, red and yellow colors. Insulated tubes are painted in similar colors to make it easier to select the required press.
Wire crimping sleeves are a type of permanent connection. To avoid installation errors, you need to have a wiring diagram in front of your eyes.
Features and rules for crimping wires
The crimping procedure is extremely simple: the exposed wires are tightly inserted into the tube and pressed with press pliers. If voids have formed between the wires, they must be filled with the remaining scraps of the appropriate length. Compression is carried out at at least two diametrically opposite points to obtain reliable contact. The conductors must not be twisted.
After the preparatory work, you can begin crimping. Sequencing:
- Strip the wires of insulation and connect them into a bundle.
- Place the lug and fill the voids with cable scraps.
- Clamp at the edges (force is applied while rotating the tool 180°).
- Trim the protruding edges of the cores.
- Use heat shrink tubing to insulate exposed parts.
- Twist the cables tightly and lay them down.
Technology
- Remove the insulating layer by 2-3 cm from the wires to be connected.
- Now, using fine-grit sandpaper, sand the bare areas to a metallic shine.
- If the conductors are aluminum, apply quartz-vaseline paste to them, if copper, then technical petroleum jelly.
- When crimping on one side, place the wires parallel to each other and put a sleeve on them. For double-sided applications, insert the stripped wires into the tube from opposite ends to the joint.
- Crimp the connection with press pliers, wipe with a cloth soaked in gasoline or solvent, insulate with electrical tape, heat-shrinkable tubing or varnished cloth.
The wiring in the junction box using crimping is shown in detail in this video:
As you can see, there is nothing complicated in crimping, and you get a reliable and high-quality connection. If you need to do similar work of a one-time nature, you can ask someone for press pliers or rent them. If you often deal with electrical installation work, buy a tool, it is not too expensive.
How to connect wires by crimping in a junction box
In distribution boxes, the most common task is to route a 2.5 mm2 line into several directions. If copper wires are used, then the connection requires sleeves for crimping copper wires and special press pliers.
Let's look at how to crimp wires with sleeves in a distribution box; for example, let's branch the cable in the distribution box in three directions.
First, the insulation from the wires is cleared to a length corresponding to the length of the sleeve. The stripped ends of the wire are inserted into the sleeve very tightly so that there are no voids.
Advantages and disadvantages
Such a connection has high mechanical strength and resistance to tearing. But it is non-separable: if necessary, it cannot be disassembled to replace one of the conductors. During repairs, the old sleeve is cut out and replaced with a new one. Reducing the cable length may require an extension procedure. In general, this is the only drawback when installing electrical wiring using the crimping method.
The crimping method has the following advantages:
- Performed with hand tools that do not need to be connected to an electrical outlet. If there is no voltage during operation, this is the only way to make a quality connection.
- Using aluminum-copper lugs, dissimilar conductors are installed in one electrical unit.
- If welding or soldering requires special equipment and skills to work with it, then even an amateur can do the work with pliers.
- The crimping tool allows for commutation in confined spaces.
- Installation is carried out quickly.
- Operational maintenance is not carried out.