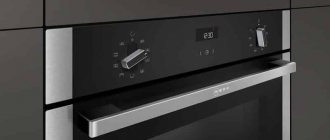
Modern ovens are powerful consumers of electricity, and if their integration into a kitchen set does not present any difficulty, then connecting the ovens to the electrical network requires fulfilling a number of requirements and special attention to this process.
Before purchasing equipment, you need to understand which wind instrument is best and how it is installed. It is worth noting that this is a rather complex process that must be approached with great responsibility and attention.
Varieties
At the moment they are distinguished.
- Type:
- dependent;
- independent.
2. By heating or heating method:
- gas;
- electric.
The first option has a switch. You can turn on the equipment with just one button. Operation is only possible in conjunction with a hob, that is, paired with a stove. Regarding the independent type, it works in autonomous mode and is equipped with a separate control panel, which provides for each actively used function of the oven.
As for gas ovens, they are more suitable for those people who are accustomed to standard cooking devices. Regarding the connection, it should be noted that connecting an oven without a plug to work is quite difficult; it is best to entrust this process to specialists. This type of equipment is equipped with burner nozzles, which are located at the bottom of the oven.
If you have chosen an electric oven, you have made the right decision. As for the connection diagram for an electric oven, it is quite simple, which allows you to make the connection yourself, without outside help.
Weak link protection
Each individual line must have its own circuit breaker
In addition to the cross-section, when choosing suitable cable products, pay attention to the actual operating conditions. Standardized values are given for heating to a temperature not exceeding +60°C
When installing the line on a site near a country house, it is necessary to provide protection from humidity and other adverse external influences.
Carefully check all parts of the electrical network. The basic rule is reliable protection, taking into account the performance of the area with the worst parameters. It should be taken into account that copper is designed with the same cross-section for greater loads compared to aluminum. The purity of the metal is of certain importance. As impurities increase, conductivity deteriorates and losses due to useless and dangerous heating increase.
Indoor wiring device
In such real estate objects, the following standard solutions are used to create a high-quality power supply system:
- the introductory machine must be placed before the counter;
- a general residual current device (RCD) is installed behind the control device;
- Next, separate lines are equipped with automatic switches (AB).
The RCD prevents accidents that provoke leakage currents. In some situations, it prevents electric shock. However, complex protective measures are carried out using circuit breakers. Effective grounding must be used.
Ratings of automatic devices for kitchen wiring
As a rule, it is convenient to install several groups in the kitchen to evenly distribute the loads. It is recommended to carefully select the distribution of powerful consumers:
- hobs;
- ovens;
- heating boilers, boilers, flow heaters;
- electric convectors, heat guns;
- air conditioners.
How to connect a gas oven
Today, gas ovens are connected using two types of connecting parts, namely:
- flexible hoses;
- a non-flexible tube that is made of copper or steel alloy.
Remember that it is recommended to install the device directly under the countertop. Due to this, you will save free space and rationally distribute the kitchen set.
Our service center offers its services for repairing household appliances at a competitive price. We repair any breakdowns of modern household appliances. Leave a request and get a 15% discount - Leave a request
Before connecting the gas oven, you need to understand the wiring of the above hoses:
- connection using a special connector located near the equipment;
- after all the work is completed, you need to make sure that the tubes are not bent and that the fuel flows to the device without obstacles;
- When connecting a gas oven, please note that the length of the hose should not exceed two meters;
- the total number of connections is minimal.
Connecting a gas oven occurs in several stages.
- The type of oven is determined.
- Connection and test run are carried out.
- An important step is to connect the equipment to gas.
It is important to take into account that you can connect a gas oven only to sections of pipelines located close to the tap, with which you can regulate the supply of this flammable substance.
Selecting a connection option
There are two connection methods - using a plug (or under the box without it) or connecting to terminals. It is generally accepted that the usual method of connecting to an outlet is appropriate when the voltage does not exceed 220V, and this means only a single-phase circuit. If it consists of two or three phases, then the Volts increase to 380, then the system will not work correctly. It is logical to use a terminal connection here. But the need or lack thereof for additional access to the network to connect other devices will help you decide whether to use an outlet or run a wire under it.
If the builders carried out only a 3-core wire, then to install a special socket or terminal box you will need to make channels in the wall to deepen the cable.
How to properly connect a built-in electric oven
Before connecting the electric oven, you should make sure that it is located in the right place and that all criteria and nuances are strictly observed. If your house or apartment was built many years ago and uses aluminum wiring, it is necessary to install three-core copper wires.
There are several methods for connecting an oven to the mains.
- Using a power cord.
- No cord required.
It is important to connect the built-in equipment correctly, as this can be fraught with serious consequences.
Connection features
First of all, it is worth noting that connecting electric ovens is not particularly difficult, since in this case there are no gas hoses. You can independently connect the oven to a 220 volt network only if you have theoretical and practical knowledge of this process. Improperly performed work can lead to short circuits and fires.
Do-it-yourself connection to the electrical network must be done in strict compliance with certain rules, including mandatory grounding.
Connecting a panel without a plug
An outlet that extends a few centimeters from the wall does not always suit the owners of the room. The solution is to hide the protruding elements of the outlet.
You can do this in one of two ways:
- Using GML sleeves (tinned copper sleeves).
- Using the KlK-5S mounting box.
We immediately decide on the conductors. On some models, an already connected four-wire wire is removed from the panel. However, in many cases there are only 3 wires in the socket box. Such surfaces are designed for both a single-phase 220-volt connection and a two-phase 380-volt connection. Half of the burners will be powered from one phase, and the other half from the second phase.
Read also: How to find out whether the battery is closed or not
There is a misconception that the second phase is only needed to power the control. In fact, the power is equally distributed over both one and the second phase. To connect to 220 Volts, you need to insulate one of the wires.
It remains to connect the neutral (blue conductor), the ground wire (yellow-green) and the phase (black or brown wire). If desired, connect two phases into one through a tip.
Note! Some Bosch hobs with a permanent cable come with a tip by default.
Sometimes there is equipment with a five-core cable. Such surfaces are characterized by high power (more than 7 kilowatts) and are designed for 380 Volts. To connect the panel to a 220-volt network, you need to connect 2 wires in pairs. For example, black and brown wires are sent to phase, and blue and gray conductors are sent to zero. The earth (green-yellow color) will remain single.
Note! The specified connection does not entirely comply with the rules, since the protective conductor PE must have the same cross-section as the phase conductors. In the described case, the protective conductor will be twice as thin.
Wire size
When wondering how to properly connect an oven, you need to pay attention to a number of nuances, including the cross-section and condition of the wiring. Remember that you must connect the stove based on the recommendations specified in the instructions. For example, a connected oven that has a built-in steam generator must have a wire with a cross-section of at least 4 square millimeters.
Wiring Requirements
Particular attention should be paid to the quality of electrical wiring, on which the safety and correct functioning of the entire system depend.
The following factors are taken into account:
- The oven and hob are connected via grounding. The plug or socket for the oven must have 3 or 5 contacts (in the first case for a 220 Volt network, in the second - for 380 Volts). In the tasks of the old building, this condition was not always adhered to. However, modern requirements are different, so a new cable will be required.
- Electrical wiring is connected to the distribution box only through an RCD (residual current device).
- Low-power equipment (up to 2.5 kilowatts) is connected to the existing electrical network (if it meets modern requirements). To connect powerful equipment you will need a dedicated line.
- The optimal cable cross-section is 6 square millimeters. A wire with this cross-section will withstand a long-term load of 10 kilowatts. The recommended protection class for the machine is C32. If the panel power does not exceed 8 kilowatts, a cable with a cross-section of 4 millimeters and a circuit breaker with protection class C25 will be sufficient.
- The correct choice of cable is VVGng or NYM. When purchasing a cable, take into account the diameter of the conductor. For a wire with a cross-section of 4 millimeters, the diameter will be 2.26 millimeters, and for a 6 mm conductor - 2.76 millimeters.
- The data for the residual current device is one point higher than the rating of the circuit breaker. For a 32 Ampere device you will need a 40 Ampere RCD.
Read also: Do-it-yourself manual potato hiller drawings
Note! Grounding an electrical household device is an essential condition for ensuring safety.
Connecting the cable to the oven
If you connect the oven to the mains, it is very important to comply with all the requirements specified in the device data sheet. Regarding connecting an electric oven, it should be said that it is important to take into account the state of the network, and also make sure that there are no voltage surges. Because otherwise, you risk saying goodbye to your device.
To 220 V network
Are you wondering which machine to put on your oven? Remember that it is important to maintain the power ratio and the safety of the devices. Connection to a 220 V network should only be made with a three-pin plug, as well as with grounding. It is also worth remembering that when connecting the oven to the network, there must be three jumpers.
To 380 V network
If there is no plug, but you want to connect kitchen appliances to a 380 V network, you do not need to connect it yourself. There are many qualified specialists in Moscow who can help you connect the plug to the oven.
Connecting the device and checking operation
The oven is connected to the network in two ways: through a plug with a socket or through a terminal block. When the first option is selected, the plug and socket are selected according to the maximum current. For a stove with a power of up to 3.5 kW, they should be rated at 15 A. If the power is up to 5 kW, their value is 32 A. Use a three-pin socket and plug with grounding. The green-yellow core of the connecting cable is connected to the grounding plate of the plug. The two remaining wires are connected to the terminals. In this case, the contacts are securely clamped.
To connect the device, a wire is pulled through the hole located on the back wall of the niche. Its end is connected to the oven. The purpose of the terminals and the connection diagram are specified in the technical documentation for the device. Unscrew the protective panel from the back and connect the PVS 3*6 wire. The phase conductor (gray or brown) is inserted under the terminal with the letter “L”. The neutral wire (blue) is tightened to the terminal with the letter “N”. The grounding conductor (yellow-green) is placed under the screw with the “grounding” sign. Then the wire clamp is secured. After this, the device should be inserted into place and secured.
When the cable comes directly from the junction box, the circuit remains identical with a socket and plug connection . At the same time, color marking is also observed.
After installation, the functionality of the equipment is checked. First, turn on the machine and insert the plug into the socket. Then turn it on according to the instructions and check the operation. At the same time, the furnace is started at full power.
Reference. If smoke comes out of the oven when you first start it, this means that the factory grease is burning out.
RCD
Experts recommend installing an automatic machine, which plays the role of ensuring the safety of equipment from overheating. It is necessary to integrate an RCD into embedded equipment, since in this way you can protect the device from a possible short circuit. That is, if a voltage surge occurs, the machine will automatically turn off the device.
Operational safety
Connecting an RCD for an oven
For safe operation of an oven that has been built into kitchen furniture or placed separately, it will be necessary to protect the user from accidental contact with dangerous potential on its body. For this purpose, switching products are equipped with a special terminal that has an electrical connection to the protective grounding system.
Some experts recommend including a residual current device in the power circuit that is triggered by the slightest leakage current. The protection option with an RCD makes sense in cases where a two-wire power cable is installed in the apartment, that is, there is no reliable and complete grounding in it.
Choosing a location for an outlet
It is worth noting that in order to connect the oven to an outlet, you need to choose the right place for its location. The distance from the electric oven to the outlet should be such that there is a reserve left from the cord. The plug coming from the oven should easily reach the outlet. Don't forget to put the machine on the oven.
What kind of socket is needed for the oven?
Please note that the choice of the outlet to which you plan to connect the equipment should be based on the technical characteristics of the equipment. The electrical cabinet is connected based on the number of phases. The most common is a single-phase version, less often - a three-phase one.
Installing the Terminal Block
In order to connect an electric oven, you must use a terminal block. This ensures a reliable and safe connection to electricity. However, there is a drawback to connecting a built-in oven through a block - difficult opening of the circuit.
Assembling the connection diagram
So, all the materials are ready, you can proceed to assembly. Here is the connection diagram for all devices.
A two-pole circuit breaker is installed in the box. The machines have one feature - the ability to connect devices to them from different sides
That is, it does not matter where the supply cable is inserted and where the outlet cable is inserted. On one side, the phase and zero from the supply wire for the oven are connected to the machine. Since the machine is selected for 16 A, it will accordingly turn off the oven if high currents appear in it. On the other hand, the modules have exactly the same phase and zero, only two wires
One will connect to the hob, the second is the power wire from the distribution panel. That is, this is the wire that was connected to the old outlet. In this case, the hob plug is cut off and the connection is made directly to the machine. By the way, some stove models are not equipped with forks. But for the oven it is better to install a separate outlet. It can be located inside the box (six-module) or be mounted on the wall next to the device. All that remains is to connect the grounding circuit, for this purpose the busbar was installed inside the box. That is, the grounding wire coming from the distribution board, the grounding from the oven and the hob are simultaneously connected to it.
You can make the connection differently. To do this, you only need a 16 A machine, through which the oven will be connected. But in addition to the grounding busbar, you will have to install an additional busbar for phase and zero in the box. That is, there will be three tires in the box, so for this you will have to choose a larger device. For example, for six modules.
- The following are connected to the phase bus: the supply wire (meaning its phase wire), the supply wire of the hob and the wire connected to the machine.
- The zero bus is connected to the zero from the supply wire, from the hob and the wire going to the socket for the oven.
- A wire is drawn from the machine to the socket.
It is better to install the box somewhere below the base of the kitchen unit so that it is not visible and so that no one touches it.
In principle, these are the most correct decisions in this situation. But there is a better option. If you are renovating your apartment and decide to purchase built-in appliances, then leave the old cable for the hob. And for the oven, draw a new one with the required cross-section. And install a separate 16 A circuit breaker on the line. That is, you will have two sockets on the wall. Each one powers its own device. This is an ideal option for connecting an oven and hob.
Let us add that today electrical circuits are equipped with various types of protective devices, where the machine plays an important role. It turns off the power supply to household appliances if an increased current has formed in the network. This current burns out the supporting electrical circuits. But there is one more device, the installation of which is considered mandatory today. This is an RCD (residual current device).
It is necessary so that a person does not get an electric shock when there is a breakdown in the electrical circuit, and the voltage is transmitted to the metal housings of the same oven or hob. If a person touches the metal, he gets an electric shock. If there is an RCD, then it takes over these stray currents. This protective device can be installed inside the distribution board or near the outlet where the box was mounted.
Tips, Electrics
Oven installation
Before installing and connecting it, you must carefully study all the nuances of installing the machine, evaluate your capabilities and, if necessary, use the help of highly qualified specialists. When connecting an electric oven to the mains or a gas oven to a gas source, you must begin by preparing a niche for its future location.
Connecting an electric oven will be correct if you take into account the following distances during installation:
- 40 mm – from the back wall;
- 50 mm – from the left and right edges;
- 90 mm – from the bottom of the oven.
It is very important that there are no distortions, as the equipment will quickly break due to improperly distributed heat. To properly carry out installation work on the oven, you need a level. There is also a risk that wooden furniture may smolder, which, in turn, can lead to a real fire.
If you decide to connect it yourself, it is important to study all the nuances associated with embedding it into this or that furniture. Remember that the connection of a built-in oven directly depends on both the version of the hob and the material of the kitchen unit.
It is also important to know 3 nuances about connection
- Just in case, you will have to make sure that the cabinet can be turned off without hindrance. That is, access to the outlet must be free.
- Do not use various extension cords - they will not cope with the load. As a result, overheating will occur. Apartment owners are wondering whether it is possible to connect the hob and oven to the same outlet. The answer here is only negative.
- After connecting, set the maximum heating power and put the cabinet into operation. Check that the wires are not sparking. Then open the door and turn on the hood. We are waiting for the smell of burnt factory grease to disappear from the room.
Examination
The final step in connecting the oven to a regular outlet is to perform a functional test and start it up for the first time. To do this, just plug the plug into the outlet and make sure that everything works properly.
- The equipment must be launched at full power.
- Set the panel to the maximum temperature and wait until the lubricant melts.
Do not forget that an automatic machine is installed on the oven, which corresponds to the power of the device.
Cable selection
To connect the oven, a three-core cable of the required cross-section . It is necessary to choose a copper cable with single or multi-core wires. Aluminum is installed only with a current strength of 50A or more, for reasons of economy - such loads will require very thick conductors, and aluminum is cheaper than copper.
VVGng-cable-3x2.5
VVGng-cable-3x4
VVGng-cable-3x6
Most often, flat power cable VVGng-LS 3x2.5 is chosen. External width - 10.3 mm. It has three single-core copper wires with a cross-section of 2.5 mm2. Color marking of cores eliminates erroneous connection. Usually the wires are blue, brown and yellow-green (phase, neutral and ground, respectively).
Other core color options are possible. The order of connection is not of fundamental importance, since all wires are exactly the same.
The main requirement is not to mix up the wires and not allow, say, a phase wire to end up on the grounding terminal.
Safety
It is very important to be safe if you plan to connect your kitchen appliances to electricity. This is due to the fact that the electric oven has high energy consumption, and because of this it is necessary to connect an additional branch under it using an intact cable with a small cross-section.
Remember that the current-carrying conductor is connected through a special machine, to which electric cooking equipment can also be connected. Auto safety parameters should be selected based on the existing load with a ten percent margin.
It is very important to remember that ovens are connected to electricity only by professionals. This is due to the following reasons:
- specialists know all the nuances of this process;
- If the device is damaged due to improper connection to the electrical network, the manufacturer's warranty will become void.
It is worth noting that when operating an oven, the machine is a general safety rule that should be strictly adhered to:
- use exclusively for household use;
- Make sure the electrical wiring is in good condition.