Why do you need lighting in a closet?
Sliding wardrobes do not have hinged doors that block narrow passages and steal precious space. It is not surprising that they are often placed in places with limited space and insufficient lighting. Additional lighting is also needed when the cabinet is deep, where the light from the ceiling lamp simply does not reach.
A convenient and modern solution is to use lighting in the cabinet itself.
Or maybe you don’t want to turn on the lamp again so as not to wake up sleeping family members. Or do you need additional lighting in the mirror area, where there are always not enough lumens. Or the main reason is not functional, but aesthetic. LED strips and built-in lamps visually transform furniture and change the perception of the interior of the entire room.
In developed countries, furniture without lamps is no longer produced.
To understand whether backlighting is needed or not, it’s worth deciding on the functions it can perform:
- Additional illumination of individual areas with insufficient lighting.
- Decorative.
- The ability to illuminate the storage system without turning on the main light sources.
Installation locations for LED cabinet lighting
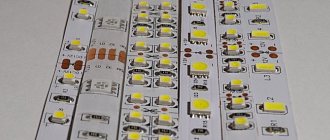
There are a lot of options for placing furniture lighting. The LED strip can be located on the inside of the ceiling or walls of the cabinet, under the bottom, on the outer, outer and end surfaces of the shelves.
Installation of the LED strip on the surface of the cabinet is carried out with the back side, which contains a special adhesive layer. To fix it, you need to remove the protective coating from the adhesive side and press the tape to the selected location.
Installation of the LED strip in a cabinet can be done using a plastic or aluminum profile. The LED profile ensures reliable fastening of the strip with diodes.
Choosing wardrobe lighting
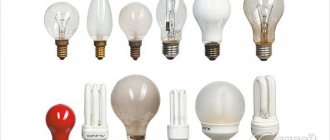
Classic incandescent lamps with spiral coils are practically no longer used in furniture lighting. Main types of lighting: halogen, fluorescent, LED. The latter are in the form of spotlights or LED strips.
More and more furniture factories and private workshops are supplying cabinets with lighting included.
Types of lighting
Cabinet lighting, main types of lighting:
- Luminescent.
- Halogen.
- LED, including LED strips.
Cabinet lighting performs two functions at once: practical and decorative.
How to choose the right one
As when choosing any other product, you should first evaluate its health safety. Fluorescent and energy-saving lamps can pose a real, and more often potential, threat to the body. The former contain a small amount of mercury, which theoretically can lead to poisoning, including small doses of vapor if the seal of the product is broken. However, the concentration of the harmful substance is so low that the threat should not be taken seriously.
Illuminated products have significant advantages.
Prolonged exposure to ultraviolet radiation from fluorescent sources is also unsafe. However, for a cabinet where the need for lighting occurs for a short time, this threat is also not relevant. The German endocrinologist Wunsch, in an interview with Neu Osnabrücker Zeitung, argued that the stroboscopic effect of fluorescent lighting at a frequency of 50 Hz can lead to epilepsy. However, over the next ten years, the scientist’s assumption was not confirmed by anything.
Lighting elements allow you to diversify the design of furniture and make the interior of the room interesting and unique.
When choosing, you should take into account the interior style, room features, existing lighting and lamp characteristics:
- brightness;
- power;
- energy saving features;
- color and design features of the lamp.
Power supplies. Rechargeable batteries and batteries need to be periodically charged and replaced. USB-powered LED lights are usually not practical for cabinet or other furniture lighting. Light sources that connect to household power may require an additional outlet.
Lighting the filling and contents of the closet allows you to quickly find the things you need in it.
Please note that ready-made lighting kits are available for sale. Including automatic ones, with motion sensors, and those triggered by opening the cabinet door.
The lighting can be mounted in any type of cabinet.
Important! The use of a carrier is highly undesirable. If the power is supplied not directly from the network, but through a 12 or 24 V transformer, the converter should not be located near heaters or open flames.
And the last aspect is the integrity of the cabinet walls and doors. If you have to saw and cut furniture to install the lighting, problems will certainly arise when you subsequently replace the lamps. It is highly likely that you will have to mask the holes... or buy a new wardrobe.
The modern furniture market offers a variety of types of cabinet lighting.
Norms and requirements
When arranging furniture lighting, it is important to comply with a number of requirements that will ensure a sufficient level of your safety and ease of daily activities.
Among the most relevant standards for furniture cabinets are the following:
- the level of illumination in accordance with the requirements of SanPiN 2.2.1/2.1.1.1278-03 for dressing rooms should be at least 75 Lux, in kitchens - 150 Lux, for hallways - 50 Lux.
- Since there is often the possibility of direct contact with cabinet lighting devices, in accordance with clause 1.7.50 of the PUE, it is advisable to use a reduced voltage to power them.
- Connecting power wires to lighting devices must be done by soldering, crimping or terminal connection in accordance with the requirements of clause 2.1.21 of the PUE .
- If the cabinet lighting is planned to be powered from a standard 220 V network voltage, then in accordance with clause 1.7.51 of the PUE , the network should be protected with the help of an RCD, which will turn off the lighting in the event of insulation damage.
Also note that all lighting elements must be positioned in such a way that they do not dazzle the eyes when located near the cabinet, regardless of height and position.
- Backlight selection
Let us immediately note that incandescent light bulbs should never be used as furniture lamps. Since these types of lighting equipment have very low efficiency and release about 95% of the energy into thermal radiation. From such proximity to the walls of the closet, clothes and cabinet doors, they will begin to fade and lose their chic. And if they are very close together, red spots may appear or even fire may occur on cotton and silk fabrics, chipboard and other materials.
Therefore, the most popular options for lighting equipment are spotlights and LED strips.
For spotlights, three types of devices can be used as cabinet lighting:
- Halogen lamps have better performance than Ilyich lamps - about 10 - 12 Lm/W, service life is about 4000 hours. The only advantage of halogen lamps is their low cost; they are also connected from a low-voltage network, which is what we require for safety reasons.
- Fluorescent lamps are capable of producing about 25 - 50 Lm/W, and their service life is about 10,000 hours. A significant disadvantage of fluorescent lamps is the presence of mercury vapor in the gas mixture.
- LED light bulbs are capable of producing a luminous flux from 80 to 120 Lm/W, which is ten times the power of halogen cabinet lighting options. The service life is about 20,000 - 30,000 hours, which practically eliminates the main disadvantage - high cost.
In addition, LED strips, duralight and flexible neon can be used for both functional and decorative lighting.
LED lights
LED lighting can also provide sufficient visibility with good power, and can be used as decorative lighting, especially RGB strips that change the color palette via a remote control. Duralight and flexible neon are not the best helpers for viewing the contents of the shelves, so they should be used as contour lighting for the cabinet. Sometimes, instead of LED strips, fluorescent illumination from tubular lamps is used, but this is an unequal replacement, since the lamp is afraid of mechanical impact and must be protected with a lampshade.
DIY installation
How to make additional lighting in a closet with your own hands? The easiest way to install LED strips. It is not surprising that more than 90% of owners of apartments and private houses prefer to use this type of lighting for illuminating cabinets and other furniture.
LED lighting combines several advantages: efficiency, durability, safety and high quality lighting.
There are other advantages:
- energy saving parameters (consume energy 10 times less than classic incandescent lamps and 2 times less than fluorescent sources);
- safety (“classic” ones break easily, leaving sharp fragments; luminescent ones contain mercury vapor, albeit in small quantities);
- “lifetime” (mean time between failures reaches 50 thousand hours, fluorescent lamps – up to 7 thousand, incandescent lamps – up to 2 thousand).
- maximum approach to natural light.
Unlike halogen and fluorescent lamps, LEDs do not tend to get very hot.
Connection method
Most often, lighting devices are connected either directly to a household power supply, or through a 12 or 24 Volt power supply. The converter may have to be purchased separately. When planning lighting, it is worth considering the proximity of sockets so that you do not have to make wiring at the last moment.
LED strip is sold in skeins of 5 meters or by meter. It is recommended to take accurate measurements before purchasing a backlight.
Installation sequence
Let's consider the stages of installing LED strip, the most popular option for cabinet lighting.
- Determine the location of the tape. When attaching to shelves, it is recommended to mount the tapes on the bottom side. The likelihood of mechanical damage is reduced. Better lighting for the bottom shelf.
- Decide on the location of the switch (bottom of the shelf, side panel of the compartment, wall near or behind the cabinet).
- Take measurements. Cut the tape (only in specially designated places!).
- The tape is installed either by laying it in a plastic box or in a cable channel attached with liquid nails. Self-adhesive tape is also sold. In this case, it is easiest to mount.
- Install switches in predetermined locations, connect the strip to a power source, and check the operation of the newly installed backlight.
The process of installing cabinet lighting requires care. It is advisable to think through its scheme in advance.
Basic concepts when choosing backlighting
We recommend choosing LED strip instead of halogen lamps. LED strips:
- More compact.
- More environmentally friendly (there are no toxic fumes inside the flask).
- More economical (consumes less electricity).
LEDs vary in color. There are one-color ones. Most often chosen:
- Blue.
- Green.
- Violet.
There are multi-colored ones. These are the so-called RGB strips.
Diodes differ in density. In our case, 30 pieces/meter is enough.
When there is a risk that your closet may flood, then choose tapes with moisture protection. They are called closed type and are designated IP65 or IP68.
There are only three classes: IP33, IP65 and IP68. The first tape is made in an open way, it does not have protection from moisture (protection is usually made by a silicone casing).
A power supply with a margin of 30% is selected for the sum of the LED powers (the margin is needed during current drops, which sometimes happens when diodes are operating).
Pay attention to the voltage of the LEDs. The block must be selected based on this figure. This is usually 12 or 24 volts.
Sometimes a brightness control is added to the circuit. For single-color tape, dimmers are used, for multi-color tape, controllers are used.
Wardrobe light when door opens
You can make a lighting system that triggers when the cabinet door opens yourself. However, it is easier to buy a ready-made kit with motion sensors. Lighting in the closet when the door is opened is a fairly convenient lighting option. You won’t have to look for the switch in the semi-darkness again.
If bright lighting is required, it is advisable to use overhead lamps - they are more powerful than recessed ones.
How to install
To prevent the backlight from turning on every time you open the door, you need to decide on its type and characteristics. It is important to correctly calculate the direction of installation of the device and the angle of action.
There are three types of lighting inside the cabinet:
- directional – has a certain coverage area;
- scattered - used as a decorative element;
- changeable by program - settings are preset for it.
Thus, if the cabinet does not block the lighting of the room, then it is recommended to install the lighting deeper, closer to the back wall. Then it will work later and highlight only those areas where it is dark. Otherwise, closer to the door so that the backlight works immediately when it opens.
Advice! If you need to install a programmable lighting option, the photocells are attached in two places: one near the door, the other to the wall.
Installation sequence
The best option would be to install lighting at a height of 300-400 mm from the floor. The location should be such that most movements occur through the sensitivity zone and not near the detector.
It is best to purchase devices that should be located at the maximum distance from each other.
Note! The wires connecting the lamps to the light source are low-voltage, they are safe, so they do not need to be inserted into a metal or plastic box.
When starting the installation process, turn off the electricity and check with a tester that there is no voltage in the network. To do this, you need to take a device whose wires are connected to the grounding wire, and then to the active and neutral wires, alternately. If the light does not light up, it means there is no voltage in the network, and you can begin installation.
Before starting work, you should read the instructions for the device. Although LEDs are easy to install, each type has some differences that must be taken into account before installation. It is also important to know the purpose of a specific photocell. For example, photodiodes are used in industries where the mains voltage is at least 220V; in everyday life they are very dangerous.
Types and methods of connecting with your own hands
It is not recommended to use existing wiring to connect the backlight. Often it does not have a grounding wire, or there are other methods of grounding, such as metal conduits. Such a system will be cumbersome and inconvenient, since all junction boxes will need to be grounded.
Contact when opening doors
In this case, it is better to use an LED strip; it is simpler and more convenient to install.
Important! To ensure safety, wires should be laid in a cable channel.
To install contact lighting yourself, you need to:
- Cut the required piece of LED strip and solder it on one side.
- Fasten the tape over the profile, and glue the entire structure with liquid nails.
- Next, you need to decide on the location of the power supply and the routing of the wires. The most suitable option would be to lay the wire behind the cabinet and lead it to the unit through a hole in the side wall.
- A microswitch is connected to the gap in one of the wires so that the contacts are open when the button is pressed (i.e. the door is open).
The entire system is checked for functionality, and if everything works, the microswitch is fixed on the side wall of the cabinet through pre-prepared holes in the housing.
At the end of the entire structure there are bare leads, which after installation are hidden under a heat-shrinkable tube.
Wired with motion sensor
In this case, the entire lighting system is connected to the mains, socket or socket box.
So that the lighting works without human presence, i.e. without movement, it is necessary to install an additional switch. It duplicates the automatic system.
The installation process is as follows:
- To begin with, electrical wiring is carried out in the cable channel to the place where the light source is installed. Before starting work, you need to measure and cut the required length of cable.
- Next, the structure is fixed to the ceiling using screws.
- After installing the cable channel, the power cable is inserted into it and closed with a lid on top.
- The base of the lamp is attached, and the power cable is connected to it.
- The backlight is connected to the power supply.
- Lamps are installed in the luminaire.
- The design is tested for functionality.
- If the lighting is working correctly, a light-diffusing platform is installed.
At the last stage, the lighting direction and direction are adjusted, as well as the necessary parameters.
Wireless with motion sensor
Connecting a motion sensor for cabinet lighting is very simple. The main thing is to choose the right installation location and eliminate the negative influence of external factors (batteries, heating devices, etc.).
The sensor operates on batteries with a service life of at least 1 year.
The installation process is as follows:
- A location for the sensor is selected.
- Using wires, the lamp and sensor are connected to the battery terminals.
After this, the functionality of the lamp is checked, and all structural elements are attached using a glue gun. Next, the lighting is adjusted.
Common mistakes
- Connecting LED to a power source without observing polarity. Decide where is “+” and where is “-”, and only then make the connection.
- Using a wire that is too long. No more than three meters is recommended. If it is longer, there may be a loss of power.
- Installation of the transformer near fire sources (for example, a fireplace) and heating devices.
Mortise structures are good to use for decorative purposes, but they are much more difficult to install.
The easiest way is to buy a ready-made cabinet lighting kit. All that remains is to determine the location of all the elements of the additional lighting system and mount it based on your preferences.
To control the characteristics of the backlight - its brightness, intensity and color, a special controller or remote control is used.
Assembly and connection diagram
Installation consists of several simple steps.
- We determine the installation location of the power supply, you can immediately fix it.
- We lay the cable. The cross-section must withstand the power.
- Installation of the tape begins with cutting it into pieces of a certain length.
- Next, solder the cable to the contacts of the tape. Be sure to isolate the solder area.
- We attach the tape to the cabinet. To do this, remove the protective film from it and simply glue it on.
- All that remains is to connect the cable to the power supply and the control element.
It is important not to reverse the polarity when connecting to the power supply.
In practice, making cabinet lighting with your own hands is not difficult. Modern LED strips do not require special skills in electrical engineering. It is enough to do everything carefully and in accordance with the instructions.
50 design options for sliding wardrobes with lighting
Types of lighting
I can immediately say that the best option for creating lighting in a compartment is considered to be LED or LED lighting. But there are several options that can be used.
- Halogen. They have good light output, even light distribution, and compact design. At the same time, they contribute to strong heating, do not like temperature changes and do not last long enough;
- Fluorescent lamps. They do not heat up, have decent light output, last a long time and are available in a wide color palette. But with high power they have a substantial size, the connection procedure is complex, plus they react to external temperature;
- LEDs. They do not heat up, save energy, last a long time, and are safe. Relatively expensive, cannot provide diffuse light and require switching power supplies;
- LED strips. They can take any shape, are easy to install, operate on low voltage, and are safe. To connect, you will need a power supply.
We conclude that LED strips are the most profitable option. Together with the LED strip, you can use automatic switching on, organize lighting with a motion sensor, and all this can operate on batteries.
"Glowing" shelves
Small, battery-powered, stand-alone lamps are often used to illuminate the far corners of a closet. They are lightweight, and therefore can easily be attached to a piece of double-sided tape. This option is good for furniture with a closed front part or compartment doors.
Lamps
What can you come up with for open glass cabinet shelves? They usually store souvenirs, festive crystal dishes, and elite alcoholic drinks. And all this remains constantly in sight. Dotted “pills” glued to the sides will look out of place here.
We recommend paying attention to LEDs. There are many types of diode strips, they differ in the number and “frequency of landing” of diodes, glow strength, color, and, of course, price. If you do not take complex control systems for “smart” lighting, LED strips can be considered an economical option for lighting design.
LED strips
To illuminate glass shelves, it is best to use flat strips without a protective tube made of transparent silicone. They take up less space and are almost completely hidden behind glass of any thickness. The light from the bulbs passes through the end through the entire canvas and comes out at the other end. It seems that the glass glows on its own and the rays come out of it from all sides. And if there is also an ornament applied around the perimeter of the shelf, it’s absolutely beautiful.
The diodes are very durable - designed for decades of continuous operation, without loss of glow intensity. They consume a small amount of energy, while shining quite brightly and evenly. We are also pleased with the wide range of colors, the likes of which no other analogue lamp can offer. And most importantly, with their help it’s easy to illuminate shelves (including glass ones) with your own hands. So the choice in their favor is obvious.
What's the best way to backlight?
You can create lighting inside the cabinet using different light sources: halogen, fluorescent, LED. Assembling lighting using halogen lamps is the most labor-intensive task, as it requires special tools and knowledge of installing spotlights. During operation, halogen lamps become very hot, have a short working life and consume a lot of energy. Cabinet lighting using a fluorescent tubular lamp is more economical and can be easily assembled by one person. But the bulb of a fluorescent lamp is thin glass, inside of which there are toxic mercury vapors. Therefore, such lighting is not suitable for a wardrobe. The most reliable way to illuminate the contents of a cabinet is to use LED-based light sources. They are safe to use, barely heat up and can be easily mounted on any type of cabinet. For general lighting of the cabinet, it is better to use an LED strip or ruler, installing it along the entire interior space. For illuminating individual shelves and compartments, ready-made LED modules, which are compact in size and operate on +12V, are ideal.
In a closet where spotlights are already built-in, you can replace power-hungry halogen lamps with LED lamps of a similar form factor.
Finished goods
Furniture lighting can serve as an additional decorative element. Since the rays of the LED strip, refracting through the glass, create the effect of a shelf floating in space.
Spectacular lighting
Shelves illuminated with LED strip also look great in the kitchen. A romantic atmosphere is guaranteed.
Another model that deserves attention are autonomous spotlights that can be directed to the right place.
Cabinet lighting
Another option is to use two types of backlight simultaneously - LED strip and point diodes.
Combined option
By the way, diode strips can be installed even in refrigerators, where lighting is usually not provided. LED lamps are not susceptible to temperature changes.
Lighting in the refrigerator
Just choose for these purposes tapes in sealed silicone flasks, with a degree of protection not lower than IP67, IP68. The same models that are resistant to humidity and temperature should be chosen for illuminating shelves in the bathroom. You will also need sealed power supplies, although they are more expensive.
LED lighting is an ideal solution for decorating bathroom cabinets. Having filled your bath, you can turn off the central powerful lamp, and, leaving only the lighting of the shelves, relax to your heart’s content.
As you can see, lighting can significantly improve not only the appearance of the furniture, but also the entire room as a whole. And all this beauty can be made with your own hands. Try it, it's not difficult at all.
