Repair procedure
Having determined the specific location of the malfunction, you can begin repairs.
To carry out repair work you will need:
- soldering iron up to 40 Watt;
- active flux;
- low-temperature solder POS-60 or other;
- a sharp knife, maybe a stationery knife;
- insulating tape;
- heat shrinkage (cambric, the diameter of which decreases when heated);
- stranded copper wire in polyvinyl chloride (PVC) insulation with a cross-section of up to 1 sq. mm.
In the event of a break in the conductors, it is necessary to remove the PVC insulation from the areas of the suspected break using a knife. Copper conductors may have additional varnish insulation; this should also be stripped with a knife.
Similarly, strip the wire from the repair kit. Next you should tin the soldering points. This requires the use of flux and solder. If you don’t have an active flux on hand, you can use acetylsalicylic acid (aspirin), which is in any first aid kit.
The soldering process can be tricky: headphone conductors are often made of oxygen-free copper, with silk threads woven in for greater resistance to mechanical stress. Some craftsmen also use aspirin to remove varnish insulation.
Having placed the wire in varnish insulation on an aspirin tablet, touch the tinning area with a heated soldering iron. An aggressive environment removes isolation. You should not breathe these fumes: the sensation is not pleasant.
Soldering is carried out in a similar way at break points near connectors, splitters, and emitters. If the conductor breaks directly near the connector, you need to purchase a new unit. It is available for sale in any store that sells radio components.
Microphones and speakers are usually beyond repair. They can be replaced with a working one from another similar headphone. If the conductor breaks off at the junction with the speaker, you can try to disassemble the emitter housing. This can be done by using a solvent to loosen the adhesive joint.
Before soldering, place a heat-shrink cambric on one of the wires. After connection, move it to the connection site and heat it slightly using an industrial hair dryer or, in extreme cases, a lighter.
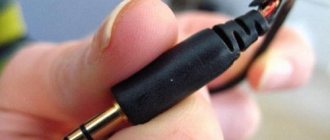
How to solder a wire to a headphone speaker
When the wiring breaks near the headphone speaker, it is best to solder it back to the headphone and renew the soldering from the factory. This is how the wires are soldered inside my ancient Aiwa earbuds.
Pay attention to the knot that is tied - it does not allow thin wires to come off when jerking. Before soldering the earphone, be sure to tie the same knot at a certain distance, slightly greater than the distance to the narrow hole
The question arises - what determines the polarity of connecting the wires to the speaker. The answer is simple - the headphones are connected in the same way so that they work in phase. When the polarity of the headphones is reversed, the sound is smeared and becomes quieter than common-mode sound. If you have a broken wire in one speaker, for proper connection you need to look at the wires and soldering in the other earphone.
What to do if the wire breaks inside the earphone
The most unpleasant thing is when the wire breaks inside the earphone. This means that the speaker winding wire has broken, which is shown in the figure.
The speaker winding is usually glued to the diaphragm and breaks off at the point where the wires are attached to it. Over time, they simply break due to micro-movements.
It is extremely difficult to restore such a break, but it is possible under a microscope. When repairing headphones, you need to be extremely careful not to tear the diaphragm or damage the geometry of the winding
Particular attention should be paid to microdust trapped between the magnet and the winding. Magnetic debris can be easily removed with chewing gum or plasticine.
How to connect wires to a plug?
Let us immediately note that the wires can simply be twisted, but to obtain a truly strong and high-quality connection, the wires must be soldered. In fact, there is nothing complicated in the procedure.
Tools and consumables:
- soldering iron (any one will do);
- solder and rosin;
- clean connector (3.5 mm jack);
- insulating tape;
- scissors;
- stationery knife for paper.
REFERENCE! You need to pay attention to the number of segments on the plug. It must match the amount on the old ones, otherwise part of the frequency range will be cut out.
Algorithm of actions:
- Carefully cut the wire crosswise so that both wires are the same length.
- Cut it lengthwise, dividing it into two wires. Do not damage the winding of the pair, as it is an additional protective layer and protects the accessory from damage.
- Each wire must be tinned in aspirin (acetylsalicylic acid). There is no need to strip with a knife, as the thin wires will be damaged and sooner or later break
- Attach the wires to the corresponding contacts on the plug.
- Solder using a small amount of tin. It is better if they do not touch each other, so as not to provoke a frequency conflict.
- Insulate the layer with electrical tape.
- Do the same for other contacts.
- Wrap the resulting connection with electrical tape in several layers and put on a reinforced layer. If there is none, you can use ordinary aluminum or copper wire, and then wrap it with electrical tape again.
Remove the cable braid
It is most convenient to cut the braid exactly as in the photo. You don't need to press the blade too hard. Thanks to bending, the braid will diverge on its own, regardless of its shape. We turn the wire, making cuts and, when we have gone through the circle, we tighten the braid. The main thing is not to cut through the wiring.
The wiring is varnished and needs to be cleaned off. You can do this with a knife. But if your knife, like mine, is dull, then the result will not be very pleasing.
The wires are very thin and the dullness of the knife leads to them being torn off along with the varnish. In principle, this can be done quite easily with a sharp knife. But we don’t have a sharp knife, so we’ll use a lighter or any other source of fire.
Speaker failure
The speaker winding burns out if the power supplied to it is exceeded. The severity of the breakdown is determined using an ammeter or multimeter. The resistance of the windings of working speakers will be almost the same (plus or minus about 10%) and varies in the range of 16–100 ohms.
Wheezing in headphones is usually caused by problems with the membrane or winding
If the speaker produces sound, but wheezing is mixed in with it, this indicates a problem with the winding or membrane. The winding becomes unstuck from the membrane due to a strong impact, displacement of the magnet, or exceeding the maximum permissible power. It happens that the coil moves away from the membrane due to mechanical damage.
For repairs you will need superglue, a toothpick (sharp match) and accuracy. Be careful, because after gluing it takes time for the parts to take the correct position.
How to replace the plug on a headset
The entire repair technique given for headphones is also suitable for a headset. The only difference is the presence of an additional wire going to the microphone. It is usually black or white in color. Since there is an additional wire, it means that there must be one more contact on the plug - the fourth:
Diagram of connecting the headset to the plug
If you have a tester at your disposal and know how to use it, then you can “calculate” which wire goes where by ordinary testing. In this case, the resistance of each headphone will be in the range of 24-35 Ohms, and the microphone - several kOhms. When you press the answer button, the microphone resistance should drop sharply to several tens of ohms or even to zero. How can I determine by dialing where the left speaker wire is and where the right one is? Aurally. When a call is made, the corresponding loudspeaker will make clicking sounds. Just put the headphones on your head and make a call.
https://youtube.com/watch?v=qUyHhXSy2T4
Typical headset layout, where:
- 1 – right headphone output;
- 2 – left headphone output;
- 3 – common wire;
- 4 – microphone wire and answer button.
One final note. There are headsets in which the microphone wire and the general wire are swapped. If your headset does not work after repair, simply swap the wires indicated in the figure above as 3 and 4.
https://youtube.com/watch?v=mXsDTTruTg8
How to solder a plug to headphones
Sound reproduction systems use different types of connectors. Conventional headphones are equipped with a connector that has three working lamellas. These are left channel, right channel and ground or common. If the sound system is a headset equipped with a microphone, then a fourth microphone output pin is added to the connector. The name of the design uses the word Jack (jack) or socket. Modern multimedia devices use three types of plug connectors:
- Jack 6.3 mm
- Mini-Jack 3.5
- Micro-jack 2.5 mm
The 6.3 mm connector is used in professional audio equipment, musical instruments and special sound cards. The 3.5 mm mini-jack is the most common design. This connector is used in all mobile phones, smartphones, music centers and other devices. Headphones and headsets with a microphone are equipped with this disconnector. The 2.5 mm micro-jack system is used in the smallest devices. These are portable players, electronic toys and some models of cameras. Recently, for greater compatibility of electronic devices, a 3.5 mm mini-jack has been used everywhere.
Thermal tube instead of tape
Using tape is not entirely kosher. Therefore, I propose to improve the technology a little, again without a soldering iron.
You will have to buy a heat-shrinkable tube, also known as thermal casing, at an electronics store or hardware store. This is such a clever tube that can shrink in diameter by at least half when heated. This miracle costs about $0.1 - $0.5 per meter.
Popular articles Decorations for a wedding car
We will need two thermal tubes with different diameters: 1-2 mm for the first and 4-5 mm for the second.
We put pieces of thin thermal tube on our twists. We cut the pieces with one and a half margin.
Now you need to heat the thermo tube. Usually I did this with a soldering iron, but we agreed that I didn’t have one, and the story was about how to fix headphones without a soldering iron, so I had to get out.
The method turned out to be quite effective and the thermo-tubes shrank. You can also use any other heater or put them in boiling water like Easter eggs. In principle, people can do it with a regular hairdryer.
While the thermotube is still hot, you can further flatten it with your fingers, then it will slightly stick together inside.
This thermo-tube must subsequently be put on the joint and also compressed with the heat of the lamp. In general, you can squeeze lighters on fire, but you can accidentally set fire to excess.
I used a piece 8-10 cm long. To strengthen the structure, the end of the thermal tube was put directly on the elastic band of the connector.
Repairing headphone plug 1
BUY WITH UP TO 50% DISCOUNT
This video shows how to repair a headphone plug. To do this, we need a broken headset with headphones, a four-pin plug, a soldering iron with accessories, hot glue, heat shrink. First of all, we need to figure out the plug circuit.
In this case, we will be redesigning a Samsung headphone headset. The layout may differ on other headsets. The photo shows the microphone plus in black. The total minus is shown in yellow. The red and green wires indicate the left and right channels, respectively.
It is important not to confuse the channels, as this is very critical for repairs. https://www.youtube.com/watch?v=3fP-i6mMWy4
https://www.youtube.com/watch?v=3fP-i6mMWy4
First of all, we need to cut off the old plug and tin the wires. First we solder the minus. Next we connect the right and left channels. Finally, we solder the plus to the microphone. Finally, we put on the heat shrink.
Second video tutorial on plug repair with explanations
Resuscitation of headphones with broken wires near the plug. This problem is global in nature, since most people use headphones, and naturally they often break. One of the most common headphone breakdowns is a fracture or break in the plug area; this presentation shows how you can restore your dear headphones if the plug breaks.
To repair the plug we will need: a soldering iron and all accessories (solder, rosin, etc.); stationery knife (you can use another, sharp one); heat shrink tube (hereinafter referred to as heat shrink), I advise you to take it with a margin in width.
We cut the wires to length, tin them and solder them. First you need to cut the insulation of the torn plug with a utility knife. Then remove the plug from the insulating housing. We strip the headphone wires and put on a piece of heat shrink. Approximately 1.5 centimeters. We examine it carefully.
We cut the wires to length, tin them and solder them. We soldered it, inspected it, if everything is satisfactory, we continue work. We check for functionality. If everything works, we continue. We put on heat shrink. We take a lighter and burn the heat shrink with short intermittent movements. Be careful not to burn the wires when repairing the plug from your headphones.
What you need to solder headphone wires
First of all, let's decide on the necessary materials that should be prepared in advance. They must always be at hand during work.
So, you will need:
- soldering device;
- rosin;
- solder;
- technical knife;
- aspirin.
You will learn about what the tablets are for a little later from the step-by-step instructions. You can even use expired ones that have been lying around in the apartment for a long time and are no longer needed by anyone.
Also, determine if your headphones are broken. In most cases, this is thinning of the wire or some kind of mechanical damage. This could happen during a strong impact or fall of the accessory.
IMPORTANT! Before starting work, carefully read the instructions to understand what you need to do and why. This is especially important for those who have never done anything like this before and do not have special skills and knowledge in the field of technology.
How to repair a headphone plug yourself
To repair a headphone or headset plug with your own hands, you need to carefully remove it from the case if it has not yet fallen out. Usually the plug is filled with rubber. When disassembling, we cut this body along the seam with a sharp knife. The neater the cut, the easier it is to restore the body after repair.
Finding out the cause of the headphones malfunction
The malfunction of headphones most often consists of a break in one of the wires in the plug. Less often, a break occurs near the speaker contacts or the wire breaks due to a violation of the integrity of the insulation.
To determine the malfunction, you need to use a multimeter and ring the contacts. From the diagrams above we already know where the common wire and the left and right audio channels are. If the resistance between the contact of one channel and the common wire is more than 20 - 120 Ohms, then most likely there is a break or break in the wire. Remember that the typical winding resistance of modern earbuds is 32 ohms.
The breaking of the wire is determined by the jumping readings of the multimeter when the wire is bent.
The easiest place to find a break is near the headphone speakers. It is often easier to open the speaker housing than to cut the rubber-filled plug. If the wires to the speakers are soldered well, then you should remember about faults in the plug.
Do-it-yourself troubleshooting
Once you have determined the location of the malfunction, you need to get to it and see with your eyes. Then it will become clear how exactly to solder the plug or headphones.
Let's assume that a wire break occurs inside the plug. To disassemble the cased one shown above. Ideally, you should record or photograph the wiring and update the connector soldering. Remember that flexible stranded wires are coated with a good varnish and it is difficult to tin them just like that. First you need to burn the varnish, for example with a soldering iron, lighter or mini-burner. After this, you can tin the wires with rosin or something else.
It is better to leave 2 - 3 mm of bare wire without braiding to increase the strength of the structure. When we return the plug housing to its place or fill a new housing with sealant, it is necessary to create as large a contact area as possible between the braid and the outer sleeve of the plug. Thus, during jerks, the load will be transferred to the most massive part of the plug, and not to the weak contacts of the left and right channels.
After soldering the plug, its internal contacts can be filled with hot melt glue, epoxy glue or sealant. After drying, modify to the desired shape.
Headphone wire colors
- Most headphones have only two pairs of wires - for the left and right channels.
- If there are three wires in the headphones - left, right and common - there is a master controller that regulates the volume of both channels.
- If there are 4 pairs there is a left, a right and a ground for each of them.
- The five wires are left, right, ground for each, and a microphone channel.
Of course, there are other options (for example, headphones with a microphone and one speaker), but the vast majority of models are designed exactly as described above.
The wires are usually double, that is, the wire with the “ground” contains an additional layer of insulation.
The left channel is green by default, and the right channel is red.
In some headphone models, the plug is marked (L (left), R (right), S (stereo), M (microphone). The contacts for ground are not additionally marked. If there are no contact markings, you need to take a closer look to see if there is a plug on the body remnants of plastic winding of the corresponding color.It is extremely rare that the wires are completely torn out.
How to fix headphones without a soldering iron
Unfortunately, you won’t be able to solder the headphones without a soldering iron. Of course, if you wish, you can solder with a hot nail. But more about this some other time. So we'll forget about soldering.
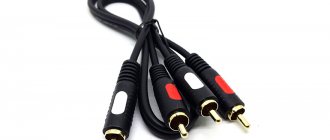
We need an AUX cable. AUX cable is now sold in any stall or passage for absolutely ridiculous money. It is used to connect your audio device to a subwoofer or car radio and looks like this:
But how nice it is to repair headphones with your own hands without a soldering iron, and you can survive the lack of buttons.
Thanks to the Chinese brothers, now there are quite tolerable laces starting from $0.5. The wire used in the article cost about a dollar. Well, I think every house has a paper knife, a lighter and some scotch tape lying around in closets.
So we scraped the bottom of the barrel, found all the tools, took them to the stall for beer with a string, what next?
How to fix a minijack on headphones without a soldering iron?
If the damage is in the area of the plug, then no way. All contacts must be soldered. Therefore, you cannot do without an electric tool.
If there is a break somewhere in the middle, as an alternative, you can carefully twist the wires and seal them with electrical tape or masking tape (not important).
Cut off the tear completely, peel off the plastic insulation and varnish within one and a half centimeters of each edge. Twist the wires by color and insulate each one separately. And only after that you can connect them together. Otherwise, a short circuit may occur and the sound from stereo will turn into mono or one of the channels will disappear completely.
If you have heat shrink tubing (cambric), use it instead of tape. Before twisting, put on a piece of larger diameter and move it to the side. Then connect the wires and put small tubes on each twist.
Heating methods: iron, hair dryer or incandescent lamp. Additionally, press the joint with your fingers for better gluing. Connect the cooled and “packed” twists tightly together and pull the larger piece moved away on top of them. Reheat the area. The broken wire has been repaired.
This method is quite reliable for further use.
How to do without a soldering iron
If you don't have a soldering iron, then this is not critical. The described technique is perfect for ordinary headphones without a microphone and control buttons. Unfortunately, it is useless if the cord breaks near the speaker.
Cut off a part of the cable with a connector no shorter than 7 cm, remove the rubber braid with a knife, exposing about 2 cm. You can clean the varnish using sandpaper or a lighter. In order not to damage the wiring, the fire must be extinguished periodically. The carbon deposits can be easily removed with your fingers, but you need to wait until it cools down.
Make an incision a few centimeters above the plug to ensure that the erased area is removed.
Twist all paired wires as tightly as possible. If there are more than three of them, then the two extra ones (responsible for the microphone) can be hidden or cut off, and the sound input will stop working. Sometimes the colors match, but it’s better to check the combination by inserting the connector into the socket of the player with music turned on.
For insulation, use electrical tape, treating each individual pair. After this, they are connected and wrapped in 3-5 layers. You can use wide tape (painting tape will also work) or thin thermal tubes.
How to do without a soldering iron when repairing headphones
It often happens that a person does not have a soldering iron or socket at hand, and the headphone plug does not work. In this case, we can resolder the plug in several non-standard, but acceptable ways.
Popular articles Microscope without lenses.
The first method is to use conductive glue to glue the wires to the mini jack pins. Everything is done simply and neatly. The reliability of such fastening is of course poor, and the electrical resistance of the glue can be tenths of an ohm. If the headphone impedance is 4 -16 ohms, the glue may affect the sound volume. The good thing is that the drying time for conductive glue is usually 10-15 minutes.
The second method is to heat a nail or piece of copper wire in a candle flame. This is a way for romantics: twilight, candles, plug, headphones and you. In this case, it is better to use scented candles. But seriously, you can solder a headphone plug using a fire and coals. The main thing is not to forget good solder and flux.
The third way is to make a gas soldering iron from a lighter with your own hands. You need to take a piece of single-core copper wire and attach it to the lighter so that part of the wire is in the flame. Heat is transferred over a certain distance through a copper wire, as can be seen from the photo.
If you use this method, pay special attention to the place where the wire adheres to the lighter body. A hole may form there due to heat.
Be careful! For more details on how to make such a mini soldering iron from a lighter, watch the video.
Not everyone has a soldering iron these days. But almost everyone has headphones, and even more than one. And as everyone knows, any headphones tend to die... And as always, at the wrong time. So today we will get out and you will learn how to fix headphones without a soldering iron. The only tools you need are a knife, a lighter and tape.
Of course, such a repair can hardly be called ideal. But it is ideal, for example, if you have a long train ride ahead of you, and your headphones suddenly died in the most vile way.
How to do without a soldering iron
Headphone failure is a common problem. But it’s not always possible to find a soldering iron on hand. Then methods that replace it can help, and you can solder the parts. Here are several options for homemade soldering irons:
- Conductive adhesive. They can be used to glue cables to contacts. This, of course, is not the best method, as it may reduce the volume of the headphones, but it will help fix the problem. This glue dries in 12-15 minutes.
- A nail or piece of copper wire heated over a candle fire. The source of the fire is not important (maybe a match, or even a fire with coals).
- Gas soldering iron made from a lighter. To make the device yourself, you need to connect a single-core copper cable to the lighter so that part of it touches the flame. Then strong heat will pass through this cable and you can use the tip like a soldering iron.
The last method requires attention. Heat can also pass down through the connected cable, and then a hole may appear on the plastic case. So be careful. But you will definitely be able to solder the wires.
If the advice helped you, write in the comments whether everything was clear and how quickly you managed to solder it. Your answers will help other users troubleshoot the problem, and help us in their description and instructions.
Everyone who uses headphones has sooner or later encountered the fact that they fail. As a rule, this manifests itself in the form of one non-working speaker. This kind of breakdown is typical for headphones, and it is due to the fact that their wires are constantly bent. Below in the photo, red circles show the areas most at risk of cliffs.
As practice shows, if such a breakdown occurs, in most cases performance can be restored. We'll tell you in detail how to solder your headphones so that they continue to delight you with clear sound.
Headphone plug repair
Hi all! Probably everyone has encountered this problem: you bought yourself headphones... You were happy listening to your favorite music through them. And then bam! And one earphone channel stopped working. It's a shame. But let’s not sniffle and run to the store for others.
After all, we are Radio Amateurs (yes, yes, with a capital R), proud people, and we cannot afford this. So let's get started. These are the collapsible 3.5 mm “mini jack” plugs that are now available for sale. Of course, their quality lately leaves much to be desired. And recently, a friend gave me headphones (cheap, Chinese) to repair.
I didn’t have to see the plug, so I’ll have to take the collapsible one mentioned above.
First, let's cut/bite off some wire:
Afterwards we remove a little insulation so that the wires can be seen:
Carefully burn the varnish insulation of all 3 wires (about half).
Now we dip the stripped wire into flux (if any), you can do without it, the wires are tinned faster with it (with rosin it takes longer).
We make sure that a drop of solder hangs on the soldering iron, and in it, so to speak, we warm up the wire until it becomes tinned. Here are the already tinned wires:
Now, you need to pass the wire through the plug body. As it often happens, I soldered everything, but forgot the case - and I have to solder everything back (yes, this happened 10 times - editor's note). Now we solder: the wire without color (transparent) insulation (varnish), i.e. minus (common), solder in the middle:
Now we crimp the wire with two petals:
We screw the plug housing into place, and you're done - we repaired the headphones ourselves!
Almost any plug can be repaired this way - microphone, headset, other audio equipment, and so on.
Thank you for your attention! Author – Admin4638
Additions to the article:
If possible, it is better to use an existing connector, if it has survived, or a similar one from more or less expensive (but already dead, otherwise why bother with this?) headphones. Because From experience, new connectors are found to be of extremely poor quality. The contacts there are crimped and very loosely.
Since the old connector is used, it needs to be cleaned of insulation (I use a utility knife to cut along the seam formed by the mold), and soldered to the soldering points (usually everything is there except the mass; the mass will have to be slightly cleaned and tinned). while not forgetting about heat shrinkage on the center (L) and middle (P).
By the way, if there are veins in a non-flammable polymer, as in the example, then when stripping with a knife, the wires are damaged, and if it is also oxygen-free copper, then they break immediately, therefore you just need to solder by tinning such an end without stripping it in a drop of tin.
When heated, the polymer will partially expose the cable to a length sufficient for soldering (about 2 mm).
For beauty, uniformity and waterproofing, you can pour hot-melt glue under it before shrinking the top layer of heat-shrink; when shrinking, excess glue will come out - you can either immediately remove it with toilet paper (a universal cleaner for any surface from almost any contaminant) or cut it off when it hardens.
From the second or third time you will get simply masterpieces
PS At one time, KOSS earbuds with a gold-plated jack served as connector donors - it is compact, beautiful and of high quality. And these kossas simply broke down from listening to them at maximum, by the way, a valuable source of neodymium magnets - washers
Thank you for your attention. Ringo aka Pavel K
Radio repair forum
What types of connectors are there and what's inside them?
Almost all plugs used to connect headphones and headsets (it would be more correct to call them connectors) have the same design and differ only in size and number of contacts. They are grouped by size as follows:
- Jack 6.35;
- mini-Jack 3.5;
- micro-Jack 2.5.
The numbers indicated at the end of each name indicate the diameter of the connector pin in millimeters, and the devices look like this:
From left to right: micro-Jack 2.5 mm, mini-Jack 3.5 mm, Jack 6.35
There can be two, three, four or five contacts on the pins The first type is a mono jack. It is simple in circuit and design, has only two contacts and is not used in stereo phones, much less in headsets. The TRS connector has three pins and is used to connect stereo phones (headphones). TRRS and TRRRS are more complex and use them to connect headsets - headphones + microphone.
Below is a TRS type connector, above is TRRS
Classification
Plugs, like any mass-produced part, have their own classification, which depends on the equipment being connected and plays a vital role in repairs. So, there is a division according to the size and number of connected wires.
By size
In practice, plugs of three sizes are most often found:
micro-jack with a diameter of 2.5 mm (1/4″) - used to connect headphones to small gadgets and old mobile phones;
mini-jack with a diameter of 3.5 mm (1/8″) - used to connect headphones to players, smartphones (for example, iPhone, Xiaomi, etc.) or audio cards installed in personal computers;
jack with a diameter of 6.35 mm - it is used to connect professional headphones, pop microphones, etc. to the sound source.
By number of cores
Jack type plugs also differ in their functional purpose, which also determines their design. In practice, there are such varieties:
- two-wire type TS - mono-jack;
- three-wire type TRS - stereo jack;
- hybrid type TRRS - 4 wires or more.
Structurally, they are all absolutely identical and differ only in size. Moreover, their contact pads are separated from each other by the required number of dielectric rings. The appearance, numbering of contacts and wiring diagrams (pinout) of various versions are shown in the figures.
Rice. 1 Appearance of plugs
A two-wire jack is used very rarely in everyday life. Its main application is professional recording equipment and musical instruments. The circuit of such a plug is the simplest and looks like this.
Rice. 2. Two-wire mono jack TS
Three-wire plugs are used on ordinary headphones that do not provide a microphone and volume control.
Four-wire plugs are found both in regular headphones, which have one ground wire for the left and right headphones, and on headsets, where the fourth wire is allocated for the microphone.
Fig.4. Pinout of a four-wire TRRS plug without a microphone.
Rice. 5. Pinout of the four-wire TRRS plug from the headset
As for the TRRRS and more plugs, the connection of the wires to the jack is similar to the TRRS from the headset, only each contact (left and right speaker, ground and microphone) can have several wires, which are determined experimentally using a multimeter. Such plugs are found, for example, in Earpods from Apple and Piston 3 - 6 wires, 3 of which are ground.
Popular articles Glasses with a hidden camera.
How to solder headphones with a microphone
To properly repair headphones with a microphone, you need to know the connection circuit and the purpose of the four-pin jack pins. A typical soldering diagram for a microphone plug and a button in a stereo headset is shown in the picture below.
For most manufacturers of simple headsets, the microphone should be soldered as in the picture.
How does a four-pin jack work?
A four-pin jack has the same structure as a three-pin jack. Coaxial design and separation by plastic bushings with standard sizes into 4 wires is present on all TRRS plugs. The pinout of 4-wire plugs differs by manufacturer. There's a lot of people here. To correctly replace the headset plug, look at the pinout of the minijacks in the picture.
The picture shows the following symbols: M - microphone, G - common contact, R - right channel, L - left channel. Now it’s clear that soldering headphones onto 4 wires is not an easy task. The wiring diagram of the plug greatly depends on the brand of the headset.
How to solder a plug to headphones - DIY headphone repair | Audio Geek
Why buy new headphones if in 9 cases out of 10 the headphones do not work due to a break in the wire near the plug. How to repair headphones with your own hands, or more precisely how to solder a plug to the headphones, is discussed in detail in today’s article.
To show how to solder headphones to a plug, we have prepared visual photographs of the repair of two Sony headphones. These are models XBA-1 and XBA-H1. In both cases, the headphones do not work precisely because of the broken wire.
The first headphones are purely reinforcement, the second are a hybrid of reinforcement with a dynamic emitter, but this does not matter. Today, all headphones are equipped with a 3.5 mm plug (jack or jack 3.5mm) and repair of the plugs of both headphones will be shown in parallel
How to disassemble the headphone plug
To repair headphones, the first step is to disassemble their plug. The vast majority of headphones have a rubber shell on the connector that can be carefully removed. It is more convenient to do this with a thick needle or awl:
We insert the needle shallowly at first, and gradually moving in a circle, we go deeper with the needle to the full depth of the connector. After this, you can pull off the rubber covering.
The second headphones (XBA-H1) had a detachable connector.
As you can see from the picture, the next step is to expose the plastic-filled contacts of the plug. I cut it carefully to demonstrate what was originally there. Usually I cut everything together with the wires
Cleaning the plug contacts:
You need to unsolder all the wires on the connector. Even if you cut them off or they are torn off, there will still be pieces of wires in the tin droplets on the contacts, which can then bridge the contacts. In any case, the tin droplets on the contacts need to be refreshed by melting them with a soldering iron dipped in rosin and pulling out excess pieces of wiring from them.
We're done with the connector for now, now let's prepare the wire. Often the wire dies at the exit from the connector, so we cut it 2-3 or even 5 cm above the connector. Then, using a sharp knife or scalpel, we cut the wire braid in a circle 1-1.5 cm from the end and remove the coating, exposing the wires.
Tinning the wires before soldering the headphones
Please note that the first headphones have 3 wires inside, and the second ones have 4. Each wire is a mixture of twisted nylon threads and copper wires coated with varnish
Each wire is a mixture of twisted nylon threads and copper wires coated with varnish.
Before soldering, the wiring must be tinned, i.e. cover with a layer of tin. First, we twist the wires, because Surely its end was swung. Then we place its tip on the rosin and press it with a heated soldering iron, lightly dipping it into the melting rosin.
After this, we place the edge of the wire on a matchbox and, pressing it with a soldering iron with a drop of tin, we turn the entire headphone cord. In this case, the wire should twist and be evenly covered with tin.
It is enough to tin the very tip. But no one forbids tinning more, and then cutting off the excess, leaving 2-3 mm covered with tin.
That's it, the tedious but important preparatory part is over. Now the more interesting task is to solder the wire to the connector
First, let's find out what and where.
Where to solder headphone wires
I think the letters L and R are familiar to everyone and the fact that they indicate the left (Left) and right (Right) channels too. But what is GND?
It's simple - it's GrouND, or in our language - land. You've probably heard that a light bulb can only light when current flows into it through one wire, and current flows out of it through the other. And what is called this thing is a closed circuit.
So here it is the same - the earphone will sing if one of its wires is soldered to L or R, and the second to ground (GND).
So we simply have no other choice but to solder the left earphone to L and GND, and the right one to R and GND.
If you find it difficult to determine which channel is which, solder the ground, plug the headphones into your player or phone and use the tinned wire to poke the contacts of the plug. look where it will play)
How to solder headphone wires
This is the most convenient option) I highly recommend not holding it with your fingers - you can easily get burned. During the soldering process, we try not to touch the connector with a soldering iron for more than 3 seconds, otherwise the plastic separating the contacts in the connector may melt and there will be a short circuit and the repair of the plug will fail (((
Fill the headphone plug with glue
When all the wiring is soldered, all that remains is to fill the connector with polyethylene hot-melt adhesive (1) and, until the glue hardens, insert it into the rubber shell (2).
It is advisable to fill the entire volume of the headphone jack, so first pour glue into the jack, and then make a drop of liquid on the connector contacts. After inserting the plug into the shell, remove the excess glue that has been squeezed out with your fingers.
Now there are another 5-10 seconds to give the connector the desired position (3). Keep it this way until the glue hardens completely. And then use a sharp knife to cut off the last remnants (4).
How to properly solder a new plug to the headphones (with wire pinout)
It's no secret that the most common malfunction of any headphones (plugs, earbuds or large over-ear ones) is a broken wire near the plug. In this situation, there is nothing left to do except change the plug on the headphones. This is easy and can be done by anyone who has ever held a soldering iron in their hands. The only thing that would be desirable is to understand the intricacy of the wires (in some headphones there are as many as 6 wires under the cable insulation!)
Today we’ll talk about how to solder headphones to a plug without making any mistakes.
How to find a damaged area?
It is almost impossible to visually find the location of a wire break inside the cable, since the outer insulation remains intact.
But it is still possible to determine the approximate location of the fracture. To do this, connect the headphones to any sound source, for example, a mobile phone, and turn on the melody on it, bend the cable along its entire length.
We look for the place of damage by bending the wire
When bending in a problem area, the sound should change its character, and it should change when bending in different directions or stretching the cable. As practice shows, most often the wire breaks near the entrance to the plug - in this place it is more mobile. If this happens, and the wire is indeed damaged in the location indicated above, the problem can be solved by cutting off the damaged section and re-soldering the plug.
How to fix a headphone wire with a microphone?
The headset has no fundamental differences from the standard system. The only difference in the plug is 3 contacts as in regular headphones and a 4th for the microphone. 4-pin Jack 3.5mm has two standards:
M- and M+ are microphone contacts. The other three: G - ground, R - right, L - left. These are standard colors used by manufacturers to differentiate wires.
Proceed according to the scheme described in the second section of the article. You can use a candle or lighter to remove insulation from wires. High temperatures will melt the plastic sheathing and protective varnish.
How to solder headphones with a microphone
To properly repair headphones with a microphone, you need to know the connection circuit and the purpose of the four-pin jack pins. A typical soldering diagram for a microphone plug and a button in a stereo headset is shown in the picture below.
For most manufacturers of simple headsets, the microphone should be soldered as in the picture.
How does a four-pin jack work?
A four-pin jack has the same structure as a three-pin jack. Coaxial design and separation by plastic bushings with standard sizes into 4 wires is present on all TRRS plugs. The pinout of 4-wire plugs differs by manufacturer. There's a lot of people here. To correctly replace the headset plug, look at the pinout of the minijacks in the picture.
The picture shows the following symbols: M - microphone, G - common contact, R - right channel, L - left channel. Now it’s clear that soldering headphones onto 4 wires is not an easy task. The wiring diagram of the plug greatly depends on the brand of the headset.