How does a spotlight work?
An LED spotlight (in everyday life the incorrect name diode is used - it is at least unprofessional to use such a term) is simple. Like a regular incandescent lamp, it contains:
- frame;
- light-emitting element (single powerful LED or matrix of several less powerful devices);
- terminal for connecting the power cable (terminal block, connector);
- glass covering the compartment with LEDs (diffuser).
LED lamp device.
Unlike its predecessor with the “Ilyich bulb”, the LED spotlight contains one more part - the driver. For powerful spotlights, it is made in the form of an electronic circuit that stabilizes the current through the light-emitting element. For small lamps, a resistor can be used as a driver. Since the emission of LEDs does not depend on the degree of heating, they are installed on a heat sink to extend their service life.
How to connect an LED spotlight: electrician answers and recommendations
LED spotlights, which appeared on the market not so long ago, are rapidly replacing other types of lighting devices. At the moment, LED lighting is recognized as the most economical and has advanced operating capabilities. The process of installing an LED flashlight will take a considerable period of time, and all that remains is to understand how to connect the LED spotlight.
Electrician's opinion! It is not recommended to install the LED lighting device yourself; this will help to avoid mistakes.
In our article, we suggest that you familiarize yourself with the list of important aspects regarding connecting the device. This operation requires some electrical knowledge, so it is very important to carefully follow each step.
Electrical connection
To connect most lighting devices to a single-phase 220 V network, they are equipped with three terminals:
- phase (denoted by L);
- neutral conductor (N);
- grounding conductor ().
Video on the topic:
Obviously, the connection must be made using an electrical network with TNS neutral mode. The peculiarity of this mode is that it consists of phase conductors, neutral (N) and protective (PE). In this case, the connection diagram for an LED spotlight with three wires is simple - phase conductor to phase, neutral to neutral, grounding to PE. The same applies to the TNC-S system. In it, the neutral and protective conductors are separated at a certain point, usually at the entrance to the building. But many networks are made according to the outdated TNC scheme, where the neutral and protective conductors are combined.
In accordance with the rules, in these networks it is necessary to use lighting devices that do not require grounding. Such devices include devices with the following protection class:
- 0 – protection is provided by one layer of insulation, the least safe option;
- II – devices with double or reinforced insulation are noticeably more expensive;
- III - devices powered by ultra-low safe voltage (below 50 V AC), they are beyond the scope of this article.
Important! The protection class of an electrical appliance can be determined by its passport, technical specifications or markings:
- 0 – not marked;
- I – grounding symbol or the very presence of a grounding terminal;
- II – double insulation icon;
- III - Class III protection badge.
In class II devices, safety is ensured by the presence of protective grounding, and their use in a TNC network without grounding is contrary to the rules and can lead to dire consequences if the main insulation is broken and voltage appears on the luminaire body. It is also contrary to the PUE to connect the grounding terminal to the working neutral conductor (N, PEN).
How to connect a floodlight with a motion or light sensor?
A spotlight with a built-in sensor is connected in the same way as a standard model, and then the operating parameters are adjusted using the controls: sensing distance, operating time after turning on the lighting, etc.
It is worth considering in more detail the question of how to connect a motion or light sensor (photo relay, day-night system), which you purchased separately, to the spotlight. This solution is optimal if the sensor and lighting device need to be positioned independently of each other. For example, so that when approaching the sensor, not just one light comes on, but a whole group at once. When placing sensors, the viewing angle and response zone are taken into account, and lighting devices can be installed where they maximally cover the required area with light.
In this case, the sensor plays the role of a standard switch, only it closes not manually, but automatically, triggered by movement or changes in lighting. Therefore, the sensor is mounted instead of or parallel to the manual switch.
The sensor has at least two wires - “plus” and “minus”. It may also contain a grounding cable that must be connected. The positive value is supplied to the flashlight only when the sensor is triggered, and the negative cable goes to the spotlight directly; it must always be connected to the circuit.
Tips for connecting and setting up LED floodlights with sensors
- Even if you know well how to connect the light sensor to the spotlight and have done everything correctly, the sensor can turn on around the clock if it is not configured correctly. The illumination parameter is usually designated as “lux”. It is better to adjust the day-night system when it gets dark outside. It is advisable to start with the maximum value. Check when the light appears, then reduce it to the desired setting (for example, turning on at light twilight).
- Even with sensors, sometimes it is better to also leave a manual switch in the circuit. This will help control the lighting, for example, if the light needs to be left on for a longer period than specified in the settings. The switch must be connected parallel to the sensor.
- Several sensors can be connected to one lighting device if there are several approaches to the place that are not covered by the coverage area of one sensor. Then the sensors need to be connected in parallel. Lighting will appear as soon as one of the working sensors is activated.
- In modern motion sensors, you can adjust the sensitivity, lighting time, and installation angle. If set correctly, you can save up to 70% on energy costs compared to using sensorless lighting.
- Sensitivity among motion sensor controls is usually referred to as “sens”. If the sensor often triggers at the wrong time, it is worth adjusting this parameter.
Required tools and materials
To connect the lamp you will need the usual electrical tools:
- wire cutters for cutting power cables;
- installer's knife for stripping cable sections;
- a screwdriver for connecting the wire ends to the terminals.
Electrical wire cutters.
This is enough to make the connection. But a professional would also advise:
- special insulation stripper;
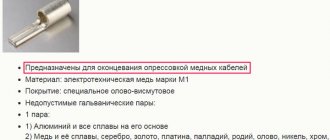
- lugs for wires of the appropriate diameter and crimping tool.
If the installation is carried out with multi-core wire, it is a good idea to tin the stripped areas - a soldering iron is useful for this.
And, of course, you need an electrical cable of the appropriate cross-section. For a voltage of 220 V, it can be selected from the table in accordance with the power of the spotlight:
| Conductor cross-section, sq. mm | 1 | 1,5 | 2,5 | 4 |
| Load power for copper conductor, W | 3000 | 3300 | 4600 | 5900 |
| Load power for aluminum conductor, W | — | — | 3500 | 4600 |
Important! When choosing a cable, you must take into account the power consumption of the lamp, and not the equivalent power (corresponding to the power of an incandescent lamp).
Sequence of work
Directly connecting the cable to the LED spotlight consists of several main steps:
- Stripping the ends of wires for their installation in a terminal socket.
- Removing the cover of the installation box or disassembling the body of the spotlight - the type of work is determined by the design of the lighting device.
- Input of the network cable through a special coupling with a seal in the device body (pressurized lead-in) and fastening of the conductors in the terminal sockets. The connection of each core is made in accordance with the color marking and purpose of the core - phase, neutral, ground.
In the case of using separate light or motion sensors, the wires from the sensor and the manual light switch are connected into one phase contact group.
After fixing the wires in the terminal box, you must carefully replace the cover of the mounting box or the housing of the lighting fixture - the LED spotlight is ready to be installed at its workplace.
Connection diagram
Connecting the LED spotlight to the electrical network can be done through a regular outlet. To do this, you need to install a plug at the supply end of the cable. If you use a lamp of protection class II, the socket and plug must have a grounding contact.
Circuit with motion sensor
In order to save energy, lighting devices are connected to work together with a motion sensor. Power is supplied to the spotlight only when a moving object (person, car) is detected. In this case, the sensor is connected to the phase wire in series with a conventional switch.
Connecting a motion sensor.
The main power switch turns off the floodlight regardless of the state of the motion sensor. When the power is turned on, the lamp operates in automatic mode. The problem with this circuit is that the sensor contacts are not designed for high current, and if the lamp is powerful, then after a while they will begin to burn and the sensor will stop working. To avoid this, you need to connect the spotlight through an intermediate relay or magnetic starter. The sensor will turn on the relay, and the relay will turn on the spotlight.
Connecting a motion sensor via an intermediate relay.
Important! A bad solution would be to connect two motion sensors in parallel to strengthen the contacts. Due to the variation in the switching level, it will not be possible to achieve simultaneous operation, and both sensors will fail.
How to connect via a switch
A less successful scheme is to connect the motion sensor in parallel with the main switch. In this case, closing the switch contacts blocks the automation circuit.
Parallel connection of the switch to the sensor contacts.
In this option, it will not be possible to remove power from the spotlight if the motion sensor malfunctions (sticking contacts).
Connecting an LED spotlight to 220V
Before wondering how to connect an LED spotlight to 220V, determine the place where you want to place it. To do this, calculate how much area the spotlight should illuminate and how much luminous flux is required - ideally, the light source should not be blocked by trees or other structures. Please ensure that there is enough free space around the lamp - air circulation will protect it from overheating during operation. Find power points - street lamps usually have a cable installed, if this is not your case, you need to take care of this in advance. Before starting work, read the instructions supplied with the spotlight. Observe polarity where indicated and use flexible copper conductor that is resistant to high temperatures.
If a power of 10-50 W is enough for you, then a stranded copper wire of 1-1.5 mm2 will suit you. For more powerful spotlights, we recommend using wiring with a cross-section of 2 mm2 or more. Don't forget to consider the distance from the connection point. If the spotlight will be located more than 100 meters from it, then a wide cross-section should be chosen. Otherwise, the brightness of the spotlight will be noticeably reduced due to voltage drop.
Remove the terminal box fastening. In the floodlight input coupling you will find a terminal socket. It includes three wires: phase, neutral, ground, which differ in color. You can find out more about the color meanings in the instructions. Connect the phase wires alternately - plus to plus, neutral wires - minus to minus, and also make grounding.
After inserting the power cable into the gland and then connecting it to the terminal block, close the box cover and attach the spotlight to the bracket. Install the entire structure in the area where operation is planned.
Installation recommendations
When connecting the spotlight, it is advisable to use a cable with standard core insulation colors and follow the connection order.
Cable for connecting a single-phase load with a grounding conductor.
- the red wire is connected to the phase terminal (L);
- blue – to zero (N);
- yellow-green – to ground (PE).
This order must be observed both on the side of the power source and on the consumer side (luminaire). Of course, for electric current, the color of the core does not matter, and if the connection is not made correctly by coloring the insulation, nothing will happen - the spotlight will work just as well. But compliance with the rules speaks about the professionalism of the installer. And in the future, if repairs or reconnection are necessary, it will be easier for another technician to understand the circuit.
If the wiring runs along the street, in order to ensure anti-vandalism, it makes sense to lay it in pipes. In this case, you need to understand that the conditions for heat removal will be worse than in the version with an open gasket. If, according to calculations, it turns out that the load power is close to the upper limit for the selected cross-section, then the diameter of the wire must be increased by at least one step. In this case, it is even more correct to clarify the parameters of the conductors in the PUE.
Installation of electrical wiring in a metal pipe.
Purpose and rules for connecting the wires of the connecting cable
The three wires of the connecting cable are used in the usual way:
- first – zero;
- second – phase;
- the third is connected to the body.
Taking into account such a layout, it is most advisable to implement one of the schemes in Figure 2 and proceed as follows:
- the phase and neutral wires of the spotlight are connected to the same wires of the stationary cable;
- the third yellow-green wire of the lamp is connected to the ground wire of the cable of the same color (if available), Figure 2 on the left;
- if there is no grounding wire in the stationary cable, the yellow-green wire of the lamp is additionally wrapped with electrical tape and left “hanging” in the air, Figure 2 on the right.
In this case, under no circumstances should the yellow-green wire be connected to the neutral wire and, especially, to the phase wire.
Figure 2. Rules for connecting the wires of the lamp and the stationary cable
In the first case, a typical scheme for connecting the receiver to the electrical network is implemented. The second option does not affect the performance of a working spotlight. To increase the effectiveness of protection against unacceptably high leakage currents, in this case it is strongly recommended to install a differential circuit breaker.
Safety precautions and operating rules
When doing any work with electrical installations, the main rule must be observed - all actions must be performed with the power turned off. The absence of voltage must be checked with a pointer directly at the place of work. The electric tool must be in good working order and have no damage to the insulation. Even better, even at home, use protective equipment against electric shock - dielectric gloves, carpets, galoshes. There are never too many security measures.
During operation, it is also necessary to monitor the integrity of the insulation of wiring and switching equipment. In case of any damage, the lighting device must be taken out of service until the fault is eliminated.
Precautions and Tools
Any work with electricity is potentially dangerous, therefore, despite the fact that almost anyone can handle the installation, it is extremely necessary to follow safety precautions and personal safety precautions. Let's talk about the basic rules and recommendations:
- A mandatory requirement is dry hands. It is impossible to install, dismantle, or repair street lighting in damp conditions.
- Be sure to disconnect the circuit from the power source;
- Do not use devices that have a low degree of protection against moisture and dust outdoors;
- Tool handles must be insulated;
- Before starting installation, do not forget to measure the voltage using an indicator screwdriver; deviation from 220 Volts is allowed no more than 10%;
- Do not use chemicals near the LED device;
- If you detect problems with the device, the spotlight begins to flicker or dimly light, disconnect it from the power source;
- Don’t forget about maintenance: the spotlight needs to be wiped down periodically.
And a few more tips:
- When using an LED element as a street lamp, pay attention to the strength of the housing - the spotlight must be protected;
- If you are using an LED light to illuminate the area around your home, hang it under the roof for additional protection from precipitation;
- If there are problems, give up the idea of repairing the devices yourself. Manufacturers strictly prohibit disassembling the device and repairing it yourself; moreover, this leads to refusal of warranty service;
- It is also prohibited to operate the spotlight without protective grounding;
- We do not recommend looking directly at the switched on spotlight at close range;
- Do not install the spotlight with the glass facing up.
Note! It is very important that the installation of the spotlight is carried out correctly, that is, the integrity of the insulation is maintained. The wiring should work correctly. If everything is done according to the rules, in compliance with recommendations and safety precautions, and all elements work correctly, then this will only increase the life of the device. With proper use, it can last up to 15 years.
If you notice condensation on the inside of the LED spotlight, the waterproofing of the device is most likely damaged. It is necessary to remove the front part of the device and check the seal - it may be worn out. Dry the device, reassemble it, and then you can connect it to power.
For installation you will need the following materials:
- Wires - choose them from the same material as the spotlight;
- Insulation – safe to use special terminal clamps;
- Side cutters;
- Shurkvert;
- Soldering iron;
- Screwdriver.
If you have this simple set in stock, you can start working.