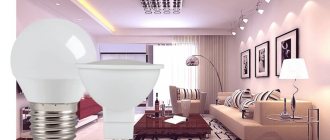
How to install halogen lamps
Lighting needs to be planned correctly. In this aspect, not only the practical function of the lighting itself is needed, but also the aesthetic appearance. These two points are resolved when installing halogen lamps. They are an improved type of incandescent lamps. The light emitted is close to natural. But before installation, connection technology and safety measures are studied.
How to connect halogen lamps: steps of action
Installing halogen spotlights requires care and time.
But you can do the work yourself:
If you have a large number of connected halogen spotlights, it is better to connect to a double switch. This will require two transformers.
If spotlights are installed on a suspended ceiling, then the wires are pre-attached to the ceiling. Then the lamps are placed and mounted on hangers, connected, and checked.
Before stretching the ceiling, you need to turn off the power and remove the light bulbs. After full tension, the places where the lamps should be installed are found (they can be seen through the material or felt), and holes are cut. O-rings are installed on them and a halogen lamp is assembled.
When installing a ceiling made of plasterboard sheets, you must also first lay the wiring along the ceiling, in the places where the lamps are installed, the wires should hang with a margin of up to 15 cm. This is necessary in case the hole is cut offset. To avoid the possibility of incorrect cuts, the connection diagram for the lamps is transferred to the drywall.
Often the installation of halogens is carried out after the drywall has been completely installed. But then the electrical wires will lie on top of the sheets. This is a fire hazard.
If the ceiling is made of wooden floors, then the wire must be non-flammable and laid in special boxes or metal pipes. This work must be carried out before laying the hanging material. Breaking the rules will lead to undesirable consequences.
How to properly replace a halogen lamp
Many lamps have a lifespan that varies depending on the manufacturer and application. They are used in suspended ceilings and lamps, as they shine brightly and are economical. Like regular ones, halogen ones burn out and need to be replaced. You can do this yourself without the help of specialists, since there will be no difficulties, but when replacing halogen lamps, several principles should be taken into account.
How to connect a halogen lamp
As a rule, there are no problems when connecting a halogen lamp designed to operate at 220 volts. If you need to connect several halogen lamps, then this can be done in exactly the same way as when connecting conventional incandescent lamps. However, when it comes to connecting a step-down transformer, certain difficulties may arise here.
You should know that it is recommended to connect halogen lamps through a pulse step-down transformer or, in other words, an electronic one. It already has built-in short circuit protection and is designed for smooth startup, which significantly extends the service life of halogen lamps.
In addition, pulse step-down transformers are compact in size. Therefore, if you decide to install halogen lamps on the ceiling in a corridor, for example, then the power supply can be hidden somewhere in the same place, in an invisible place.
Connecting halogen lamps
In order to connect halogen lamps, it is enough to connect a group of light sources in parallel, and then connect the power wires to a step-down transformer.
The connection diagram for halogen lamps looks like this:
The optimal transformer power for connecting halogen lamps is 250 W. You should know that it is better not to make the length of the wire from the transformer that connects halogen lamps more than two meters, otherwise there will be a loss of lamp brightness and current.
Also, it is not recommended to install a step-down transformer for a halogen lamp near heating appliances or in poorly ventilated places. This can lead to overheating of the transformer and its rapid failure.
Source
Replacement procedure
Halogen ones are often used because of their long service life, heat transfer, and low susceptibility to power surges. But they can also burn out, which is why the lamp will not work. You can fix it by replacing the halogen lamp with a new one.
To do this you need:
When changing, it is necessary to work with gloves, because greasy fingerprints remain on the light bulb, compromising its integrity and shortening its service life. Its glass parts should be wrapped in a paper napkin to protect them from greasy stains, because they should not be touched with bare hands.
To change a halogen lamp in a suspended ceiling, you must stop the voltage supply from the electrical panel and replace the voltage stabilizing unit.
Connection diagram for halogen lamps
halogen lamps are connected via special power supplies for 6, 12 and 24V.
It is noteworthy that low-voltage halogen lamps in practice turn out to be as bright as conventional lamps, while energy consumption is reduced by an order of magnitude. In addition, low voltage acts as an additional guarantee of human safety.
Often such lamps are installed in bathrooms for safety reasons. However, low-voltage halogen lamps are also used in built-in luminaires for suspended ceilings, due to the fact that the small size of modern electronic transformers allows them to be installed directly on the frame of such ceilings.
The only limitation for the operation of such lamps is the need to install a special step-down transformer.
Fig 1. Connecting halogen lamps via a transformer
Thus, when a low-voltage halogen lamp , the network connection diagram implies the presence of a 12V step-down transformer.
How halogen lamps are connected in the diagram
The connection of the lamps itself turns out to be extremely simple: all you need to do is connect the halogen lamps in parallel with each other and connect them to the transformer.
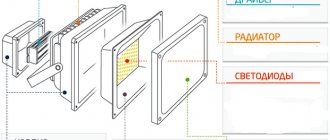
Let's take a closer look at how all the elements are connected to each other (transformer, halogen lamp, connection and control diagram).
The figure below shows a block diagram consisting of two step-down transformers and six halogen lamps. Blue indicates the neutral wire, brown indicates the phase wire.
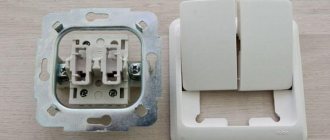
Connection on the 220 V side. The connection of the wires in the distribution box is carried out in such a way that the phase of the supply wire (the one that comes into the box) goes to the switch.
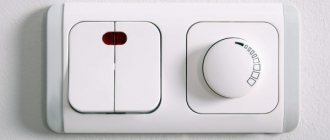
Lighting control (on/off) is carried out by a conventional switch. It is connected to transformers on the 220 V side.
Checking the light bulb
Like a regular one, halogen also refers to a thermal lighting source due to the spiral, which heats up during operation. The brightness and saturation of the light is due to the halogens contained inside.
But if it stops working, what should you do? You need to find out whether there is voltage in the base or not. If everything is fine with it, you need to check the halogen lamp. You cannot touch it with bare hands, because it will leave greasy stains. In this place it will become especially hot, which will shorten its service life. Therefore it is necessary to use gloves.
To check the lamp, you need to:
The final readings depend on the type of lamp, because for a regular 220 volt lamp and a 12 volt car lamp they will be different. Under any circumstances, the resistance varies from 0.5-1 Ohm; if the value is high, then the lighting device is faulty.
How to connect a halogen lamp
As a rule, there are no problems when connecting a halogen lamp designed to operate at 220 volts. If you need to connect several halogen lamps, then this can be done in exactly the same way as when connecting conventional incandescent lamps. However, when it comes to connecting a step-down transformer, certain difficulties may arise here.
You should know that it is recommended to connect halogen lamps through a pulse step-down transformer or, in other words, an electronic one. It already has built-in short circuit protection and is designed for smooth startup, which significantly extends the service life of halogen lamps.
In addition, pulse step-down transformers are compact in size. Therefore, if you decide to install halogen lamps on the ceiling in a corridor, for example, then the power supply can be hidden somewhere in the same place, in an invisible place.
Connecting halogen lamps
In order to connect halogen lamps, it is enough to connect a group of light sources in parallel, and then connect the power wires to a step-down transformer.
The connection diagram for halogen lamps looks like this:
The optimal transformer power for connecting halogen lamps is 250 W. You should know that it is better not to make the length of the wire from the transformer that connects halogen lamps more than two meters, otherwise there will be a loss of lamp brightness and current.
Also, it is not recommended to install a step-down transformer for a halogen lamp near heating appliances or in poorly ventilated places. This can lead to overheating of the transformer and its rapid failure.
Before we start looking at the connection diagram, let's figure out what a halogen lamp is or, as people say, a “halogen lamp”.
How to replace a burnt out halogen light bulb
Halogen bulbs, unlike incandescent bulbs, shine brighter and consume less electricity. But at the same time, they also burn out quite often, and replacing them yourself involves some nuances that you will learn by reading this article in full.
Replacing a halogen lamp with a two-pin base (G4, GU5.3)
These are the most common types of lamps, which are most often used in spotlights, as well as in furniture-mounted lamps. They are available both with an open bulb and with a reflector, where the bulb bulb is protected by glass.
| Halogen lamp with G4 base | Halogen lamp with GU5.3 base |
Connection diagram
Low-voltage halogens are connected via a power source of 6, 12 and 24 V. But 12-volt ones are most often used.
In practice, it turns out that low-voltage lamps produce the same brightness as ordinary lamps, but at the same time, electricity consumption is reduced significantly. Low voltage also reduces the risk of fire.
Often, halogen lamps are installed in bathrooms for safety reasons. Today they are also mounted in ceilings, since the transformers are already placed directly in the frame.
The only drawback is the mandatory installation of a step-down transformer. That is, for the lamp to work, it must be connected via a 12 V transformer.
Connecting them is extremely simple. You just need to connect the lamps in parallel to each other and connect them to the transformer.
The figure shows a block diagram. It consists of a pair of step-down transformers and three pairs of halogen lamps. The phase wire is marked in brown, and the neutral wire is marked in blue.
Connecting a transformer to halogen lamps
In the distribution box, the wires are connected so that the phase of the power wire goes to the switch. The switching is controlled using a conventional switch.
The neutral wire from the panel is immediately connected to the neutral wires of the transformers. The phase is then connected to the phase wire of the transformer.
The number of transformers is not important. The main thing is that there is one separate wire for each transformer and that all transformers are connected only in the junction box. If this is not done, then if contact is lost, it will be impossible to get to the place of the breakdown.
When most of the work is ready, you need to start connecting the halogen lamps. The connection is very simple, it is important to remember that the lamps must be connected in parallel.
If the number of lamps is very large, then terminal connectors are used for ease of installation.
Replacement procedure
1.
Turn off the power supply.
2.
Remove the lampshade or protective glass and remove the burnt out light bulb. Depending on the design of the luminaire and the type of lamp, various options are possible.
Open Bulb Light Bulbs
usually hidden under various lampshades (a common option is built-in backlights in furniture cabinets).
Light bulbs with reflector and protective glass
Most often used in lamps built into suspended / suspended ceilings. In order to remove the lamp from the lamp, in most cases it is enough to remove the spacer spring or ring that secures the lamp in the lamp body.
In rarer cases (usually in rotating lamps), you will not find a spring; here you will need to remove the decorative lampshade, or remove the entire lamp.
To remove the decorative shade, try slightly turning the decorative ring that holds it in a counterclockwise direction. If you are unable to remove the lampshade, you will have to completely pull out the lamp.
To remove the lamp, carefully slide a flat tool (screwdriver, ruler, spatula) between the edge of the decorative ring of the lamp and the ceiling, then slightly pull the lamp out of the hole in the ceiling until the spacer springs appear.
Press both springs against the light with your fingers and continue to pull the light out little by little. By pressing the springs, you will not allow them to suddenly open when the lamp is finally removed, and thus protect both the hole in the ceiling and your hands from damage.
After you have removed the lamp, remove the bulb from it and disconnect it from the socket. If the light bulb is equipped with a GU10 socket, remove the light bulb by turning it approximately 90 degrees counterclockwise.
If the light bulb slips in your hands and does not want to rotate, then try turning it by wearing rubber gloves or using a suction cup.
3.
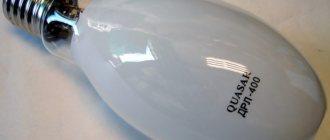
Buy a new light bulb to replace it. Preliminarily determine the characteristics of the burnt out light bulb. Be especially careful with this point, because halogen light bulbs are designed for both 220 volts and low voltage (12 volts).
READ How to install addons on arma 3 pirate
An indication of the type and power of the light bulb can be found on the lamp, or read on the light bulb itself.
If you are not sure what you can use to replace the light bulb, then you need to take the burnt out light bulb to the store and ask them to find one with similar characteristics.
4.
Install the new working light bulb in place.
When installing a new halogen light bulb in its rightful place, you must take into account that it is strictly not recommended to touch its bulb with your hands. The fact is that during operation, the bulb of a halogen lamp gets very hot (it is even made of heat-resistant quartz glass). And if there are greasy fingerprints on it, then in this place the glass will heat up even more.
A burnt grease stain forms carbon deposits on the flask, which makes it even hotter. The glass in this can melt and even swell. All this leads to destruction or premature burnout of the halogen lamp.
Therefore, hold the lamp without touching it with your fingers. Use the packaging in which the lamp was sold or hold the lamp through a dry, clean cloth (polyethylene). If you did take the lamp with your fingers, then it must be degreased with a lint-free cloth moistened with alcohol.
This does not apply to lamps whose bulbs are “hidden” inside the reflector and covered with protective glass. You can safely take such lamps with your hands.
5.
After installing the light bulb, try turning it on and then, if everything works, reinstall the light bulb in the reverse order.
Replacing a halogen light bulb with an r7s base
This is also a fairly common type of lamp, most often used in floor lamps, as well as floodlights for outdoor lighting. Lamps with r7s base are available in various lengths and wattages.
Replacement procedure
1.
Turn off the power to the lamp, then remove the protective glass or shade to gain access to the lamp. Be sure to let the lamp cool down.
3.
Buy a lamp of the required size, power and voltage from the store. Remember that a halogen lamp should not be touched with your hands, so install the new light bulb in place using a clean cloth, glove or piece of non-slip polyethylene.
Typically, this type of light bulb is sold packaged in polyethylene, which can be used to hold the lamp during installation. Just remember to remove it after installation.
5.
Turn on the lamp. If everything works fine, install the protective glass or lampshade in its rightful place.
If you wish, you can find out how to replace fluorescent lamps by reading about it in the corresponding article.
For greater clarity, you can watch this short video on how to replace burnt out halogen light bulbs. The video will open in a separate window.
Press the ↓↓↓ button
and share with your friends if you find this article useful!
Source