Characteristics of a pipe stand for introducing electricity
The product has the following parameters:
- Height.
- The amount of depth.
- Cross-sectional dimensions.
- Mark for installing brackets for mounting the shield.
- Ground loop resistance.
Design
The stand is a metal rod dug into the ground. The following elements are welded to it:
- At the top point there is a loop for a tension clamp for SIP.
- The cabinet brackets are at a height convenient for maintenance.
- A little lower is a bolt or stud for connecting to ground. It cannot be painted.
The grounding electrode (angle or rod) is driven nearby into the ground to a depth of at least 3 m.
Key Benefits
The product allows:
- Supply electricity to the site where construction is just beginning. In this case, there is no other way to place a panel with a meter, an input machine and other protection devices.
- On a site with a finished building, keep its façade attractive. If there is no pipe support, the cabinet is placed on the building, which spoils the appearance of the house.
Disadvantages of alternative options:
- Placing the cabinet inside the building. It is not welcomed by the energy sales service: according to the rules, the electricity consumption meter must be located so that the inspector can take readings from the street. They also require that the connection diagram be visible.
- On an overhead power line support. Permission from the energy sales service is required. Theft of equipment and damage to the cabinet by vandals or electricians during work on the pole are possible. In the latter case, the victim has no right to compensation from the supplier organization.
Choosing an installation location
Before choosing a location on the site to install a pipe stand with a shield, in order to avoid violating the technical conditions for connecting the facility, you must carefully study the information on this issue that this document may contain. As a rule, a structure with a metering cabinet should be located in a place remote from the border of the site at a depth of no more than 25 meters. At the same time, the distance from the overhead power line support from which the connection is made should not exceed the same distance.
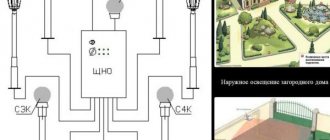
There is also the option of installing a pipe stand on the roof (shown in the diagram below), but we are not considering it in this article, because This installation method is rarely used.
Making a pipe stand
The product is not complicated to make, so the homeowner can make and install it themselves. In addition to the material and plumbing tools, you will need a welding machine and electrodes.
Despite the simplicity of the design, it is recommended to complete the drawing first.
Dimensions
Since the minimum depth and distance from the wire to the ground are 1.5 and 2.5 m, respectively, the length of the product should be 4-5 m. To lay the line over the road, a higher structure will be required - 6.5-7.5 m.
Energosbyt does not allow you to make such racks yourself and may require you to purchase a certified product.
In this case, it is necessary to remind the supplier of his obligations to install an additional support at his own expense if there is a road between the power line and the facility. The minimum cross-sectional size established by regulatory documents is 40 mm. But to ensure certain strength, it is recommended to make a stand from a profiled pipe with parameters 80x80x3 mm. Square steel is preferred because it is easier to weld cabinet brackets to it. They are mounted at a height of 800-1700 mm so that the hand can reach freely.
Raw material
To deliver a single piece of pipe 5 m long to the site, special transport will be required. Therefore, in most cases, the structure is made as a composite, connecting parts by welding or using bolts. It is best to select the correct dimensions of the workpieces so that the upper one fits tightly into the lower one. This connection is the most reliable. If all the workpieces have the same cross-section, you can proceed as follows:
- Dig vertically into the ground 2 lashes measuring 60x60 mm and 3 m long, so that the gap between them is 60 mm. With a depth of 1.5 m, the height of the above-ground part will be the same.
- Insert a third lash of the same dimensions into the gap. The total size of the part protruding above the ground will be 3 m.
- Drill all 3 lashes together in 2 places and tighten them with bolts or studs.
Design, dimensions, source material
The requirements for the design of a pipe stand for a meter are the same, both for a single-phase network of 220 Volts and for a three-phase voltage of 380 Volts. This device is not difficult to make and can be installed on site with your own hands in a home workshop. The ideal option would be to use a 80x80 mm profile pipe with a wall thickness of 3 mm to make the pipe stand. As a starting material, you can select a pipe with a round cross-section. If for some reason there are no tubular products at hand, and the situation requires the immediate arrangement of an input device, you can use a metal corner with a shelf width of about 80 mm or a T-beam to make a rack. In this case, you will have to take measures to protect the conductor, part of which will be laid along the rack, from mechanical damage.
The question of how to lay the cable along the pipe stand (inside or on the surface) is best agreed in advance with the company involved in monitoring energy consumption. There is a possibility that in order to avoid possible unauthorized connection to the power supply network up to the meter, internal installation may be prohibited.
A sketch of the general view of a rack made of a 80x80 profile pipe is shown in the figure; the following parameters remain mandatory in the dimensions, such as the depth of depth - (C), which cannot be less than 1.5 meters, and the mounting height of the shield - (b), ranging from 800 up to 1700 mm. The total length of the pipe stand blank (a) must be selected depending on the situation, strictly adhering to the following conditions. The height of the input line above the ground for a SIP cable must be at least 2.5 meters; if a bare wire is used for input, this parameter increases to 2.75 meters. The height of the rack will be increased if the input passes through the road. According to regulatory requirements, in this case the distance from the surface of the roadway must be at least 5 meters. Depending on this, the total length of the structure, taking into account the recess (a), should be from 4 to 7 meters.
Where:
- Bracket for fastening a power line outlet.
- A steel plate that prevents water from entering the profile pipe.
- Hole for entering cables removed from power lines.
- Steel strip for installing an electricity metering cabinet.
- Hole for cable exit.
- Ground bolt.
Having decided on the height of the pipe stand, it is necessary to weld or bolt to it two brackets made of a metal strip or angle (4), on which the shield for the meter will be attached, holes in which are drilled depending on the size of the cabinet.
If the shield is fixed to the rack using factory-made banding tape, these structural elements will not be needed. To prevent rainwater from getting inside the pipe, it is recommended to weld a steel plate (2) to its upper end, to which the SIP cable fastening bracket (1) will be attached. A hole (3) is cut in the upper part of the structure, through which the branch cable will be inserted for laying through the internal cavity of the pipe. This is necessary to prevent wiring from mechanical damage. Hole (5) is necessary for the removal of the electrical conductor from the pipe and subsequent entry into the cabinet. Below the installation location of the shield, a bolt or threaded rod is welded, which will serve as the point of connection of the rack and cabinet to the ground loop. After completing the assembly of the pipe stand, before installation it is recommended to clean the structure from rust, cover it with primer or red lead and paint it. That part of the structure that will be hidden underground is additionally treated with bitumen and or covered with heat-shrinkable material.
Preparing a pit for installing a pipe stand
The hole is made using a garden auger. To speed up the process, the first few tens of centimeters are passed with a shovel.
A sand and crushed stone cushion is placed at the bottom of the pit. They operate in this order:
- Sand is poured to a thickness of 10-15 cm with layer-by-layer tamping every 5-7 cm. Before compaction, the material is moistened.
- Crushed stone is poured to the same thickness with layer-by-layer compaction every 5-7 cm. As a result of compaction, it is partially embedded in the sand.
The pillow has drainage properties. Thanks to it, the sole of the stand will always be dry.
If it is intended to install a grounding electrode, the recess is made wider.
Installation of a pipe stand
The product is placed in a hole, plumbed into a vertical position and fixed with wooden wedges or fragments of bricks. Then proceed in one of the following ways:
- Fill the hole with soil using a layer-by-layer tamper every 15-20 cm.
- Concrete is poured.
The first option provides additional grounding of the rack (in the absence of an anti-corrosion coating made of bitumen or similar material). But it has disadvantages:
- the service life of the structure is reduced due to rust;
- roll is possible.
It is recommended to combine excavation work with the installation of the electrode. In this case, it will only need to be hammered to 1.5 m.
After this, a bolt or stud is welded to the product to connect the wire.
Photo of the process of introducing electricity into the house
Pvs wire: full decoding, technical characteristics, types, where to buy and how to choose a manufacturer- Wire VVG: description of the main characteristics of the cable and its application. 120 photos of modern types and models
- SIP wire - technical characteristics, purpose and use of the wire (connection instructions)
Read here! How to connect wires - 125 photos of installation, crimping, laying and basic connection rules
Assembling the metering cabinet
The external location of the cabinet causes 2 negative factors:
- Possibility of equipment theft.
- Reduction of its service life due to changes in temperature and humidity.
Therefore, they are limited to installing a minimum set of devices - a counter and an input machine. Voltage relays, RCDs and group switches are mounted in the distribution board inside the house.
The cabinet is attached to the rack in 3 ways:
- Factory bandage tape. In this case, there is no need to equip the rack with brackets. In addition to the tape, you will need a bandage machine and staples.
- Using bolts threaded into special eyes.
- For welding. An undesirable option, since replacing the shield becomes more difficult.
It is forbidden to screw self-tapping screws into the back wall of the cabinet. This compromises the integrity of the product, as a result of which it will no longer comply with the IP54 dust and moisture protection class required by regulations.
Connecting the metering panel and electric meter
Before carrying out the connection procedure, it is necessary to assemble and connect the instruments and devices of the metering panel. In order to protect the connecting elements from moisture and precipitation, the connection itself is made through special holes located in the lower part of the box.
After installing the support, the electricity is connected, a meter, automatic machines (input and output) and a zero grounding bus are placed inside the cabinet. Having completed the grounding procedure, it is allowed to carry out work on connecting the pipe stand to the power supply line.
Connection to power line
The supply of electrical communications is carried out according to the following rules:
- The cable is secured to the stand using a clamp.
- At a height of up to 2 m from the ground, it is placed in a metal corrugation. This requirement also applies to insulated conductors, incl. SIP.
- The wire is inserted into the cabinet from below so that water does not get inside through the hole.
It is not recommended to route the cable inside the rack. The reasons are as follows:
- The outlet hole will weaken its cross-section.
- Water will seep into the pipe, causing corrosion.
- Energosbyt may force you to redo the connection due to the possibility of an unnoticeable connection to the line up to the meter. The entire diagram should be clearly visible.
The connection of the supply wire to the power line is made using a special piercing clamp. Only an energy sales employee has the right to do this.
Connecting the electrical panel
Before mounting the shield on the installed pipe stand, it is assembled. An electricity meter, an input and output circuit breaker in accordance with the calculated current load, and a zero bus are installed in the cabinet, which must be connected to the grounding point provided in the design of the switchboard. After assembly is completed, the cabinet is attached to the rack structure. Installation can be done using threaded connections or self-tapping screws. Then it is necessary to ground the shield and pipe stand. To do this, you need to use a jumper to connect the cabinet body to the grounding bolt (6), which in turn must be connected to the grounding circuit. As jumpers, it is allowed to use copper conductors with a cross-section of at least 4 mm2, insulated aluminum wire - 6 mm2, steel wire with a diameter of 6 mm.
After completing the assembly of the circuit and grounding the metering cabinet, it is connected to the supply power line, for which, as a rule, a self-supporting wire with aluminum SIP conductors is used. The process of connecting to overhead line wires is complex and unsafe, so it is better to hire an experienced specialist to perform it. On the pipe stand, the SIP is attached to the bracket (1) using special anchor clamps. The use of this type of fastener allows you to provide the necessary cable tension.
To prevent precipitation from entering the shield, cable lines are entered into it only from below.
You can connect the house to the metering panel with a cable laid underground or, using the principle of air input, with a wire. Depending on the situation in this case, part of the wiring, subject to the requirements of the PUE, can be laid along the fence or facade of the building.
Finally, we recommend watching the video instructions for installing a rack for introducing electricity to the site:
Now you know how to install a pipe stand under a meter on a site with your own hands and what are the requirements for installation. We hope the information provided was useful and interesting for you!
Common Mistakes
The most common mistakes made are:
- They choose a place for the pipe stand without taking into account the ease of maintenance of the cabinet.
- Leaves burrs, scale or sharp edges on the top of the structure. They damage the cable insulation.
- Use thin corrugation. For a 4x16 conductor, its diameter cannot be less than 32 mm.
- Use a small cross-section pipe without guy wires on the side opposite the power line support.
The top of the rack is subject to lateral load from the wire.
Without a guy to compensate, the thin pipe gradually bends.
Additional recommendations
It is useful to do the following:
- Instead of bitumen mastic, use heat-shrink tube as anti-corrosion protection for the buried part. This is an expensive but more reliable option.
- Thickly coat the bolts and nuts with petroleum jelly or other lubricant. It will protect them from rust.
- If there is no welding, use a special threaded hook instead of a loop to attach the tension clamp. To do this, a hole with a diameter of 12-16 mm is drilled in the pipe. The hook is secured with a nut.
It is also necessary to regularly update the paintwork.

