“Emergency” connection methods and their disadvantages
Typically, “fire” methods are used in cases where for some reason it is impossible to use the generator directly - you need to connect it to your home network urgently, and there is no time to install a separate connection circuit.
What distinguishes a specialist from an ordinary person, among other things, is knowledge of the reasons for prohibitions - this is what allows one to bypass them at the right moments: to do something not according to the rules, but to get the desired result. Just don’t forget the platitudes - electricity does not forgive mistakes, which means you need to calculate your actions several steps ahead in order to eliminate all possible mishaps.
Connection via socket
The most common “fire” way to connect a generator to a house is to simply plug it into an outlet, for which you buy or make your own “carrying” with plugs at the ends.
This method is strongly discouraged, but the simplicity of its use has won over many owners of small and medium power generators time and time again.
The principle of using such a connection becomes clear if you look at a standard home wiring diagram. Indeed, if you connect a current source to one of the sockets, voltage will appear in all parts of the circuit.
1. Introductory machine. 2. Electricity meter. 3. Generator. 4. Distribution machine. 5. Sockets.
There are not so many disadvantages of this method, but you need to remember about them so as not to damage the generator.
1. Wire overload.
You can ignore this point if you use a generator with a power of up to 3 kW. Socket lines are standardly connected with a wire with a cross-section of 2.5 mm², and the sockets themselves are designed for a maximum current of 16 Amps. According to the table of the ratio of cable cross-section to the current strength that they can pass, even aluminum wires (which are already prohibited for installation) of this cross-section can easily withstand power up to 3.5 kW.
| Cable core cross-section, mm2 | Cable core diameter, mm | Copper core | Aluminum core | ||||
| Current, A | Power, kW at network voltage 220 V | Power, kW at network voltage 380 V | Current, A | Power, kW at network voltage 220 V | Power, kW at network voltage 380 V | ||
| 1 | 1,12 | 14 | 3,0 | 5,3 | — | — | — |
| 1,5 | 1,38 | 15 | 3,3 | 5,7 | — | — | — |
| 2,0 | 1,59 | 19 | 4,1 | 7,2 | 14 | 3,0 | 5,3 |
| 2,5 | 1,78 | 21 | 4,6 | 7,9 | 16 | 3,5 | 6,0 |
| 4,0 | 2,26 | 27 | 5,9 | 10,0 | 21 | 4,6 | 7,9 |
| 6,0 | 2,76 | 34 | 7,7 | 12,0 | 26 | 5,7 | 9,8 |
| 10,0 | 3,57 | 50 | 11,0 | 19,0 | 38 | 8,3 | 14,0 |
| 16,0 | 4,51 | 80 | 17,0 | 30,0 | 55 | 12,0 | 20,0 |
| 25,0 | 5,64 | 100 | 22,0 | 38,0 | 65 | 14,0 | 24,0 |
| 35,0 | 6,68 | 135 | 29,0 | 51,0 | 75 | 16,0 | 28,0 |
Using the formula for finding power P=I*U, you can determine the maximum current supplied by the generator. If its power is 3 kW and the voltage is 220 Volts, then I = 3000 / 220 ≈ 13.65 Amperes, i.e. the safety margin of even a standard outlet should be more than enough (of course, if these are not outdated, still Soviet models, designed for a maximum at 6.3 or 10 Amps).
Another thing is generators of higher power - for them all calculations must be carried out separately. True, they are all usually permanently connected and the urgent need to “throw” them through an outlet can only arise in the event of a wiring fault. This is where you need to know for sure what is being violated and whether it can be done.
2. Human factor.
Before turning on the backup generator, it is imperative to turn off the input circuit breakers. If this is not done, then in the best case, part of the power will simply go to the neighbors, and the generator will stall from overload. It will be worse if, at the moment of trying to start the generator, the supply of electricity to the main line is resumed - this is guaranteed to burn the electric motor winding with counter currents.
If trouble is possible in principle, then sooner or later it will happen. Even if you attach a large sign to the generator body reminding you of the need to turn off the input circuit breaker, there is always a chance of making a mistake in a hurry.
3. Use of protective devices.
If the wiring in the house is made in accordance with the recommendations of the PUE, then individual outlet lines, in addition to standard circuit breakers, will be protected using residual current devices (RCDs). In addition to the fact that they must be connected in compliance with polarity, many of them are designed to connect the current source to the upper terminals and the load to the lower ones.
1. Introductory machine. 2. Electricity meter. 3. Distribution machine. 4. RCD. 5. Consumer machines.
Accordingly, when you plug the generator into a socket, you will need to monitor where the phase and zero are, and it is also quite likely that only the adjacent sockets will work, and when you try to even turn on the light, the RCD will trip. There is no point in correcting the circuit for the sake of a few hours of generator operation, so the only way out here is to turn it on directly through the switchboard.
In addition to all the existing disadvantages, the emergency scheme for connecting the generator to the home network through an outlet does not imply the ability to track when electricity appears on the main line in order to switch back in time. For this you need at least a separate signal light, but since the input machine is turned off, it is not possible to use it.
Connecting the generator to the switchboard
This is the most correct way to quickly connect a generator, but with some nuances that must be taken into account.
The easiest way to make such a connection is if there is an outlet next to the switchgear - it is often installed in case of repair work or simply for insurance. True, you need to imagine exactly how this outlet is connected - the best option is shown in the diagram.
1. Introductory machine. 2. Electricity meter. 3. Generator. 4. Socket. 5. Distribution machine.
In this case, everything depends only on the capacity of the outlet itself (16 Amperes) and you must remember to turn off the input circuit breaker.
If such an outlet was not provided when installing the panel, then you will have to unplug the wiring from the input of the distribution machine and connect the generator directly to it
If there are RCDs further along the circuit, then the polarity must be observed.
1. Introductory machine. 2. Electricity meter. 3. Generator. 4. Distribution machine.
The main thing here is not to confuse which machine to connect to. If suddenly there is access to an input circuit breaker in front of the meter, and the generator is connected to it, then in general the circuit will not change... It will simply include an electricity metering device, which does not care what counts - the current from the main line or generated by the generator.
1. Introductory machine. 2. Electricity meter. 3. Generator. 4. Distribution machine.
However, the likelihood of such an error/connection is small, since the meter and the input machine are sealed by inspectors from the energy supervision department.
Since the wires from the main line fold out, you can connect a control light to them - when it lights up, it means the generator can be turned off. The input machine must be left on.
1. Introductory machine. 2. Electricity meter. 3. Generator. 4. Distribution machine.
Connecting the generator via a changeover switch
In essence, this is the same connection of the generator to the switchgear, but already equipped with a stationary three-position switch so that you do not have to unscrew the wires from the terminals of the circuit breaker.
By three-position is meant a switch to which current can be supplied from two different branches, but the load is connected to only one of them. The third position is neutral to prevent contact of incoming wires. Since the generator has its own zero, the switch must be selected accordingly - installing a single-wire one, through which only the phase is switched, is not possible here.
If you don’t have a three-position switch at hand, then you can temporarily make a two-position changeover device from two two-pole circuit breakers. It is advisable to take them from the same manufacturer and denomination so that the sizes match. The machines must be installed side by side, but one of them must be turned upside down, and the keys must be fastened together - for this, the manufacturers provide holes for pins.
A person who understands electrics can build such a device from four single-pole circuit breakers - without turning them over and switching each one separately. But if someone other than him will start the generator, then it’s better to take care of “foolproofing” right away.
The switch itself is installed near the generator. This is the most convenient, since it is started in a certain order: first the generator itself starts, and when it warms up, the load is connected to it.
To prevent the generator from working in vain, after turning on the electricity on the main line, you need to make a tap for the signal lamp and place it in a conspicuous place. To prevent it from shining all the time, it must be connected via a switch. If you are afraid of forgetting to turn it on, then you can add an element of automation by connecting the lamp through any normally open contact of the starter. The entire diagram for connecting the generator through a changeover switch and with a signal lamp looks like this:
1. Introductory machine. 2. Electricity meter. 3. Generator. 4. Distribution machine. 5. RCD.
As long as there is voltage on the main line, the entire circuit operates as usual - the current passes through the switch and then goes to the switchgear. When the electricity goes out, you need to manually start the generator and transfer the load from the house to it. When the generator starts, current flows through the coil of the KM starter and its contacts close - the signal lamp is turned on to the network and when electricity appears on the main line, the lamp lights up.
The simplest auto-switching scheme
So that you don’t have to flip the switch every time you need to start the generator, you can assemble a simple automatic switching circuit for the current source. This is not an autostart system - its purpose is only to switch the input between the main line and the generator, and starting and stopping the engine will still have to be done manually.
The minimum parts required for this are two starters (contactors) - KM1 and KM2 with cross connection. They will involve power contacts (KMk) and normally closed (KMnz). To give the generator time to warm up, it is additionally advisable to use a time relay.
The figure shows a diagram of how to connect a generator to the network at home - it works according to the following principle:
1. Introductory machine. 2. Electricity meter. 3. Distribution machine. 4. Generator. 5. Time relay. 6. Main input contactor. 7. Backup input contactor.
As long as there is electricity on the main line, the KM1 coil keeps the KMk1 power contacts closed and the normally closed KM1nz1 and KM1nz2 open. When the electricity is turned off, the power contacts KMk1 open, and KM1nz1 and KM1nz2 close - now when the generator starts, after the time for which the relay is designed, voltage will appear on the KM2 coil, the power contacts KMk2 will close and current will be supplied to the house from the generator.
When electricity appears on the main line, the KM1 coil is triggered - the contacts KM1nz1 and KM1nz2 open, de-energizing the KM2 coil. The power contacts KMk2 open, and KMk1 close and power to the house again comes from the main line. All you have to do is remember to turn off the generator itself.
Rules of use and safety
When using a gasoline generator, the following rules must be observed:
- If the device is connected to very sensitive equipment, then it is necessary to use a voltage stabilizer.
- If you use the mini-power plant frequently, you need to carefully monitor the degree of wear of certain parts and, if necessary, replace them.
- If scheduled maintenance is planned, then it is necessary to use only those brands of fuel and liquids that are recommended by the manufacturer.
- Do not store fuel in the tank for a long time. Its downtime can ruin the ignition of the gas generator, thereby reducing its service life.
- Carry out switching on and off in the prescribed sequence.
- When the generator is starting, it is better to have good lighting around;
- If necessary, adjust the valves - the essence of it is that the valve clearances of the gas generator are set in a certain way.
- Do not inhale gasoline fumes - they are harmful to health.
- If fuel gets on your skin, be sure to wash it off thoroughly with soap and water.
- Do not allow flammable objects near the device, and especially do not turn it on in an explosive environment!
Do-it-yourself generator autostart
If you have certain skills in electrical engineering, you can independently assemble a circuit that can start a generator without human intervention when there is a loss of electricity on the main line. The main condition is that for this you need a generator model that starts and stops with a key, since automating the starter, which must be pulled by the cord, is obviously a thankless task.
To understand the principle of operation of automatic start, you need to accurately imagine the entire procedure that will have to be done to turn on the generator:
1. 1-2 minutes after the light goes out, open the engine choke and start it. A time delay is needed in case the light simply blinked or turned off for a few seconds.
2. After another 2 minutes, when the engine warms up, switch the load from the main line to the generator, then close the air damper.
3. When electricity appears on the main line, after 30-60 seconds, turn off the engine and switch the load from the generator to the main line
To implement this algorithm, you will need four time relays, four electromagnetic starters and magnetic pushers with limit switches, similar to the servos that are used for the central locking of a car. A standard electromagnetic starter has a coil (KM), normally open power contacts (KMk), 2 normally open control contacts (KMnr1-2) and 2 normally closed control contacts (KMnz1-2).
The figure shows a general diagram of connecting a generator to a house with auto start - the principle of its operation is as follows.
1. Introductory machine. 2. Electricity meter. 3. Generator. 4. Distribution machine. 5, 6. RCD.
When the electricity is turned off, the KM4 coil ceases to hold the KM4nz2 contacts open, which turns on the generator ignition. Also, the KM1 coil stops holding the KMk1 contacts - they open and now the line is disconnected from the home network. In parallel, the normally closed contacts KM1nz1 and KM1nz2 are closed. They start the servo drive, which opens the engine air damper, and provide an impulse to start Time relay 1 - in a minute the key contact will close and the starter will start the engine.
The start of the generator triggers the KM3 coil, which opens the normally closed contacts KM3nz1 and KM3nz2, which stops the starter and de-energizes Servo-1. The parallel closure of the normally closed contact KM1nz2 sends an impulse to another time relay - after two minutes, Servo-2 will start, closing the air damper, and the KM2 coil will operate, closing the contacts of KMk2, after which current is supplied to the house from the generator.
To ensure reverse switching, you must first open the circuit of the KM2 coil 1-2 minutes after the appearance of electricity and turn off the engine, for which time Relay 3 and the KM4 starter are used, when triggered, the normally closed KM4nz1 and KM4nz2 are opened. When the KM2 coil is turned off, the normally closed contact KM2nz1 closes, which, after two minutes, turns on the KM1 coil through Time Relay 4 - now the generator is de-energized and ready for the next start, and power to the house comes from the main line.
This is just one of the possible launch automation options. For example, if desired, the circuit can be simplified by removing the time relay and air damper servos from it. True, this can only be done if the engine starts well, and in general all its components are well adjusted.
The main disadvantage of any such scheme is that it controls the autostart of the generator, but will not be able to respond to even a minor emergency situation. For example, if the air damper jams, the engine will run at higher speeds, and if the internal combustion engine itself malfunctions - if it does not start - at best, the battery will run out.
Gasoline generator does not start: what to do?
Most generator starting problems can be fixed on your own. In this article, we have collected the most common reasons why gasoline power plants do not start.
Why won't the generator start? Let's find out!
If you have a generator with a two-stroke engine, check:
- Fuel
. Firstly, it may not be enough, and secondly, the mixture of oil and gasoline (in two-stroke models) may become unusable. Drain the old fuel, add fresh fuel or fuel mixture to the fuel tank and try starting the generator again. - Fuel hose
, is it leaking? Replace the hose if it becomes unusable. - A candle
. The generator may not start because there is no spark. Remove the spark plug, check its condition, the presence of a spark and, if necessary, replace it with a new one. - Is fuel entering the carburetor
? If not, check to see if the fuel valve is closed? - Air damper
: it needs to be closed, remember? - Air filter
: It may be so clogged with dirt that it is not allowing enough air to flow through.
If you have a gasoline generator with a four-stroke engine
, then a few more are added to the previous points. The generator may not start due to the following:
- The automatic oil level control system
is activated . If this happens, you need to check the oil level and add if necessary. - Oil enters the combustion chamber
. This can happen due to the generator being tilted too much. To fix this, you need to unscrew the spark plug and turn the engine crankshaft, pulling the starter cord 3-4 times, put the spark plug in place. - The battery
is discharged or faulty . Of course, this applies to models that have a battery. In this case, the battery must be charged or replaced.
If none of the above helps, call SKAT technical support
at
8-800-555-36-75
(toll-free) or contact
the service center
in your city.
Return to list
Automatic generator start via AVR unit
The purpose of such devices is to partially or completely eliminate human participation in the operation of the generator. There are two main types of such devices. The first completely copies the auto-switching system, which operates on two starters, but with the addition of an electronic unit for starting and stopping the generator.
A low-current cable is connected to it from the main power supply line, through which the unit receives information about the presence or absence of voltage in the network. Depending on this, it sends a command to the engine to start or stop, and switching between input from the main line or from the generator is performed by the starters themselves. In general, this is the same system as the proposed scheme for self-assembly, but here you don’t have to invent anything - just install a ready-made unit.
The disadvantage of such a block is the same - its purpose is only to start and stop the engine without additional protection.
The diagram itself looks like this:
1. Introductory machine. 2. Electricity meter. 3. Automatic generator start block. 4. Generator. 5. Time relay. 6. RCD. 7. Main input contactor. 8. Backup input contactor.
A more advanced option is a complex system controlled by microprocessor electronics. In general, it works in the same way as a homemade autostart system, but its main advantage is the presence of numerous sensors that monitor all aspects of the generator's operation. If any equipment malfunction occurs, the ATS unit will be able to react adequately - not torment the generator with autostart attempts, but if there is a GSM module, send a message to the owner about the malfunction.
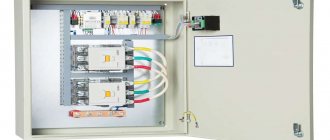
The ATS unit itself is mounted instead of a distribution panel - this does not require much knowledge - you just need to connect wires from the main line, power and control cables from the generator and output to the house to it.
1. Introductory machine. 2. Electricity meter. 3. AVR. 4.Generator. 5. Control cable. 6. Consumer machines. 7. Zero bus. 8. Grounding bus.
Such a unit is a complex set of equipment and its cost in some cases can be equal to the price of a generator. Therefore, its purchase is justified only in case of frequent power outages and for sufficiently powerful generators.
Troubleshooting basic gas generator problems on your own.
The basic principle of repairing any equipment is eliminating faults by elimination. How we do it. The generator comes to us and we begin to check:
- First of all,
we inspect the appearance for mechanical damage and oil leaks, as well as the presence of rust in the tank. Next, check the presence of oil and crank the engine with the starter (check the compression resistance and extraneous noise). Let's try to start it. - If not, look for a spark
. We immediately take a new spark plug (leaning the spark plug against ground and cranking the engine), if there is no spark or it is weak, we try to disconnect the wires from the oil sensor relay and replace the spark plug cap. If it doesn't help, look at the ignition switch or power button. If everything is fine there, then the ignition coil is faulty. - If there is a spark
, we try to start it. If it starts and stalls or runs with the choke closed, the carburetor is definitely clogged. Many people say that they cleaned it themselves, but the symptoms are the same. This is obvious; you need to clean the carburetor by disassembling it down to the bolt using special means. And that’s half the battle, then you need to install it and correctly adjust the rods and springs of the damper and speed controller. If it does not start at all, add a little gasoline to the combustion chamber, through the spark plug hole or an open carburetor choke. - Rust in the tank
is a very annoying problem, you can clean the fuel system and everything will work. But soon, after some time, this rust will get into the carburetor (into the jets, under the needle) and the symptoms will repeat. If there is rust in the tank, it is almost impossible to remove it. You can pour special agents (such as solvent) into the tank overnight or install a fuel filter, but the only salvation is to replace the tank.
Any technology begins to fail over time. This can happen for many reasons. The gas generator may also stall, or the diesel unit may stop working.
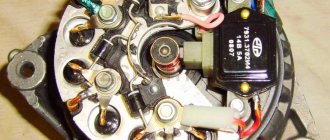
A gas generator is a device that converts thermal energy into electricity. The unit consists of two main parts - the engine and the electric generator. The engine drives the generator shaft, which produces a certain voltage.
Difference between single and three phase connection
All connections, whether in a single-phase or a three-phase network, are made completely identical, with the exception of the number of power wires. The only important nuance concerns the so-called control phase - if you connect the starter to the network, then its main contacts connect and disconnect the power wires from the network, and the power for the electromagnetic coil must also be taken from somewhere.
In a single-phase network there are no problems - there is only one phase and such a question simply does not exist, but in a three-phase network everything is somewhat more complicated - there are L1, L2 and L3. Without going into technical details, there is only one answer - for control circuits you can use any of the phases, but only one. That is, if the KM1 coil is powered from phase L3, then the control of the remaining starters, the “Start” and “Stop” buttons must also be “hung” only on it.
This is not difficult to do - just note what color the wire is on the desired phase, and if the cable has single-color conductors, then stick or draw markers on them.
Cold generator won't start
First, I’ll confess, I lied a little, that the carburetor is without delays and mine is unique. Today I took a photo in the sun and realized that I’ve seen something like this before. But I didn’t find any inscriptions. Today I saw the wires from the bottom. I used 2 tanks of gasoline, 40 liters exactly. Once there was 8 hours without a smoke break, there was no light in the village for a long time, the rest was minor things. The gene does not have a counter. When it’s warm and you cover the air vent with a rag, after several attempts with short smoke breaks it starts. Naturally, the suction has to be removed; it begins to slurp. After a little warming up, the load pulls without problems, including welding, I loaded it with two heating elements of 2.5 kW each, the voltage dropped from 230 to 215 according to the built-in voltmeter. He strains but works cleanly, there are no coughs or sneezes. Of course, it makes quite a lot of noise inside, especially when you turn it off. It started to stall from 0, with an electric starter it’s better, but also not from the first push and it’s still warm. In the cold of 0 and below, you don’t have to twitch; I’ve already broken my fourth rope. There is compression, you bring it under the starting point and pull, then there is a chance to start it. I have never touched the carburetor, because the tank is as clean as new. Top. There is no filter, although you should try to insert it. When it’s hot, if you just turn it off, it starts up well, but if it cools down a little, it starts with suction from the first to the second poke from the rope. The starter is lazy, and it charges at 20 volts, it’s good that I noticed this glitch in time. I measured the voltage on the battery and almost fell - over 15 volts. The candle is gray and clean, although I understand it should be brown. But I took it as a fashion to close the tap, burn gasoline out of the carburetor, cover the air vent with my hand and wait for it to start dying. I turn off the ignition. By this I seem to ensure that there is fresh gasoline in the carb the next time I start it due to long breaks. Castrol oil, semi-synthetic, like in Bibi, is quite clean, I don’t remember the viscosity. I took some photos today, I'll edit them and post them. By the way, the first time I was able to start it after buying it only from the starter, but it was already cool, it was 100 km away to take it to Murlen, especially since it started, I thought it would roll around. Gasoline 92 as in Bibi. My heart feels like the starting system is dull, but I don’t know what to turn without disrupting the working stroke. Since it holds the load well. And yet, a diaphragm with a rod to the carb and a tube to the gasket behind the carb hangs on a separate piece of hardware. I tried to create a vacuum in the diaphragm with my mouth, but it could barely move. But this is more of a type of accelerator for better performance during sudden load changes. In any case, I will be grateful for any advice. I changed gasoline not so long ago - a month or two ago. The oil level was normal that year. When tilted towards the cylinder, the engine stalls, as it should, the level system works. Now I'll try to make the photos smaller. Health to you and with respect. Victor.
Why does the gasoline generator not start?
Hi all! In this article I will look at why and for what reasons a gasoline generator does not start. The instructions are suitable for both new and used units. In general, if a person is looking for such information on the Internet, then apparently he is a “newbie” in this matter (forgive me if this is about you and it offends you). Therefore, in this article we will talk about those things that a user of a generator (and other gasoline-powered equipment) who has no experience in repairing gasoline-powered equipment can do. The manufacturer is not important - your device can be called Huter, or Hyundai, or Fubag, or something else - the essence is the same for everyone.
We will assume that you did everything according to the instructions and re-read them again to make sure that the reason is not that you did not follow them.
So, for a gasoline engine to work, two main things are required:
- for gasoline to flow
- so that there is a spark
If these conditions are met, then in most cases the engine starts at least somehow. So you need to find out if these conditions are met.
Checking the fuel supply
In order to check whether gasoline is entering the cylinder, you need to unscrew the spark plug and look at its electrodes. If the spark plug is dry, then gasoline apparently does not flow, but if it is wet, then it does.
Sometimes it happens that the spark plug is “flooded” with fuel during starting. That is, there seems to be a spark, but for some reason it was not possible to start the engine right away, and at the same time gasoline flowed while pulling the starter, the spark plug became damp and the spark no longer breaks through the fuel at the electrode. In this case, the electrodes can simply be wiped.
Checking the spark
So, you've unscrewed the spark plug. After you are sure whether fuel is flowing or not, check for the presence of a spark. To do this, insert it into the tip of the high-voltage wire (popularly the “mouthpiece”) that was on it when it was twisted, and attach the outer electrode to any metal part of the engine (to ground). It’s just better to connect it away from the twisting point, so that the resulting spark does not accidentally ignite the fuel evaporating from the cylinder.
After applying the spark plug electrode to the ground, you need to pull the starter. If there is a spark, then everything is in order. If not, then there can be a lot of reasons for its absence: from banal wear of the spark plug to an electrical malfunction.
To make sure that the problem is in the spark plug, you need to either put the same spark plug on a known-good unit, or on a generator that won’t start, check the spark from a known-good spark plug.
What can a teapot do?
- If fuel flows and there is a spark, then tighten the worn spark plug again and start it according to the instructions for the generator. In 99% of cases it is possible to start.
- If there is a spark, but the spark plug is dry, you can try to make a “prick”. We take a syringe, fill it with 1-2 cubes of gasoline, pour gasoline into the cylinder, quickly tighten the spark plug, put the mouthpiece on it and start it. In such a situation, the engine will definitely start (even if not on the first try), but in the future it may either stall after a few seconds or continue to work. If it stalls, then the problem is most likely in the carburetor - only service will help here, if you yourself are not boom-boom. If it continues to work, it means that somewhere in the gas channels there was a speck that was simply sucked in after this and now the generator will work normally.
- If there is no spark, and it was not possible to achieve its appearance by replacing the spark plug, then repair of the electrical part is required. Here again, only a specialist can help.
Thus, in this article we looked at what a generator user without special repair knowledge can do if his generator does not start. Naturally, these actions can be applied to any equipment that has a gasoline engine.
What are the features and advantages of generators
When the gasoline generator starts, the electrical station turns on. The main reason for the breakdown is the lack of checking the oil level sensor. A lack of this fluid leads to complete engine failure. A breakdown causes the need for more serious and costly repairs.
If the generator starts and operates erratically, the oil must be completely changed. Below is the technology:
• first remove the drain plug and the oil tank cap;
• used oil is drained into an old container;
• the drain plug must be reinstalled.
Fresh oil is added to the upper mark. It is located above the level of the oil tank cap.
When completely replacing, you need to use only high-quality oil that is specifically designed for a gasoline engine. It is important not to forget about the optimal temperature regime, which is required for efficient operation of the power plant.
First start of the inverter generator
If the station has not been used before, it is imperative to fill it with oil and fuel before turning it on. Since we are considering a specific model, the TI 2300 will need about 400 g of oil. It is not recommended to save on liquid, because the performance of the gas generator directly depends on its quality.
For FUBAG stations, the best choice will be branded oil, the composition of which is optimally selected for the branded engine and tested by numerous tests in production. Before each time you turn on the device, it would be a good idea to check the oil level in order to add working fluid if the values are below normal.
In addition to oil, you also need to add fuel. Like the entire TI series, the model is equipped with a FUBAG four-stroke gasoline engine. An excellent option would be 92 gasoline without impurities. It is desirable that the fuel is clean, fresh and free of water impurities.
Let's pay attention to a feature of the TI 2300 model. On TI models, the fuel tank cap is equipped with a valve that protects against fuel spillage. When transporting, the valve handle is set to the “OFF” position. When preparing for operation, the valve handle is moved to the “ON” position clockwise.
Preparations are complete. Make sure that before starting all the load is disconnected from the station and feel free to turn on the inverter generator engine.
As soon as it starts working, move the choke lever to the “START” (CLOSE) position.
And then carefully pull the starter handle until there is resistance and slowly return the handle back.
Attention! Do not release the handle suddenly. Return it slowly, holding it with your hand.
A green indicator on the device panel will signal that the station is ready to connect the load.
Note that the digital display can monitor output voltage, AC frequency, engine speed, and engine hours to track service intervals. Convenient, isn't it?
If you have miscalculated the load and the station is overloaded, the red indicator will light up. The RESET button will help restore power without having to completely restart the engine. It is located above the digital display. To activate it, you need to press and hold it for one second until the overload indicator goes out and the operation indicator (green) lights up.
What do you need to do before you launch?
If you are wondering how to start a gasoline generator, the first thing to remember is that you should not start it right away, this is wrong. Before starting a gasoline generator, you should conduct a thorough external inspection for defects. First of all, you should pay attention to the presence of grounding. The next step is to check the fuel tank. It is worth remembering that adding gasoline to a running generator is strictly prohibited.
If the unit is used no more than once a month, then before refueling it is necessary to drain the old fuel.
Don't forget about the oil. It is recommended to replace it at least once every 70 operating hours. ATTENTION ! Mixing different types of oil is prohibited!
Before starting, you need to check all connected current consumers.
After this, you can carry out a test run. It is carried out using a starter. And only after you are satisfied with the trial run can you proceed to the real launch. When operating electric generators, it is necessary to control the energy consumption level of all connected devices; their total power should not exceed the power of the generator.
