Penoplex is rightfully considered the optimal material for insulating floors on the ground, concrete slabs, ventilated subfloors and interfloor ceilings. This is explained by close to zero water absorption, biological and chemical resistance, high insulating and strength characteristics and ease of installation. Laying a Penoplex coating with your own hands is not particularly difficult and helps save at least 50% of the total costs. It is important to adhere to the manufacturer’s recommendations; nuances include the need for waterproofing in certain areas, the exclusion of compositions with substances that dissolve polystyrene foam, and tight joining of adjacent slabs.
Depending on the type of base, one of the following options is selected:
- Thermal insulation on the ground: Penoplex is laid on top of the sand and gravel cushion and under the waterproofing membranes. Particular attention is paid to the preparation of the base and the thickness of the layers.
- Placement on concrete floor. One of the most common schemes, found in apartments and already used private houses.
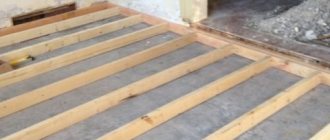
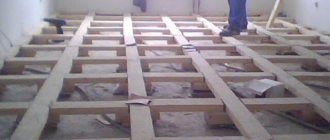
- Laying Penoplex on a wooden covering over logs (ventilated underground).
- Insulation of concrete floors between heated rooms. Often this option is combined with laying electrical cables or water pipes in the screed. The requirements for insulation thickness are minimal here; a slab of 40 mm or even less is sufficient.
- Special cases: balconies and loggias, rooms with high humidity.
Step-by-step guide for installing Penoplex on a concrete floor followed by screed
This is the easiest option to do it yourself:
- Preparing the base. The insulation is laid on the most even, clean and dry concrete floor. Protrusions, cracks, painting and other defects are unacceptable; to eliminate them, a thin layer of cement-sand screed (2-3 cm) is applied over the slab. After drying, it is primed with an antiseptic.
- Placement of sheets: tightly to each other, without gaps. The thickness depends on the type of floor and the type of basement; on average, when thermally insulating the floor of the first floor with Penoplex in an apartment or balcony, 40 mm is enough; in private houses, at least 50-100 mm are needed for the middle zone, 140 for the north. The ideal option is to carry out calculations taking into account the climatic conditions of the region.
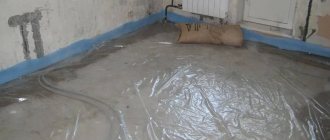
- Installation of a vapor barrier: reinforced polyethylene film or waterproofing membranes with a mandatory overlap of 15 cm and outlet to the walls. The main purpose of this layer is to protect the insulation from upper moisture.
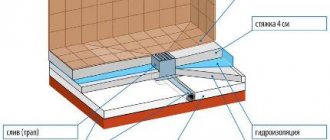
- Pouring the top layer of floor screed with a mandatory compensation gap around the perimeter of the walls. The recommended thickness of this layer is 4 mm; a regular cement-sand mixture without large fractions or specialized ready-made compositions are used. A distinctive feature is the absence of the need for additional iron reinforcement due to the high compressive and bending strength of Penoplex. Fiberglass mesh is enough; many simply pour and level the solution.
- Installation of a decorative covering over a hardened floor screed.
This guide is suitable for thermal insulation in open ground, but with some reservations. The differences in steps concern the first stages. Insulation of a cold floor for unventilated rooms is carried out after organizing a sand and gravel layer, backfilling, leveling and carefully compacting a layer of sand of about 20 cm. After checking the evenness of the base, the slabs are installed (point 2 of the above instructions). Deviations in level in this case are unacceptable.
When insulating balconies and loggias, the floor covering is placed on top of the lathing laid on Penoplex. If there is opportunity and time, an upper screed is carried out, but in general it is not necessary due to the absence of significant loads. A special case is floor insulation in bathhouses; in these rooms, the minimum thickness of the top layer is 6 mm; unlike other construction projects, it is necessarily reinforced with fiberglass mesh. Penoplex is not installed in the steam room and near stoves due to its low resistance to temperatures above 75 °C.
When considering the option of thermal insulation of concrete floors with subsequent placement of cables or pipes for heating, it is worth noting that these works are more difficult to do yourself. The action scheme differs by laying another layer of vapor barrier between the heating elements and the insulation. This is necessary to eliminate the risk of damage to the main insulating coating when fixing cables or pipes (this can lead to penetration of the liquid solution onto Penoplex, which is unacceptable).
Possible mistakes
The most serious violations of Penoplex floor insulation technology include the absence of a temperature gap between the walls and the screed. Even the most elastic, expensive mixtures shift and expand when they harden; pouring a solid monolith leads to the formation of cracks throughout the entire coating. This is fraught with extremely negative consequences, especially for heated floors: moisture getting inside or damage to the heating elements. Experts recommend using damper tape around the perimeter of the walls and near the columns; in extreme cases, a gap of 1 cm is left, which is filled after the floor screed has completely hardened with sealant.
The next possible mistake is using unsuitable mastics for waterproofing. When protecting from upper moisture, Penoplex for floors should not be covered with thick canvases coated with compounds containing acetone, toluene and other substances that destroy polystyrene foam. To play it safe, you should read the instructions again, or even better, use membrane films joined with tape.
The question is often asked how many layers of waterproofing are needed; many place Penoplex exclusively on roofing felt when insulating over the ground. But the manufacturer’s recommended scheme includes only one reliable layer of vapor barrier - on top of the slabs; reinforcement is only required when installing heated floors. It is important to understand the principle: the ingress of upper moisture is excluded, but the possibility of removing accidental condensation is left, which is impossible when Penoplex is closed from all sides.
The last note concerns decorative flooring. Many people overestimate the strength of thermal insulation and lay the finishing layer, ignoring the screed filling. At the same time, they forget about its main purpose - uniform load distribution and vibration damping, and its auxiliary purpose - protection from ultraviolet radiation and open air. An alternative option for floor screed is to place 2 layers of moisture-resistant plasterboard (if indoor conditions allow this), but its complete absence is unacceptable.
Tips and tricks
It is not difficult to insulate the floor under the screed with Penoplex slabs yourself; the strength of 1 person is enough. To simplify the process, it is recommended to purchase slabs with a tongue-and-groove system; they are simply laid on the base. Penoplex does not require additional fixation; cracks and gaps are filled with polyurethane foam. To avoid excess consumption of the solution, the level of thermal insulation is checked before pouring the screed.
Work options
As is clear from the title, we will analyze 4 technologies:
- Floor insulation on the ground;
- Thermal insulation of concrete surfaces;
- Insulation of wooden floors;
- Creating a base for a warm floor.
Each option has its own characteristics, so choose according to your base.
The material is excellent as a base for heated floors
Option No. 1 – ground insulation
If you are just building a house, then you can insulate the floors of the first floor without screed. First, let's figure out what materials are needed when working.
Grooves at the ends of the material simplify joining of elements
| Material | Description |
| Crushed stone or gravel | Required to create a base 30 cm thick. The required volume is calculated based on the insulated area |
| Construction sand | It is used to make a pillow under the insulation. The layer should be 5-10 cm |
| Insulation | The thickness of extruded polystyrene foam is selected depending on the region. I recommend using options no thinner than 50 mm. It is optimal to use material 100 mm thick to reliably insulate the surface |
| Waterproofing | Most often, the surface is covered with durable polyethylene film, which is sold in hardware stores. When purchasing, please note that the material must extend onto the walls by at least 20 cm |
| Reinforcing mesh | To strengthen the surface, a special steel mesh is placed on it. Choose options made from wire 3 mm thick or more |
| Screed mortar | The easiest way is to buy a ready-made version in bags. Before use, you simply mix the solution with water - and it’s ready |
| Reflective tape | Metallized tape is used for gluing joints. It can be used as desired, so if you don’t find such tape, you can work without it |
Screed solutions save your time and are inexpensive
As for the tool, you need the following:
- Tamping – you can rent electrical equipment, or you can make a homemade version from a piece of log;
- Shovel and wheelbarrow - it is impossible to level sand and gravel without these tools;
- A level for establishing a plane and a rule for leveling the screed;
- Container and mixer for preparing the solution. If the amount of work is large, then it is better to rent a concrete mixer.
A concrete mixer will greatly simplify the process of preparing the solution.
Instructions for doing the work yourself consist of the following steps:
This is what the floor diagram we will work on looks like
- First you need to remove all the soil, if any. The base should be 40-45 cm below the level of the future floor. If the recess is larger, then you will have to make the crushed stone cushion thicker. It is not worth filling with ordinary soil, since it is difficult to compact it well and there is a danger that the floor will sag;
- A base of crushed stone or gravel with a thickness of at least 30 cm is poured. The material should be distributed in an even layer over the entire surface. Check the level to ensure that one side is not higher than the other. It is very important to compact the material well; for this it is best to use special equipment;
Crushed stone must be well leveled and compacted
- A sand cushion is poured on top of the crushed stone; the layer thickness should be at least 5 cm. The surface must be carefully leveled using a level. Tamping is carried out over the entire area, in order to achieve the best result, it is advisable to moisten the sand well. After finishing compacting, check the plane again;
Wet sand compacts much better than dry sand
- Penoplex slabs are laid on the sand. The most important thing is to join them tightly and lay the entire surface. Don't worry about reliability, the material is so durable that it is also used in industrial premises. After installation, you can seal the joints with reflective tape. ;
The thickness is selected depending on the temperatures in the region
- The surface is covered with a waterproofing film. Do not forget about the overlap on the walls; it is better to tape the joints with tape for reliability;
The film will create a barrier to moisture
- A reinforcing mesh is laid on top of the film. It needs to be carefully laid out over the entire area, the joints can be tightened with wire;
The mesh makes the screed much stronger
- In order to make the screed even, it is advisable to install beacons. To do this, you can use a wooden block or a drywall profile. The elements are set in the required position and fixed to the solution; work can be continued only after the mixture has hardened;
- Filling the surface is done as follows: a solution is prepared, after which it is evenly distributed between two beacons. Leveling and removing excess is done using a rule.
According to beacons, the screed is poured quickly
You can lay any floor covering of your choice on the finished base.
Beacons may not be deleted
Option No. 2 - insulation on a concrete slab or rough screed
If you need to insulate such a surface, then you will need the following set of materials for work:
- Penoplex insulation with a thickness of 50 mm;
- Cement mortar or self-leveling for leveling the base;
- Waterproofing film;
Any thick film will fit under the screed
- Dry mixture for floor screed.
The process of floor thermal insulation takes place in the following order:
The scheme of operation is quite simple
- First you need to empty the room of all objects in it. After this, check for any sagging mortar or protruding areas of concrete. If there are any, you need to knock them down using a hammer drill. Lastly, the floor should be thoroughly cleaned of dust with a broom or vacuum cleaner;
This is what the insulation structure looks like in this case
- If there are cracks, damage and noticeable irregularities on the base, they need to be repaired . To do this, use either a regular screed solution or a self-leveler. The second option is especially good if you need to get rid of numerous small irregularities;
- After the solution has dried, Penoplex is laid. Everything here is simple and fast, the main thing is to join the sheets well;
Video description
In the video, the owner of a private house tells how floors were poured over the ground with the installation of penoplex slabs:
See also: Contacts of construction companies that specialize in the installation of stoves and fireplaces.
Insulation of a concrete slab
This technology belongs to the category - floor insulation for concrete under screed. In private housing construction, concrete floor slabs are not uncommon. More often, finished products are used for this; less often, a monolithic structure is poured. And although the second one is cheaper, there is less fuss with the slabs, and besides, they comply with GOST standards in terms of strength and reliability.
So what is gender in this case? These are reinforced concrete slabs laid on a foundation or on walls, between which there are often gaps. So, the latter must be filled with concrete mortar, with linings made of sheet material installed underneath.
The slabs themselves, or rather their surfaces, do not always meet the standards of evenness. That is, they have protrusions, depressions, and cracks that need to be gotten rid of. Typically, a repair cement-sand mortar is used for this. The main task is to bring the surface of reinforced concrete slabs to maximum evenness.
Floor slabs laid with gaps Source profrab.allgranite.com.ua
As for laying foam flooring under the screed, the slab material in this case must be fixed to the surface of the concrete base. To do this, you can use two methods:
- A special adhesive composition made for Penoplex boards.
- Mushroom screws. The latter are either driven or twisted products. We choose the first option. They are made of either plastic or steel. We choose the first option so as not to create cold bridges.
The method of attaching thermal insulation panels to the floor using self-tapping screws is simple. To do this, the panel is laid at the destination. Two holes are drilled through it with a drill and a drill so that holes for the dowel are created in the concrete floor. A dowel is inserted into the concrete base directly through the panel, into which a self-tapping screw is then simply driven with a hammer. It turns out to be a very reliable mount.
As for the holes, their location is in the middle of the width of the slab at a distance of 20-25 cm from the edge.
Forming a floor using a foam screed is done using the same technology mentioned above. That is, with the laying of a reinforcing frame.
